Call our helpline
0300 180 0028Short guide:
- Open the Settings app.
- Tap Accessibility.
- Tap Per-App Settings.
- Tap Add App and choose an app from the list.
- Select the app name and choose the accessibility features you would like to use with this app.
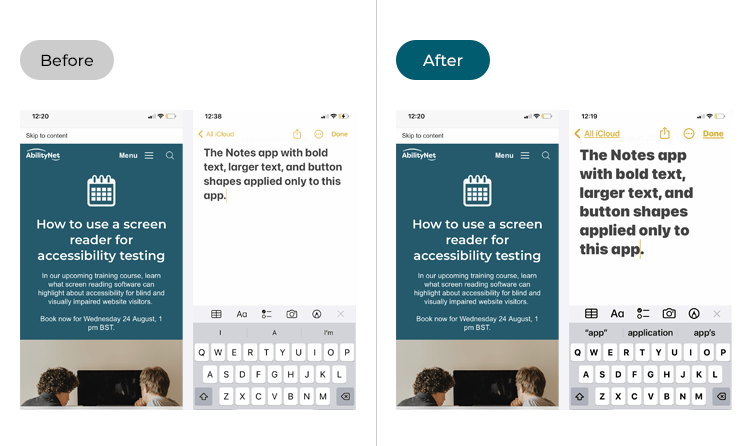
Before and after

This section gives you step-by-step instructions on how to apply accessibility settings to individual apps in iOS 17, with pictures of the screens to help.
Find the Accessibility settings
1. Tap the Settings icon on your Home screen to open the Settings app. Scroll down and tap Accessibility.

Open the Per-App settings
2. On the Accessibility screen, scroll down and tap Per-App Settings.

Choose an app to apply settings to
3. On the Per-App Settings screen, tap Add App and choose the app you want to apply accessibility settings to.

Choose which settings to apply
4. Back on the Per-App Settings screen, tap the app name in the list of apps. Next, choose from the list of accessibility settings and follow the on-screen steps to customise that setting. Use the back button in the top-left of the screen to return to the list of accessibility settings.

Return to the Home screen
5. When you are happy with your settings, you can return to the Home screen by swiping up from the bottom of the screen or by pressing the Home button on devices with a physical Home button.