This page explains how you can turn on the TalkBack screen reading application on your Android tablet or mobile. Sighted assistance will be required to turn on TalkBack if not turned on during setup.
- Accessibility features on your Android device select the ‘Settings’ icon then ‘Accessibility’ (Figure 1)
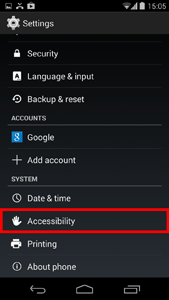
Figure 1 - Accessibility Settings.
- Select ‘TalkBack’ from the list (Figure 2).
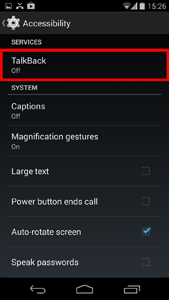
Figure 2 - TalkBack Option.
- Set the toggle switch to ‘On’ (this is in the top-right hand corner of the screen) (Figure 3).
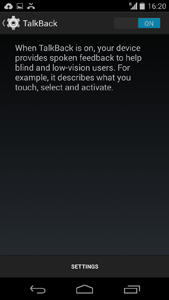
Figure 3 - TalkBack Toggle Switch.
- An alert box will appear on the screen (Figure 4). Select ‘OK’to turn on TalkBack or ‘Cancel’ to return to the previous screen.
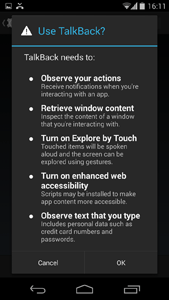
Figure 4 - Alert Box.
- If this is the first time you have turned on TalkBack you will be presented with the first of five lessons which will teach you how to operate TalkBack effectively (Figure 5). You can select ‘Exit’to return to the menu or ‘Next’to move through the tutorials.
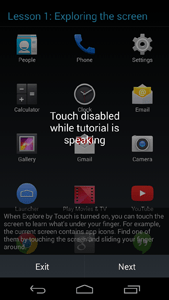
Figure 5 - TalkBack Tutorial.
Launch “Explore by touch” tutorial
- If you would like to access the “Explore by touch”tutorial again later, select ‘Settings’ from the main TalkBack screen (Figure 6).
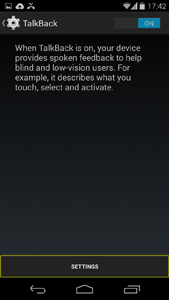
Figure 6 - Settings.
- Scroll down the list and select ‘Launch “Explore by touch”' tutorial. (Figure 7)
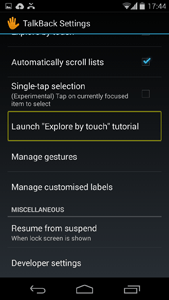
Figure 7 - Explore By Touch Tutorial.
TalkBack Settings
- If you want to change how TalkBack works, select ‘Settings’.
Speech volume
- Tap to select Speech volume. By default, the Speech volume will match the current media volume. Select the item to change this setting (Figure 8).
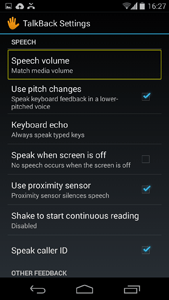
Figure 8 - Speech Volume.
- There are four options (Figure 9):
- Match media volume.
- 75% of media volume.
- 50% of media volume.
- 25% of media volume.
Select ‘Cancel’ to return to the main TalkBack Settings screen.
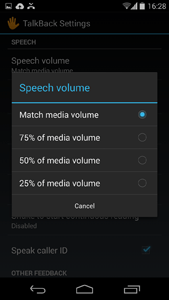
Figure 9 - Speech Volume Options.
Use pitch changes
- By default, TalkBack will speak keyboard feedback in a lower-pitched voice. Select the item and un-tick the tick-box if you would like TalkBack not to do this (Figure 10).
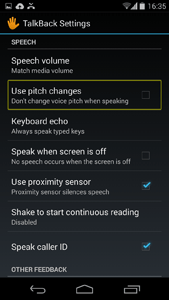
Figure 10 - Pitch Changes.
Keyboard Echo
By default, TalkBack will always speak keys as they are typed. If you would like TalkBack not to do this select the item (Figure 11).
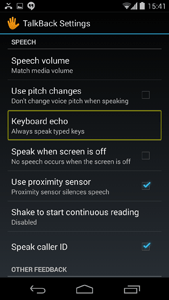
Figure 11 - Keyboard Echo.
There are three options (Figure 12):
- Always speak typed keys.
- Only for on-screen keyboard.
- Never speak typed keys.
Select ‘Cancel’ to return to the main TalkBack Settings screen.
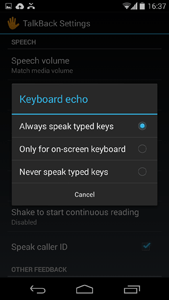
Figure 12 - Keyboard Echo Options.
Speak when screen is off
By default, TalkBack will not speak when the screen is off. Select the item and tick the box if you would like notifications to be spoken when the screen is off (Figure 13).
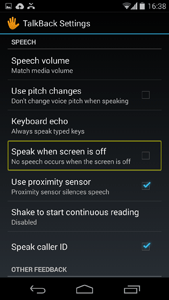
Figure 13 - Speak When Screen is Off.
Use proximity sensor
By default, TalkBack will use the proximity sensor in the device to silence speech. If you would like speech to not be controlled by the proximity sensor in any way, un-tick the tick-box (Figure 14).
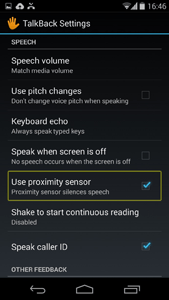
Figure 14 - Proximity Sensor.
Shake to start continuous reading
By default, Shake to start continuous reading is disabled. If you would like TalkBack to read on-screen content by shaking the device, select the item (Figure 15).
There are six options to adjust the sensitivity of this feature (Figure 16):
- Disabled
- Very light
- Light
- Medium
- Hard
- Very Hard
Select ‘Cancel’ to return to the main TalkBack Settings screen.
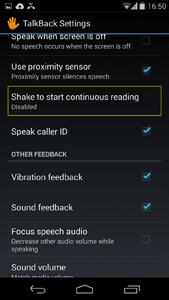
Figure 15 - Shake to start continuous reading.
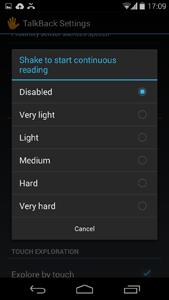
Figure 16 - Sensitivity settings.
Speak caller ID
By default, TalkBack will speak the caller ID. If you would like TalkBack not to do this un-tick the tick-box (Figure 17).
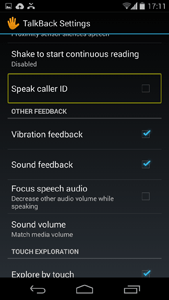
Figure 17 - Speak Caller ID.
Vibration feedback
By default, the device will also vibrate to give you feedback. If you would prefer this not to happen, un-tick the tick-box (Figure 18).
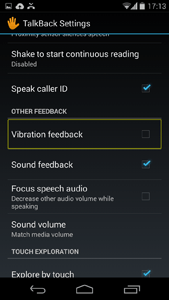
Figure 18 - Vibration Feedback.
Sound feedback
By default, feedback will be provided using sounds as well as speech output. If you would prefer this not to happen, un-tick the tick-box (Figure 19).
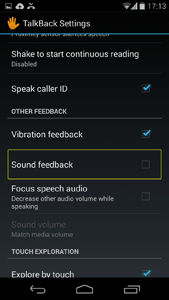
Figure 19 - Sound Feedback.
Focus speech audio
If you would any other audio on the device to be reduced when TalkBack is speaking, select the item to tick the tick-box (Figure 20).
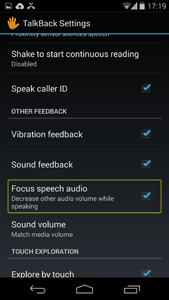
Figure 20 - Focus Audio.
Sound volume
By default, any audio feedback will match the media volume. Select the item to change the setting (Figure 21). There are four options:
- Match media volume.
- 75% of media volume.
- 50% of media volume.
- 25% of media volume.
Select ‘Cancel’ to return to the main TalkBack Settings screen.
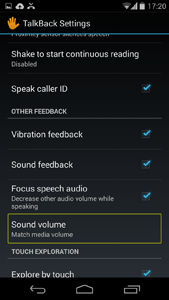
Figure 21 - Sound Volume.
Explore by touch
By default, Explore by touch is turned on. Explore by touch means that TalkBack will speak items as you touch the screen. If you would like to turn this off, select the item (Figure 22). An alert box will then appear (Figure 23). Select ‘OK’ to turn off Explore by touch or select ‘Cancel’ to return to the main TalkBack settings screen.
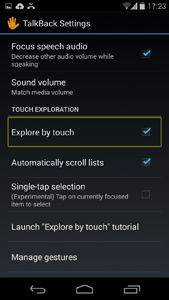
Figure 22 - Explore By Touch.

Figure 23 - Alert Box.
Automatically scroll lists
By default, list items in on-screen list boxes will scroll automatically. If you would like this not to happen, un-tick the tick-box (Figure 24).
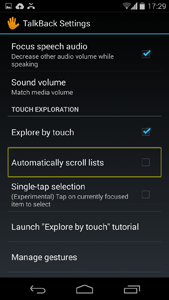
Figure 24 - Automatically scroll lists.
Single-tap selection
If you would like to be able to select the item which has the current focus of TalkBack by using a single-tap gesture, tick the tick-box (Figure 25). Note: This function is marked as ‘experimental’ and as such may not work as intended or in a consistent manner.
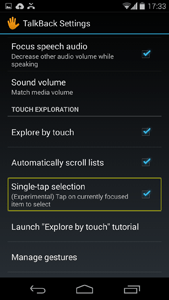
Figure 25 - Single Tap Selection.
Manage gestures
Select Manage gestures if you would like to change the gestures used to operate TalkBack (Figure 26).
- This will open the Manage gestures menu. The default settings are as follows:
- Two-part vertical gestures – Move to the first and last items on screen.
- Swipe up then right – Open local context menu.
- Swipe up then left – Home button
- Swipe down then right - Open global context menu
- Swipe down then left – Back button
- Swipe right then down – Open notifications
- Swipe right then up – Unassigned
- Swipe left then down – Unassigned
- Swipe left then up – Recent apps button.
- To change any of the gestures, select the item and change the value from the list of radio buttons.
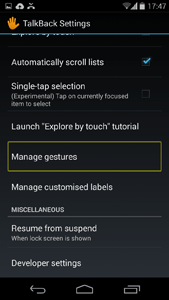
Figure 26 - Manage Gestures.
NOTE: These instructions apply to the standard version of Android as found in the Google Nexus range. They also apply to other devices (as long as they are using the same operating system) but please be aware that there may be minor differences. This is due to the custom ‘skins’ some companies apply to their mobile devices instead of the stock Android theme.
Need some more help?
Call our helpline 0300 180 0028 or email enquiries@abilitynet.org.uk
Need free IT Support at Home?
If you are older or disabled and need IT support at home, you can book a free home visit.