Step 1
- Open the ‘Apple Menu’ by clicking on the Apple icon in the top-left corner of the screen, or press ‘Fn’ + ‘Ctrl’ + ‘F2’ to highlight the Apple icon and press ‘Enter’.
- Select ‘System Preferences…’ from the Apple menu as shown in Fig 1 or press the down arrow key to highlight it and then press ‘Enter’.
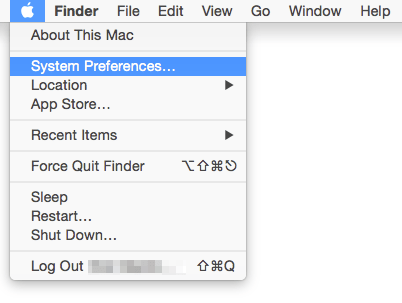
Fig 1.
Step 2
- In the ‘System Preferences’ window, choose ‘Displays’ or press ‘Tab’ repeatedly (you might need to press ‘Ctrl’ + ‘F7’ first) to cycle through the icons until the ‘Displays’ icon is highlighted, see Fig 2 and then press the ‘Spacebar’.
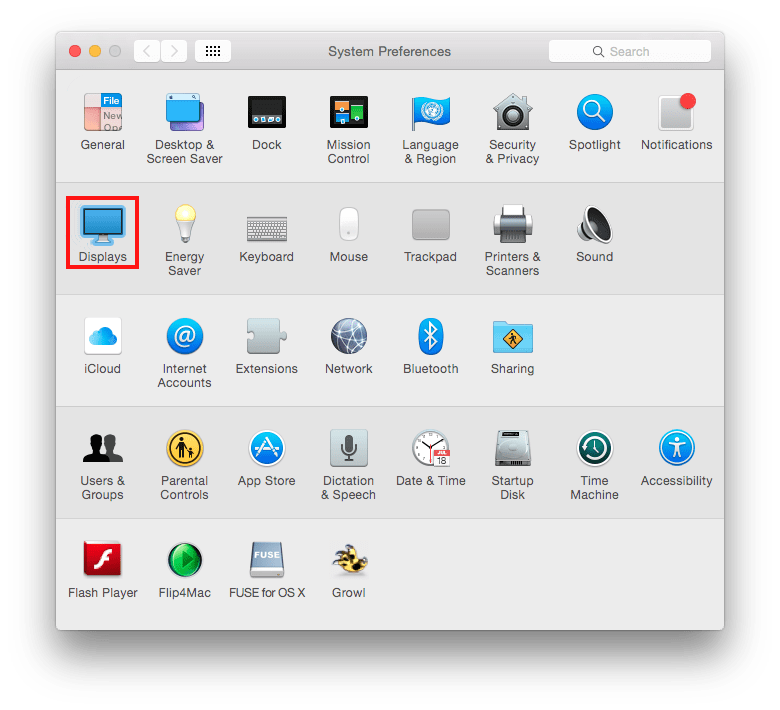
Fig 2.
- On the next screen, click on the ‘Scaled’ radio button or press ‘Ctrl’+ ‘F7’ to highlight and select the ‘Scaled’ radio button if it is not already selected
- The typical display resolution is 1366 × 768 although this depends on the type of display you are using with your computer and yours may have a different setting. To make text on the screen bigger change your resolution to a value lower than the current setting. To do this either click on the resolution you want or ‘Tab’ to highlight the resolutions settings and use the up or down arrows keys to select a resolution that is best for you as shown in Fig 3.
 Fig 3.
Step 3
- When you are happy with screen size click the ‘Close’ (red) button at the top of the window or press ‘Apple’ + ‘W’ to close the window and return to the Finder desktop.
Changing font size for displaying files and folders
This section explains the ways you can change both the text and icon size for all files and folders including those on the desktop on your Mac. To change the text size for desktop icons and folders:
Step 1
- Make sure you are in ‘Finder’,press ‘Apple’ + ‘Tab’ if necessary to cycle through open applications until you return to ‘Finder’.
- Click to select ‘View’ from the Menu Bar and select ‘Show View Options’ from the menu or press ‘Apple’ + ‘J’, Fig 4.
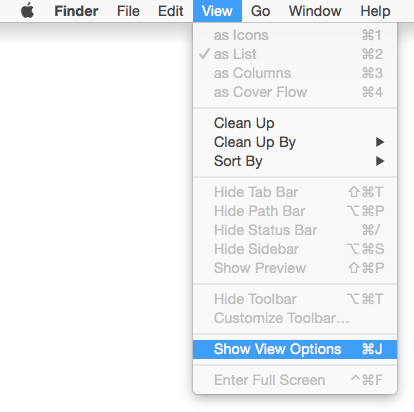
Fig 4.
Step 2
- On the pop-up window, using the mouse, click on the box next to ‘Text size:’ and choose a font size up to 16pt. You can also make the Icon size smaller or larger by clicking on the ‘Icon size’ gauge, Fig 5.
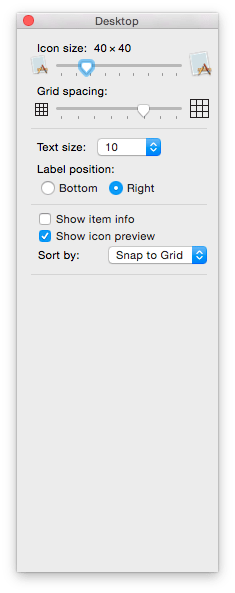
Fig 5.
- When you are happy with your choice, click on the close button at the top of the window.
To change the text size for files in folders:
Step 1
- Select a folder by double clicking on it or press ‘Tab’ to highlight it and press ‘Apple’ + ‘O’ to open it. In this example a folder called ‘Pictures’ has been used.
- Click to select ‘View’ from the Menu Bar and select ‘Show View Options’ from the menu or press ‘Apple’ + ‘J’ , Fig 4.
- On the pop-up window, click on the box next to ‘Text size:’ and choose a font size up to 16 pt. You can also make the Icon size smaller or larger by selecting a small or large icon (no keyboard shortcut), Fig 6.
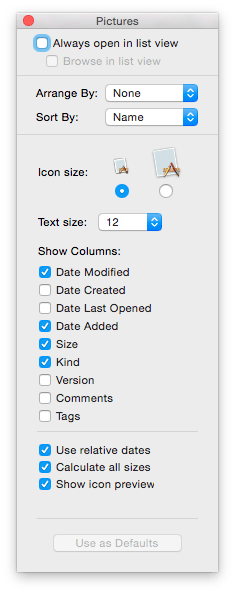
Fig 6.
- When you are happy with your choice, click on the close button at the top of the window (no keyboard shortcut).
Note: If this does not work it could be because your computer settings cannot be changed due to local IT policies – contact your local IT support for further help.
Need some more help?
Call our helpline 0300 180 0028 or email enquiries@abilitynet.org.uk
Need free IT Support at Home?
If you are older or disabled and need IT support at home, you can book a free home visit.