Short guide
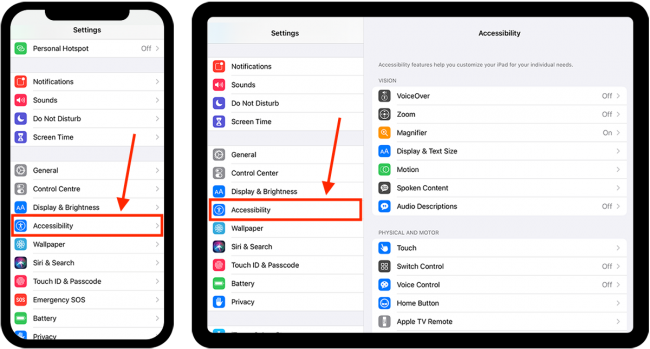
- Open the Settings app,
 and select Accessibility.
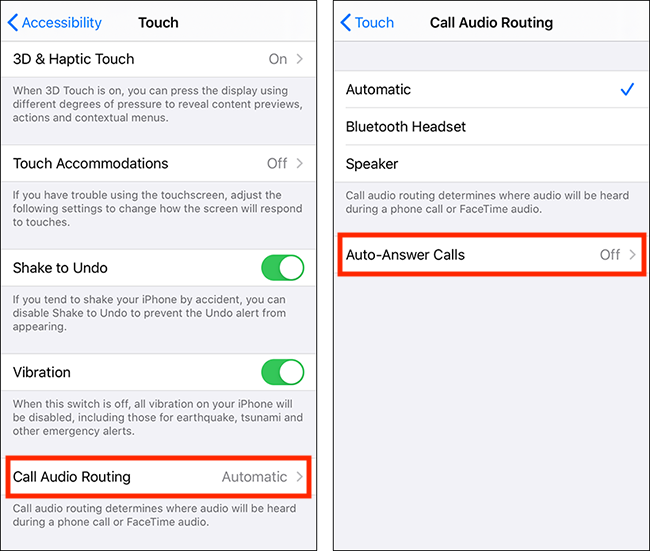
 - On the Accessibility screen, tap Touch, then scroll down and tap Call Audio Routing.
- On the Call Audio Routing screen, tap Auto-Answer Calls.
- Tap Auto-Answer Calls to set the toggle switch to On.
- Set the time limit after which calls are automatically answered by tapping on the + (plus) or - (minus) buttons.
Before and after

This section takes you through each step to enable the auto-answer feature of your iPhone, iPad or iPod Touch running iOS 13. This is a step-by-step guide with pictures of the screens to help you.
Open Settings and select Accessibility
1. Open the Settings app by tapping the Settings icon ![]() . Scroll down and select Accessibility from the list.
. Scroll down and select Accessibility from the list.
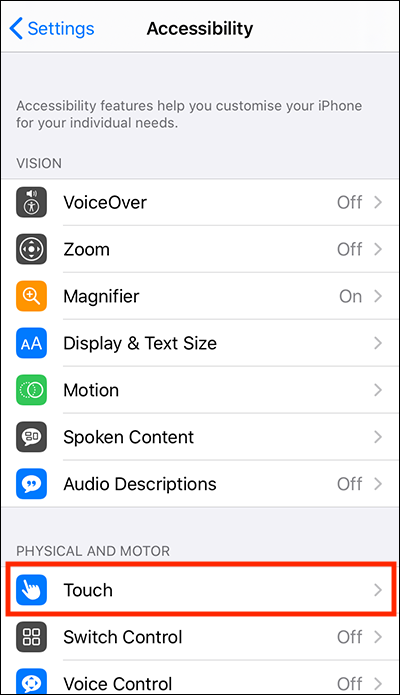
Tap Touch
2. Scroll down to the Physical and Motor section and tap Touch.
Find Auto-Answer Calls
3. On the Touch screen, scroll to the bottom and tap Call Audio Routing, then tap Auto-Answer Calls.
Turn on Auto-Answer Calls
4. Tap Auto-Answer Calls to set the toggle switch to on.

Set the time limit
5. Finally, set the time limit after which calls will be answered automatically. The default is 3 seconds, but you can make it shorter or longer using the + (plus) or - (minus) buttons.

Need some more help?
Call our helpline 0300 180 0028 or email enquiries@abilitynet.org.uk
Need free IT Support at Home?
If you are older or disabled and need IT support at home, you can book a free home visit.