To change the colour scheme
- Open the ‘Ease of Access’ settings by pressing the ‘Windows logo key’
 + ‘U’ on the keyboard or via Start Menu > Settings > Ease of Access (see the article Open Accessibility Preferences on this website for more information.)
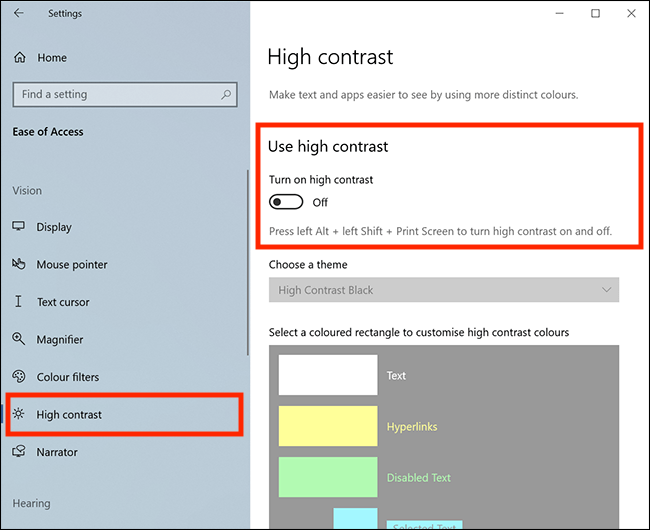
 - Select ‘High contrast’ from the Vision section in the left column.
- Under ‘Use high contrast’ in the right column, click the toggle switch labelled ‘Turn on high contrast’. The screen colours will immediately change.

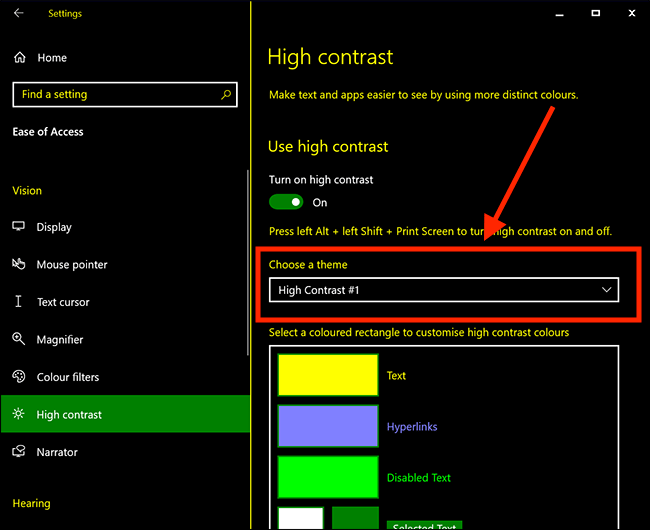
- High contrast has four defaults themes to choose from. Click or tap on the drop-down menu labelled ‘Choose a theme’ and select from:
- High Contrast #1
- High Contrast #2
- High Contrast Black
- High Contrast White

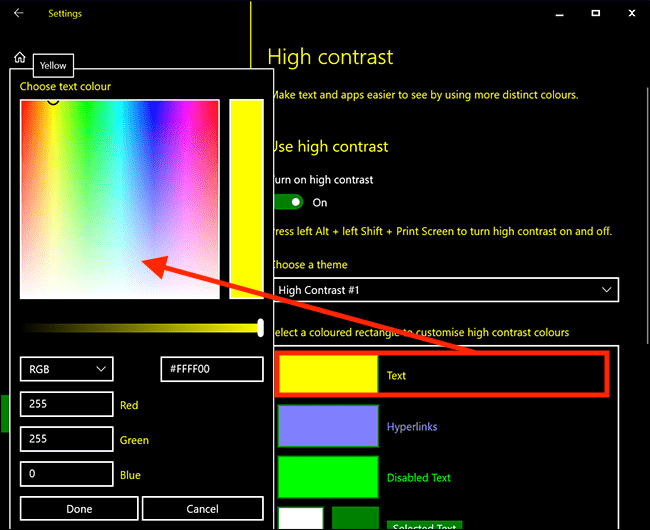
- Each High Contrast theme can be fully customised by changing the colours of individual items such as text, buttons and hyperlinks. To do so, click or tap on the coloured rectangles and edit them in the pop-up colour palette. When you have selected a new colour, click done.

- When you are happy with your settings click the ‘X’ close button in the top-right of the window
Note: If this does not work it could be because your computer settings are managed by someone else (an IT department or administrator for example) in which case you will need to contact them to access these settings or for further help.
Need some more help?
Call our helpline 0300 180 0028 or email enquiries@abilitynet.org.uk
Need free IT Support at Home?
If you are older or disabled and need IT support at home, you can book a free home visit.