To enable ‘Guided Access’:
- Tap the ‘Settings’ icon on your home screen. Fig 1.

Fig 1 - Tap on ‘General’. Fig 2.
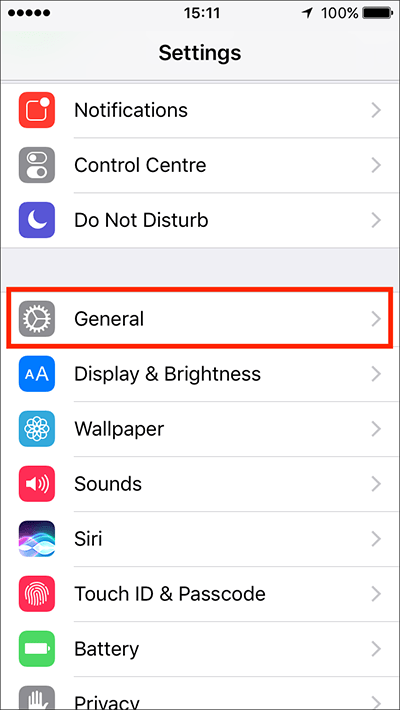
Fig 2 - Tap on ‘Accessibility’. Fig 3.
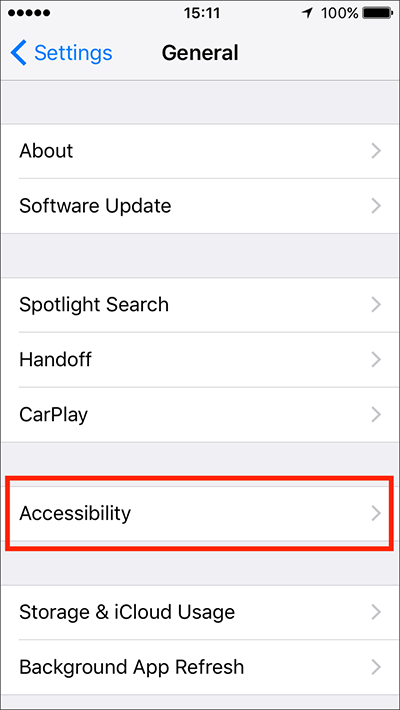
Fig 3 - Under the ‘Learning’ section (scroll to the bottom), tap on ‘Guided Access’. Fig 4.
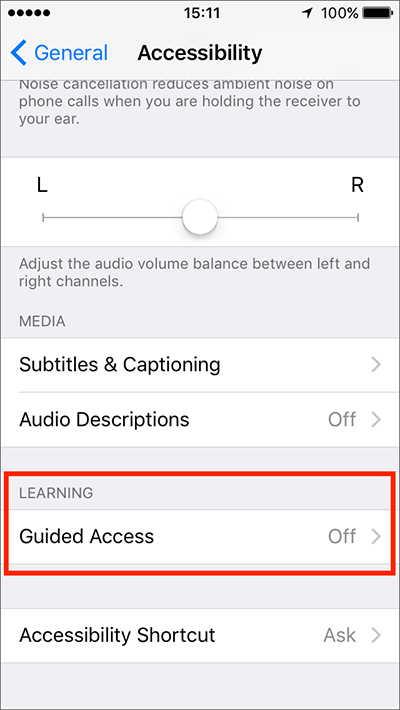
Fig 4 - Tap the toggle switch next to ‘Guided Access’. Fig 5.
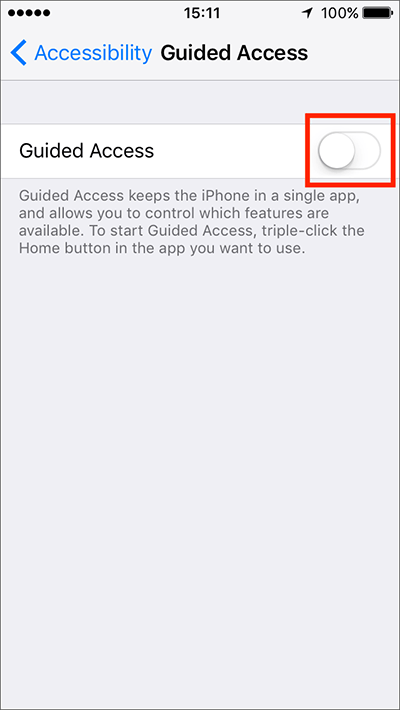
Fig 5
Guided Access settings
Passcode Settings
To stop someone from switching off the Guided Access feature early, you can set a password that has to be entered before the Guided Access session can be switched off (like a parental lock).
Note: If you don’t set a password at this stage you will be asked to set one when you begin a Guided Access session.
- In the ‘Guided Access’ section, tap on ‘Password Settings’. Fig 6.
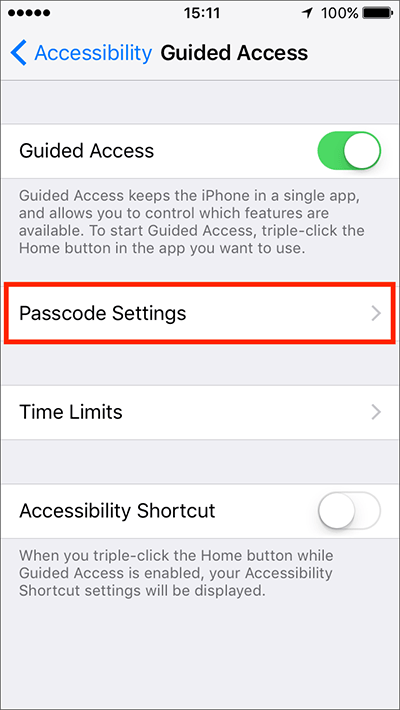
Fig 6 - Tap on ‘Set Guided Access Password’. Fig 7.

Fig 7 - Enter a six-digit passcode. You will be prompted to re-enter the passcode for confirmation. Fig 8.
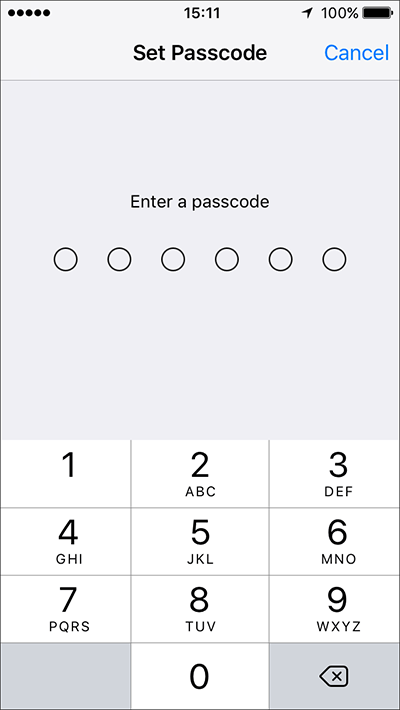
Fig 8 - If your device has ‘Touch ID’ where you can use your fingerprint to unlock your device (iPhone 5s onwards / iPad Air 2 / iPad 2017 / iPad Pro) you will be given the option to allow it to be used to end a ‘Guided Access’ session.
Tap the toggle switch next to ‘Touch ID’ to enable this feature. Fig 9.
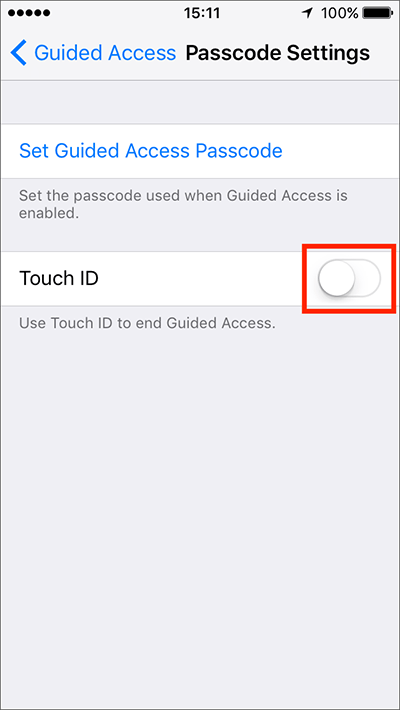
Fig 9
Time Limits
When you begin a ‘Guided Access’ session you will also be given the option to set a time limit for that session. This settings screen allows you to choose the sounds that are associated with the time limit.
- Tap on ‘Time Limits’. Fig 10.
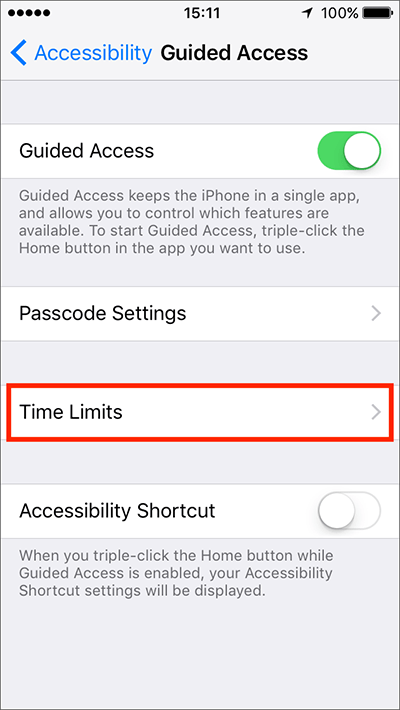
Fig 10 - To change the sound that plays when a session ends tap on ‘Sound’ (Fig 11) and choose from the list of sounds that appears.
- By default ‘Guided Access’ will also speak aloud the time remaining before a session ends. If you would like to turn this feature off, tap the toggle switch next to ‘Speak’ (Fig 11).
Note: The toggle switch will become greyed out when this feature is disabled.
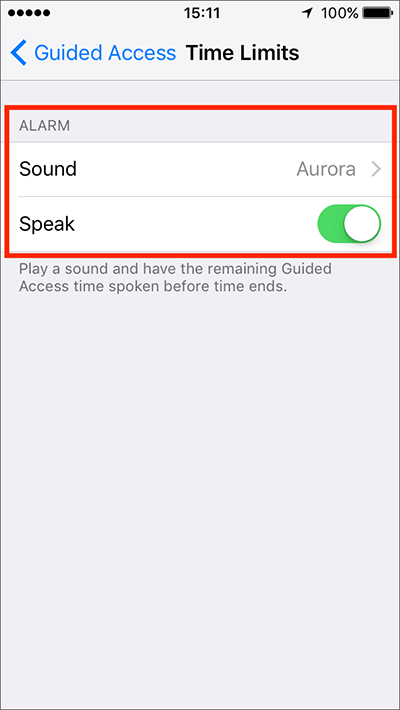
Fig 11
Accessibility Shortcut
If you have enabled the ‘Accessibility Shortcut’ (see the article Accessibility Shortcut - iPhone/iPad/iPod Touch on this website) in order to gain access to another accessibility feature or set of features, you can allow access to the shortcut during a ‘Guided Access’ session. Tap the toggle switch next to ‘Accessibility Shortcut’ to enable this feature. Fig 12.
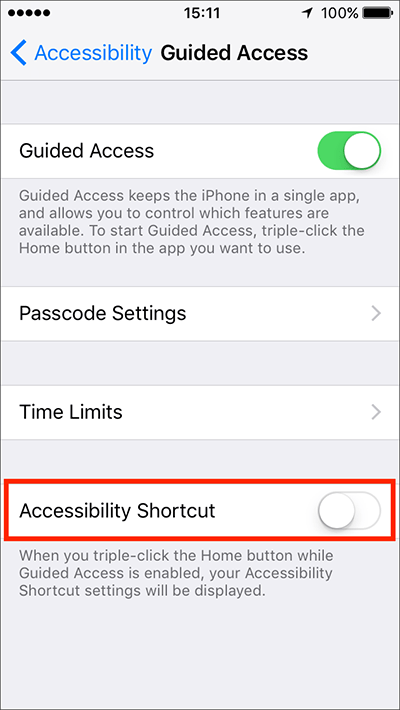
Fig 12
When you are happy with your settings, either tap the back button in the top left of the screen to return to the main ‘Accessibility’ settings screen or press your device’s ‘Home’ button to return to the home screen.
Using ‘Guided Access’:
- Open the app you wish to use during the ‘Guided Access’ session, in our example we will use the Notes.
- Triple-click the ‘Home’ button to activate ‘Guided Access’.
- The app will shrink to the middle of the screen and you will see the ‘Guided Access’ heading at the top of the screen. Fig 13.
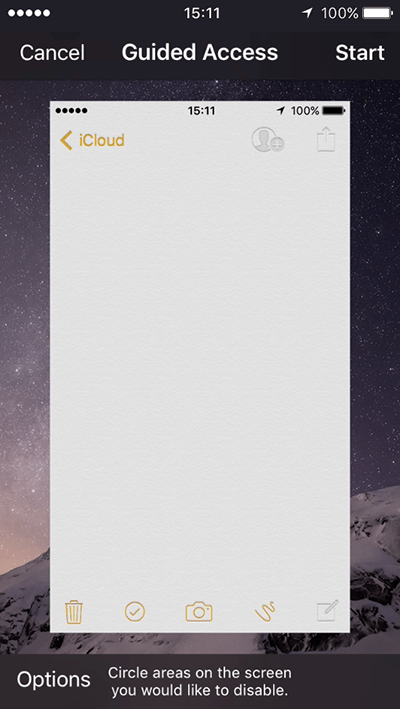
Fig 13 - You can draw circles over any parts of the app that you want to restrict access to. Fig 14.
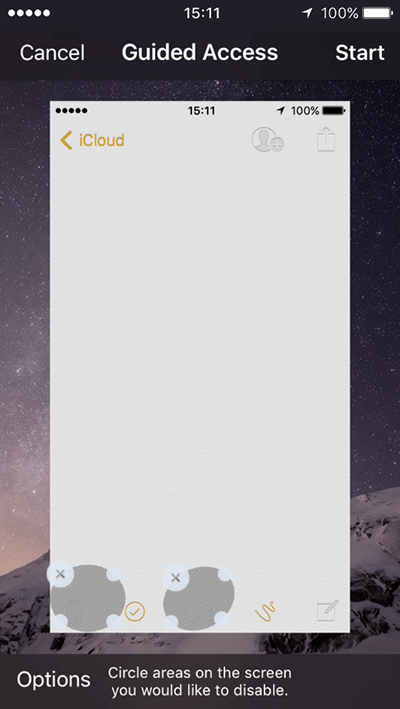
Fig 14 - Tap the ‘Options’ button to see more items that you can restrict access to. Fig 15.
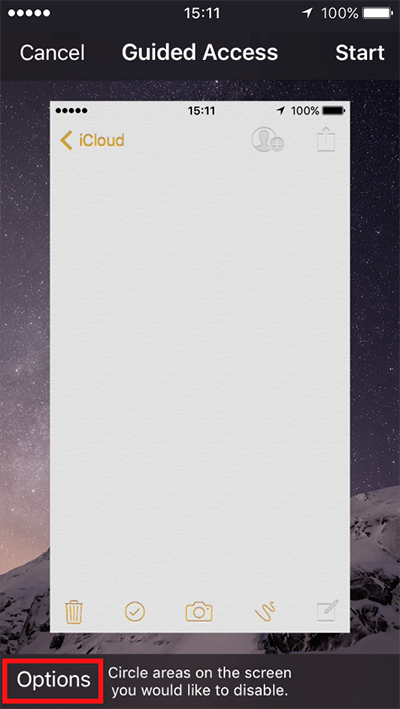
Fig 15 - You can also disable access to:
- Sleep/Wake Button
- Volume Buttons
- Motion
- Keyboards
- Touch
Tap the toggle switch next to each option to turn access on or off. Fig 16.
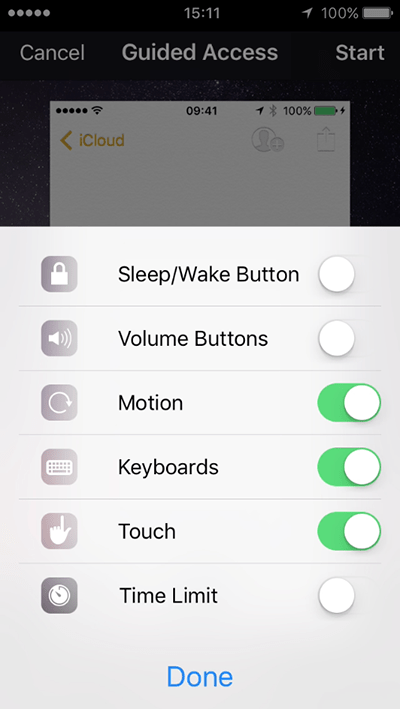
Fig 16
- To set a time limit for the ‘Guided Access’ session, tap on ‘Options’ (Fig 15, above) if they are not already visible.
- Tap the toggle switch next to ‘Time Limit’ (Fig 16, above).
- Select a duration. Fig 17.
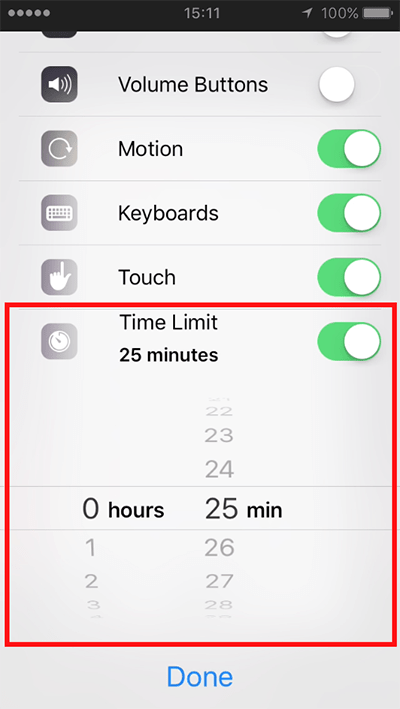
Fig 17 - When you are happy with your settings click the blue ‘Done’ button.
- To begin the session, click ‘Start’ in the top right corner or click ‘Cancel’ in the top left corner to return to the app. Fig 18.
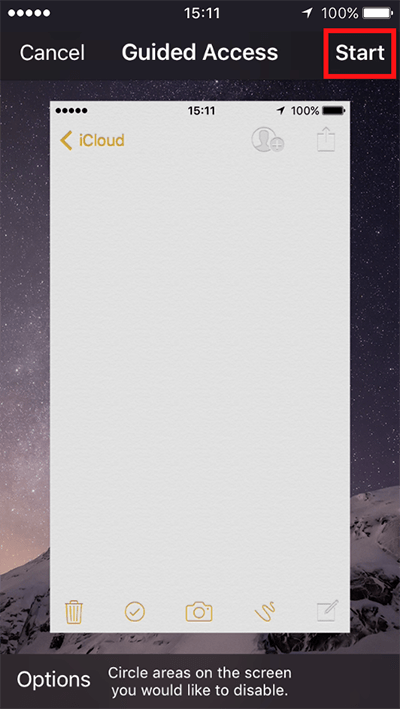
Fig 18 - If you wish to stop a ‘Guided Access’ session before it finishes, triple-click the ‘Home’ button (or use ‘Touch ID’ if you have enabled that feature). If you have set a passcode you will be asked to enter it in order to cancel the session.
Need some more help?
Call our helpline 0300 180 0028 or email enquiries@abilitynet.org.uk
Need free IT Support at Home?
If you are older or disabled and need IT support at home, you can book a free home visit.