Call our helpline
0300 180 0028In this article
How to enable Sticky Keys
Using Sticky Keys
How to enable Sticky Keys
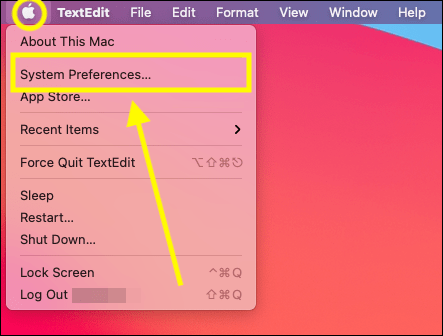
- Select the Apple icon
 in the top left corner of the screen.
 - Select System Preferences from the menu.
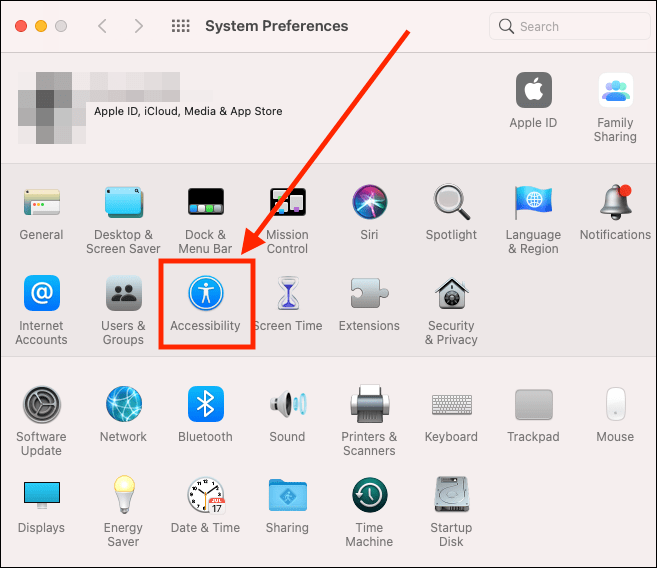
- On the System Preferences window, select the Accessibility icon.
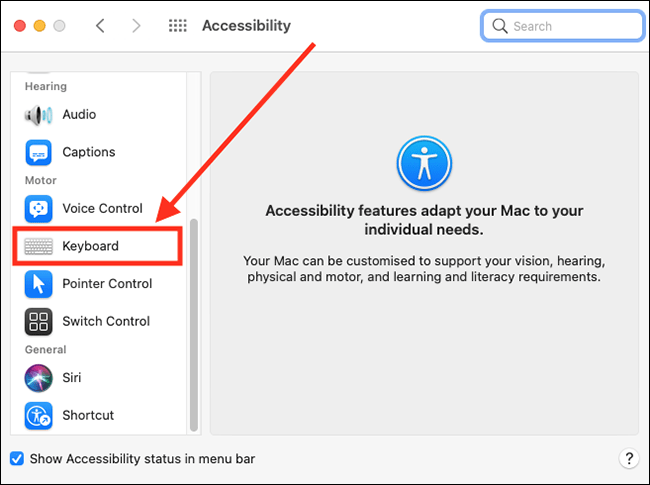
- On the Accessibility screen, scroll down in the left column and select Keyboard.
- In the right column, make sure the Hardware tab is selected.
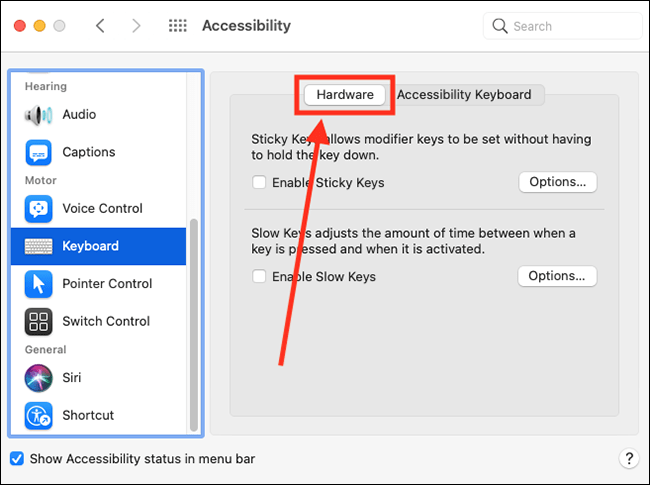
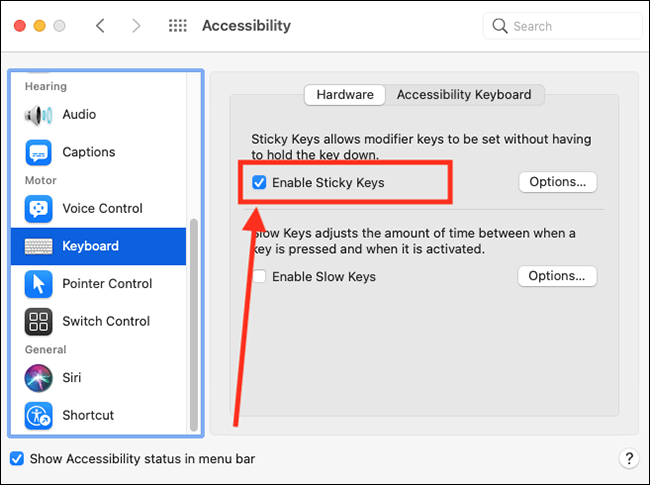
- Tick the checkbox for Enable Sticky Keys.
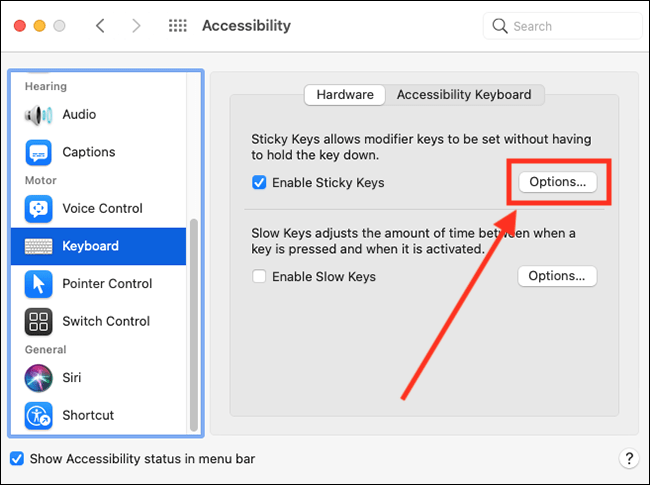
- If you would like to edit the settings for Sticky Keys, select Options.
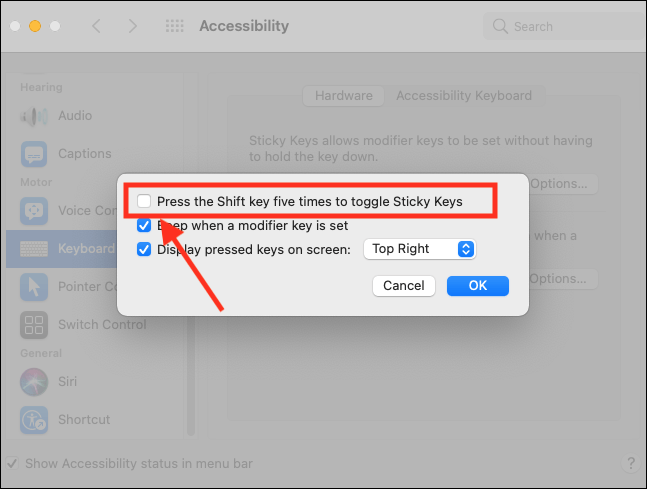
- To use a keyboard shortcut to turn Sticky Keys on or off, tick the checkbox for Press the Shift key five times to toggle Sticky Keys.
You can now turn Sticky Keys on or off by pressing the Shift key five times in a row.
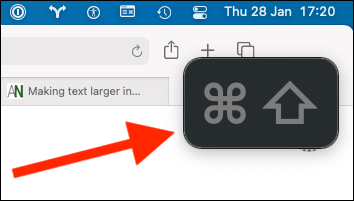
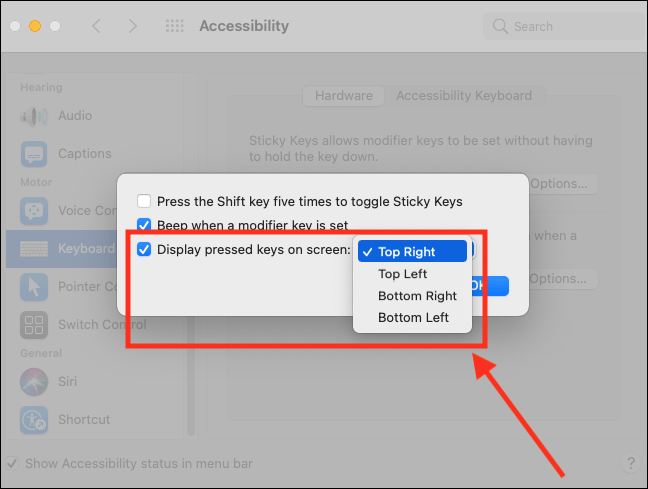
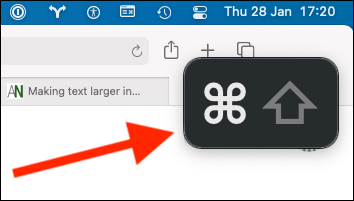
- When a ‘sticky’ key is active, an indicator will appear in the top-right corner of the screen.
- To change the position of the indicator, select the drop-down menu for Display pressed keys on screen and choose a new position. Choose from:
- Top Right
- Top Left
- Bottom Right
- Bottom Left
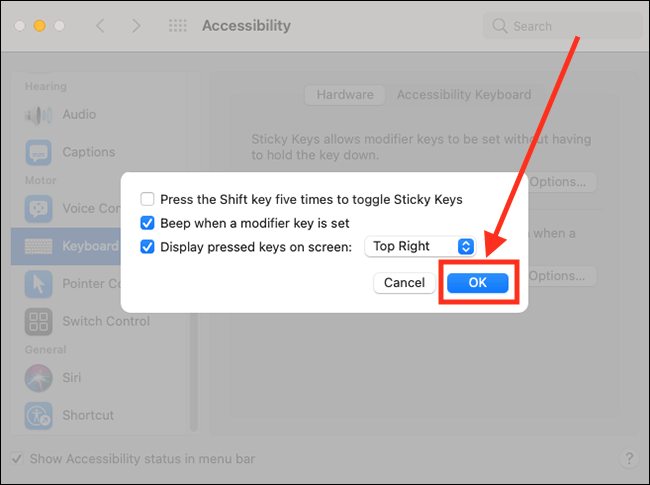
- When you are happy with your settings, select the OK button.
- When you are finished, click the Close (red) button in the top left corner of the System Preferences window.
Using Sticky Keys
- To use Sticky Keys, press the keys for the required shortcut, one after the other.
- To keep any of the modifier keys (Cmd, Alt, Shift, Ctrl) ‘pressed’, press it twice. To ‘un-press’ a key, press it a third time.
- The on-screen indicator will show which modifier keys you have pressed. If you pressed the key once, the icon will be grey. If you pressed the key twice, the icon will be white.
Note: If this does not work it could be because someone else manages your computer settings (an IT department or administrator). If this is the case, you will need to contact them to access these settings or for further help.
Need some more help?
Call our helpline 0300 180 0028 or email enquiries@abilitynet.org.uk
Need free IT Support at Home?
If you are older or disabled and need IT support at home, you can book a free home visit.