In this article
How to enable Speak selection
Using Speak selection
How to enable Speak selection
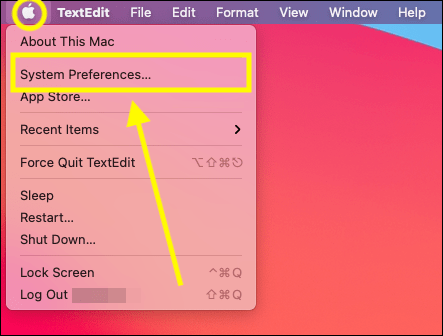
- Select the Apple icon
 in the top left corner of the screen.
 - Select System Preferences from the menu.
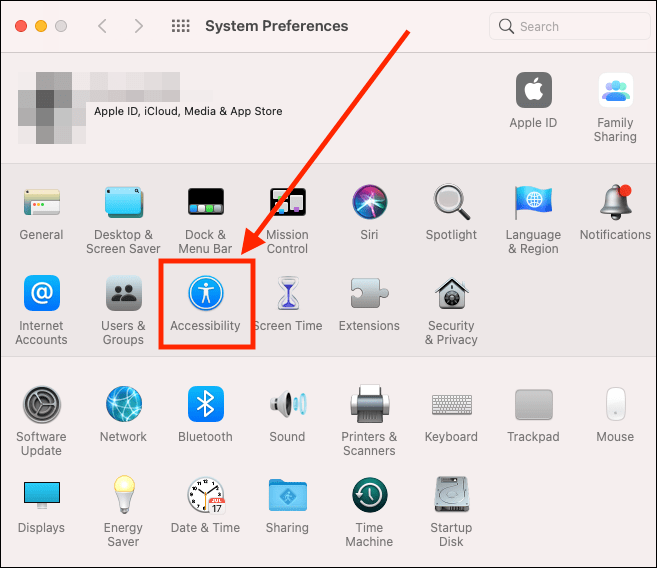
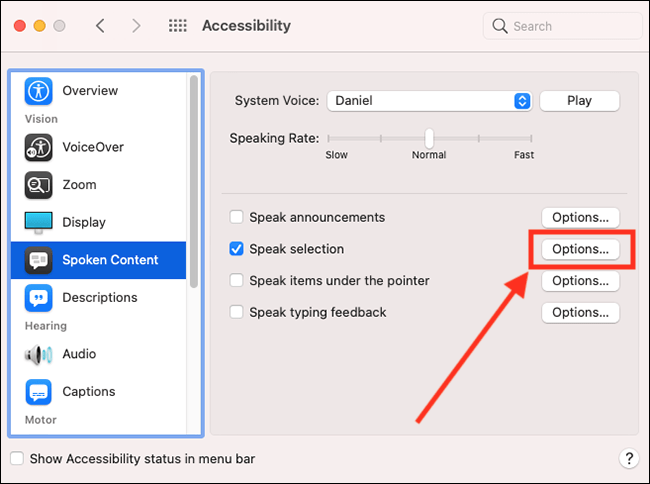
- On the System Preferences window, select the Accessibility icon.
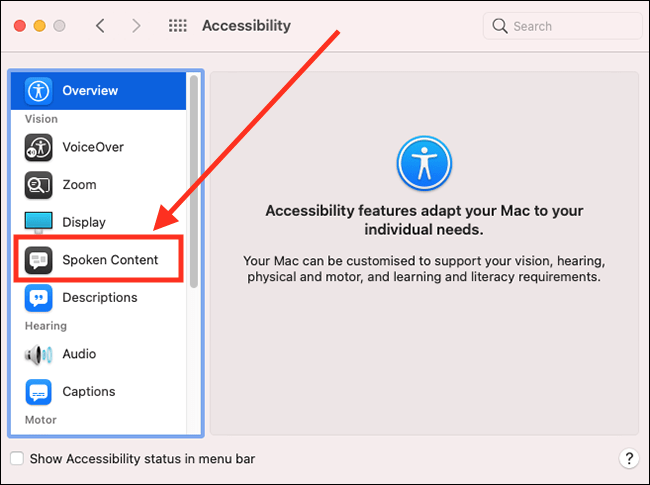
- On the Accessibility screen, select Spoken Content from the left-hand column.
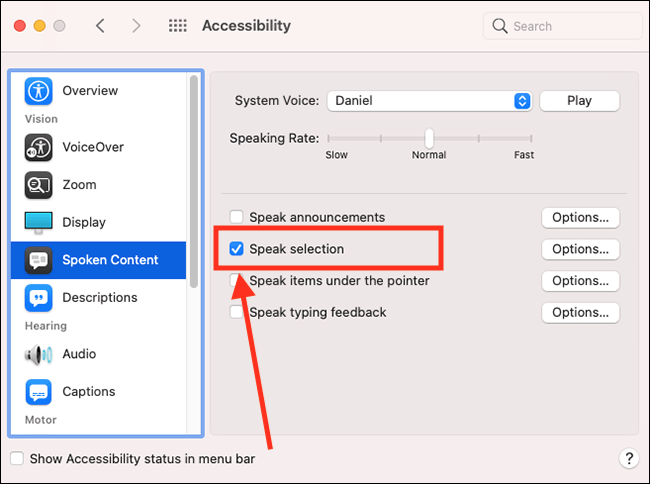
- In the right column, tick the checkbox for Speak selection.
- To change the settings for Speak selection, select its corresponding Options button.
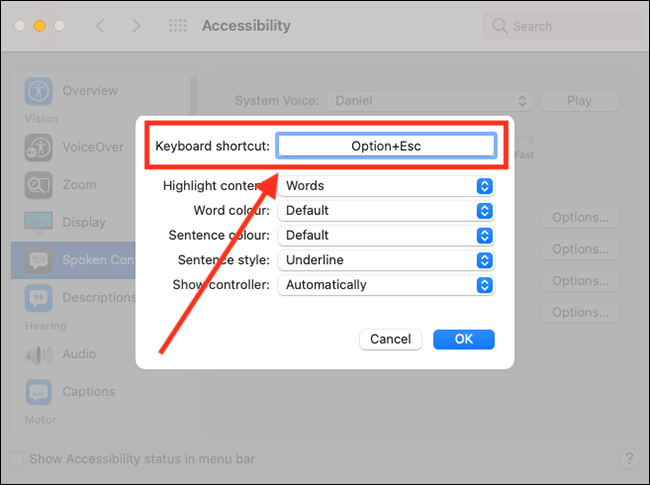
- In the Options window, you can change the settings for:
- Keyboard shortcut – you can use a keyboard shortcut to activate Speak Selection. The default is Option (alt) + Esc. To change the shortcut, select the box showing Option + Esc and type your new key combination.
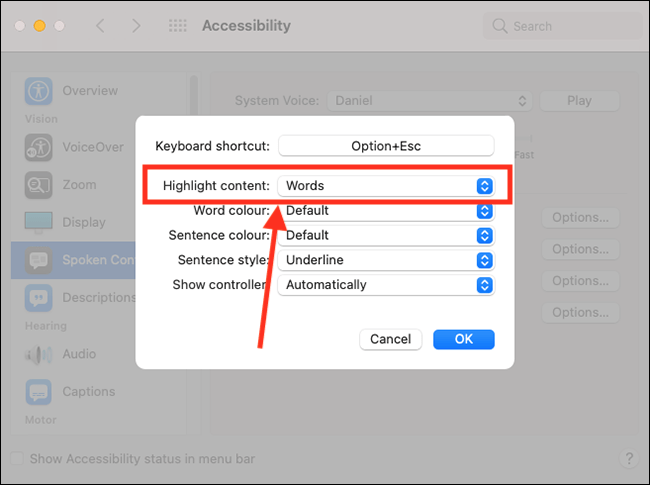
- Highlight content – The selected text can be highlighted as it is being read aloud. From the drop-down menu for Highlight Content, you can choose to have Words, Sentences, or both Words and Sentences highlighted. Note: Content highlighting only works in some applications. For instance, content read aloud in Microsoft Word and the Chrome web browser doesn’t get highlighted. Another issue is that highlighting runs out of sync in some applications. This will hopefully be fixed in a future macOS update.
- Keyboard shortcut – you can use a keyboard shortcut to activate Speak Selection. The default is Option (alt) + Esc. To change the shortcut, select the box showing Option + Esc and type your new key combination.
- You can customise how text is highlighted using the following settings.
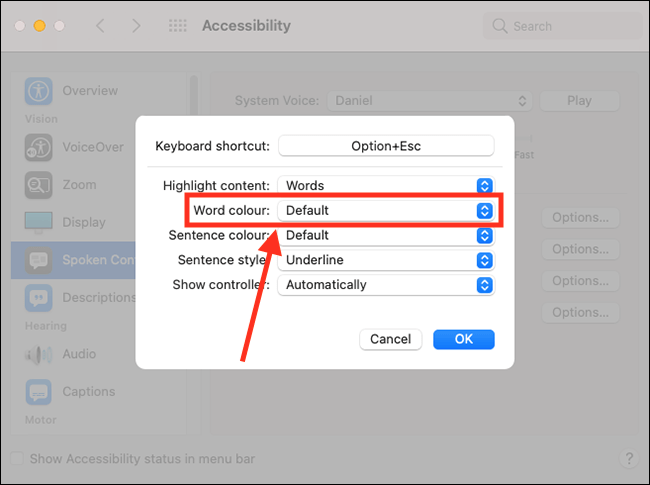
- Word colour - by default, words are highlighted with a yellow background. To change the highlight colour, select the drop-down menu for Word colour and choose from the options.
- Sentence colour – by default sentences are highlighted with a blue background. To change the highlight colour, select the drop-down menu for Word colour and choose from the options.
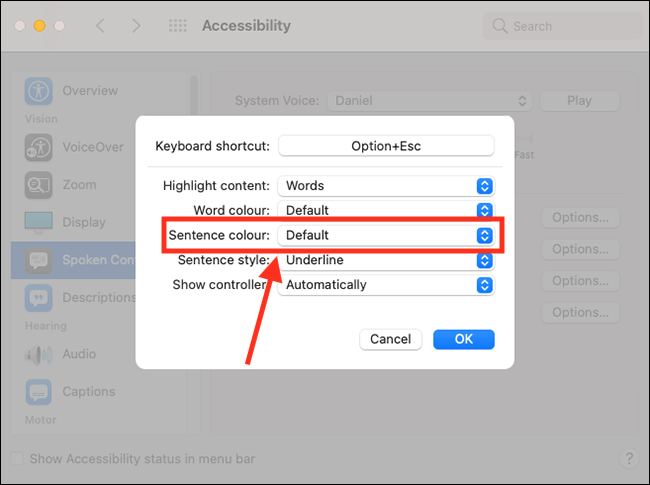
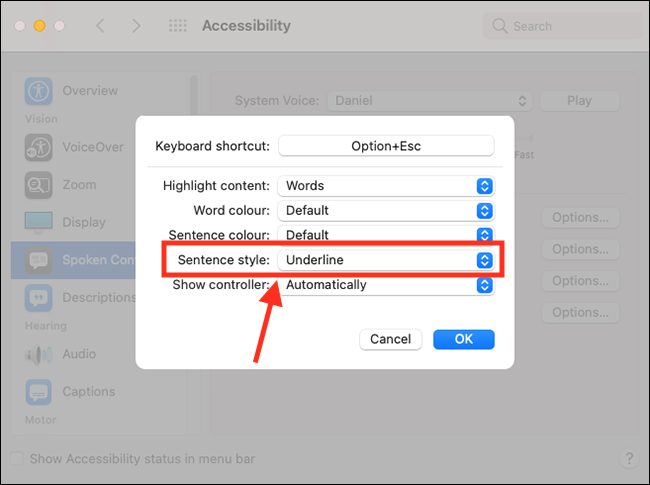
- Sentence style – by default, sentences are highlighted with a coloured underline. The underline colour is black unless you changed the Sentence colour using the option shown above. If you would prefer sentences are highlighted using a background colour, select the drop-down menu for Sentence style and choose Background Colour.
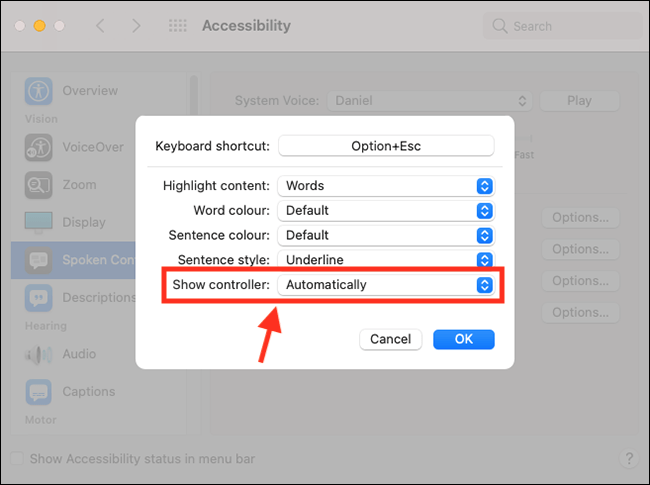
- Show controller – when you activate Speak select using a keyboard shortcut, a controller appears on the screen. The controller allows you to speed up/slow down speech, jump to the next/previous sentence, pause speech, and stop speech. In the drop-down menu for Show controller, you can choose whether the controller appears automatically, never appears, or always appears.
- Word colour - by default, words are highlighted with a yellow background. To change the highlight colour, select the drop-down menu for Word colour and choose from the options.
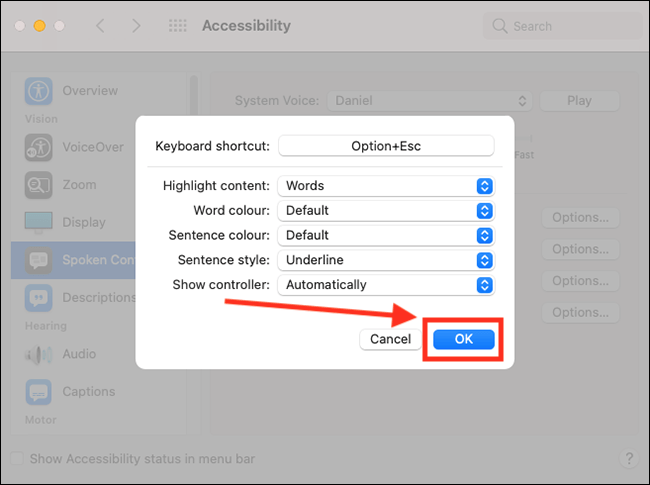
- When you are happy with these settings, select OK.
- When you have finished, click the Close (red) button in the top left corner of the System Preferences window.
Using Speak selection
There are two ways to use Speak selection.
Method 1: Using a keyboard shortcut
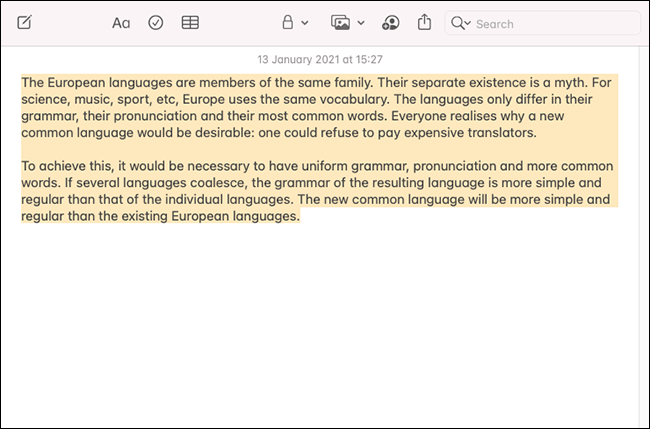
- Select the text you would like to hear spoken. Note: If you want to hear a whole page read aloud you don’t need to highlight it first.
- Use the keyboard shortcut associated with Speak selection – the default shortcut is Option (alt) + Esc. See step 7 of the How to enable Speak section, above, to see how to change the shortcut.
- You will hear the text being read aloud. Depending on your settings, the text will be highlighted in applications that support it. See an example of highlighting using the Notes application, below.
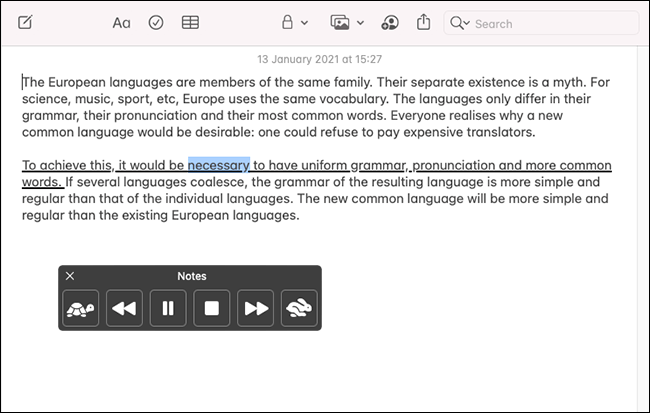
- If you have enabled the Speak selection controller (see step 7 of the How to enable Speak section, above) you can use it to:

- Slow down speech
- Jump back to the previous sentence.
- Pause / Play speech.
- Stop speech.
- Jump to the next sentence.
- Speed up speech.
- To stop your computer speaking, select either the Stop button on the controller or click the X button in the top-left corner of the controller.
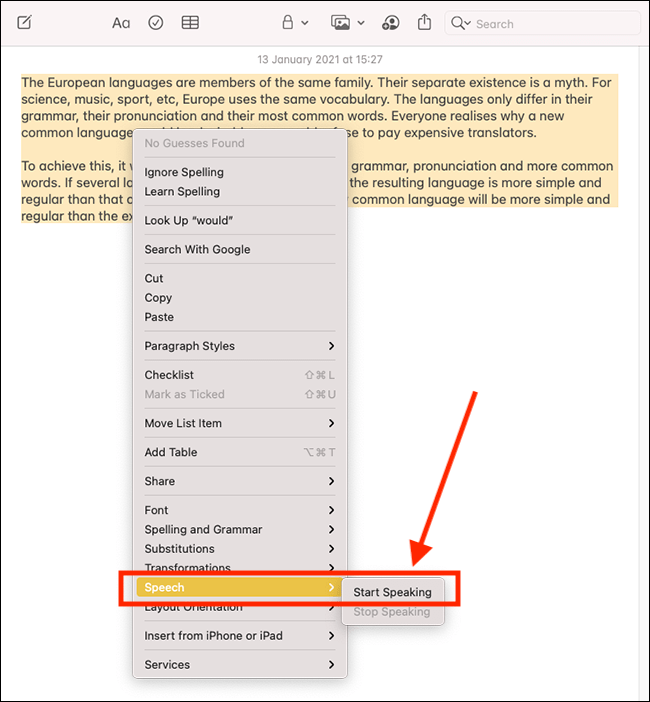
Method 2: Using the right-click menu
When using this method, the text will not be highlighted as it is being read aloud and the Speak selection controller will not be available. Note: This right-click option is not available in all applications.
- Select the text you would like to hear spoken. Note: In some applications, if you want to hear a whole page read aloud you don’t need to highlight it first.
- Right-click and choose Speech > Start Speaking from the menu.
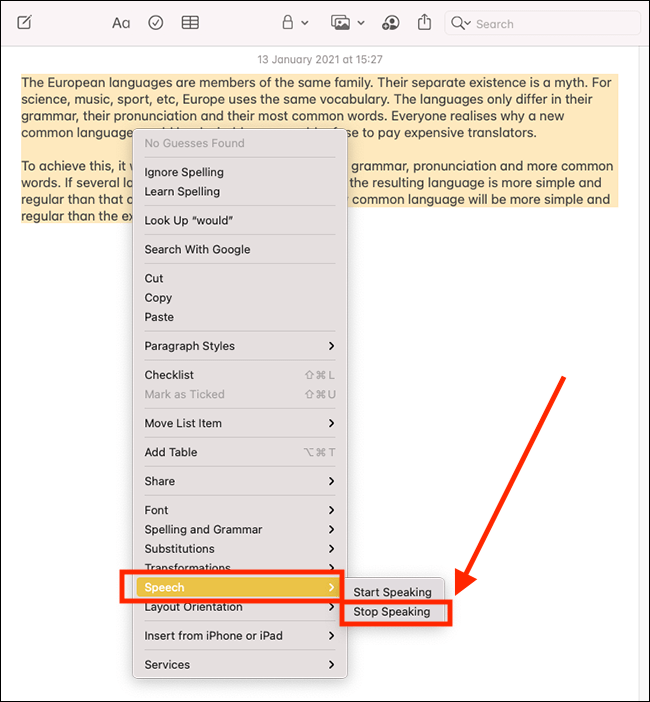
- To stop speech, right-click and choose Speech > Stop Speaking from the menu.
Note: If this does not work, it could be because someone else manages your computer settings (an IT department or administrator). If this is the case, you will need to contact them to access these settings or for further help.
Need some more help?
Call our helpline 0300 180 0028 or email enquiries@abilitynet.org.uk
Need free IT Support at Home?
If you are older or disabled and need IT support at home, you can book a free home visit.