Call our helpline
0300 180 0028Short guide:
- Open the Settings app and tap Control Centre.
- Scroll down to the More Controls section, then tap the + (plus) button next to the items you want to add to the Control Centre.
- To reorder items, scroll back up to the Included Controls section. Press and hold on the ‘list’ icon on the right-hand side of an item, then drag it to a new position.
- To use the Control Centre, swipe down from the top-right corner of your device. On devices with a physical Home button, swipe up from the bottom of the screen.
Before and after
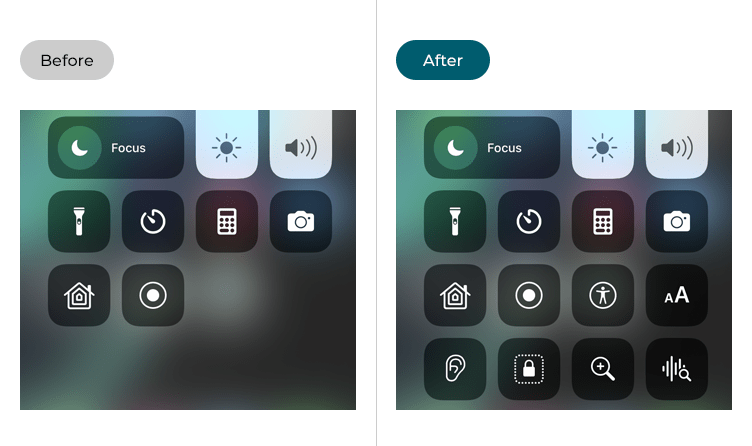
This section gives you step by step instructions on how to add accessibility items to the Control Centre in iOS 17, with pictures of the screens to help.
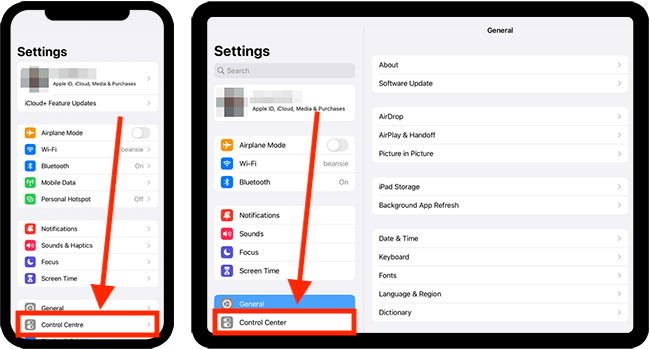
Find the Control Centre settings
1. Tap the Settings icon ![]() on your Home screen to open the Settings app. Scroll down and tap Control Centre.
on your Home screen to open the Settings app. Scroll down and tap Control Centre.
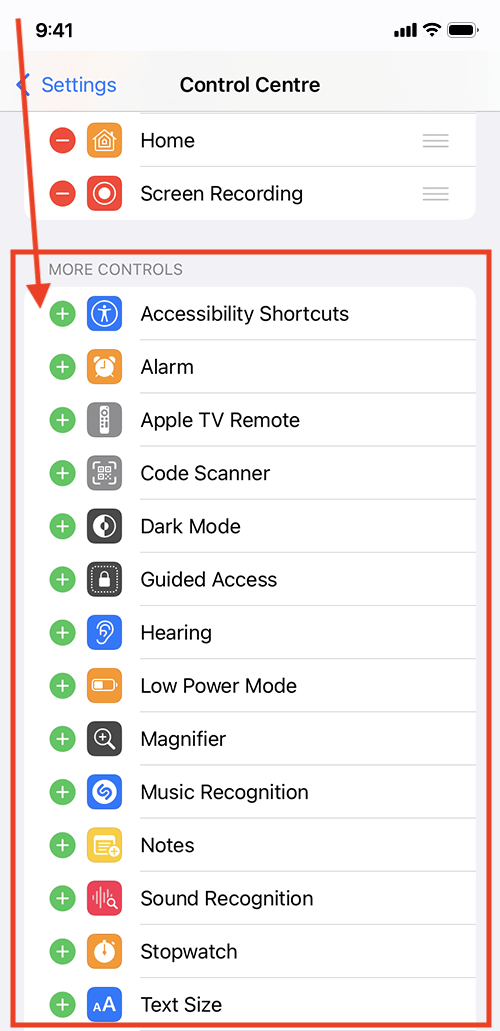
Add Accessibility items to the Control Centre
2. Scroll down to the More Controls section, then tap the + (plus) button next to the items you want to add to the Control Centre.
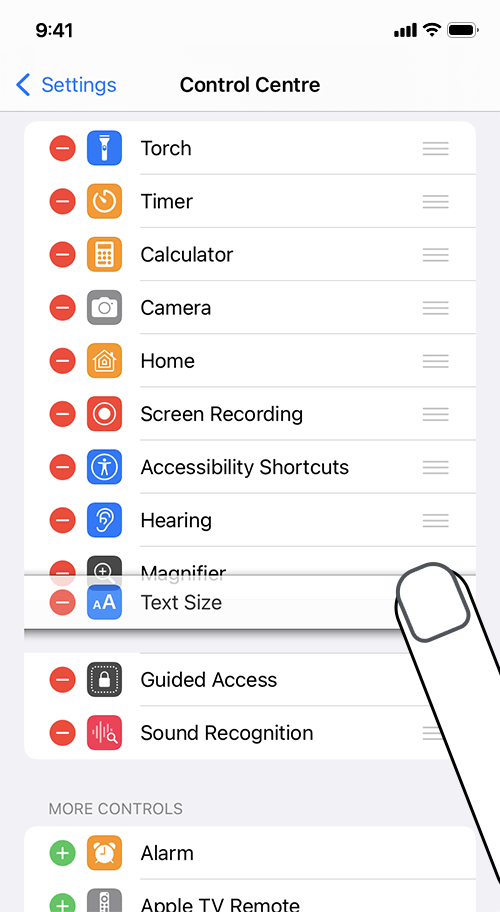
Reorder the items you have added to the Control Centre
3. To reorder items, scroll back up to the Included Controls section. Press and hold on the ‘list’ icon on the right-hand side of an item, then drag it to a new position.
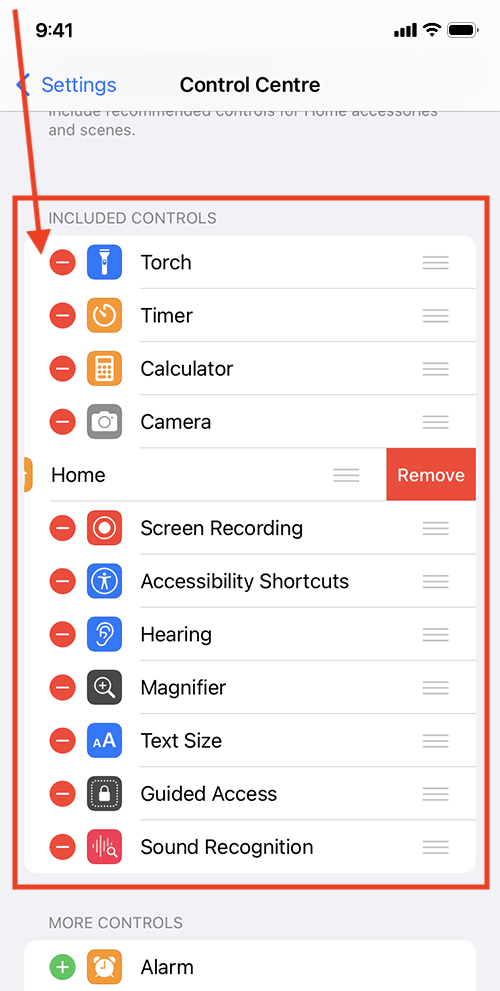
How to delete items from Control Centre
4. To delete an item from the Control Centre, tap the – (minus) button, then tap Remove. The deleted item will go back into the More Items section.
Return to the Home screen
5. When you are happy with your settings, you can return to the Home screen by swiping up from the bottom of the screen or by pressing the Home button on devices with a physical Home button.
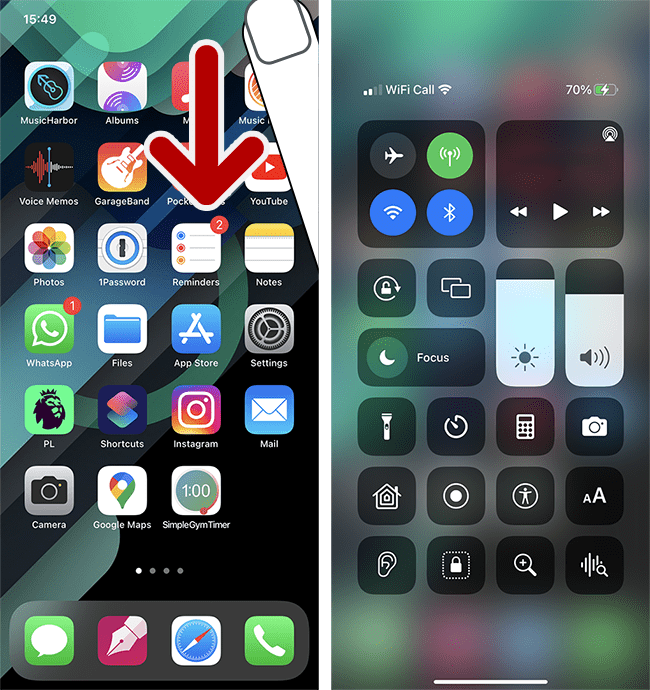
How to use the Control Centre
6. To access the Control Centre, swipe down from the top-right corner of your device. On devices with a physical Home button, swipe up from the bottom of the screen. Tapping an item in the Control Centre will either activate it or open a settings card depending on the item. You can long-press on some items to see more options.
Need some more help?
Call our helpline 0300 180 0028 or email enquiries@abilitynet.org.uk
Need free IT Support at Home?
If you are older or disabled and need IT support at home, you can book a free home visit.