Short guide:
- Open the Chrome browser and click on the Options button. Select Settings.
- Select Appearance from the left-hand panel.
- Click on the Font size drop-down menu to change the size of the existing fonts, or click on Customise fonts.
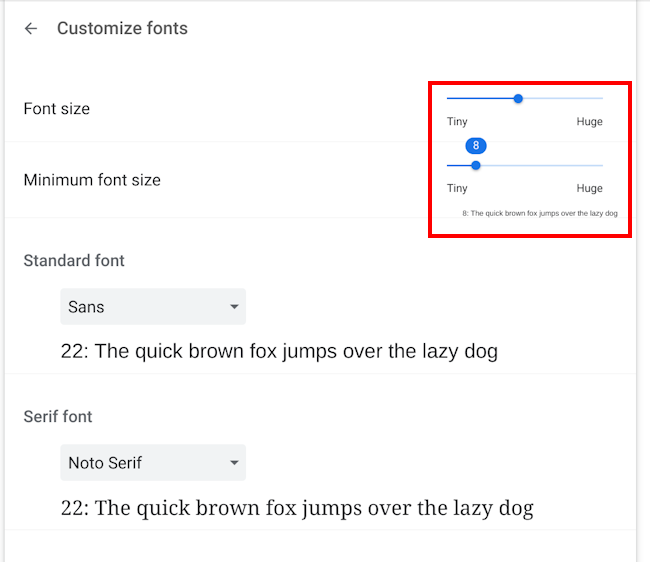
- Use the Font size and Minimum font size sliders to set a new default and minimum size.
- Scroll down and use the four font drop-down menus to select which fonts Chrome will use for the Standard, Serif, Sans Serif and Fixed-width font styles.
Before and after
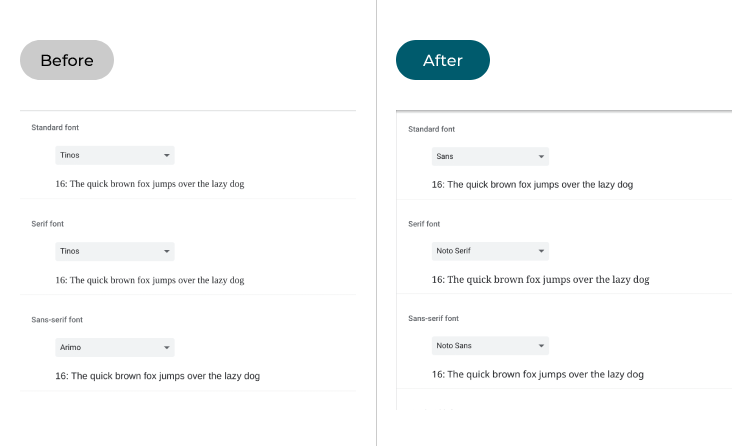
This section explains the steps you need to follow to change the font and the size of the font in the Chrome web browser in Chrome OS, with pictures of the screen to help.
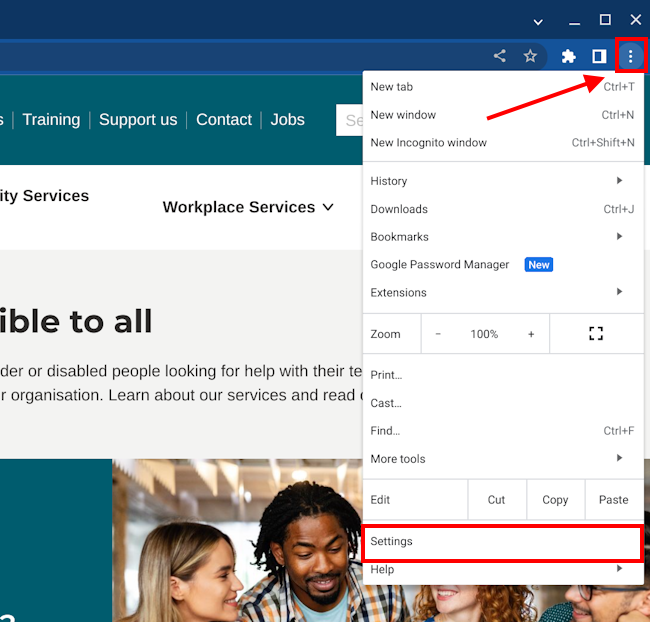
Open the Chrome browser settings
1. Open the Chrome web browser and click on the Options button in the top-right of the window. Select Settings from the menu.
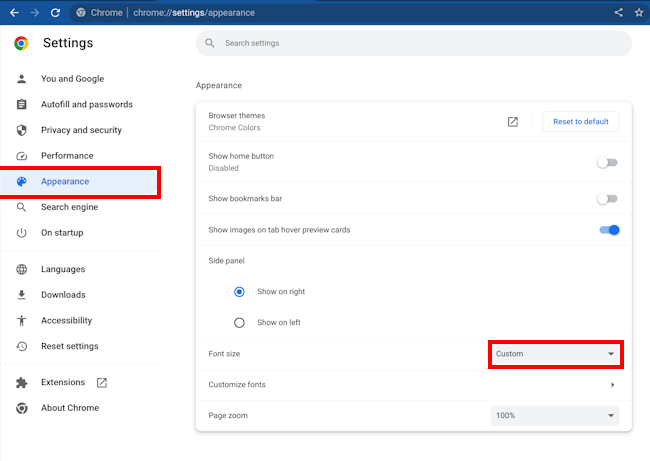
Find the Appearance settings
2. The Chrome settings page will open. Select Appearance from the left-hand panel then click on the Font size drop-down menu. Select Large or Very Large to make the fonts easier to read.
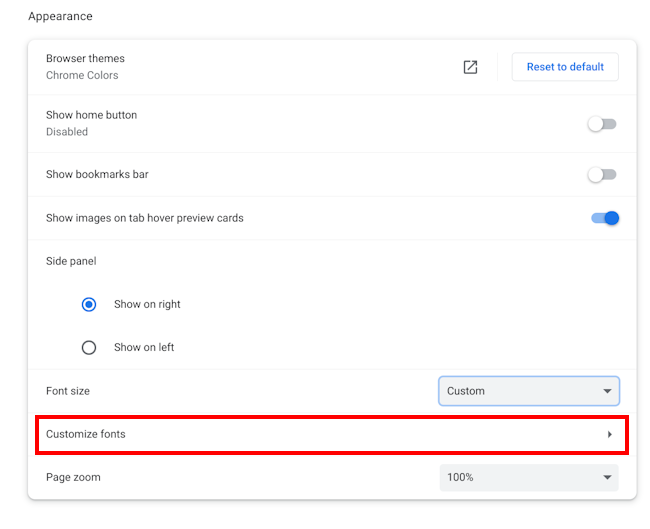
Customise the fonts
3. Alternatively, click on Customise fonts to see more options.
Change the Font size and Minimum font size
5. Use the Font size slider to set a new default size for fonts and use the Minimum font size slider to change the smallest size they can appear at. Moving both sliders to the right can make small text easier to read.
Change the font styles
6. Scroll down and use the four font drop-down menus to select which fonts Chrome will use for the Standard, Serif, Sans Serif and Fixed-width font styles.
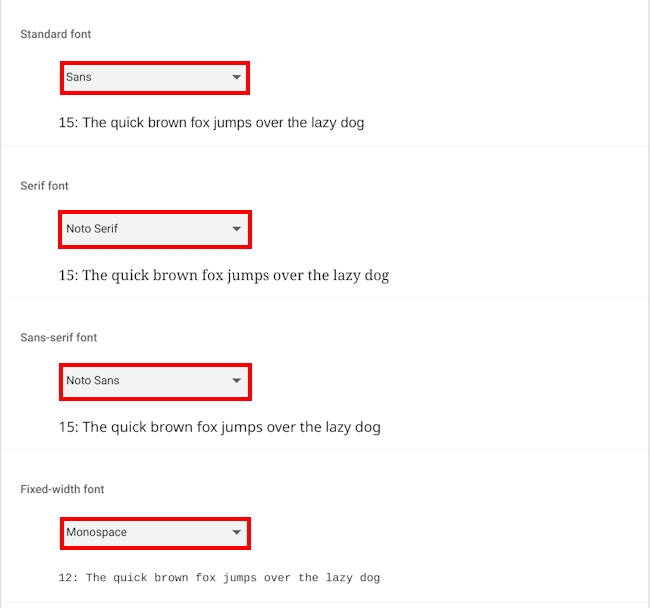
- Standard font: If the website you are visiting has not indicated which font, or font style, to use the browser will use the font you choose here.
- Serif font: These are older style fonts like Times News Roman that have little feet at the top and bottom of the letters. If the website you are visiting only states to use a Serif font, the browser will use the font you choose here.
- San-serif font: These are modern fonts such as Helvetica and Arial. They are simpler in style than serif fonts and don't have feet at the top and bottom of letters. If the website you are visiting only states to use a Sans-serif font, the browser will use the font you choose here.
- Fixed-width font: These are monospace fonts, such as Courier. The letters, numbers, and spacing all have the same width. These fonts are often used for writing computer code. If the website you are visiting only states to use a Monospace font, the browser will use the font you choose here.
Note: If this does not work it could be because someone else manages your computer settings (an IT department or administrator). If this is the case, you will need to contact them to access these settings or for further help.