Note: Most websites now tell the browser which fonts to use to display text and these fonts will take precedence over your choices.
Short guide:
- Click the Menu button
 in the top-right corner of the browser window, then select Settings in the menu.
 - In the sidebar, click Appearance.
- Click Customise fonts.
- Use the drop-down menus to choose which fonts to use for the Standard, Serif, San-serif and Fixed-width styles.
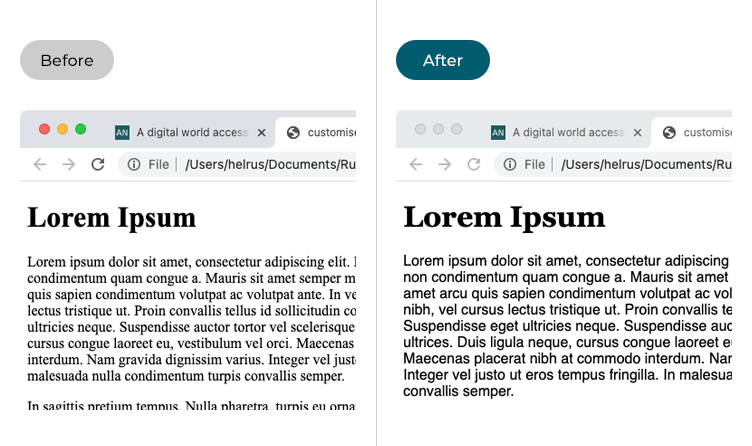
Before and after

This section gives you step by step instructions on how to change the fonts in the Google Chrome web browser in macOS 13 Ventura, with pictures of the screens to help.
Open the Chrome browser settings
1. Click the Menu button in the top-right corner of the browser window, then select Settings in the menu.

Open the Customise fonts settings
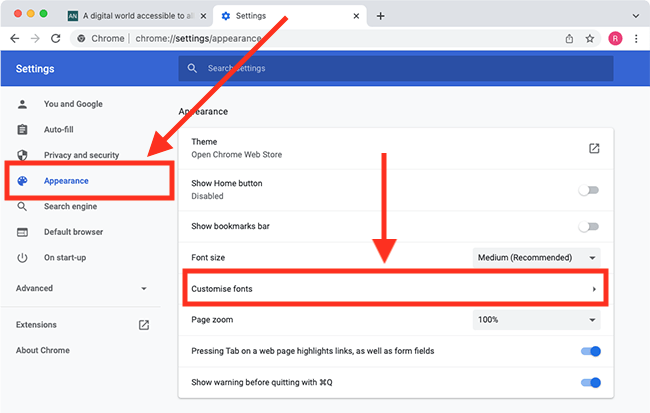
2. On the Settings page, click Appearance in the sidebar then click Customise fonts on the right.

Select new fonts
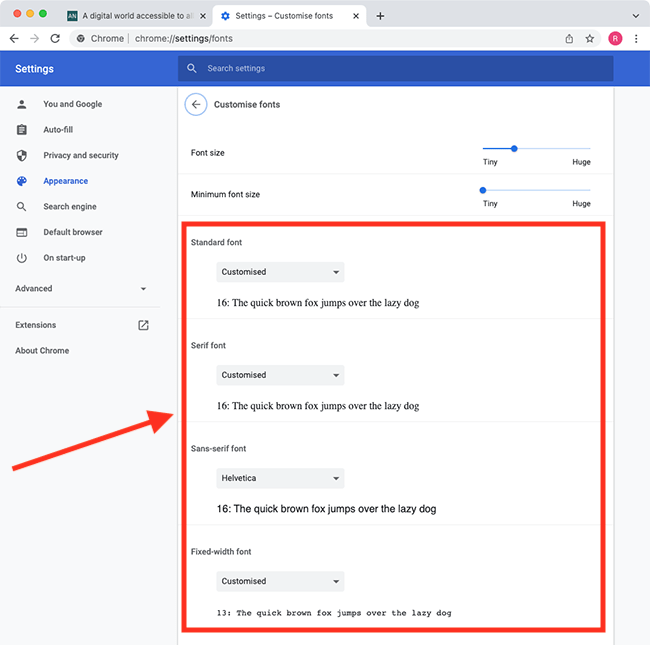
3. In the Customise fonts screen you can change the fonts used for the Standard, Serif, Sans-serif, and Fixed-width font styles. If a website hasn't indicated which fonts to use, or the chosen fonts are not available on your device, the browser will use the fonts you choose here instead. Use the four drop-down menus to select your chosen font for each.
- Standard font: If the website you visit has not declared a specific font or font style, then text will be displayed using the font you choose here.
- Serif font: These fonts have little feet at the top and bottom of the letters, like the classic Times New Roman font. If the website you visit states to use a Serif font, the browser will use the font you choose here.
- Sans-serif font: These are modern fonts without the feet at the top and bottom of the letters. If the website you're viewing states to use a sans-serif font, the browser will display the font you choose here.
- Fixed-width font: In fixed-width fonts, all the letters, numbers and special characters have the same width. Fixed-width fonts are often used to write and show computer code. If the website you are visiting states to use a fixed-width font, Chrome will display the font you select here.

Adjust the font size
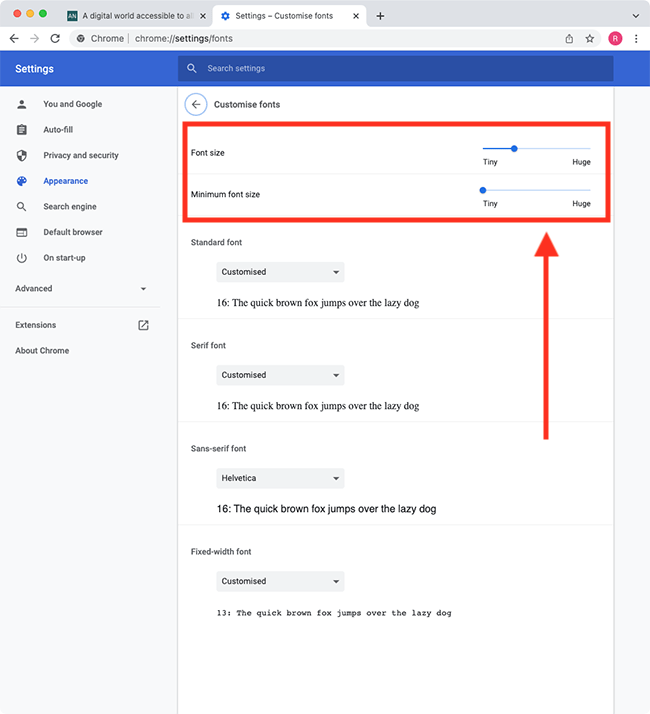
4. To make your substitute fonts easier to read, you can also change the Font size and Minimum font size using the sliders. This may affect the layout of some web pages, however.
