Note: Most websites now tell the browser which fonts to use to display text and these fonts will take precedence over your choices.
Short guide
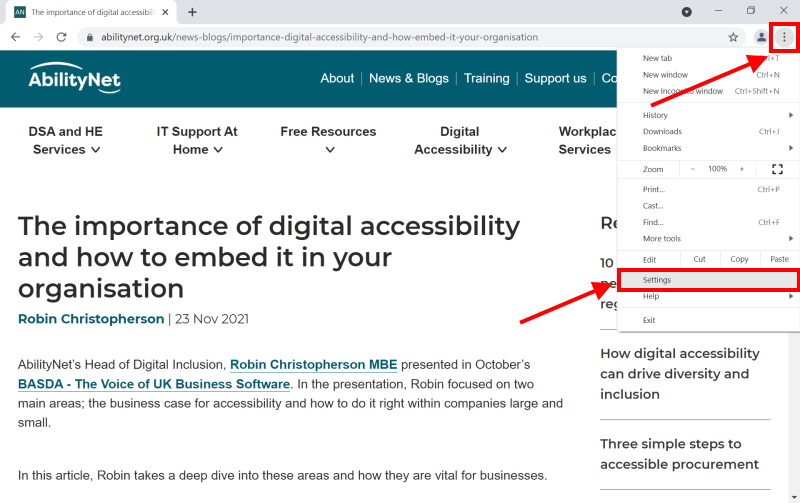
- Select the Menu button in the top-right corner of the browser window or press Alt + F on your keyboard. Select Settings.
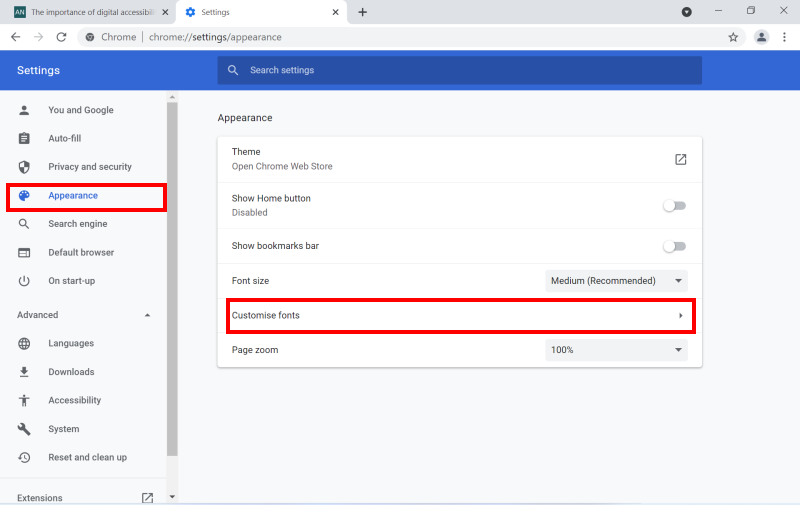
- Click Appearance on the left-hand side then click Customise fonts on the right.
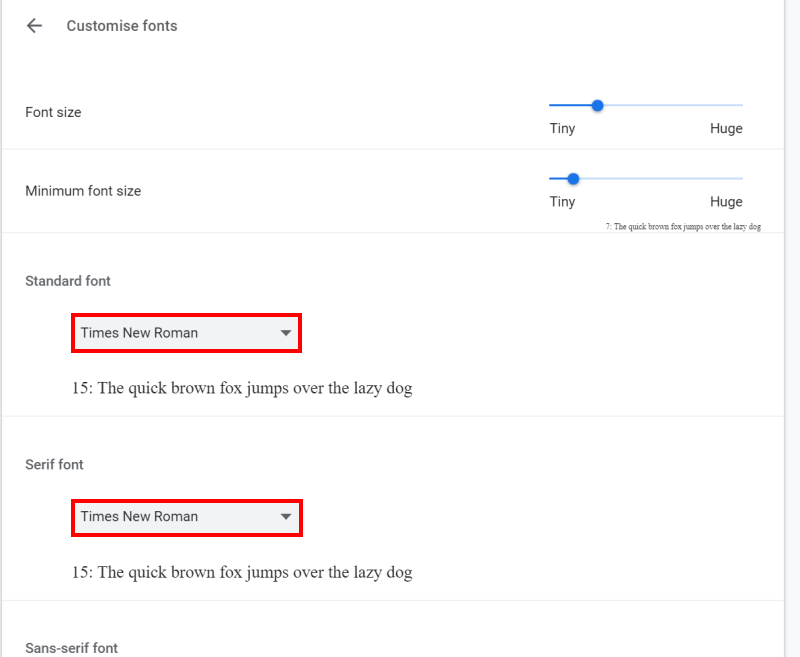
- Use the drop-down menus to choose which fonts to use for the Standard, Serif, San-serif and Fixed-width styles.
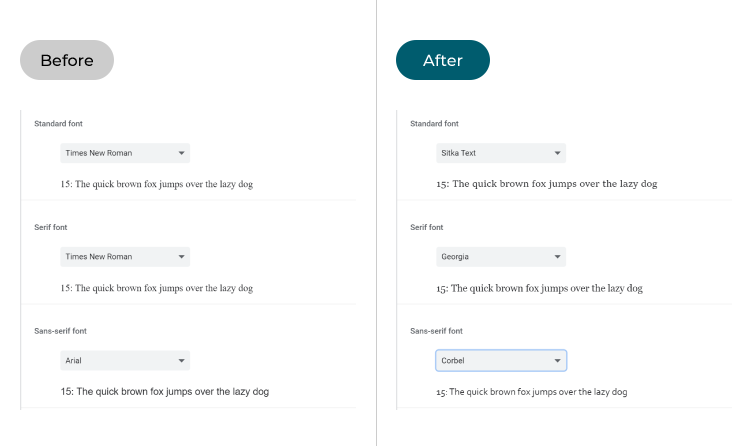
Before and after

This section explains the steps to follow if you want to change the fonts in the Google Chrome web browser for Windows 10. This is a step-by-step guide with pictures of the screens to help you.
Open the settings
1. Click or tap the Menu icon ![]() in the top-right corner of the browser window or press Alt + F. Select Settings from the menu.
in the top-right corner of the browser window or press Alt + F. Select Settings from the menu.

Click Customise Fonts
3. Click Appearance on the left-hand side then click Customise fonts on the right.

Select new fonts
4. In the Customise fonts screen you can change the fonts used for the Standard, Serif, Sans-serif and Fixed-width font styles. If a website hasn't indicated which fonts to use or the chosen fonts are not available on your device, the browser will use the fonts you choose here instead. Use the four drop-down menus to select your chosen font for each.

Standard font: If the website you visit has not declared a specific font or font style, then text will be displayed using the font you choose here.
Serif font: These fonts have little feet at the top and bottom of the letters, like the classic Times New Roman font. If the website you visit states to use a Serif font the the browser will use the font you choose here.
Sans-serif font: These are modern fonts without the feet at the top and bottom of the letters. If the website you're viewing states to use a sans-serif font, the browser will display the font you choose here.
Fixed-width font: In these fonts all the letters, numbers and special characters have the same width, and they are often used to write and show computer code. If the website you are visiting states to use a fixed-width font, Chrome will display the font you select here.
Note: If this does not work it could be because your computer settings are managed by someone else (an IT department or administrator for example). If this is the case you will need to contact them to access these settings or for further help.