Call our helpline
0300 180 0028Short guide:
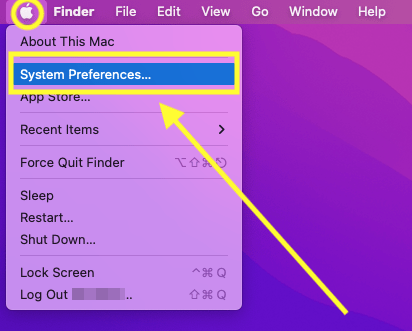
- Click the Apple icon
 in the top left corner of the screen and select System Preferences.
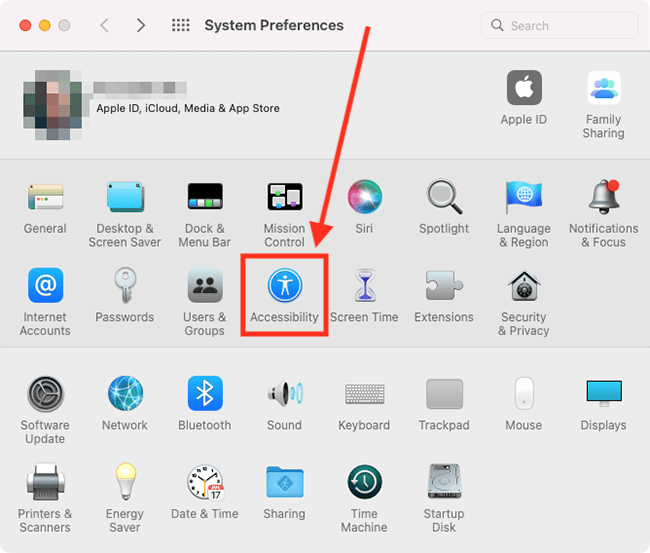
 - Click Accessibility.
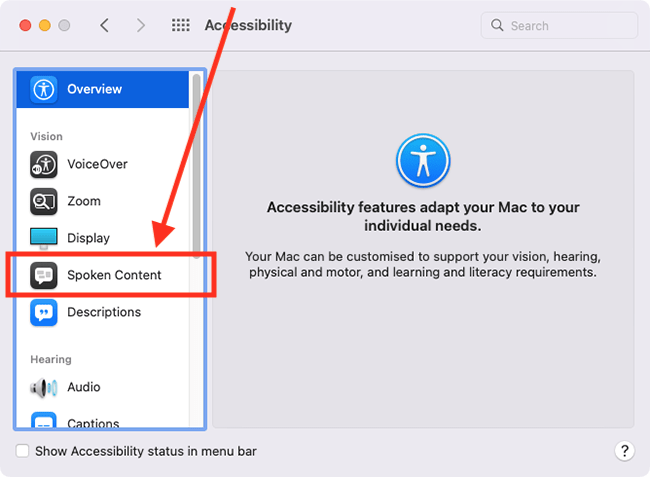
- In the sidebar, click Spoken Content.
- Choose your preferred voice from the drop-down menu for System Voice.
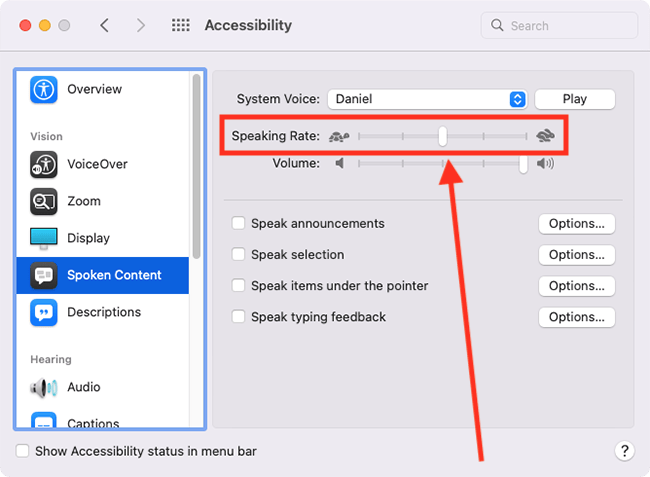
- Use the slider for Speaking Rate to speed up or slow down speech.
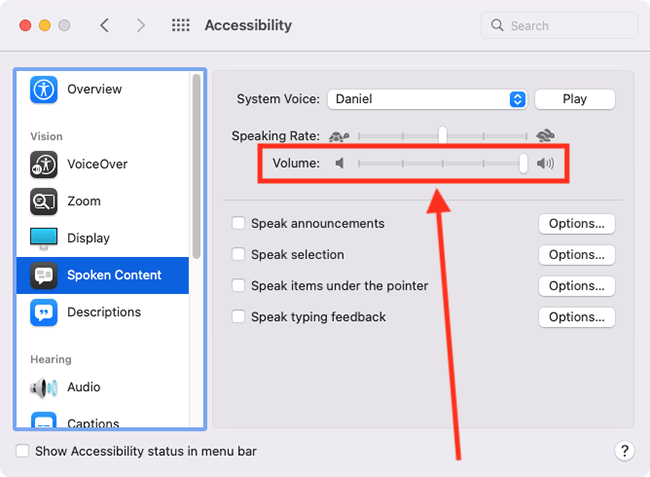
- Use the slider for Volume to set the volume for spoken text. Setting the volume here doesn’t affect the volume for media on your Mac.
Before and after
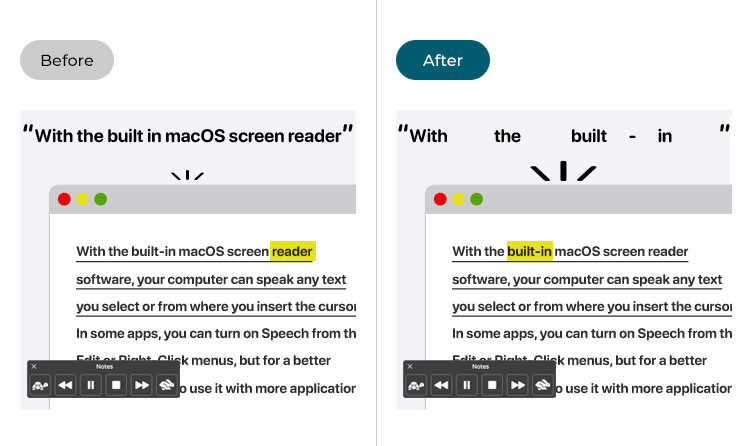
This section takes you through step-by-step instructions on how to change the text-to-speech (TTS) settings for screen readers in macOS 12 Monterey, complete with pictures of the screens to help.
Open System Preferences
1. Click the Apple icon ![]() in the top left corner of the screen and choose System Preferences from the menu.
in the top left corner of the screen and choose System Preferences from the menu.
Open the Accessibility settings
2. In the System Preferences window, click Accessibility.
Find the Spoken Content settings
3. In the sidebar, select Spoken Content.
Choose a new voice for spoken content
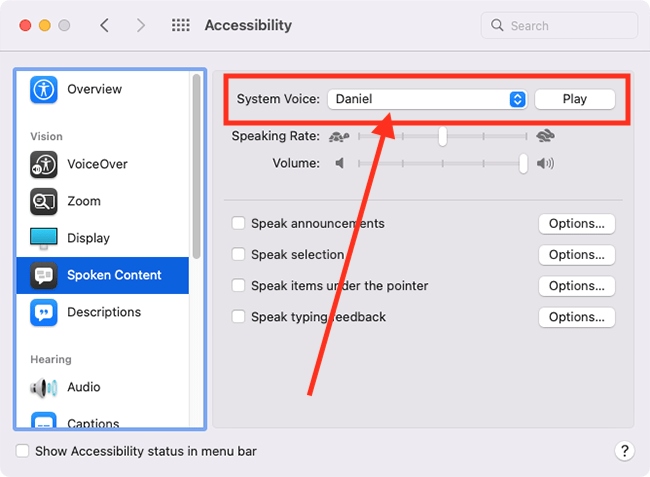
4. Click the drop-down menu for System Voice and choose a new voice from the list. Tip: The Siri voices tend to be the most natural sounding. To hear how your new voice sounds, click the Play button.
Add new voices options
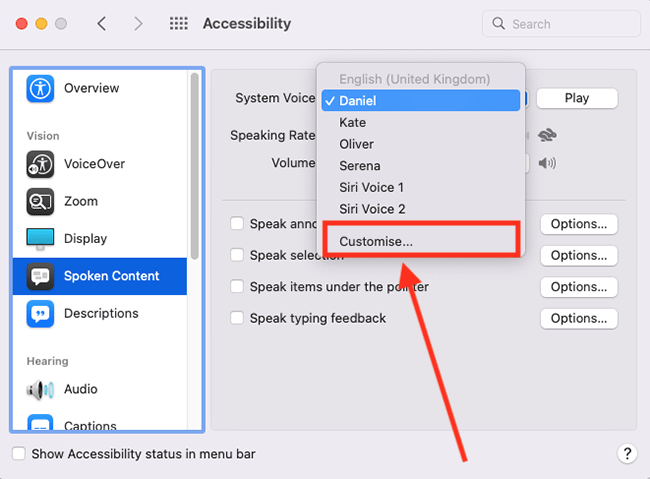
5. You can add new voices to the list. Click the drop-down menu for System Voice, then select Customise.
Select the voices you want to add
6. Tick any of the voices to add them to the list. The voices you tick will be downloaded so you will need to be connected to the internet. To hear how your new voice sounds, click the Play button. Click OK to save your changes.
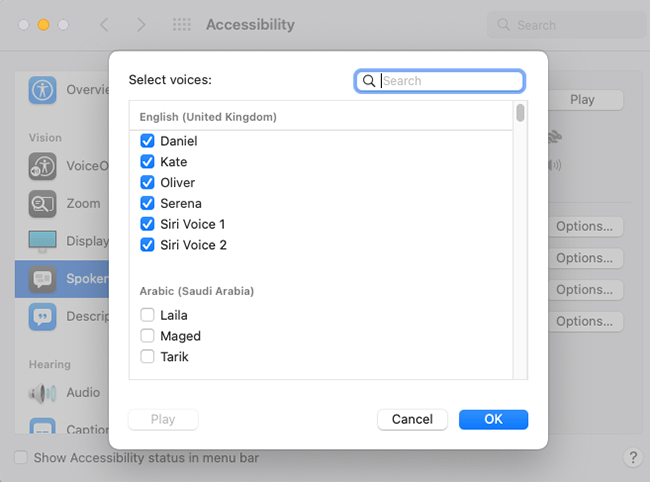
Note: A voice you add will only be used to speak text that is written in the language for that voice.
Choose one of the newly added voices
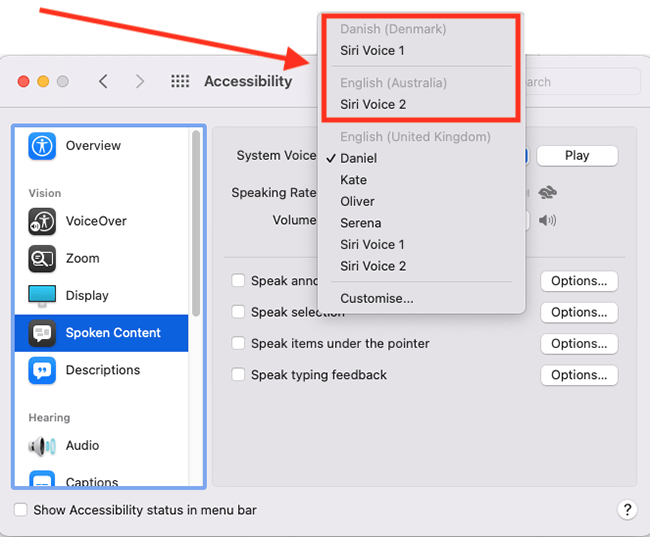
7. You can now choose from the voices you just added from the Voices drop-down menu.
Change the speaking rate
8. Use the slider for Speaking Rate to speed up or slow down speech.
Change the volume for spoken content
9. Use the slider for Volume to set the volume for spoken text. Setting the volume here doesn’t affect the volume for media on your Mac.
Close System Preferences
10. When you are happy with your settings, close System Preferences by clicking the Close button (red circle) in the top-left corner of the window or using the Cmd + W keyboard shortcut.
Note: If this does not work it could be because your computer settings are managed by someone else (an IT department or administrator for example). If so, you will need to contact them to access these settings or for help.