Short guide:
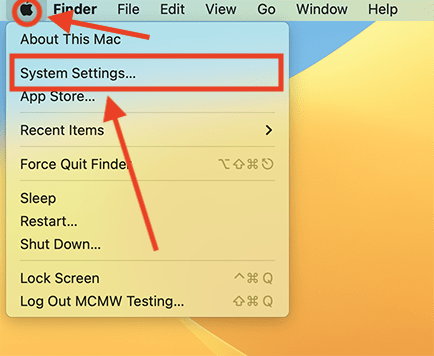
- Click the Apple icon in the top left corner of the screen and select System Settings.
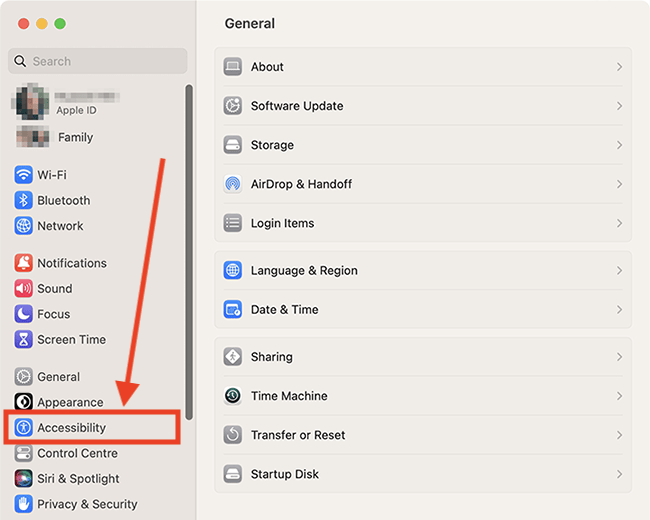
- Click Accessibility in the sidebar.
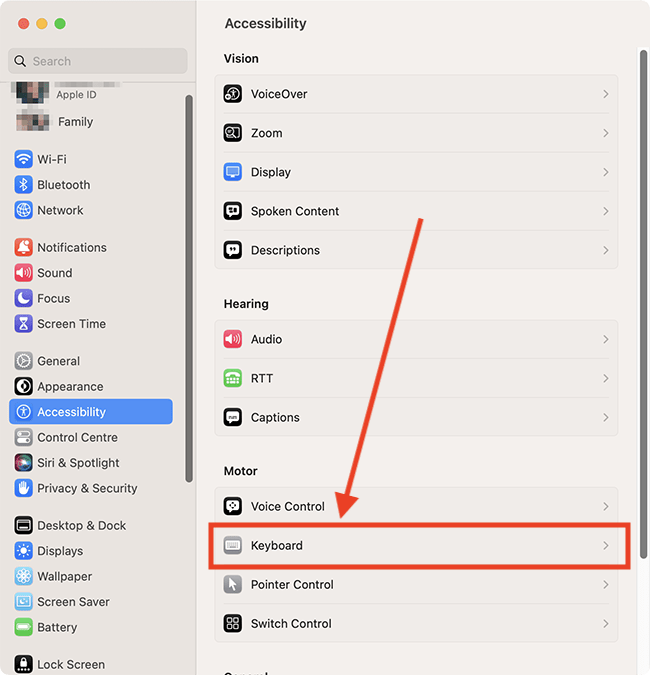
- Select Keyboard from the list of Accessibilty options.
- Turn on the toggle switch for Enable Full Keyboard Access.
- To change the settings for Full Keyboard Access, click the i button
 next to the toggle switch..
Before and after
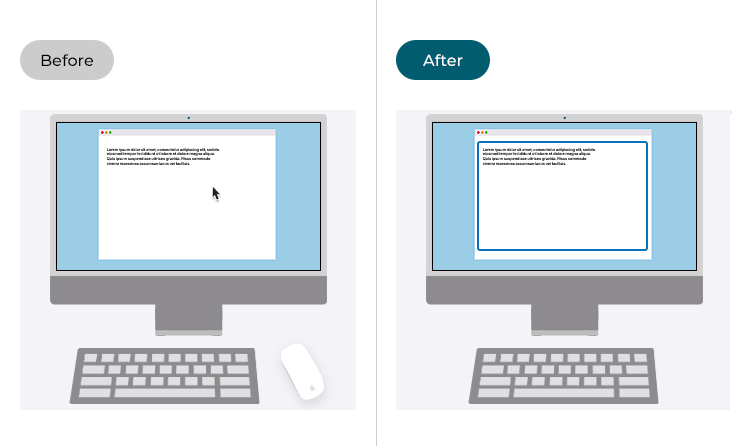
This section gives you step by step instructions on how to enable Full Keyboard Access in macOS 13 Ventura, with pictures of the screens to help.
Open System Settings
1. Click the Apple icon in the top left corner of the screen and choose System Settings from the menu.
Open the Accessibility settings
2. In the System Settings window, click Accessibility in the sidebar.
Find the Keyboard settings
3. Select Keyboard from the list of Accessibilty options on the right.
Enable Full Keyboard Access
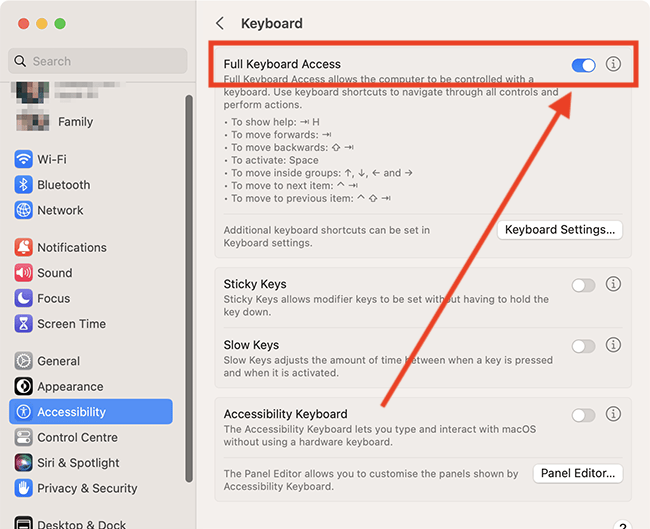
4. Click the toggle switch for Full Keyboard Access to turn it on.
Change the appearance of Full Keyboard Access
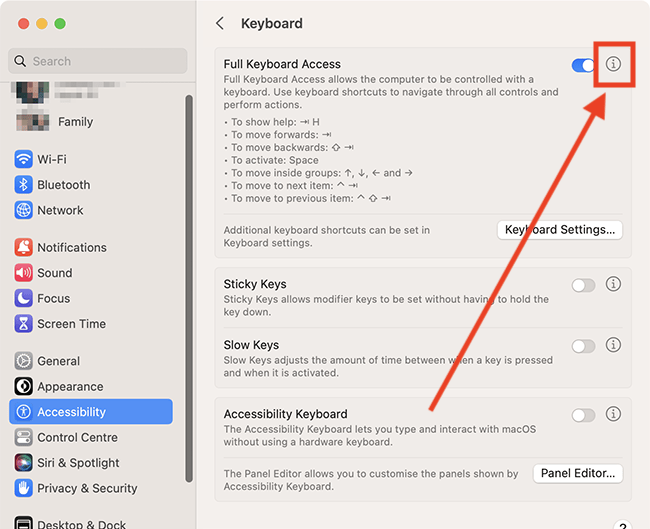
5. To change the appearance of Full Keyboard Access, click the i (show detail) button ![]() next to the toggle switch.
next to the toggle switch.
Change the auto-hide time
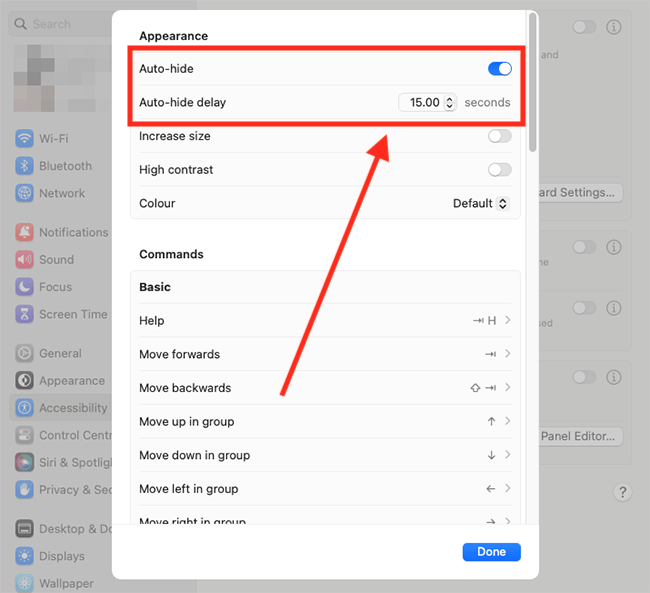
6. When you use Full Keyboard Access, the item you can select is highlighted with a coloured outline (you can see the Appearance tab highlighted with a blue outline in the next screenshot). By default, the outline is hidden after 15 seconds. If you want the outline to remain visible all the time, untick the checkbox for Auto-Hide. To change the auto-hide length, click the up and down buttons for seconds.
Make the outline thicker
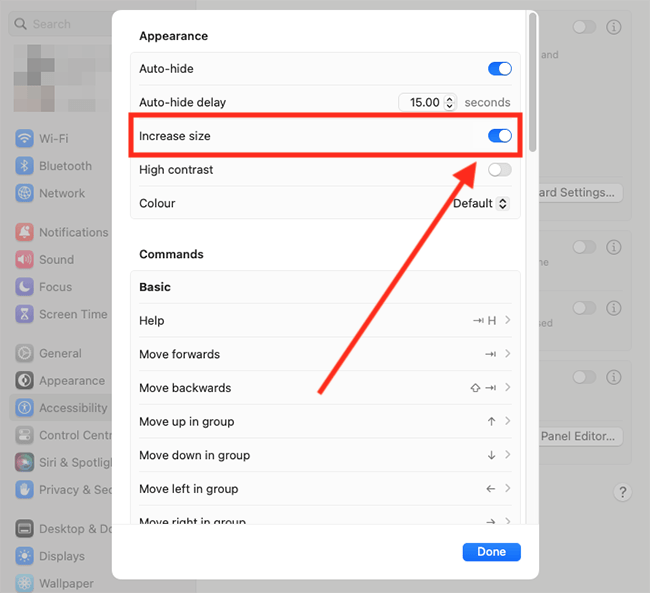
7. To make the outline thicker, tick the checkbox for Increase size.
Make the outline easier to see
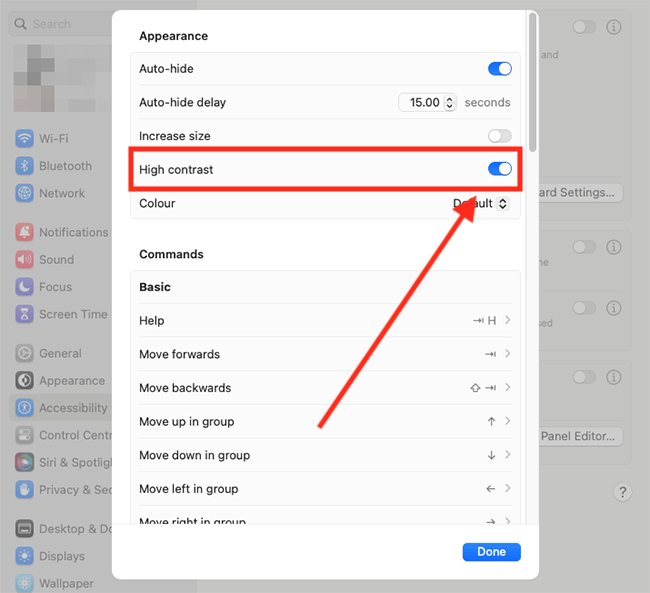
8. To make the outline stand out against the background, tick the checkbox for High contrast.
Change the colour of the outline
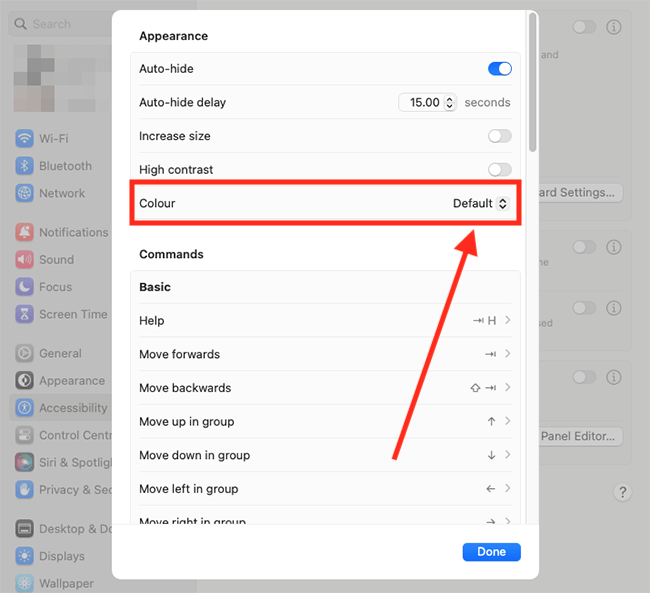
9. To change the colour of the outline, click the drop-down menu for Colour and choose from the options.
View, and edit, the commands for using Full Keyboard Access
10. Follow step 5 (above) to open the Full Access Keyboard settings window (if it's not already open). Scroll down to the Commands section to see all the commands you can use to navigate and control your computer with the keyboard.
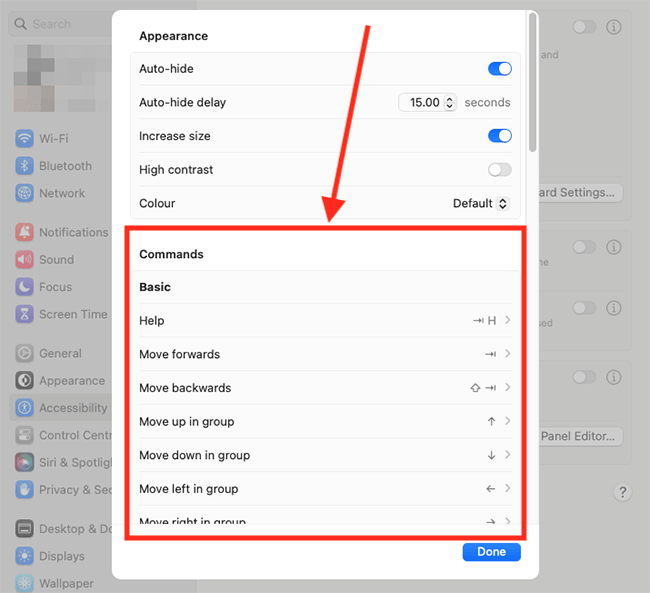
A full list of commands is also shown in the Keyboard commands to control your computer section at the end of this guide.
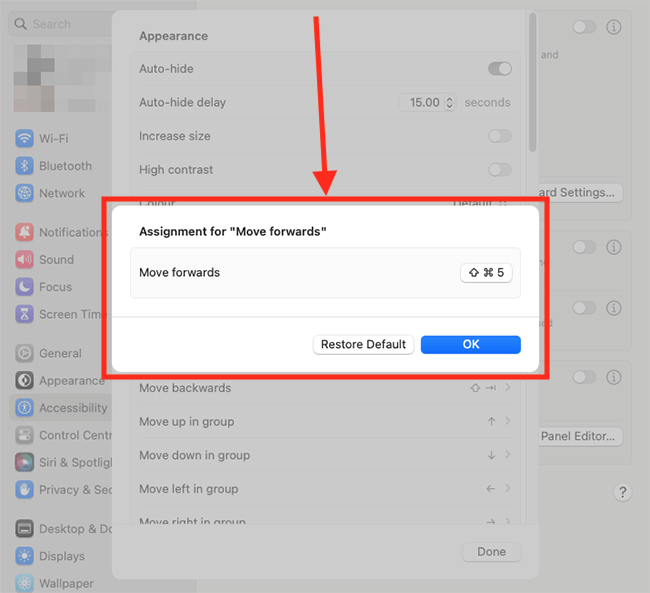
11. To assign a different key, or combination of keys, to a command, click on the command in the list then press the key/s you would like to use. Click OK to save your changes.
Close System Settings
11. When you are happy with your settings, click the Done button to close the Full Keyboard Access settings window. To close the System Settings window, click the Close button (red circle) in the top-left corner of the window or use the Cmd + W keyboard shortcut.
Keyboard commands to control your computer
12. You can use the following keyboard commands to navigate and control your computer:
| Action | Keyboard command |
| Help | Tab + H |
| Move forwards | Tab |
| Move backwards | Shift + Tab |
| Move up in a group | Up arrow |
| Move down in a group | Down arrow |
| Move left in a group | Left arrow |
| Move right in a group | Right arrow |
| Activate (select) | Space bar |
| Move to the beginning | Tab + Left arrow |
| Move to the end | Tab + Right arrow |
| Move to the next item | Control + Tab |
| Move to the previous item | Control + Shift + Tab |
| Switch applications | Hold down the Command key and press Tab. Whilst holding down Command, press Tab repeatedly to move to the application you want to use. Release the Command button to switch to that app. |
| Contextual menu (the right click menu) | Tab + M |
| Actions | Tab + Z |
| Move to Menu bar | Control + F2 |
| Control Centre | Fn + C |
| Notification Centre | Fn + N |
| Dock | Fn + A |
| Pass-Through Mode | Control + Option (Alt) + Command + P |
You can find other keyboard shortcuts for navigating your device listed in the Keyboard section of System Preferences - Apple logo (top-right of the screen) > System Preferences > Keyboard > Shortcuts tab.
View the Full Keyboard Access help window
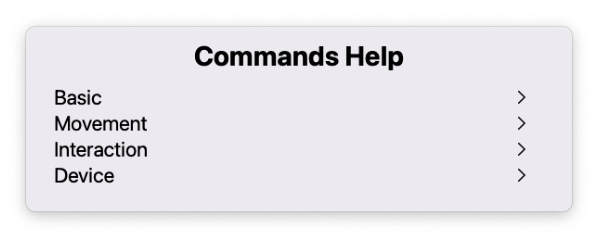
13. To open the Help window, press Tab + H. The help window contains all the keyboard commands you can use with Full Keyboard Access. You can select these commands to activate them right from the Help menu.
Temporarily disable Full Keyboard Access
14. To temporarily disable Full Keyboard Access when it might interfere with what you are doing - for instance, when you are playing a game - use Pass-Through Mode. To turn Passthrough Mode on or off, press Control + Option (Alt) + Command + P.
Note: If this does not work it could be because your computer settings are managed by someone else (an IT department or administrator for example). If so, you will need to contact them to access these settings or for help.