This guide also covers setting up switches (keyboard keys, assistive switches, or facial movements) to perform actions such as left-clicks and right-clicks.
Short guide:
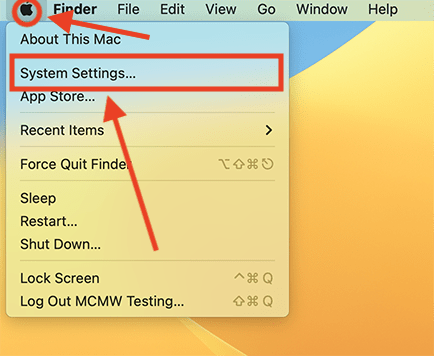
- Click the Apple icon
 in the top left corner of the screen and select System Settings.
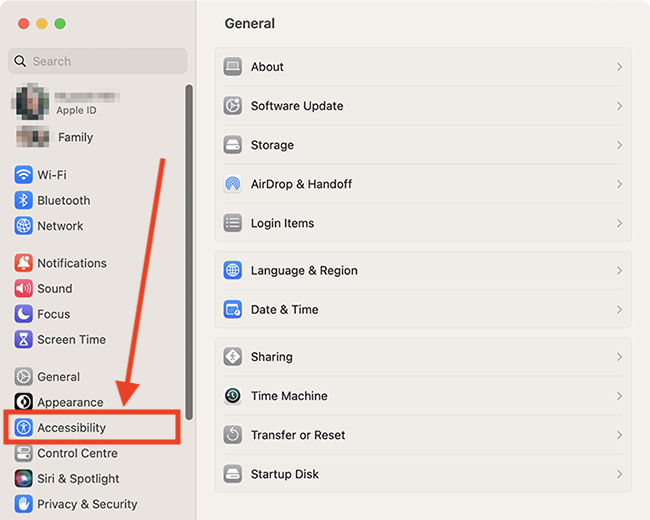
 - Click Accessibility in the sidebar.
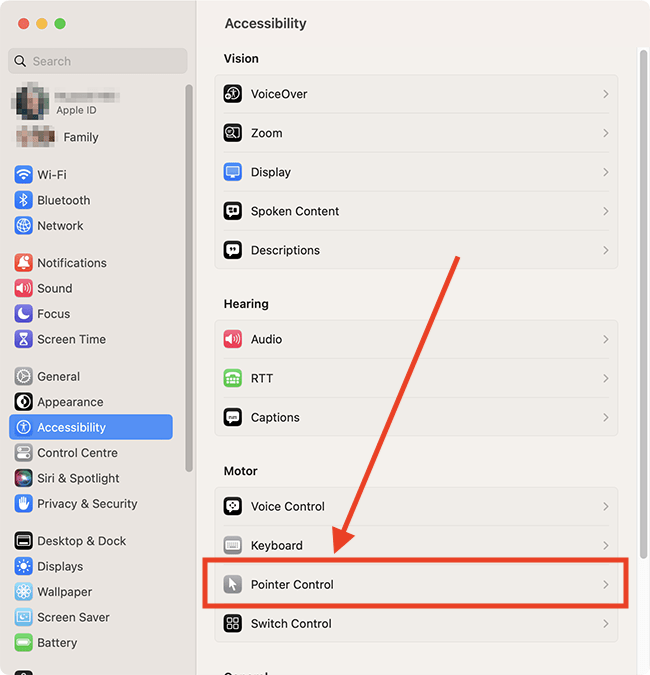
- Select Pointer Control from the list of Accessibility options.
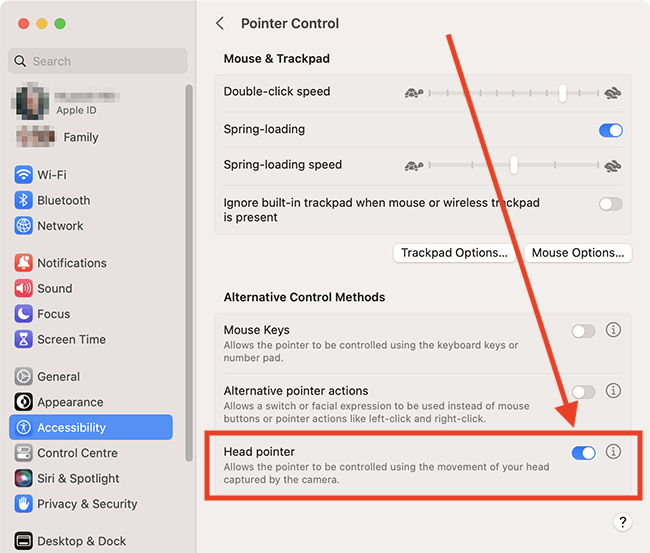
- Turn on the toggle switch for Head pointer. The pointer will now follow your head movements.
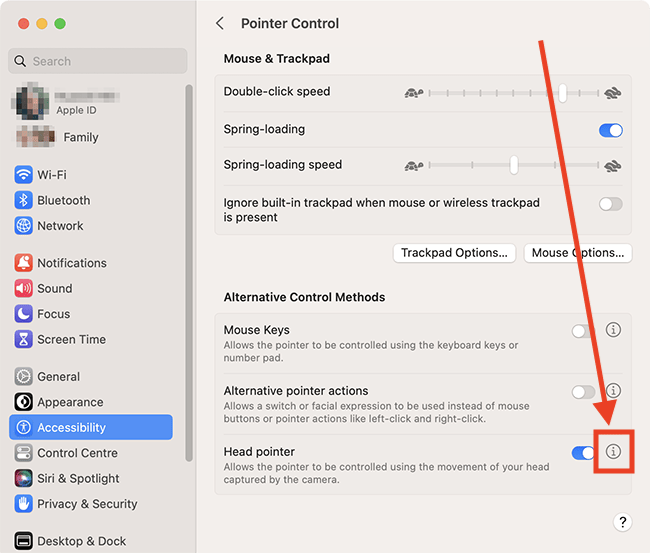
- To change the settings for Head pointer, click the i button
 next to the toggle switch.
Before and after
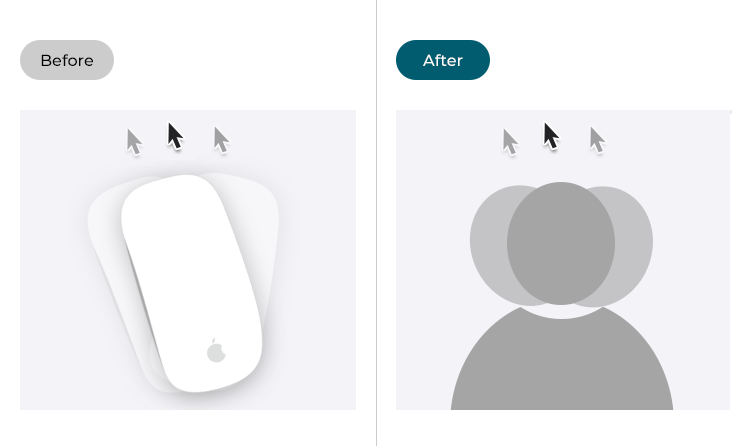
This section gives you step by step instructions on how to enable the head pointer option in macOS 13 Ventura, with pictures of the screens to help.
Open System Settings
1. Click the Apple icon ![]() in the top-left corner of the screen and choose System Settings from the menu.
in the top-left corner of the screen and choose System Settings from the menu.
Open the Accessibility settings
2. In the System Settings window, click Accessibility in the sidebar.
Find the Pointer Control settings
3. Select the Pointer Control from the list of Accessibilty options on the right.
Enable Head pointer
4. Click the toggle switch for Enable head pointer to turn it on. The pointer will now follow your head movements.
Fine-tune Head pointer
5. To change the settings for Head pointer so that it works best for you, click the i button ![]() (more) next to the toggle switch.
(more) next to the toggle switch.
Select the camera you wish to use
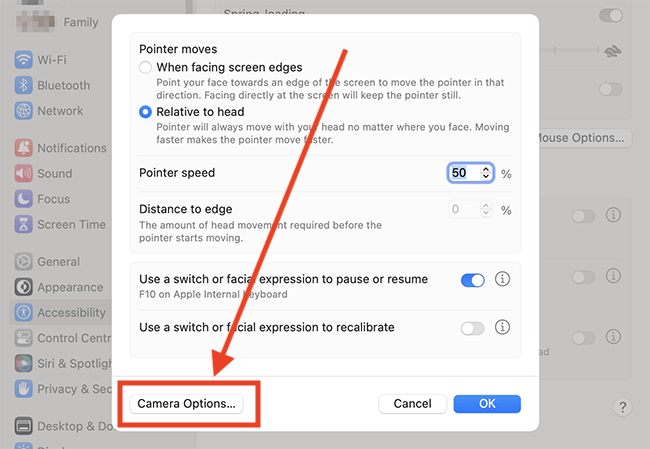
6. By default, Head pointer will use your computer’s built-in camera. If you would like to use a different camera, connect it to your computer, then select the Camera Options button.
Choose you camera
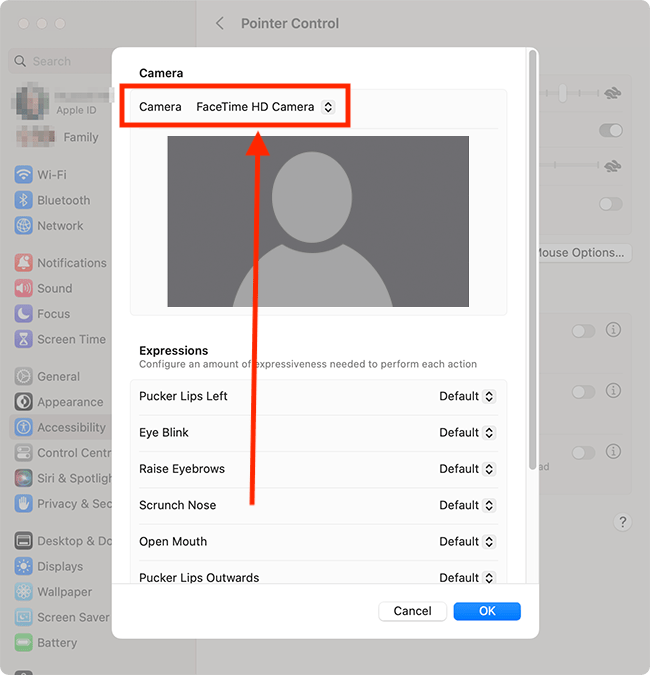
7. Select your camera from the drop-down menu for Camera. Click OK to save your selection.
Chose whether the pointer follows your head or your face
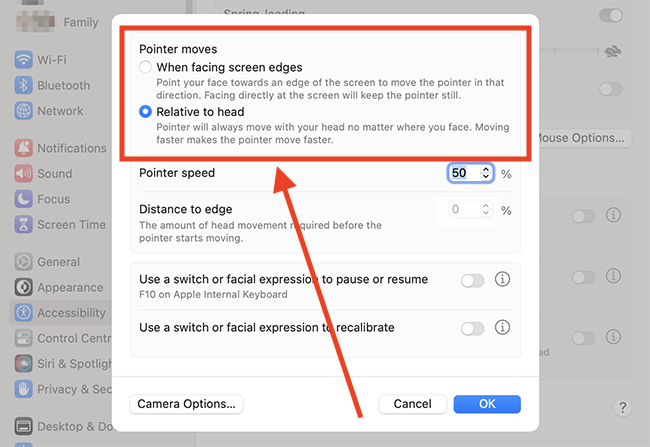
8. There are two ways to control the pointer - When Facing Screen Edges and Relative to Head.
In the Pointer moves section, choose from:
- When Facing Screen Edges – the pointer follows the direction you turn your face away from the centre of the screen - for example, if you turn your face towards the bottom-left of the screen, the pointer moves towards that end of the Dock. To stop the pointer moving, turn your face to the centre of the screen again.
- Relative to Head – this is the default. The pointer will follow the direction of your head movements (regardless of where your face is turned) - for example, if you move your head to the right, the pointer moves to the right.
Change the pointer speed
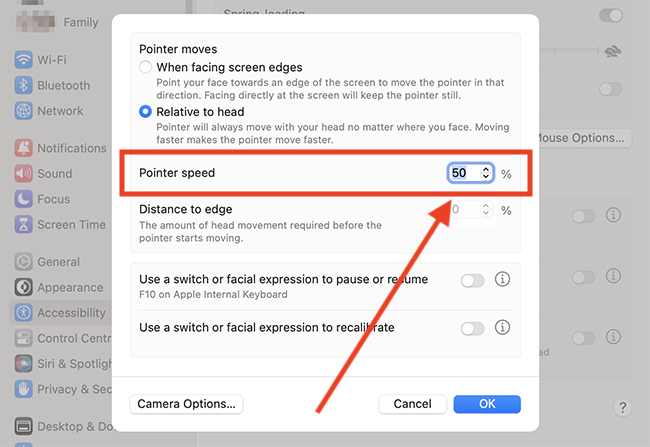
9. Adjust the Pointer Speed setting to specify how fast the pointer moves when you turn your face or move your head. The lower the number, the slower the pointer moves.
Change the amount of head movement required before the pointer starts moving
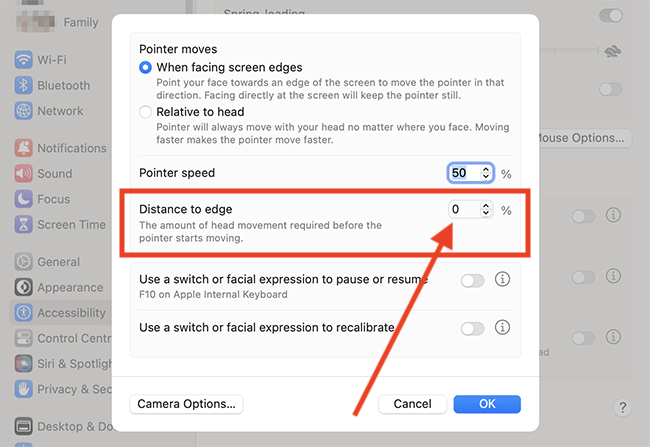
Note: This option only applies if Head pointer is set to When Facing Screen Edges.
10. Adjust the Distance to Edge setting to specify how far your face must be turned away from the centre of the screen before the pointer starts moving. A higher number helps Head pointer differentiate between intentional and unintentional movements.
Use a switch or facial expression to pause Head pointer
11. You can pause and resume Head Pointer using a physical switch or a facial expression. Click the toggle switch for Use a switch or facial expression to pause or resume to turn it on.
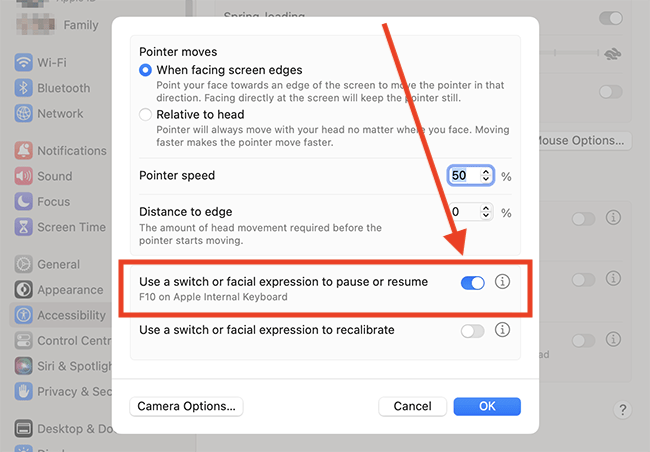
12. To set up the switch or facial expression to use for pausing/resuming Head pointer, click the i ![]() button (more) next to the toggle switch.
button (more) next to the toggle switch.
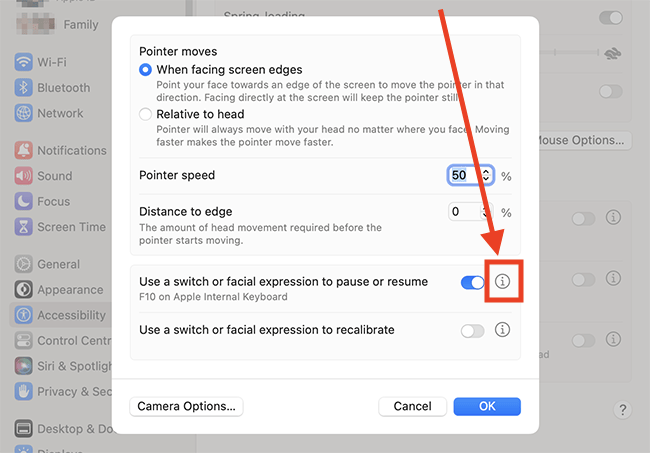
13. In the Switch type section, choose between Physical switch or Facial expression.
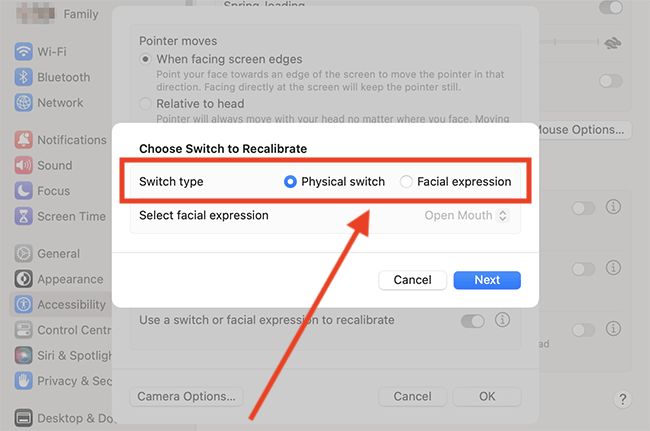
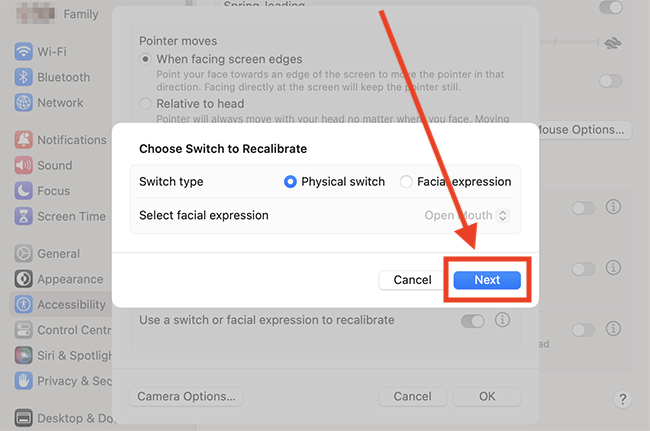
14.a. If you chose Physical switch, click the Next button, then press the switch you would like to use. The physical switch can be an adaptive switch, a mouse button, a key on the keyboard, or another input device.
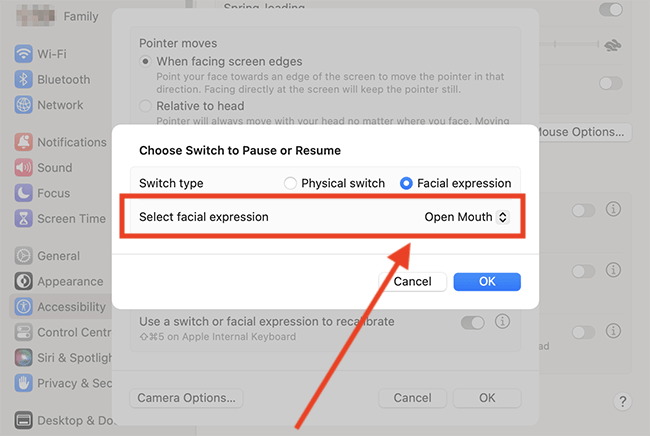
14.b. If you chose Facial expression, click the drop-down menu for Select facial expression and choose from the options. Click OK to save your switch setting.
15. You can now use this switch or facial expression to pause / resume Head pointer.
Use a switch or facial expression to recalibrate Head pointer
16. You can reset Head pointer to reposition the pointer in the middle of the screen and reset your face or head position. Click the toggle switch for Use a switch or facial expression to recalibrate to turn it on.
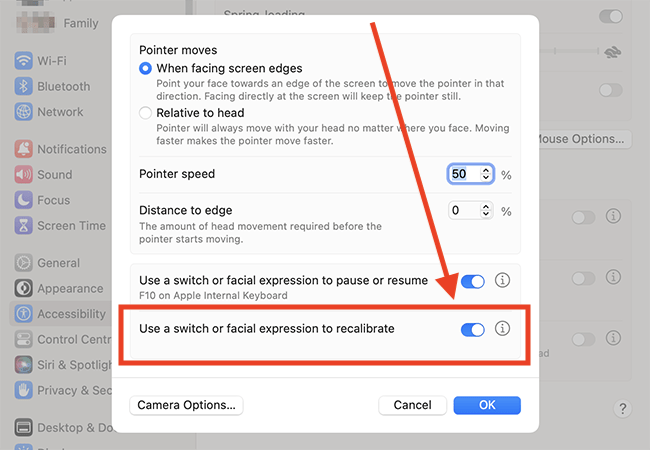
17. To set up the switch or facial expression to use for recalibrating Head pointer, click the i button ![]() (more) next to the toggle switch.
(more) next to the toggle switch.
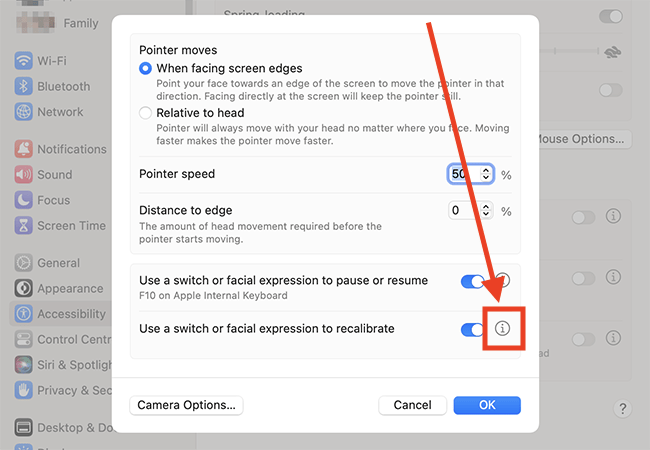
18. In the Switch type section, choose between Physical switch or Facial expression.
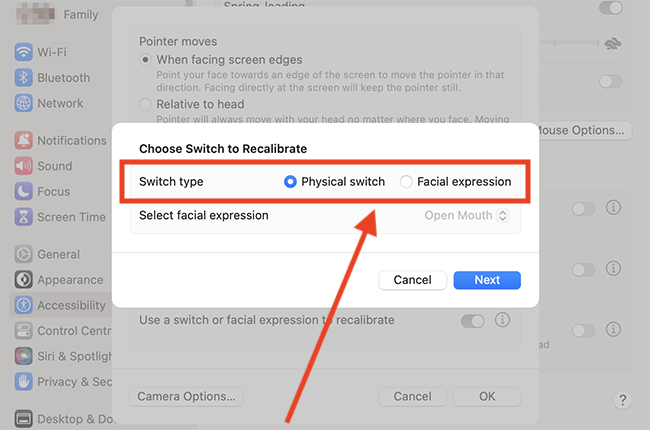
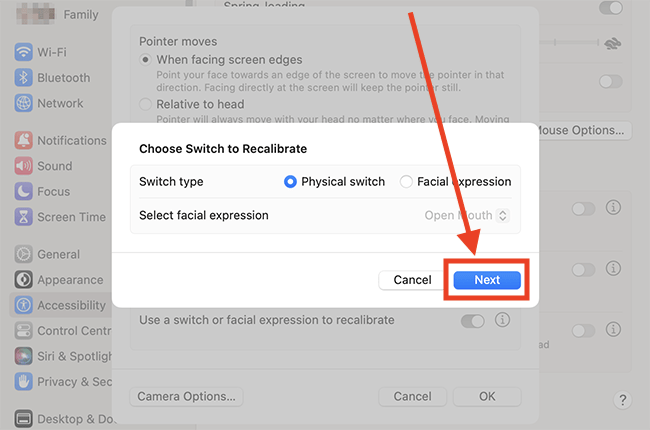
19.a. If you chose Physical switch, click the Next button, then press the switch you would like to use. The physical switch can be an adaptive switch, a mouse button, a key on the keyboard, or another input device.
19.b. If you chose Facial expression, click the drop-down menu for Select facial expression and choose from the options. Click OK to save your switch setting.
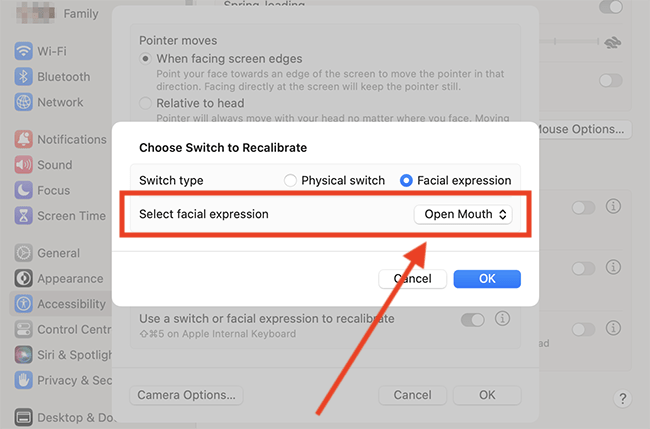
20. To recalibrate Head pointer, adjust the position of your face or head, then use this switch or facial expression to start recalibration.
An on-screen countdown is displayed and counts down from 3. When the countdown is at 1, try not to move so you’re still during recalibration.

When the countdown disappears, Head pointer is recalibrated.
Enable alternative pointer actions to perform mouse clicks
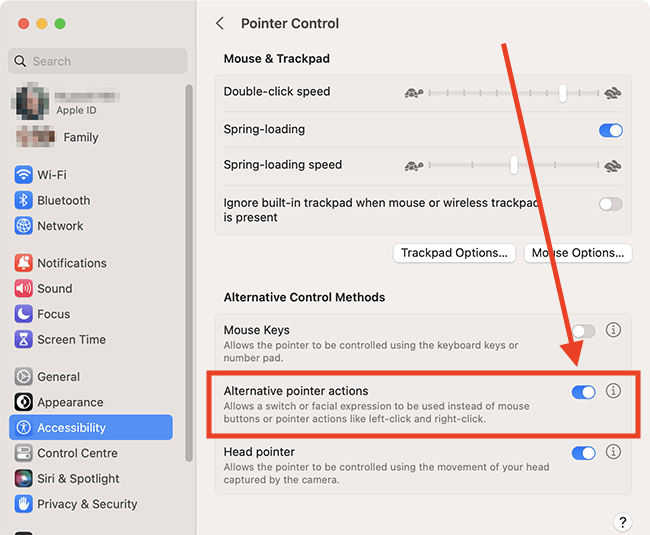
21. When using Head pointer, you may also want to use a different way of performing pointer actions, such as left-click, right-click, double click, and drag-and-drop, rather than using a mouse or trackpad. You can perform these actions using a 'switch' – either a physical switch or a facial expression. The physical switch can be an adaptive switch, a key on the keyboard, or another input device.
To enable alternative pointer actions, go back to the main Pointer Control screen.
Click the toggle switch for Alternative pointer actions to turn it on.
Open the alternative pointer actions settings
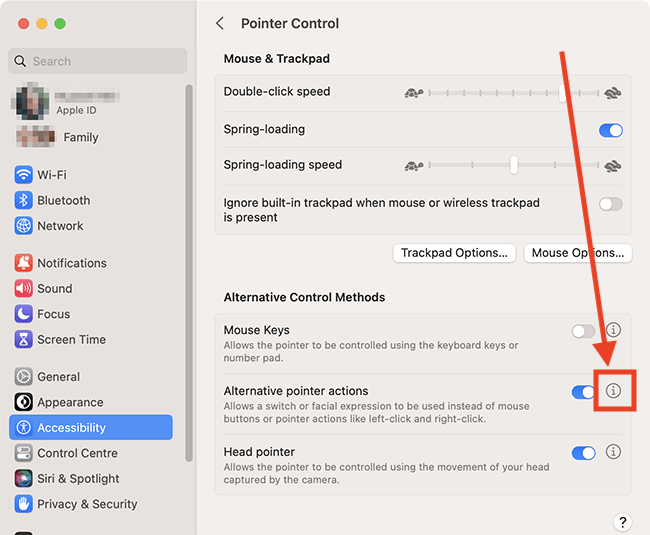
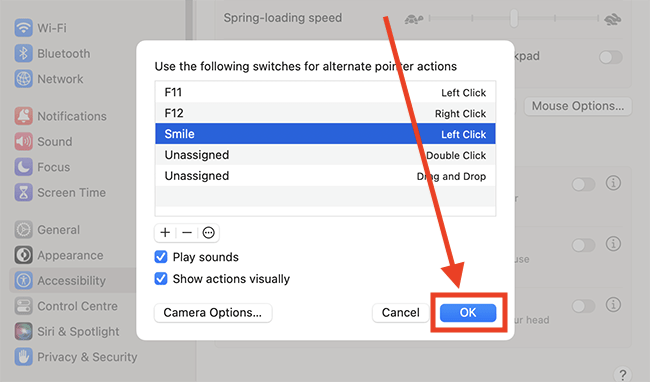
22. To set up new switches for performing alternative pointer actions, click the i button ![]() (more) next to the toggle switch.
(more) next to the toggle switch.
Add a new switch to perform an action
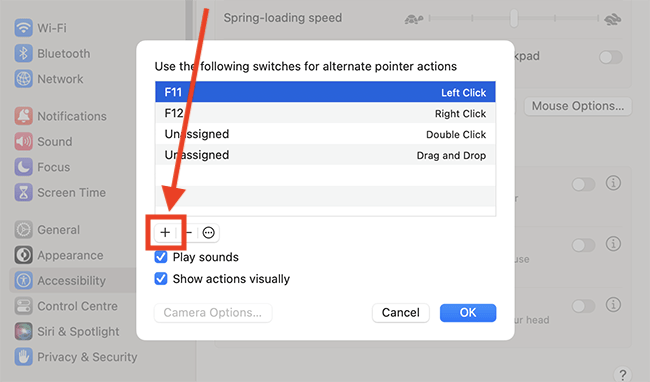
23. To add a new switch, click the + (add) button.
Choose the type of switch you want to use
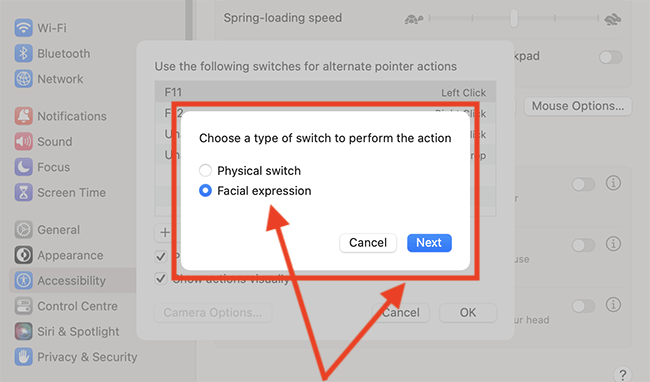
24. Choose Physical Switch or Facial Expression, then click Next.
Set up your switch
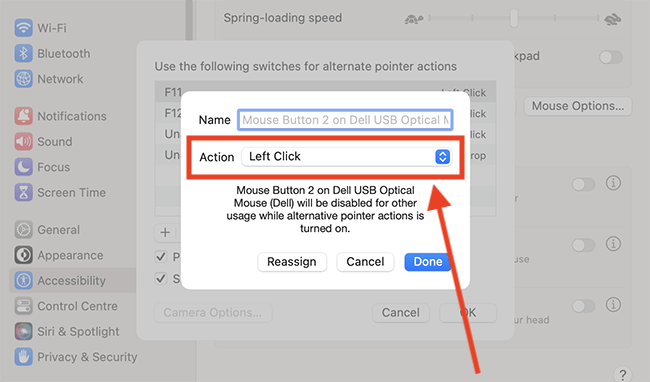
25.a. If you chose Physical Switch, press your switch when instructed. Next, chose the action you want the switch to perform from the drop-down menu for Action. Click Done to save your new switch.
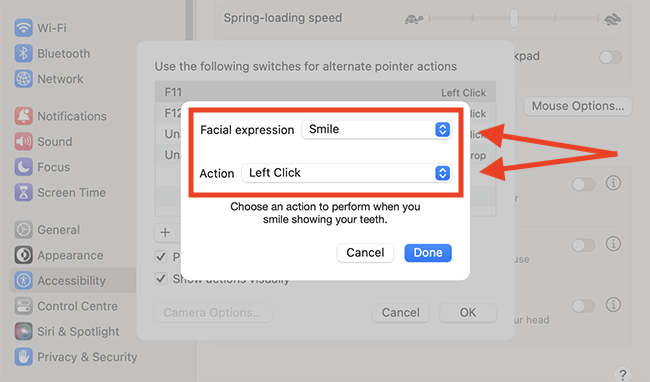
25.b. If you chose Facial Expression, choose an expression from the drop-down menu for Facial expression. Next, choose the action you want the facial expression to perform from the drop-down menu for Action. Click Done to save your new switch.
Hear a sound when a switch is recognised
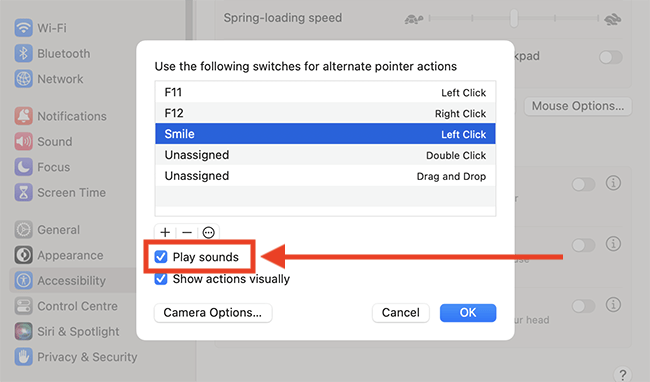
26. To hear a sound comfirming a switch was recognised, tick the checkbox for Play sounds.
Receive visual feedback when a switch is recognised
27. If you’d like to see an onscreen notification confirming a switch was recognised, tick the checkbox for Show actions visually. Once enabled, you will see a circular outline around the pointer whenever you activate a switch.
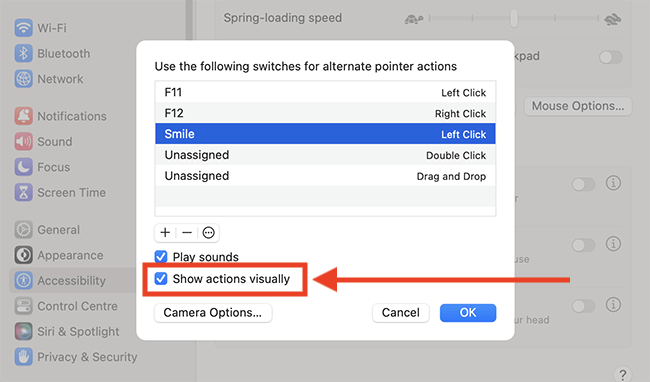
Set how expressive a facial expression needs to be to trigger an action
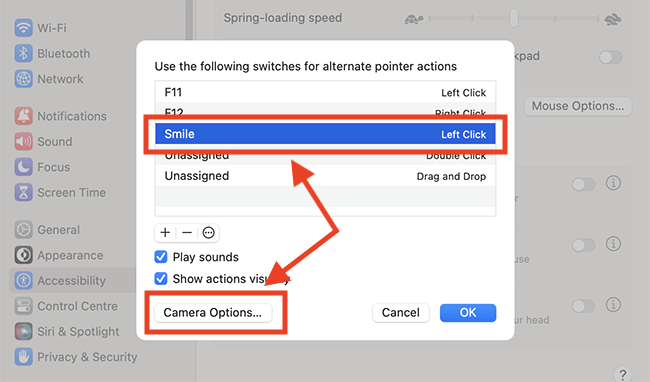
28. If you have used a facial expression as a switch, you can set how expressive the gesture needs to be in order to perform the corresponding action. To do so, select the switch in the list of switches, then click the Camera Options button.
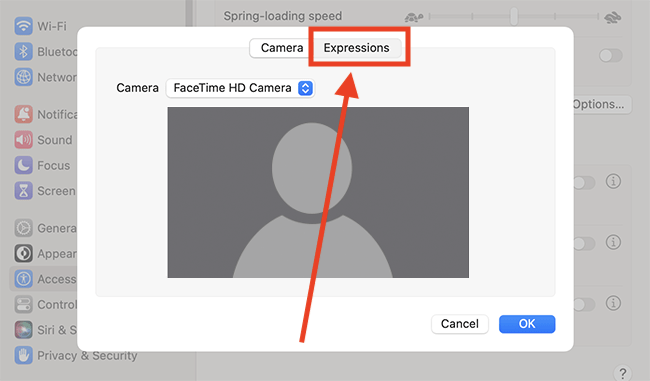
29. On the Camera Options screen, select the Expressions tab.
30. Select the drop-down menu for the expression you want to edit and choose a level of expressiveness from Slight, Default, and Exaggerated.
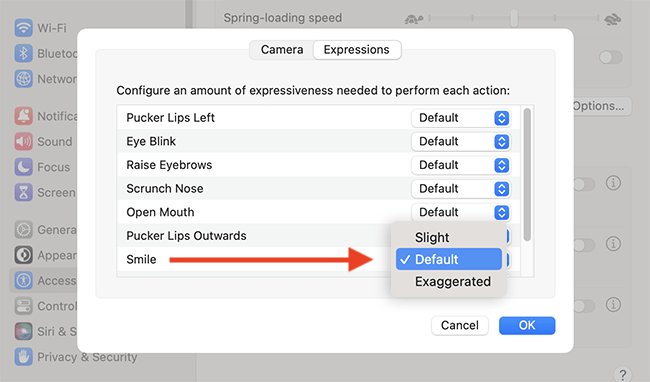
31. Click OK to save you changes.
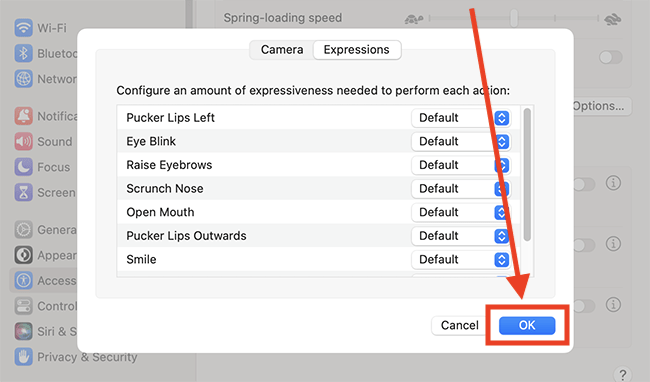
Note: You can also set the expressiveness of facial expressions in the Camera Options section within Head pointer settings (see step 6, above).
Save your alternative pointer actions switches
32. When you are happy with your alternative pointer actions switches, click the OK button to save your changes.
Close System Settings
33. To close the System Settings window, click the Close button (red circle) in the top-left corner of the window or use the Cmd + W keyboard shortcut.
Note: If this does not work it could be because your computer settings are managed by someone else (an IT department or administrator for example). If so, you will need to contact them to access these settings or for help.