Call our helpline
0300 180 0028Short guide:
- Open the Settings app
 and tap Accessibility.
 - Tap the Touch option.
- Tap AssistiveTouch.
- On the next screen, tap the toggle switch for AssistiveTouch to turn it on.
- Tap the onscreen button to open a menu, then choose from the options.
- You can customise the button on the AssistiveTouch settings screen.
Before and after
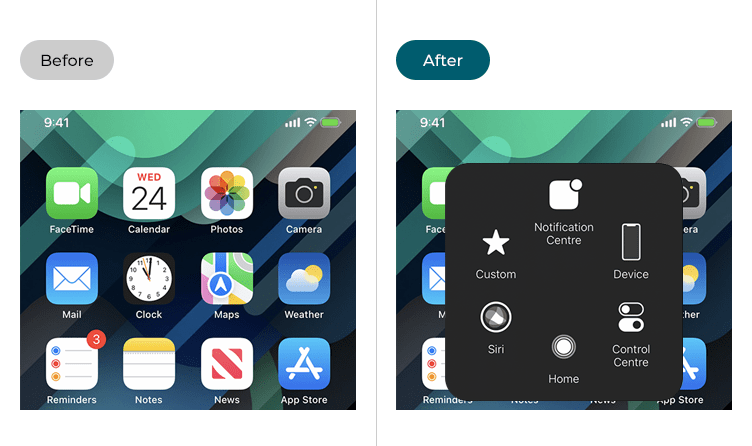
This section gives you step by step instructions on how to control your device using an onscreen button in iOS 16, with pictures of the screens to help.
Find the Accessibility settings
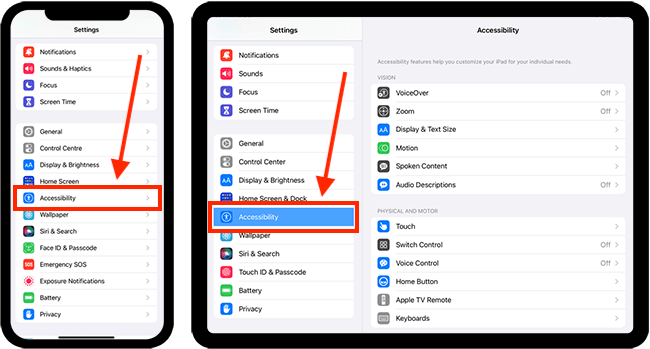
1. Tap the Settings icon ![]() on your Home screen to open the Settings app. Scroll down and tap Accessibility.
on your Home screen to open the Settings app. Scroll down and tap Accessibility.
Open the Touch settings screen
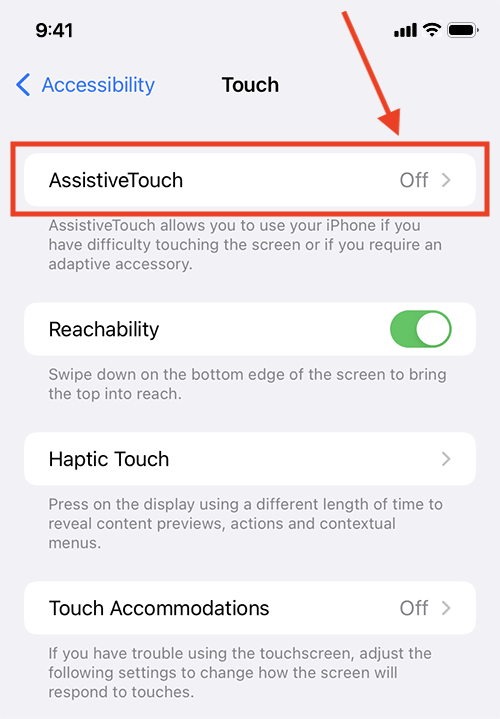
2. On the Accessibility screen, tap the Touch option.

Open the AssistiveTouch settings
3. On the Touch settings screen, tap AssistiveTouch.
Enable AssistiveTouch
4. On the next screen, tap the toggle switch for AssistiveTouch to turn it on.
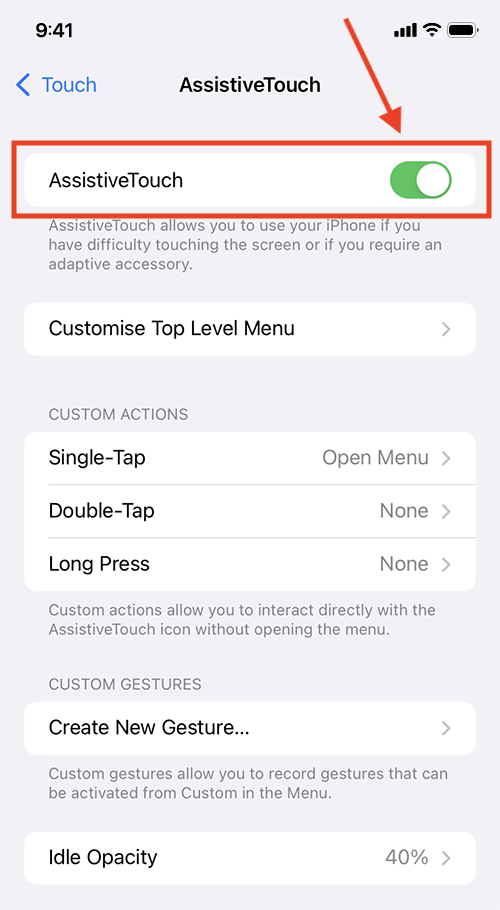
5. When you enable AssistiveTouch a round button appears on the screen ![]() . You can tap this button to open a menu of options for controlling your device. Some of the menu options immediately trigger an action, others open a sub-menu of options.
. You can tap this button to open a menu of options for controlling your device. Some of the menu options immediately trigger an action, others open a sub-menu of options.
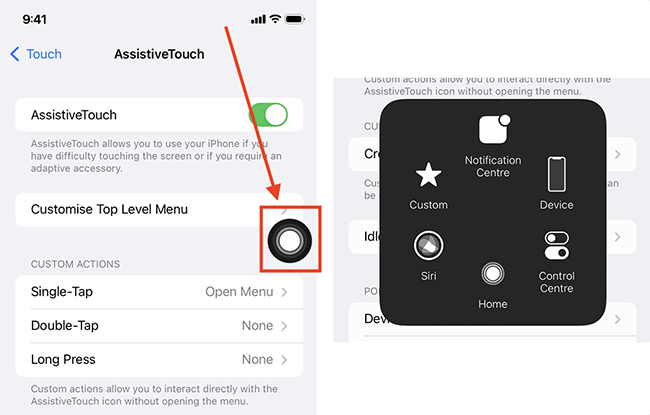
You can customise what happens when you activate the button and which items appear in the menu. See the following steps
Customise the top-level menu
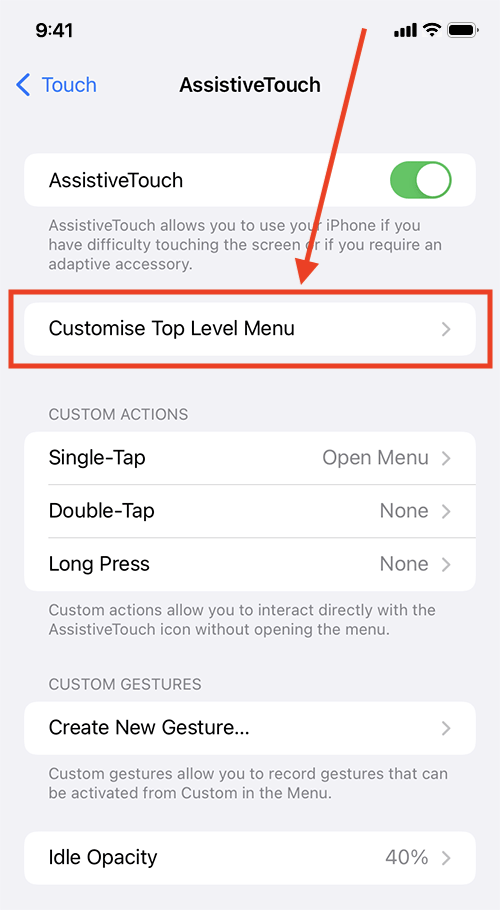
6. To change what items appear in the menu, tap Customise Top Level Menu.
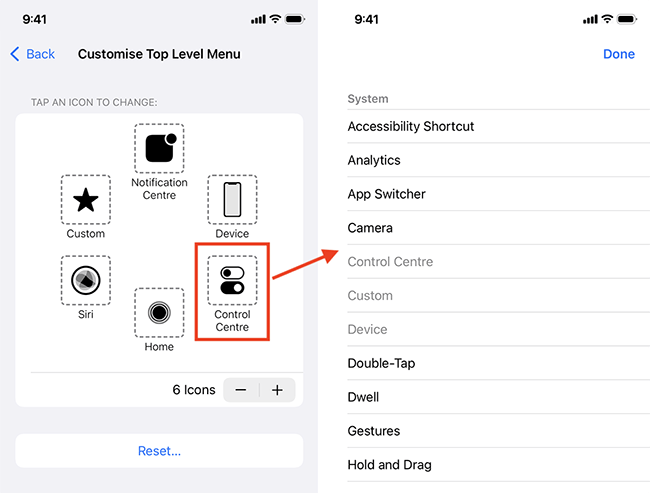
7. To change an existing menu item, tap an icon then choose a new item from the list. Tap Done when you have finished.
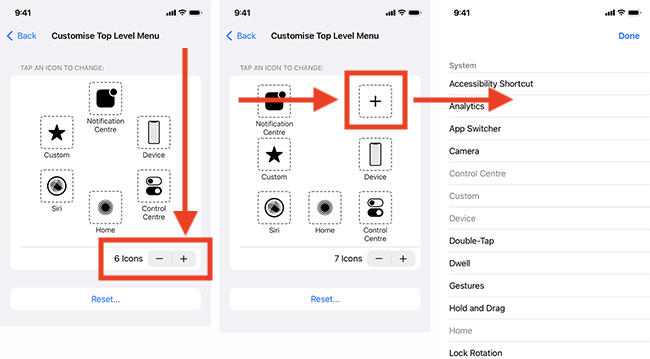
8. To add more items to the menu, tap the + (plus) button. Next, tap the new icon that appears (this is a blank icon with a + (plus) in the middle of it), then choose an item from the list. Tap Done when you have finished.
9. To remove an item from the menu, select the – (minus) button. Note: You can’t choose which item gets removed so you may need to re-assign actions to the remaining icons
Set up custom actions that occur when you tap or press the button
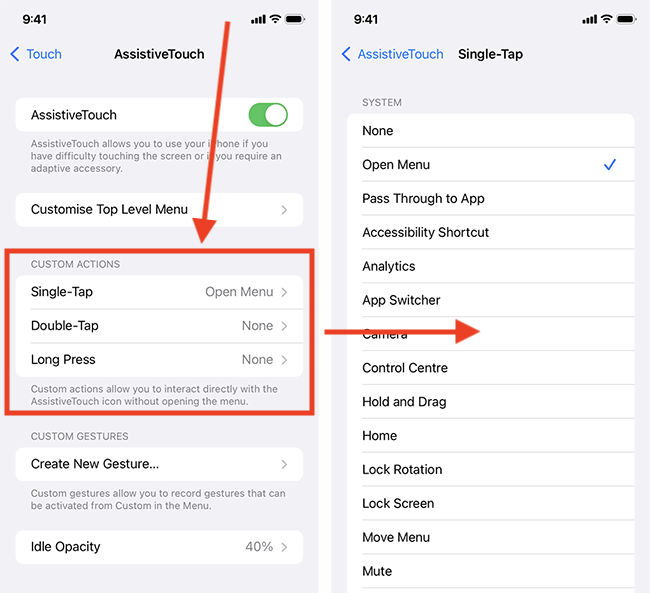
10. Custom Actions allow you to trigger an action by pressing the button without also opening the menu. By default, the only action assigned to the button is the single-tap gesture to open the menu. You can change the single-tap action to something else and assign actions to double-tap and long-press gestures.
Tap on one of the actions listed under Custom Actions (Single-Tap, Double-Tap, or Long Press), and choose an action from the list. When you have finished, tap the back button, labelled AssistiveTouch, to return to the main AssistiveTouch settings screen.
Change the opacity of the button when it isn’t being used
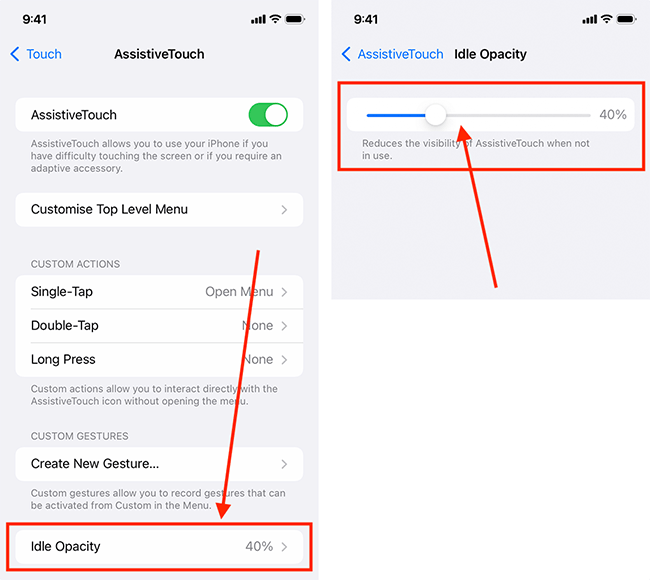
11. By default, the AssistiveTouch button fades to 40% opacity a few seconds after you stop using it. This stops it from being distracting as you use your device. To change this, tap Idle Opacity. On the next screen, adjust the slider until you are happy with how the button will appear when idle.
When you have finished, tap the back button in the top-left corner, labelled AssistiveTouch, to return to the main AssistiveTouch settings screen.
Return to the Home screen
12. When you are happy with your settings, you can return to the Home screen by swiping up from the bottom of the screen or by pressing the Home button on devices with a physical Home button.