Call our helpline
0300 180 0028The Virtual Trackpad is part of the AssistiveTouch accessibility features. You’ll need to have AssistiveTouch turned on to use the Virtual Trackpad. To learn more about using Assistive Touch, see our guide How to control your device using AssistiveTouch in iOS 26 on your iPhone or iPad.
Short guide:
- Open the Settings app
 and tap Accessibility.
 - Tap the Touch option.
- Tap AssistiveTouch.
- On the next screen, tap Customise Top Level Menu.
- Tap the + (plus) button, then tap the + (plus) icon that appears and choose Virtual Trackpad.
- To use the virtual trackpad, open the AssistiveTouch menu and tap Virtual Trackpad.
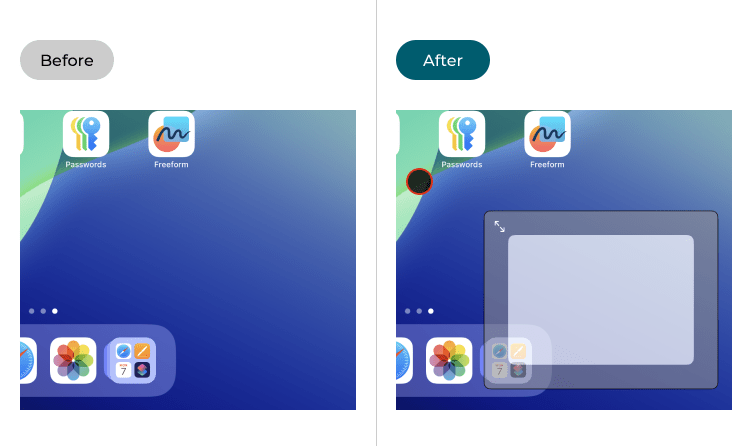
Before and after
This section explains how to enable and use the Virtual Trackpad on your iPad in iOS 26. This is a step-by-step guide with pictures of the screens to help.
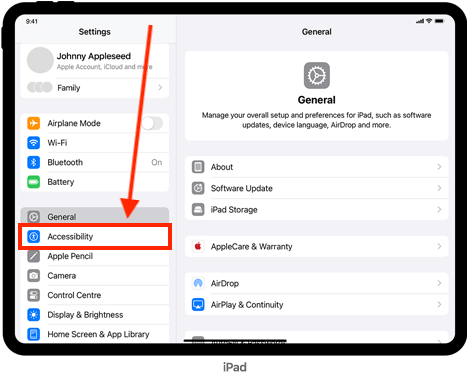
Find the Accessibility settings
1. Tap the Settings icon ![]() on your Home screen to open the Settings app. Scroll down and tap Accessibility.
on your Home screen to open the Settings app. Scroll down and tap Accessibility.
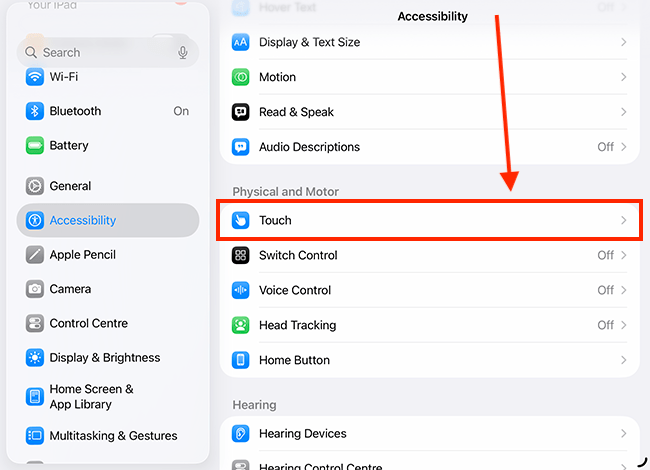
Open the Touch settings screen
2. On the Accessibility screen, tap Touch.
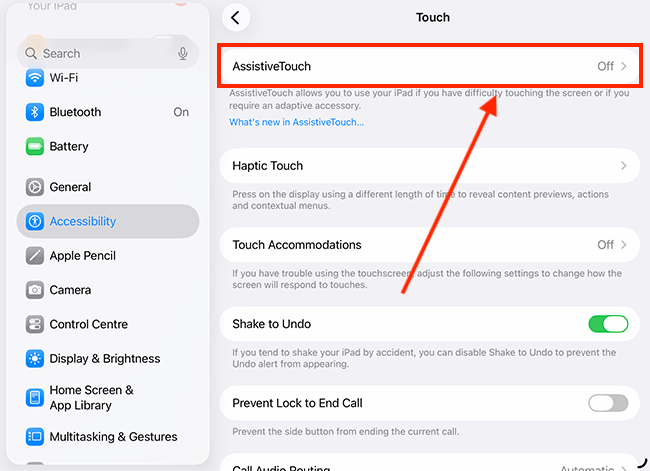
Open the AssistiveTouch settings
3. On the Touch screen, tap AssistiveTouch.
Add the Virtual Trackpad to the AssistiveTouch menu
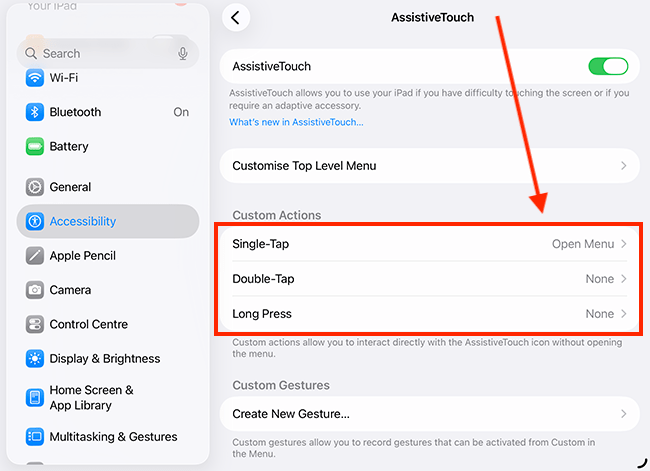
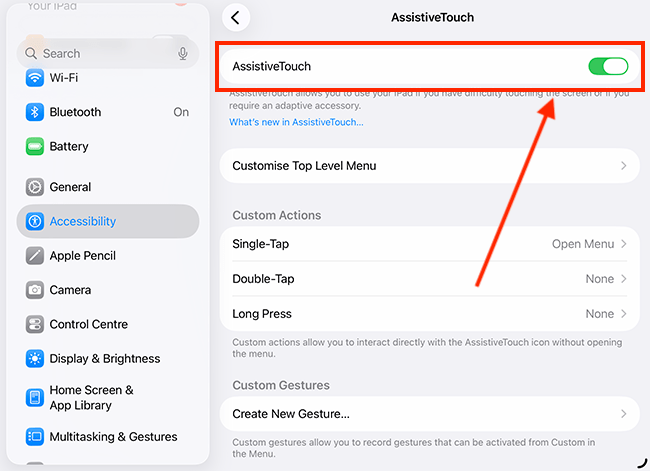
The Virtual Trackpad can be turned on from the AssistiveTouch menu – a small onscreen button that lets you perform a range of actions. You can add the Virtual Trackpad as a menu item, or set it as a custom action that activates when you tap the AssistiveTouch button.
Add the Virtual Trackpad to the AssistiveTouch menu
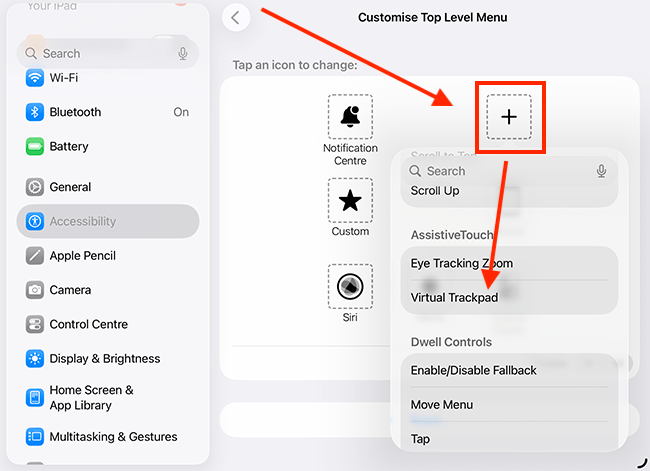
4. Tap Customise Top Level Menu.

5. Tap the + (plus) button.

6. Tap the new + (plus) icon that appears alongside the existing top-level menu options, then select Virtual Trackpad from the pop-up menu.
Set a custom action to open the Virtual Trackpad
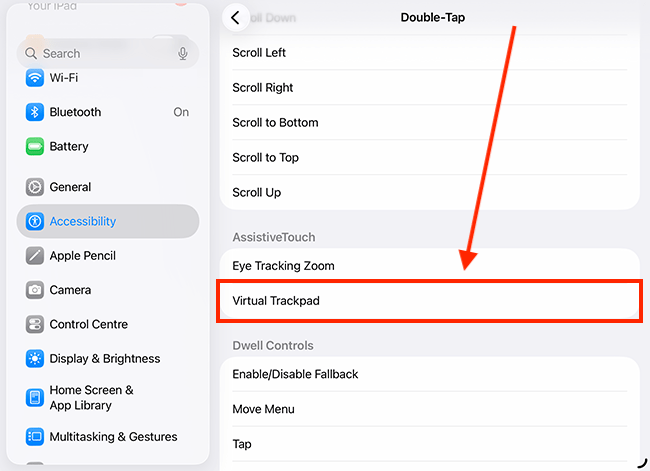
7. A custom action is performed when you tap, double-tap, or long-press the AssistiveTouch button. To create a custom action, tap one of the options – Single-Tap, Double-Tap, Long Press – in the Custom Actions section.
8. On the next page, select Virtual Trackpad from the list of options.
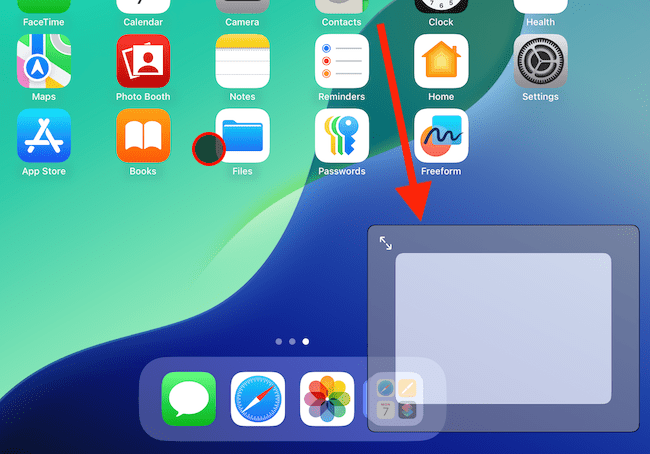
Open the Virtual Trackpad
9. If AssistiveTouch isn’t already turned on, enable it in Settings > Accessibility > Touch > AssistiveTouch (steps 1 - 3 above).
10. Opening the Virtual Trackpad depends on how you set it up earlier (see steps 4 - 7 above).
You can either open the AssistiveTouch menu and tap Virtual Trackpad, or use the custom action you assigned (see steps 7–8 above) to the AssistiveTouch menu button – tap, double-tap, or long-press.

Using the Virtual Trackpad
11. The table below provides instructions on how to use the Virtual Trackpad.
| Action | Gesture |
| Move the pointer | Move one finger on the trackpad. |
| Perform a single-click | Tap the trackpad. |
| Perform a double-click | Long-press on the trackpad. |
| Scroll | Move two fingers on the trackpad in the direction you want to scroll the page. |
| Resize the Virtual Trackpad | Drag the arrows in the top-right corner of the Virtual Trackpad to resize it. |
| Move the Virtual Trackpad | Tap and hold on the border of the Virtual Trackpad, then drag to reposition it. |
| Close the Virtual Trackpad | Repeat the action you used to open the Virtual Trackpad (see step 10, above). |
Customise the Virtual Trackpad settings
12. Open the AssistiveTouch settings page - go to Settings > Accessibility > Touch > AssistiveTouch (steps 1 - 3 above).
13. On the AssistiveTouch screen, scroll down and tap Virtual Trackpad.
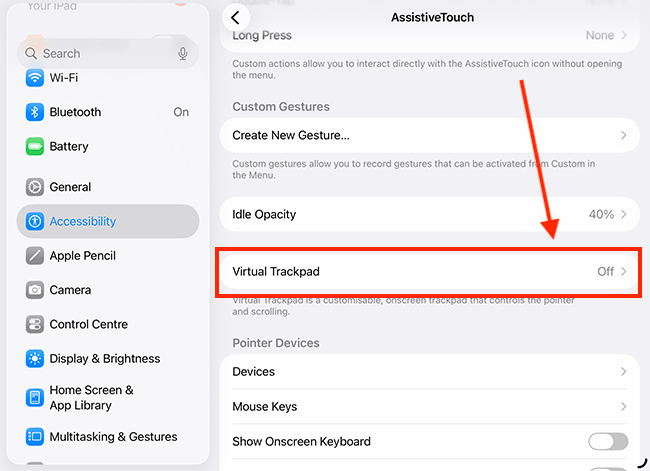
14. You can now adjust the following settings; descriptions are shown after the screenshot below.
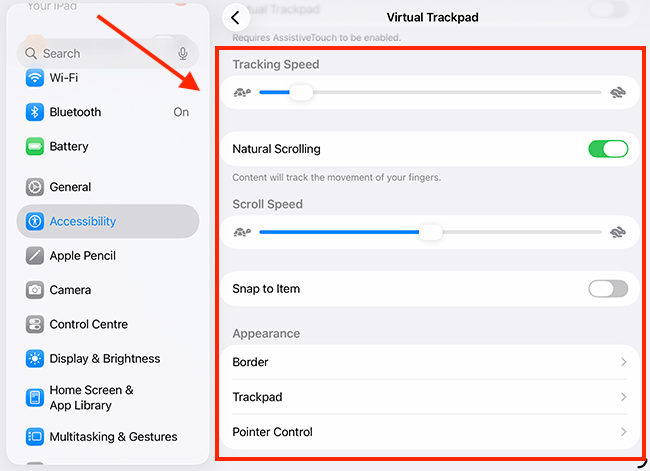
| Setting | Description |
| Tracking Speed | Adjust the slider for Tracking Speed to change how quickly the pointer moves across the screen |
| Natural Scrolling | When Natural Scrolling is enabled, the page content moves in the same direction as your fingers as you scroll. |
| Scroll Speed | Adjust the slider for Tracking Speed to change how quickly a page scrolls when performing a scroll gesture (moving two fingers up, down, left, or right). |
| Snap to Item | When Snap to Item is enabled, the pointer snaps to the nearest item and highlights it with a red border. |
| Border | You can change the colour, width, and opacity of the Pointer border. Tap Border to customise these settings. |
| Trackpad | You can change the colour and opacity of the trackpad. Tap Trackpad to customise these settings. |
| Pointer Control | You can customise the pointer to make it easier to see. You can choose to keep the trackpad visible even when it's not in use. Tap Pointer Control to customise these settings. |
Need some more help?
Call our helpline 0300 180 0028 or email enquiries@abilitynet.org.uk
Need free IT Support at Home?
If you are older or disabled and need IT support at home, you can book a free home visit.