Short guide:
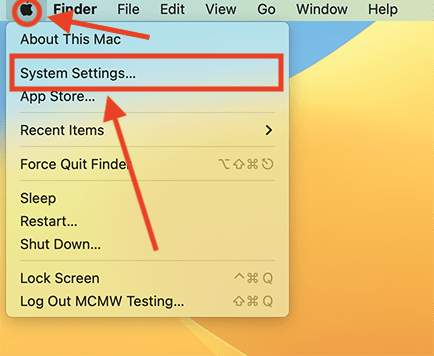
- Click the Apple icon
 in the top left corner of the screen and select System Settings.
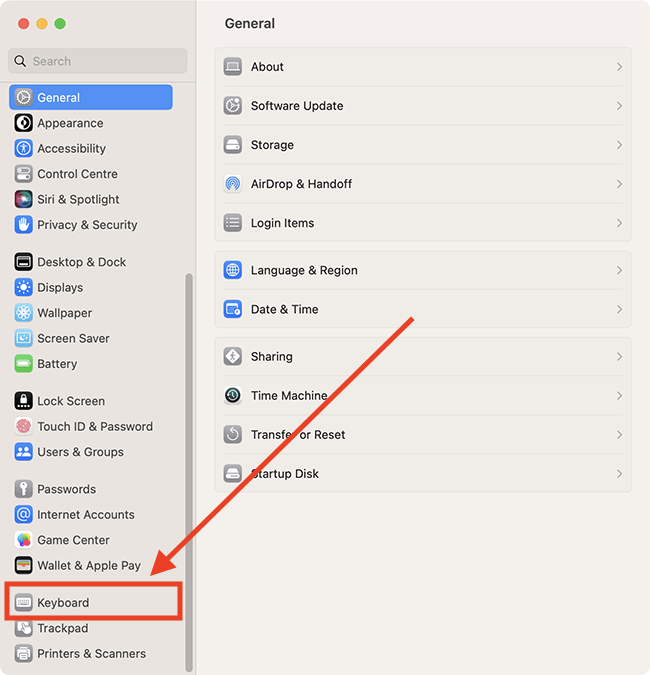
 - Click Keyboard in the sidebar.
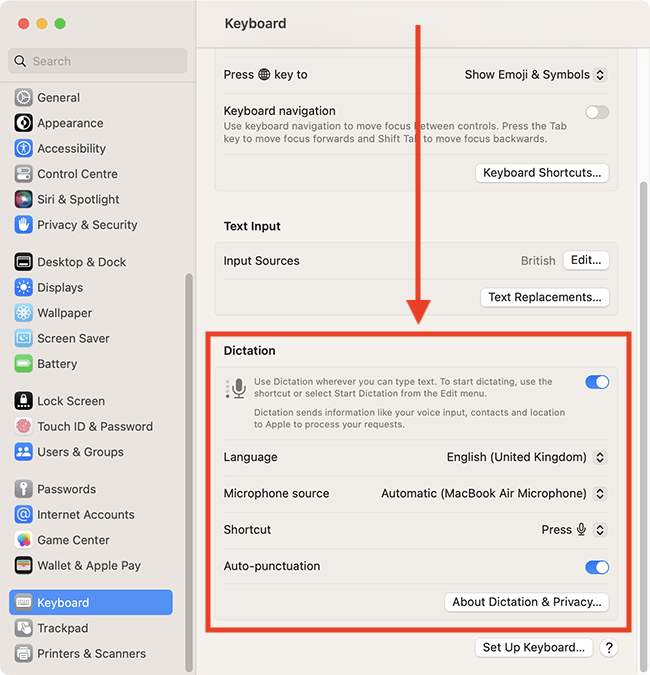
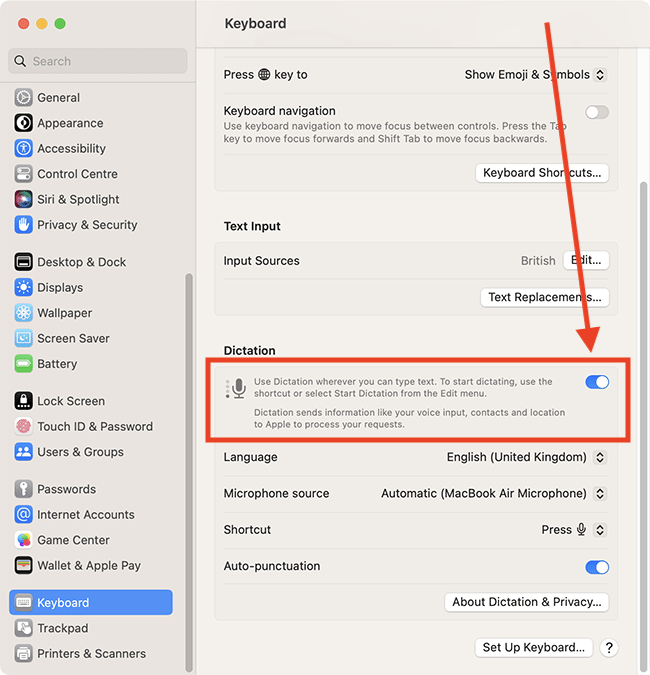
- Click the toggle switch for Dictation to turn it on.
- When you want to dictate text, place the cursor where you want the dictated text to appear.
- To start dictation, press the microphone icon
 in the row of function keys (if available), or use the dictation keyboard shortcut, or choose Edit > Start Dictation.
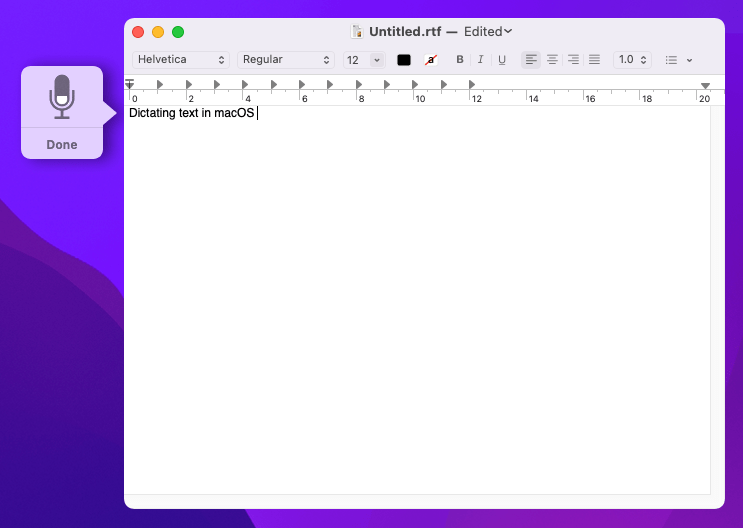
 - When the dictation feedback window appears (a microphone with a fluctuating sound level indicator), you can start dictating your text.
- When you have finished, press the dictation keyboard shortcut or the Return key, or click Done in the dictation feedback window.
Before and after
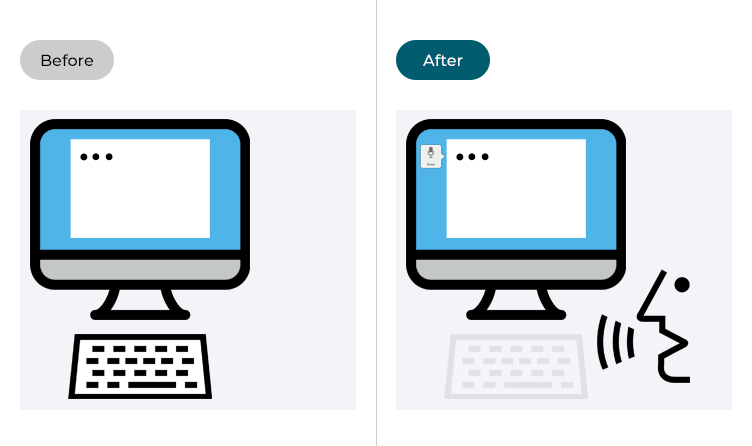
This section gives you step by step instructions on how to dictate text in macOS 13 Ventura, with pictures of the screens to help.
Open System Settings
1. Click the Apple icon ![]() in the top left corner of the screen and choose System Settings from the menu.
in the top left corner of the screen and choose System Settings from the menu.
Open the Accessibility settings
2. In the System Settings window, click Keyboard in the sidebar.
Find the Dictation settings
3. On the Keyboard page, scroll down to the Dictation section.
Enable Dictation
4. Click the toggle switch for Dictation to turn it on.
Choose which microphone to use
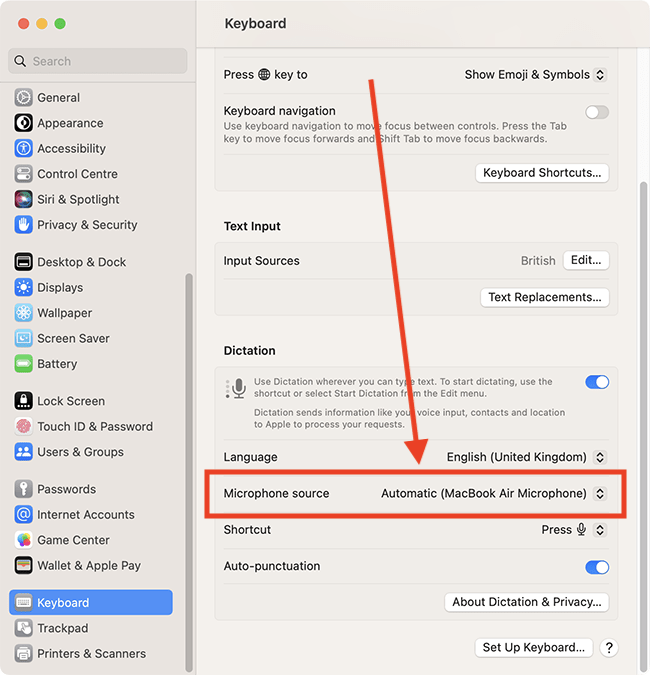
5. If you have more than one microphone, you can choose which one to use for dictation from the drop-down menu for Microphone source.
Choose a keyboard shortcut to launch Dictation
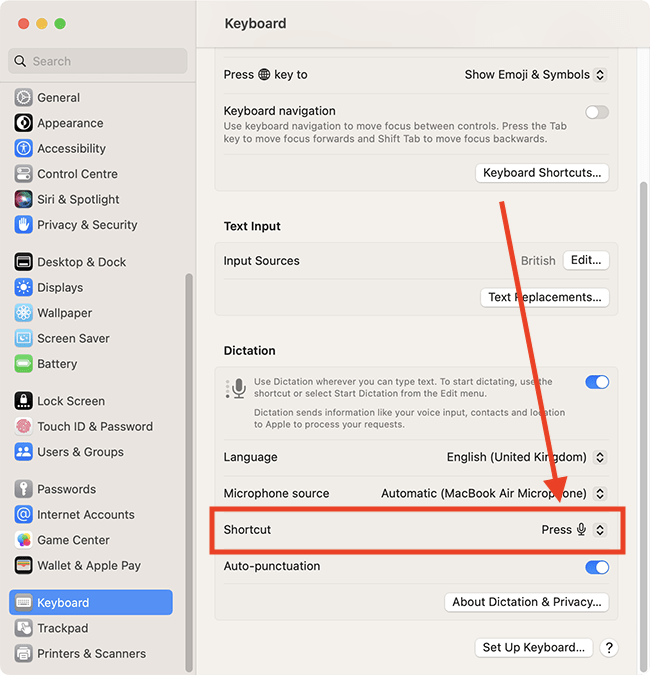
6. One of the ways you can start Dictation is by using a keyboard shortcut. Click the drop-down menu for Shortcut and choose your preferred shortcut from the options. If you choose Customise, press the key combination you would like to use to start dictation.
Using auto-punctuation
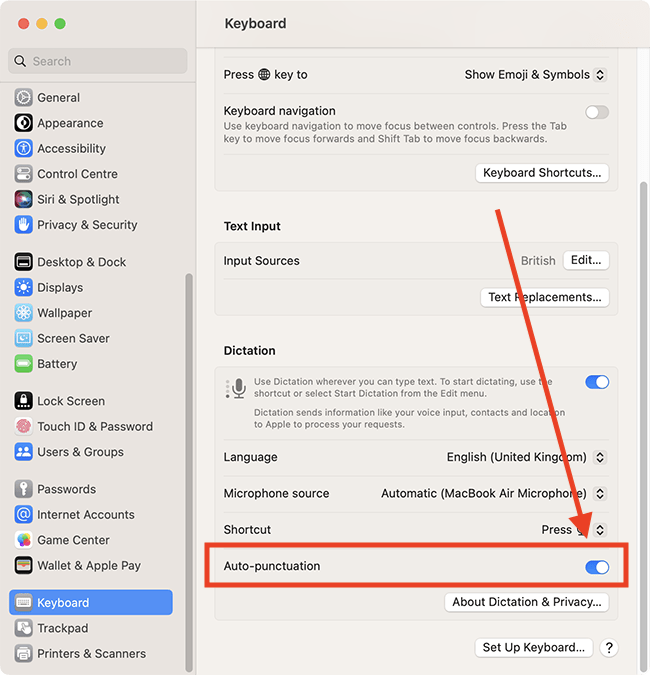
7. Dictation can automatically insert punctuation as you speak. Set the toggle switch for Auto-punctuation to on or off as required.
Close System Settings
8. When you are happy with your settings, close System Settings by clicking the Close button (red circle) in the top-left corner of the window or using the Cmd + W keyboard shortcut.
Using Dictation
9. Place the cursor where you want dictated text to appear.
To start dictation, press the microphone icon ![]() in the row of function keys, if available, or use the dictation shortcut, or choose Edit > Start Dictation.
in the row of function keys, if available, or use the dictation shortcut, or choose Edit > Start Dictation.
When the dictation feedback window appears (a microphone with a fluctuating sound level indicator), you can start dictating your text.

If auto-punctuation is turned off, you can enter punctuation by saying the type of the punctuation you wish to use, e.g. “full stop” to enter ‘.’ or “question mark” to enter ‘?’. You can find the full list of punctuation commands on Apple’s dictation support page: https://support.apple.com/en-gb/guide/mac-help/mh40695/mac
When you have finished, press the dictation keyboard shortcut or the Return key, or click Done in the dictation feedback window.
Note: If this does not work it could be because your computer settings are managed by someone else (an IT department or administrator for example). If so, you will need to contact them to access these settings or for help.