Call our helpline
0300 180 0028Short guide:
- Open the Settings app.
- Tap Accessibility.
- Tap Keyboards & Typing.
- Tap Hover Typing.
- Tap the toggle switch for Hover Typing to turn it on.
- Choose where to display the larger text - tap Display Mode and choose Top, Inline, or Docked To Keyboard.
- Customise other settings as required.
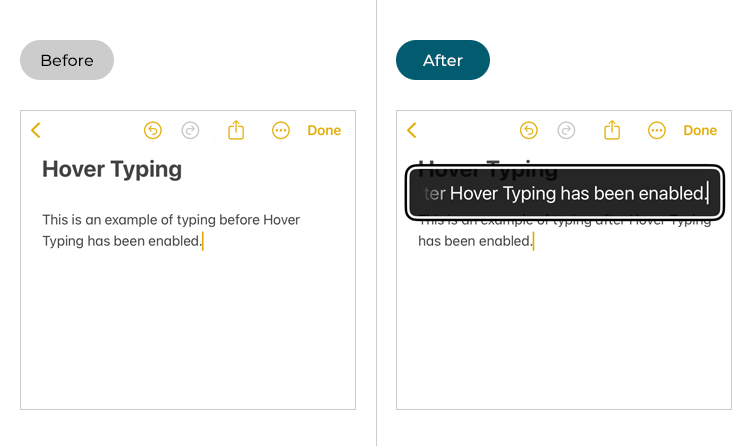
Before and after
This section explains how to enable the Hover Typing feature in iOS 26. This is a step-by-step guide with pictures of the screens to help.
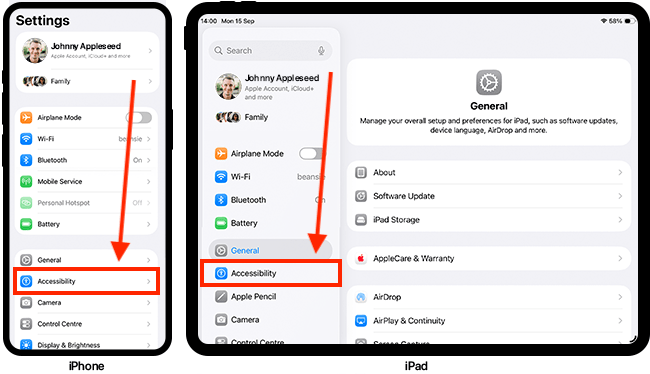
Find the Accessibility settings
1. Tap the Settings icon on your Home screen to open the Settings app. Scroll down and tap Accessibility.
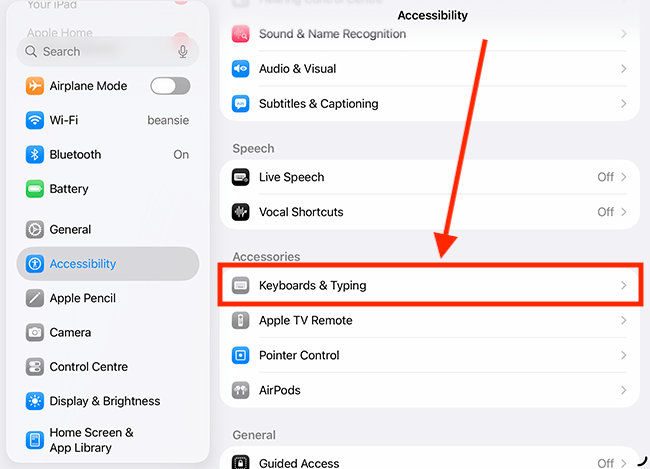
Open the Keyboard & Typing settings
2. On the Accessibility screen, tap Keyboards & Typing.
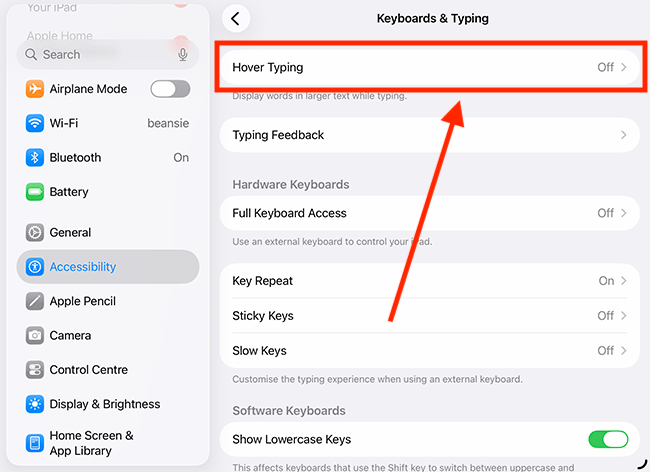
Open the Hover Typing settings
3. On the Keyboards & Typing screen, tap Hover Typing.
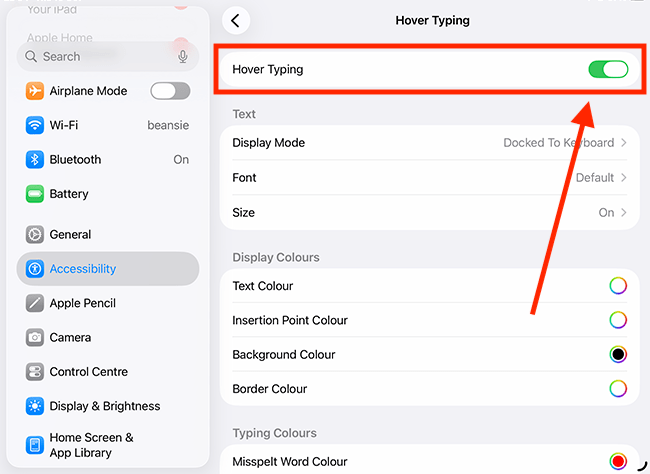
Enable Hover Typing
4. On the next screen, tap the toggle switch for Hover Typing to turn it on.
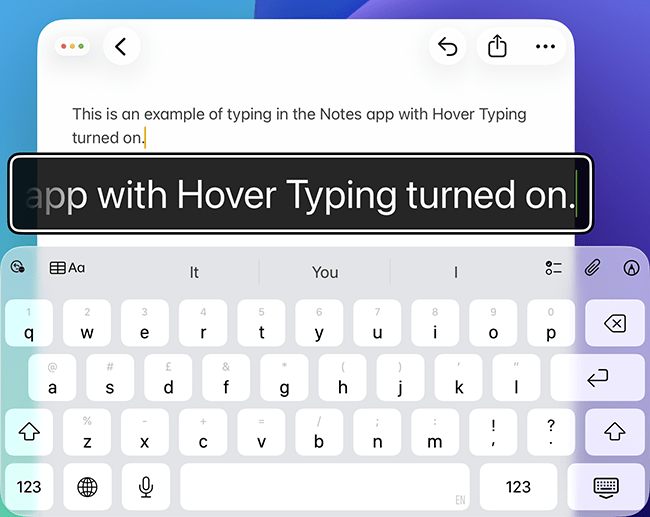
How to use Hover Text
5. With Hover Typing turned on, just type as you normally do – your text will automatically appear in a larger size in the Hover Typing window.
Below is an example of Hover Typing in action within the Notes app.
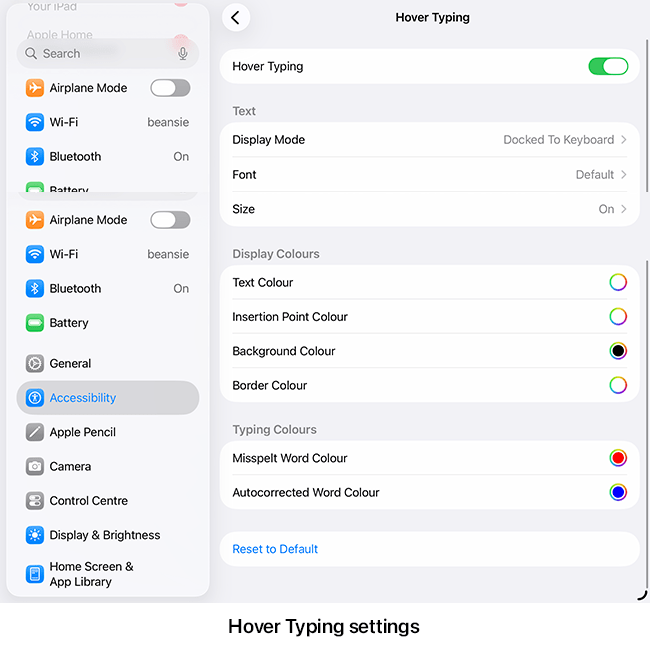
How to customise the settings for Hover Typing
6. You can customise the Hover Typing settings to change how and where the enlarged text appears, making it easier to read what you are typing in a way that suits your needs. Descriptions for each setting are provided in the table below, following the Hover Typing settings screenshot.
| Hover Typing settings | |
| Text settings | |
| Setting | Description |
| Display Mode | By default, the Hover Typing window appears just above the keyboard. To change its position, tap Display Mode and choose from the following options: Top - The Hover Typing window appears at the top of the screen. Inline - The Hover Typing window appears just above or below the cursor. Docked To Keyboard - The Hover Typing window appears just above the keyboard. |
| Font | To customise the appearance of the enlarged text, you can change the font used by Hover Text. Tap Font, then choose from the list of available fonts on the next screen. This allows you to select a typeface that best suits your reading preferences. |
| Size | To change the size of the text, tap Size. Then use the slider on the next screen to adjust it. |
| Colour settings |
|
| Setting | Description |
| Text Colour | To change the text colour, tap Text Colour. Then, choose a new colour from the colour picker. |
| Insertion Point Colour | The insertion point shows the current position of the cursor. To change the colour of the insertion point, tap Insertion Point Colour. Then, choose a new colour from the colour picker. |
| Background Colour | To change the background colour of the Hover Typing window, tap Background Colour. Then, choose a new colour from the colour picker. |
| Border Colour | To change the colour of the Hover Text window's border, tap Border Colour. Then, choose a new colour from the colour picker. |
| Typing Colours | |
| Setting |
Description |
| Misspelt Word Colour | This is the colour used to indicate misspelt words. To change the colour, tap Misspelt Word Color, then choose a new colour from the colour picker. |
| Autocorrected Word Colour | This is the colour used to indicate words that have been autocorrected. To change the colour, tap Autocorrected Word Color, then choose a new colour from the colour picker. |
| Reset to Default | Tap Reset to Default to restore all Hover Typing settings to their defaults. |
Return to the Home screen
7. When you are happy with your settings, you can return to the Home screen by swiping up from the bottom of the screen or by pressing the Home button on devices with a physical Home button.
Need some more help?
Call our helpline 0300 180 0028 or email enquiries@abilitynet.org.uk
Need free IT Support at Home?
If you are older or disabled and need IT support at home, you can book a free home visit.