Call our helpline
0300 180 0028Important things to know:
- Don’t rely on this feature in emergencies or high-risk situations. While Name Recognition can be helpful, it isn’t always 100% accurate.
- If you can, ask someone with typical hearing to help you test that your name is detected correctly.
- Note for Siri users: If you use the “Hey Siri” voice command, it won’t work while Sound Recognition is turned on.
Short guide:
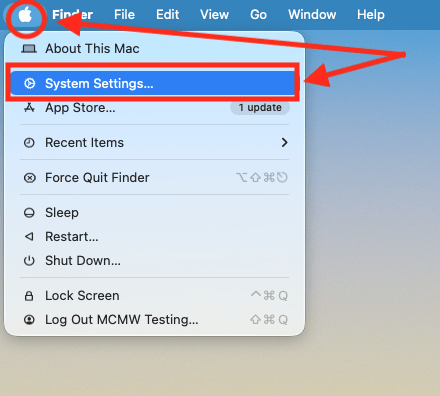
- Click the Apple icon
 in the top left corner of the screen and select System Settings.
 - Click Accessibility in the sidebar.
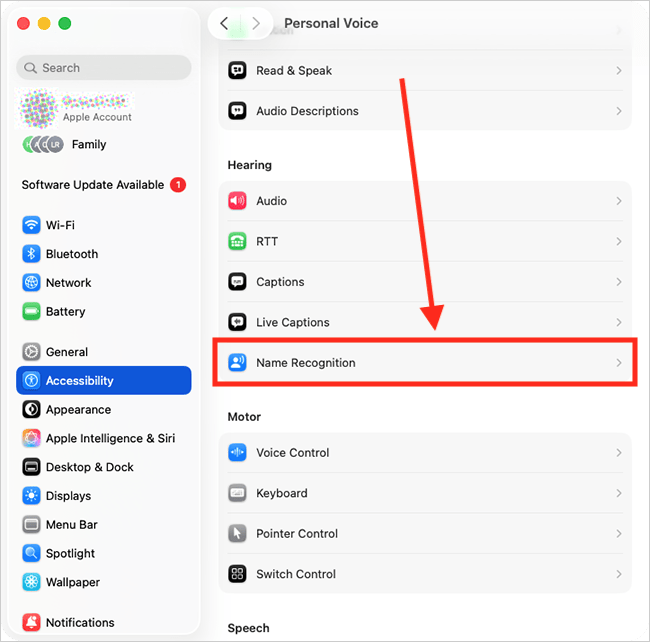
- Select Name Recognition from the list of Accessibility options on the right.
- Click the Set Up button.
- On the introductory screen, click Continue, then enter your name when prompted.
- Your computer will generate a version of your name to listen for. To improve name recognition, you can record your own version if you wish.
- Click Done to complete the set up.
- Your computer will now listen for your name and display a notification when it hears it spoken.
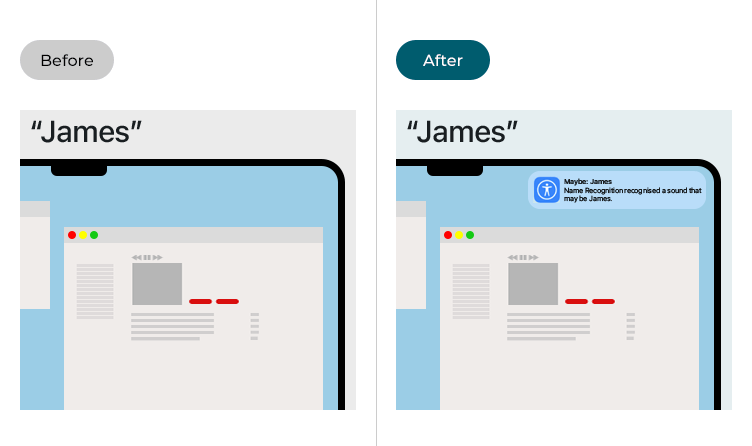
Before and after
This section explains how to set up Name Recognition in macOS 26 Tahoe. This is a step-by-step guide with pictures of the screens to help.
Open System Settings
1. Click the Apple icon ![]() in the top left corner of the screen and choose System Settings from the menu.
in the top left corner of the screen and choose System Settings from the menu.
Open the Accessibility settings
2. In the System Settings window, click Accessibility in the sidebar.
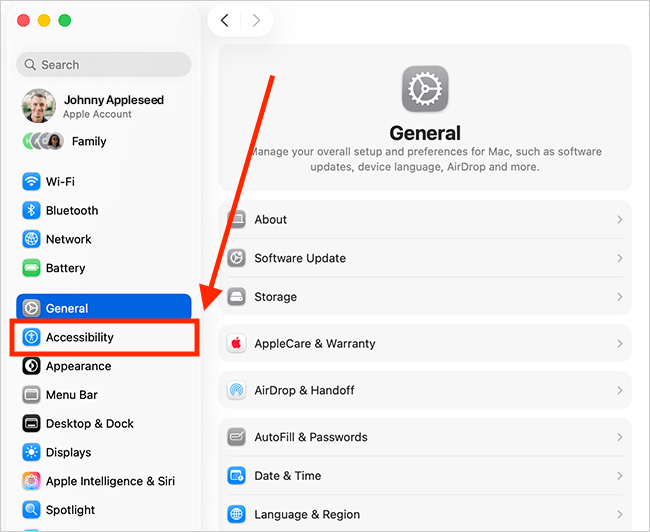
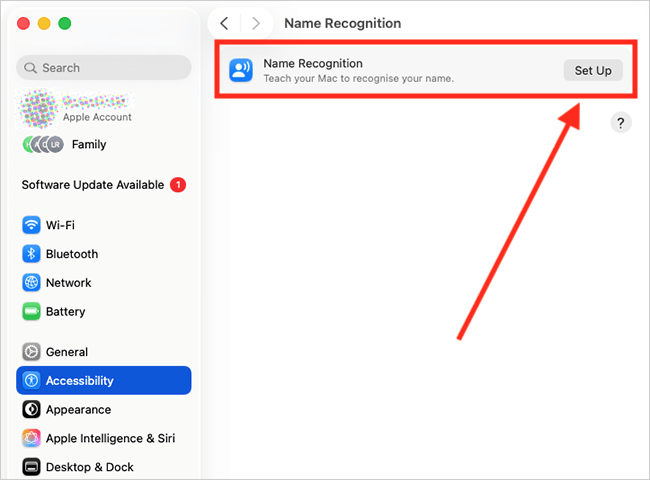
Find the Name Recognition settings
3. Select Name Recognition from the list of Accessibility options on the right.
Set up Name Recognition
4. On the Name Recognition page, click the Set Up button.
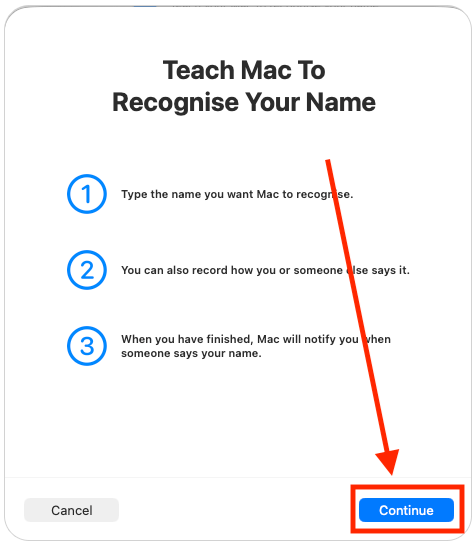
5. Click Continue on the introductory screen,
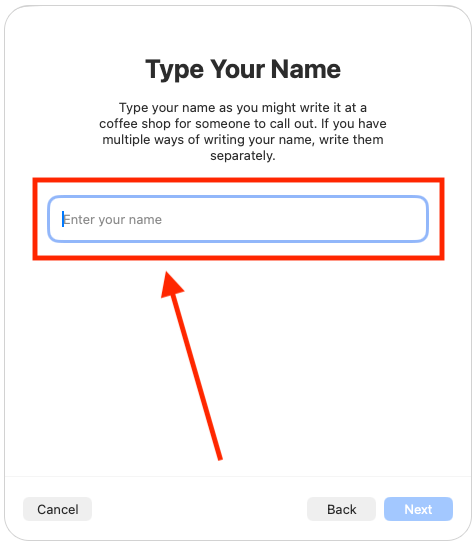
6. Type the name you want your device to listen for in the text box labelled Enter Your Name. Type it how you might write it in a coffee shop for someone to call out. For our example, we'll use the name "James".
7. On the next screen, you’ll see that your computer has generated an audio version of your name. This is the pronunciation it will listen for when detecting your name. Click the Play button to hear how it sounds.

Recording your own pronunciation
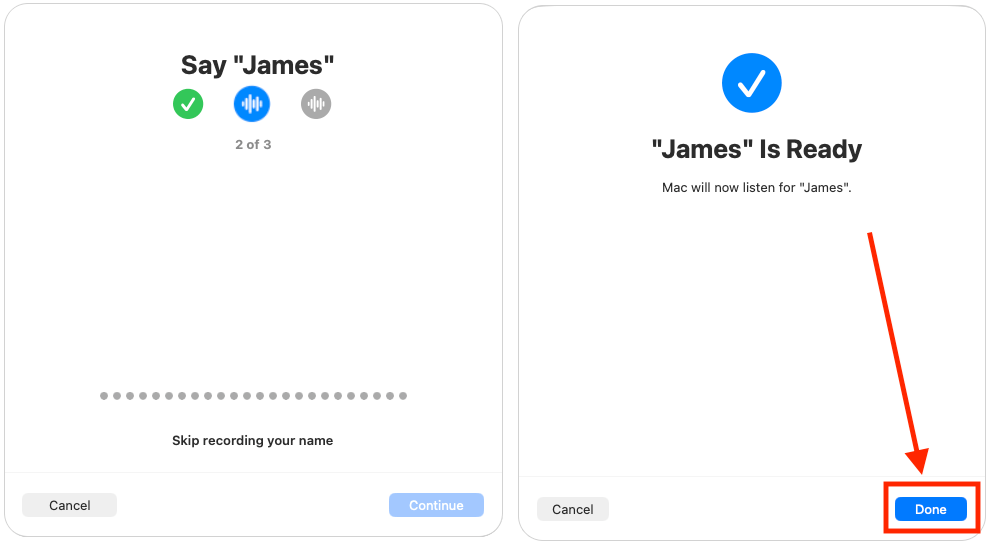
8. To improve name recognition, you can record your own pronunciation. To do this, click Record Your Pronunciation. If you don't want to record your own pronunciation, click Continue, then click Done to complete the set up.

9. When prompted, speak your name three times, then click Done to complete the set up.
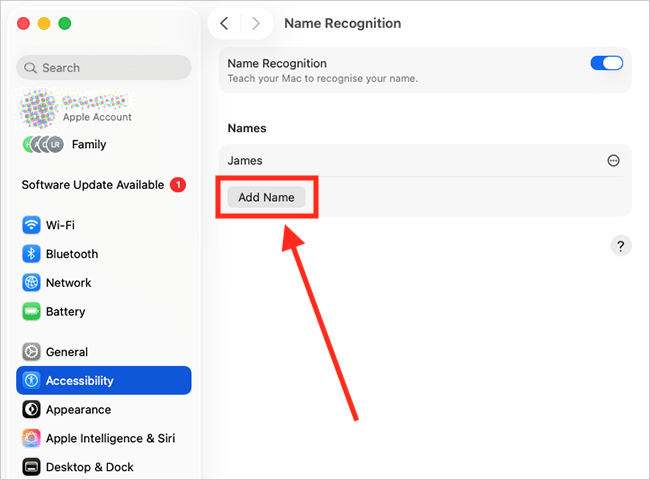
Add another name or a different pronunciation
10. If you want to add another name for your computer to listen for, or add different pronunciations of the same name, click Add Name and repeat the steps above.
Close System Settings
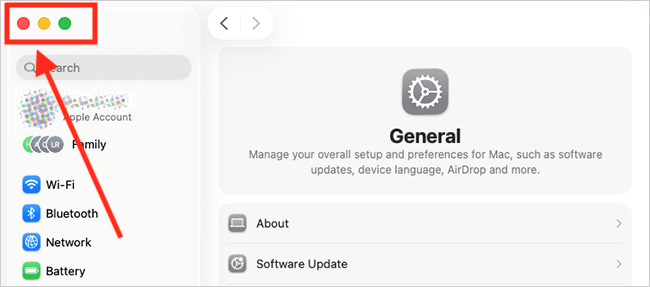
11. When you are happy with your settings, close System Settings by clicking the Close button (red circle) in the top-left corner of the window or using the Cmd + W keyboard shortcut.
Using Name Recognition
12. When you have finished setting up your name, the Name Recognition icon ![]() will appear in the menu bar to indicate that your computer is listening for your name.
will appear in the menu bar to indicate that your computer is listening for your name.

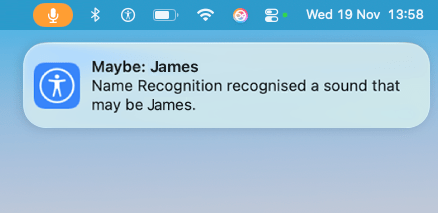
13. When your computer hears your name, you'll get an on-screen notification.
Note: If this does not work it could be because your computer settings are managed by someone else (an IT department or administrator for example). If so, you will need to contact them to access these settings or for help.
Need some more help?
Call our helpline 0300 180 0028 or email enquiries@abilitynet.org.uk
Need free IT Support at Home?
If you are older or disabled and need IT support at home, you can book a free home visit.