Call our helpline
0300 180 0028Short guide:
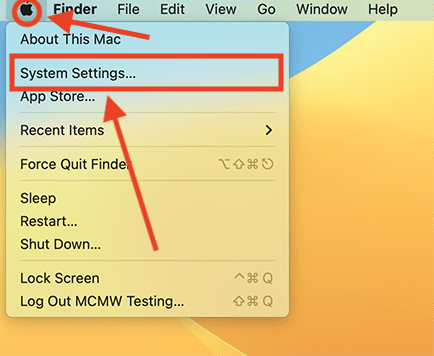
- Click the Apple icon
 in the top left corner of the screen and select System Settings.
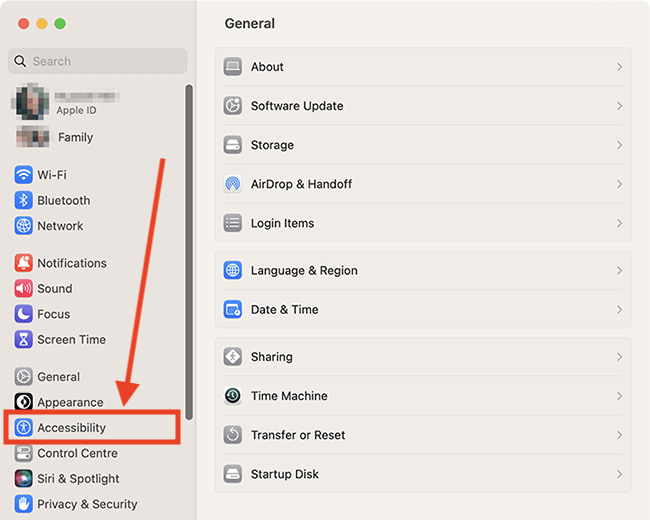
 - Click Accessibility in the sidebar.
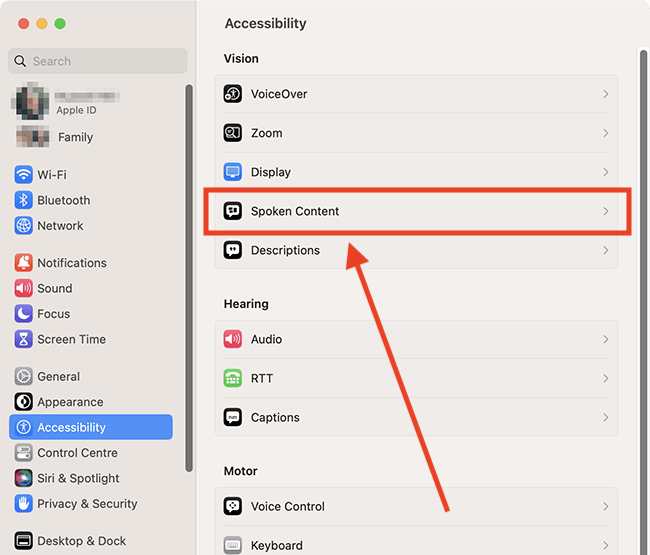
- Select Spoken Content from the list of Accessibilty options on the right.
- Turn on the toggle switch for Speak items under the pointer.
- To change the settings for Speak items under the pointer, click the i button
 next to the toggle switch.
Before and after
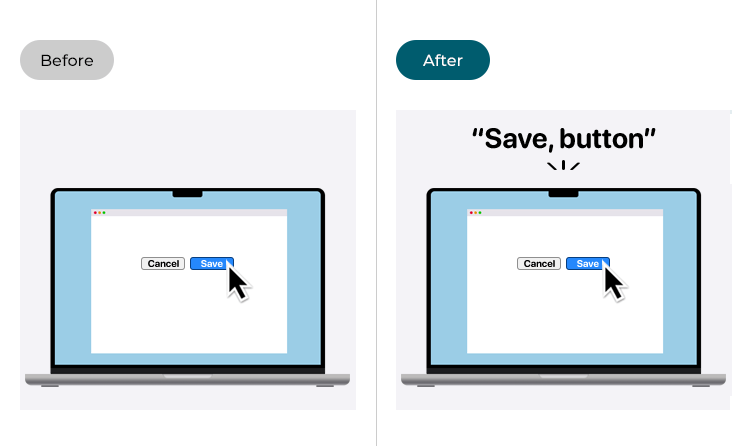
This section gives you step by step instructions on how to hear the item currently under the pointer spoken aloud in macOS 13 Ventura, with pictures of the screens to help.
Open System Settings
1. Click the Apple icon ![]() in the top left corner of the screen and choose System Settings from the menu.
in the top left corner of the screen and choose System Settings from the menu.
Open the Accessibility settings
2. In the System Settings window, click Accessibility in the sidebar.
Find the Spoken Content settings
3. Select Spoken Content from the list of Accessibilty options on the right.
Turn on Speak items under the pointer
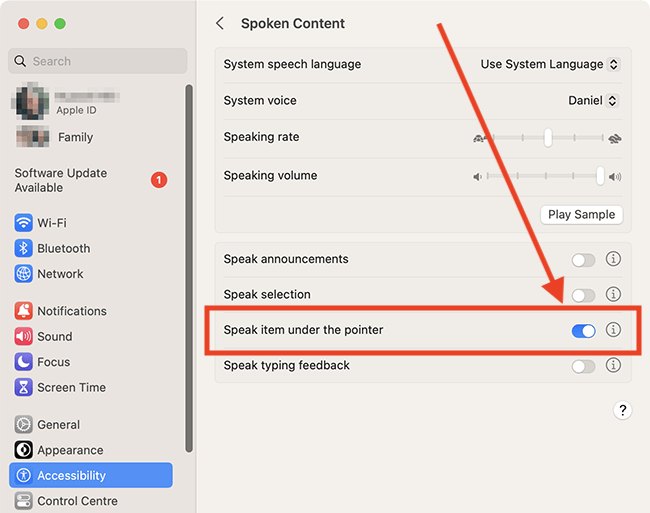
4. Click the toggle switch for Speak items under the pointer to turn it on.
Change the settings for Speak items under the pointer
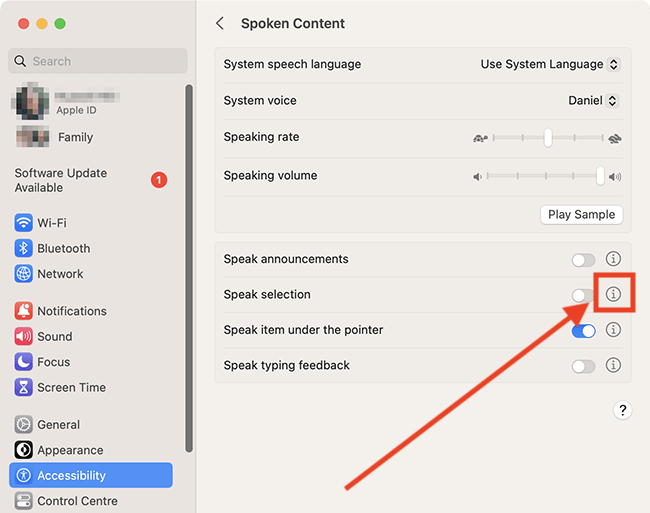
5. Click the i (show detail) button ![]() next to the toggle switch.
next to the toggle switch.
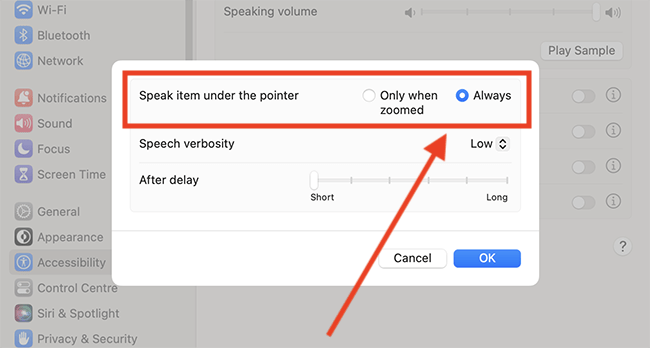
Choose when to speak the items under the pointer
6. By default, your computer will only speak the item under the pointer when you have the Zoom screen magnifier turned on. You can change this, so the items are always spoken. In the Speak item under the pointer section, choose Always.
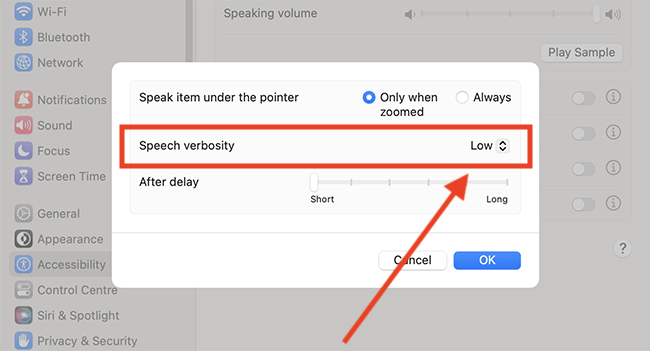
Choose how much spoken feedback you receive
7. Verbosity is the amount of feedback you receive about the item under the pointer. For instance, if you hover over a button when verbosity is set to low, only the text on the button will be spoken. If verbosity is set to high, the text on the button will be spoken along with the description, “button”. To change the level of Verbosity, select the drop-down menu for Speech Verbosity and choose from Low, Medium, or High.
Choose the time delay between moving the pointer over an item and the item being spoken
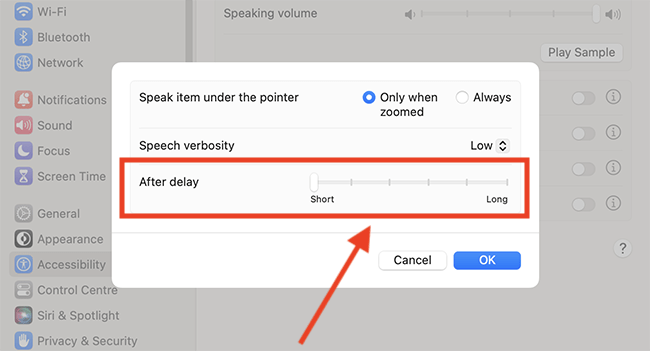
8. By default, items will be spoken as soon as you move the pointer over them. This can become overwhelming when moving the pointer quickly across the screen. You can change this so that you need to rest the pointer over an item for a set amount of time before it is spoken. To do so, adjust the slider for After delay.
Save your changes
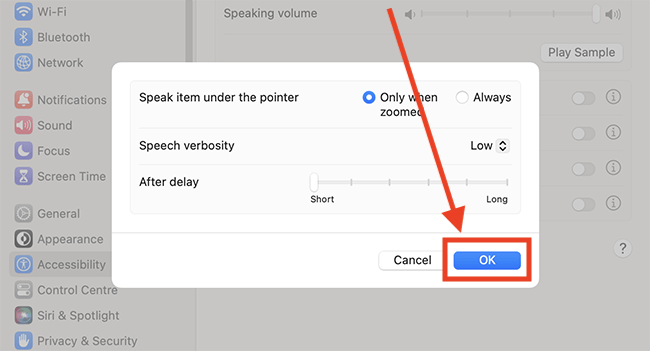
9. When you are happy with your settings, click the OK button.
Close System Settings
10. When you are happy with your settings, close System Settings by clicking the Close button (red circle) in the top-left corner of the window or using the Cmd + W keyboard shortcut.
Note: If this does not work it could be because your computer settings are managed by someone else (an IT department or administrator for example). If so, you will need to contact them to access these settings or for help.