Short guide:
- Click the Apple icon
 in the top left corner of the screen and select System Preferences.
 - Click Accessibility.
- In the sidebar, click Zoom.
- Tick the option/s you would like to use to launch Zoom.
- Choose a Zoom style; Choose from Full screen, Split screen, or Picture-in-picture.
- Click the Advanced button to see the options you can customise.
Before and after
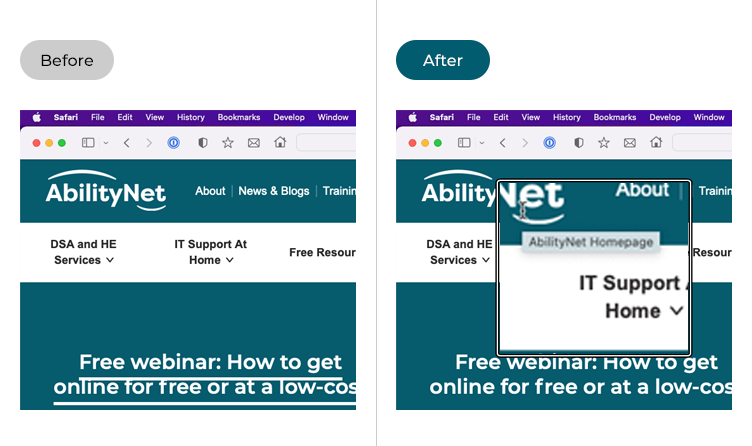
There are three styles of magnification you can use:
Full screen - the entire screen is magnified
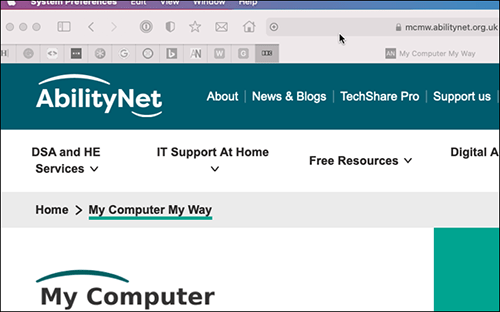
Split screen – the screen is split into two sections. One section is a standard view, and you use this area to navigate and interact with the items on-screen as normal. The other section shows a magnified view of what you are doing.
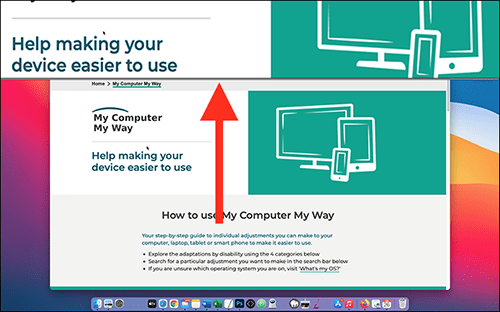
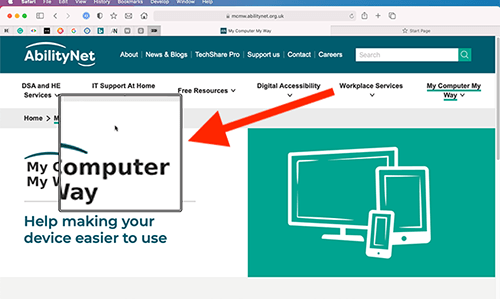
Picture-in-picture – a small window magnifies the area around the cursor. This works particularly well to Zoom temporarily using the scroll gesture.
This section gives you step by step instructions on how to magnify the screen in macOS 12 Monterey, with pictures of the screens to help.
Open System Preferences
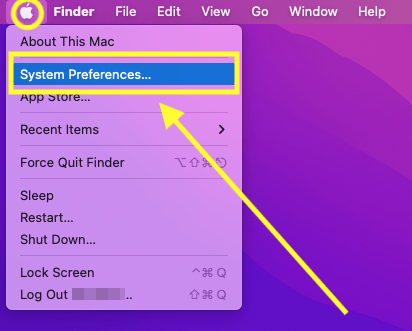
1. Click the Apple icon ![]() in the top left corner of the screen and choose System Preferences from the menu.
in the top left corner of the screen and choose System Preferences from the menu.
Open the Accessibility settings
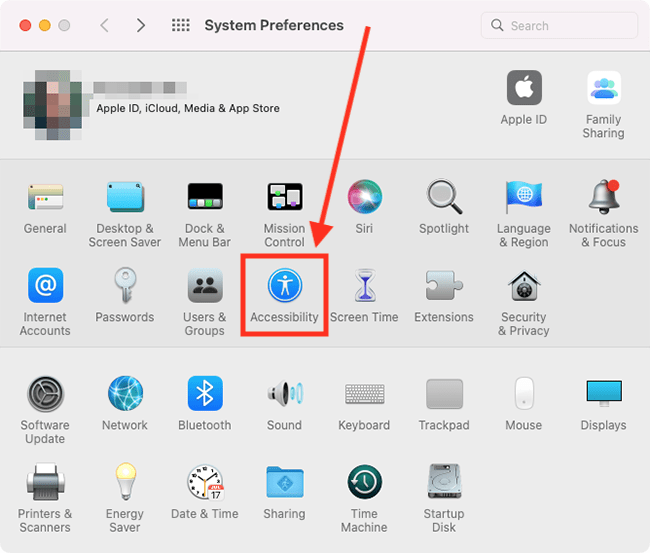
2. In the System Preferences window, click Accessibility.
Find the Zoom settings
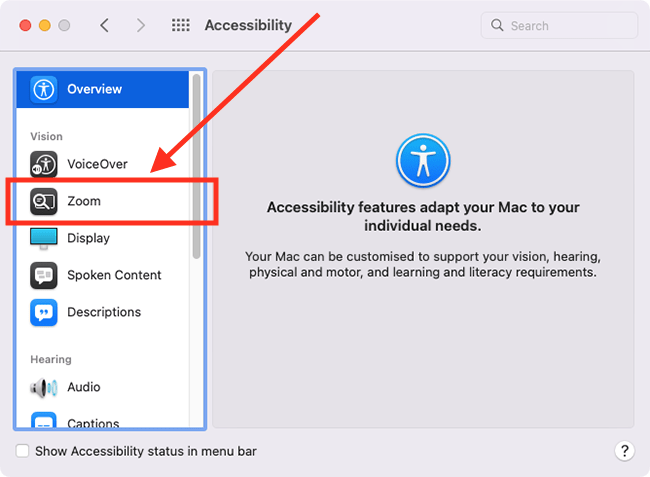
3. In the sidebar, click Zoom.
Choose how you would like to start and control Zoom
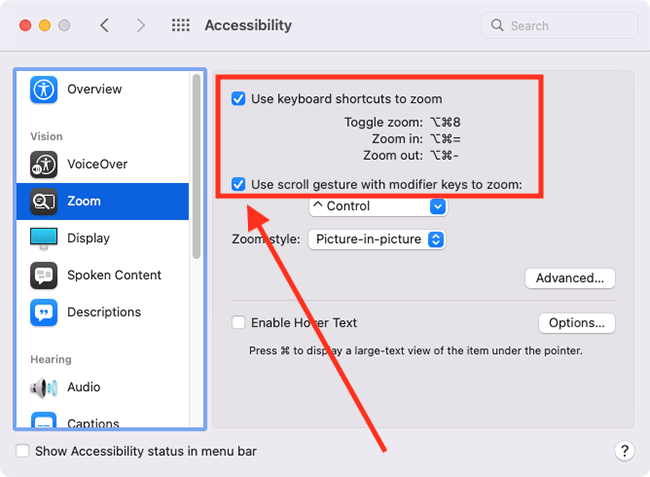
4. You can start and control Zoom in two ways
With keyboard shortcuts:
- Turn zoom on and off: Option (Alt ⌥) + Command (⌘) + 8
- Zoom in: Option (Alt ⌥) + Command (⌘) + = (equals)
- Zoom out: Option (Alt ⌥) + Command (⌘) + – (minus)
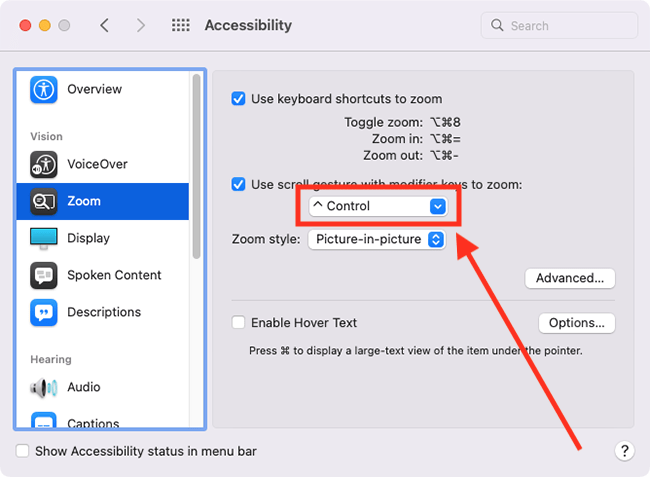
With a scroll gesture while holding down the Control key (or the modifier key of your choice)
With a scroll gesture while holding down the Control key (or the modifier key of your choice)
- Hold down the Control key (⌃) and scroll up to start Zoom.
- While holding down the Control key (⌃), use scroll gestures to zoom in and out.
- Zoom all the way out to turn Zoom off.
Tick the options/s you would like to use.
Change the scroll gesture modifier key
5. To change the scroll gesture modifier key, select the drop-down menu under Use scroll gesture with modifier keys to zoom and choose from Control (^) + Option (Alt ⌥), or Command (⌘).
Choose a Zoom style
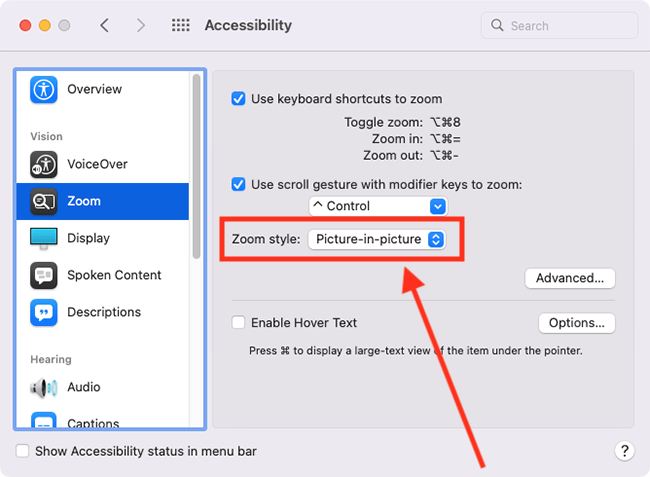
6. Select the drop-down menu for Zoom style and choose from Full screen, Split screen, and Picture-in-picture. See the examples at the beginning of this step-by-step guide for more information about each style.
Note: Whilst using Zoom, you can switch between Full screen and Picture-in-picture styles using the Option (Alt ⌥) + Command (⌘) + F keyboard shortcut. You can’t switch the view to Spilt screen, but you can switch from Split screen to one of the other styles.
Customise Zoom
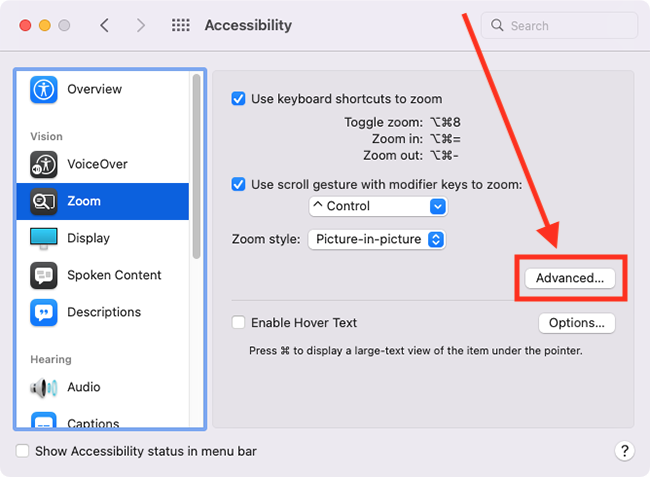
7. To customise Zoom, click the Advanced button.
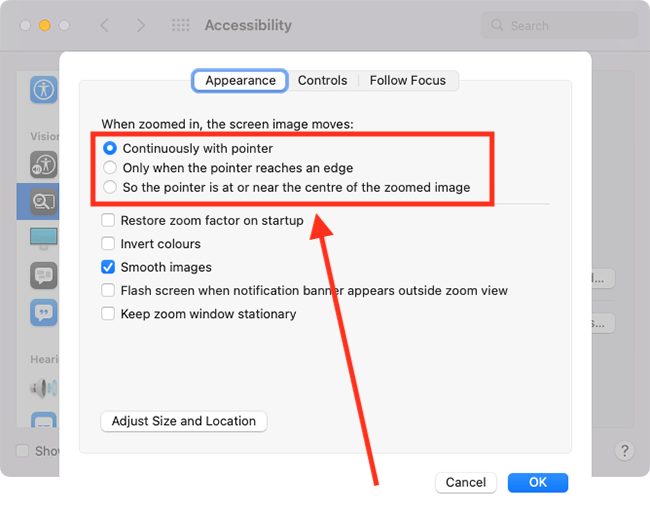
Choose when the screen image should move so that you can see the area around the pointer
(under the Appearance tab)
7. Choose from:
- Continuously with pointer – the zoomed screen image moves as you move the pointer.
- Only when the pointer reaches the edge – the zoomed screen image remains stationary until the pointer reaches an edge of the screen. Once the pointer is touching an edge, keep moving the pointer and the screen will reposition.
- So the pointer is at or near the centre of the zoomed image – when you move your mouse or your finger on the trackpad, the zoomed screen image will move but the pointer will remain centred on the screen.
Start Zoom at the same magnification as the last time it was closed
(under the Appearance tab)
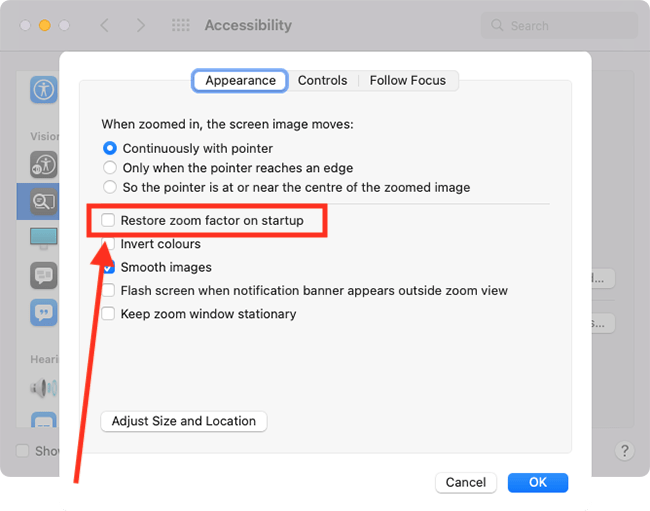
8. If you would like to start Zoom at the same magnification level as when you last closed it, tick the checkbox for Restore zoom factor on startup.
Invert the colours of the zoomed area
(under the Appearance tab)
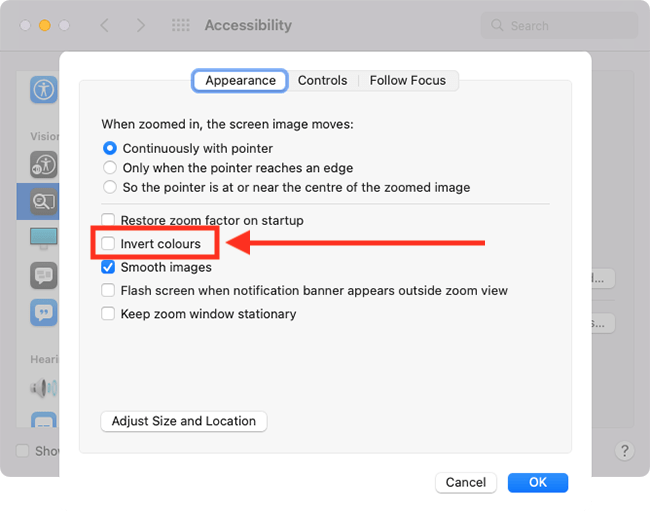
9. This option is only available for Split screen and Picture-in-picture styles. If you would like the colours of the zoomed area to be inverted, tick the checkbox for Invert colours.
Smooth the appearance of text and images
(under the Appearance tab)
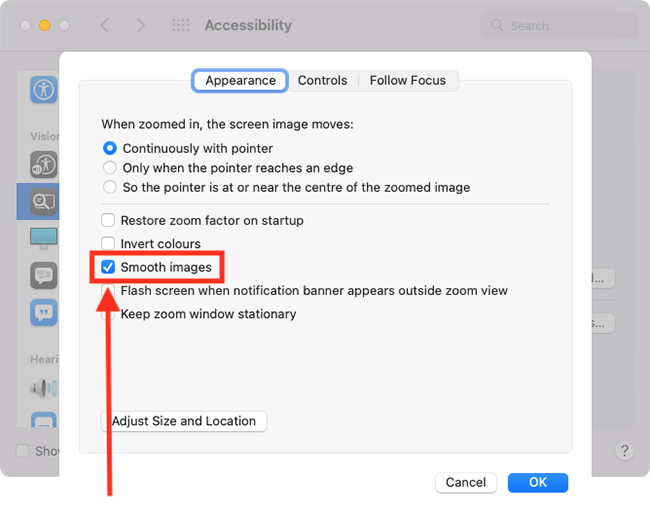
10. Text and images can appear pixelated when they are zoomed in. To smooth their appearance, tick the checkbox for Smooth images.
Flash screen when the notifications banner appears outside the zoom view
(under the Appearance tab)
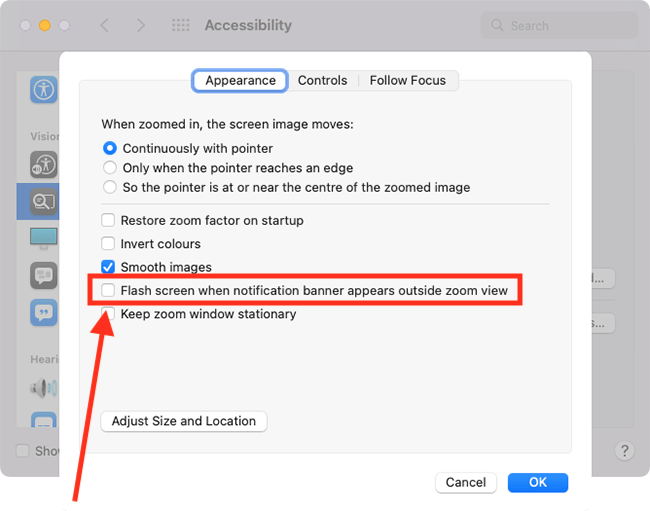
11. When you are zoomed in, you might not see notifications. When this happens, you can get the screen to flash the screen. Tick the check box for Flash screen when notifications banner appears outside zoom view to turn it on.
Keep the picture-in-picture window in a fixed position
(under the Appearance tab)
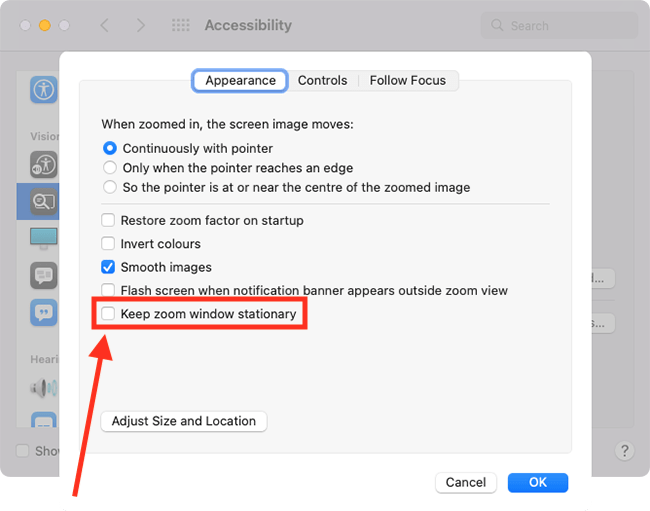
12. This option is only available for the Picture-in-picture style. By default, the Picture-in-picture window moves as you move the pointer. Alternatively, you can keep the picture-and-picture window in a fixed position on the screen. Tick the checkbox for Keep the Zoom window stationary.
Change the size of the picture-in-picture window
(under the Appearance tab)
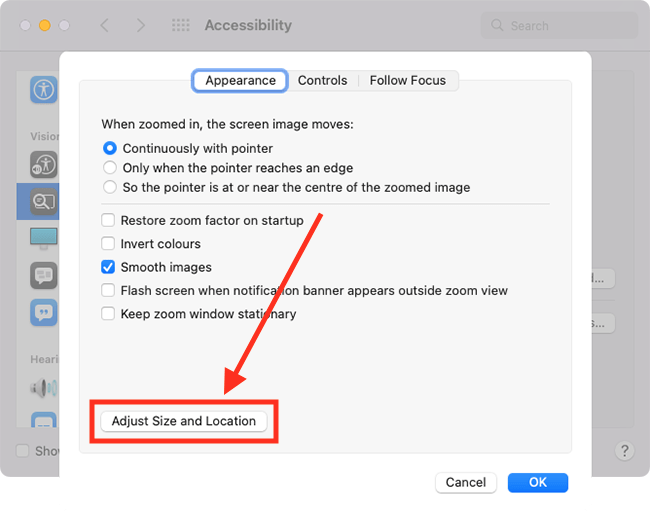
13. This option is only available for the Picture-in-picture style. Click the Adjust size and location button.
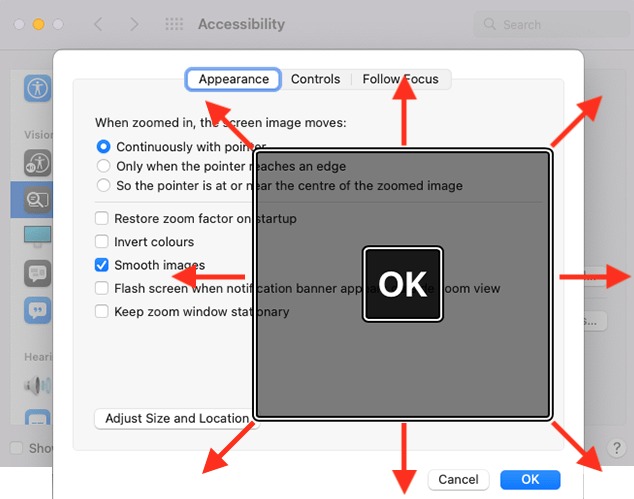
14. Drag the sides or corners of the picture-in-picture window to resize it. Click the OK button in the middle of the window when you have finished.
Enable a keyboard shortcut to temporarily toggle zoom off
(under the Controls tab)
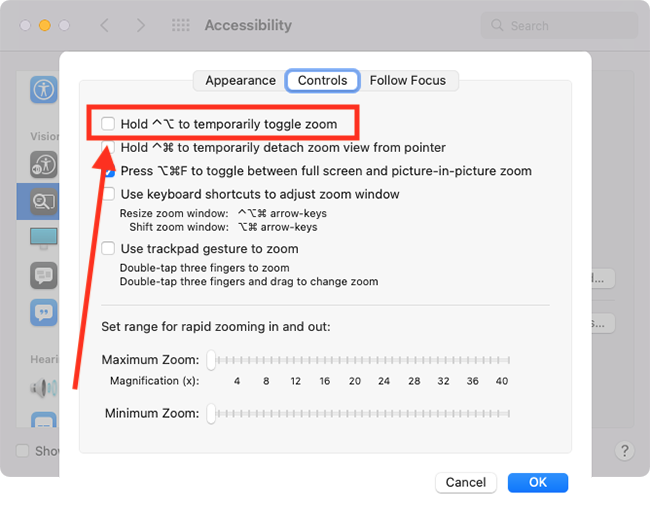
15. When zoomed in, you can temporarily view the screen at normal size whilst holding down the Control (^) + Option (Alt ⌥) keys. Tick the checkbox for Hold ^ ⌥ to temporarily toggle zoom to enable it.
Enable a keyboard shortcut to temporarily detach zoom view from the pointer
(under the Controls tab)
16. If you find it difficult to see the content underneath the pointer when you are zoomed in, hold down the Control (^) + Command (⌘) keys to temporarily hide the pointer. Tick the checkbox for Hold ^ ⌘ temporarily detach zoom view from pointer to enable it.
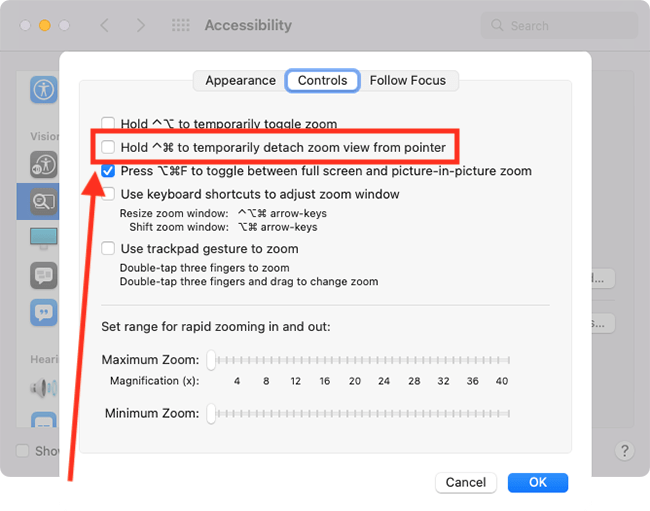
Enable a keyboard shortcut to switch Zoom styles
(under the Controls tab)
17. Whilst using Zoom, you can switch between Full screen and Picture-in-picture styles using the Option (Alt ⌥) + Command (⌘) + F keyboard shortcut. Note: You can’t switch the view to Spilt screen, but you can switch from Split screen to one of the other styles. Tick the checkbox for Press ⌥ ⌘ F to toggle between full screen and picture-in-picture zoom to enable it.
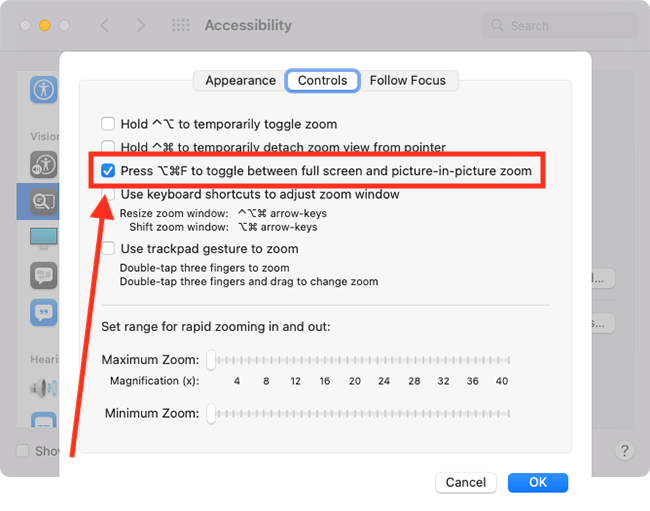
Enable keyboard shortcuts to adjust the zoom window
(under the Controls tab)
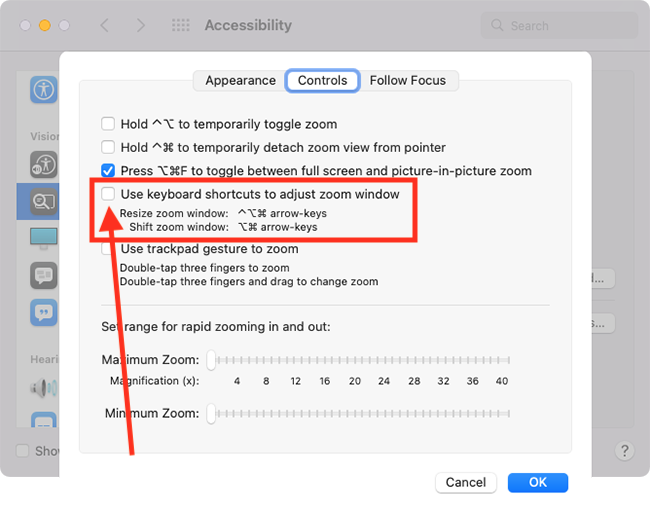
18. To enable keyboard shortcuts to adjust the zoom window, tick the checkbox for Use keyboard shortcuts to adjust zoom window. Once enabled, you can use the following shortcuts:
- Resize zoom window: Control (^) + Option (Alt ⌥) + Command (⌘) + arrow keys
- Shift zoom window: Option (Alt ⌥) + Command (⌘) + arrow keys
Use trackpad gestures to zoom
(under the Controls tab)
19. If you use a trackpad, you can double-tap with three fingers to start zoom and double-tap with three finger and drag to change zoom. Tick the checkbox for Use trackpad gestures to zoom to enable it.
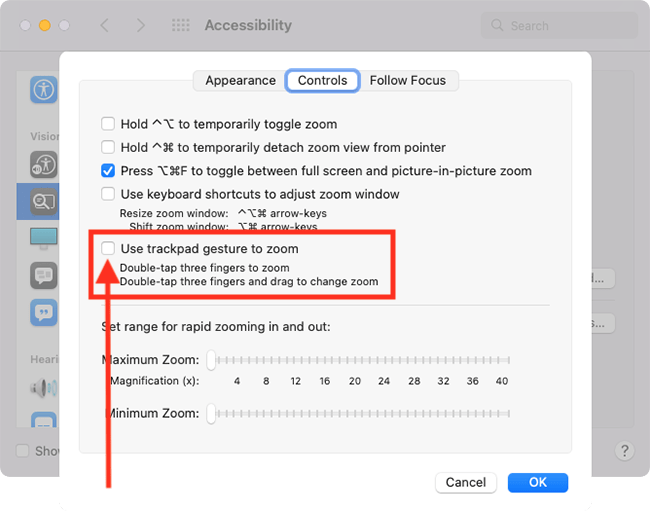
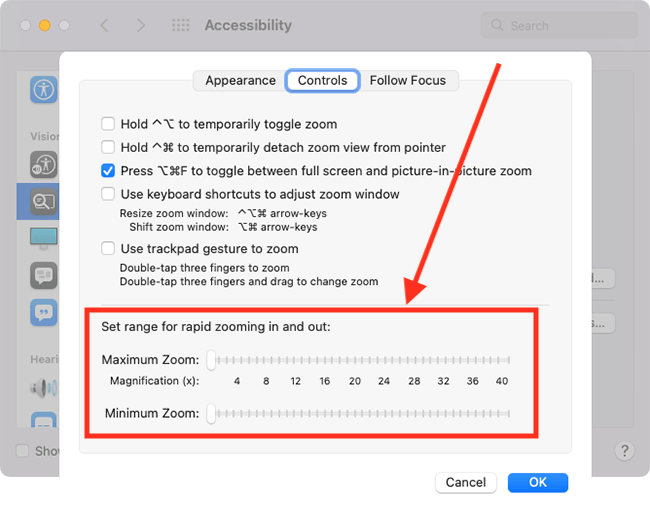
Set the minimum and maximum magnification levels for rapid zooming
(under the Controls tab)
20. Adjust the sliders to set Maximum zoom and Minimum zoom magnification levels.
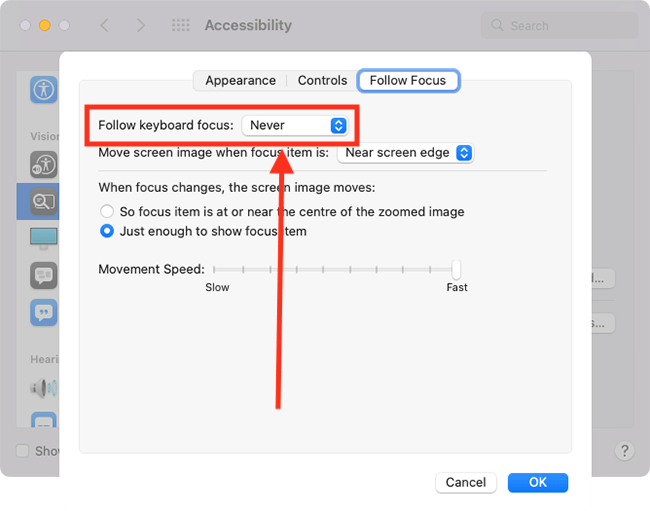
Set how zoom responds to the element that currently receives keyboard input
(under the Follow focus tab)
You can set how Zoom reacts to the element on the screen that is currently in focus, i.e., when you are focusing on an element that can receive keyboard input, such as text boxes, buttons, and links.
21. Select the drop-down menu for Follow keyboard focus and choose how you would like zoom to react.
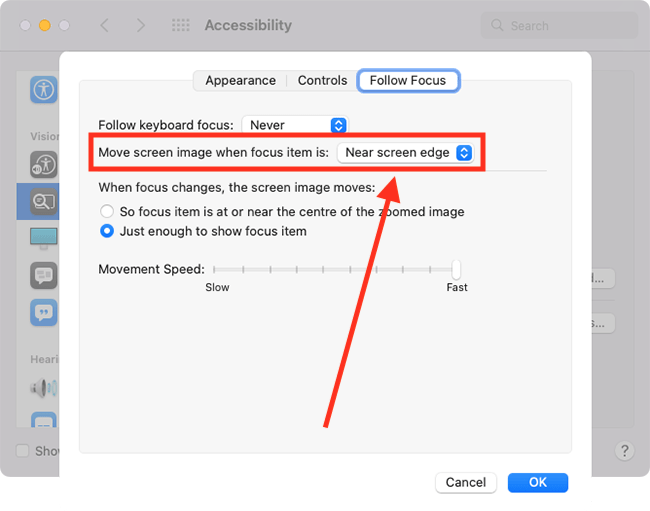
22. You can choose when the screen image should move if it might become unviewable. Select the drop-down menu for Move screen image when focus item is and choose from the options.
23. Choose how the screen image should move when the focus item changes. Choose from:
- So focus item is at or near the centre of the zoomed image
- Just enough to show the focus item
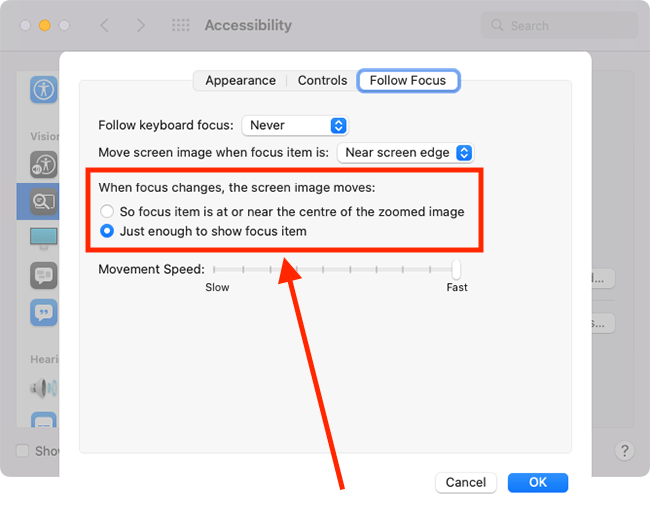
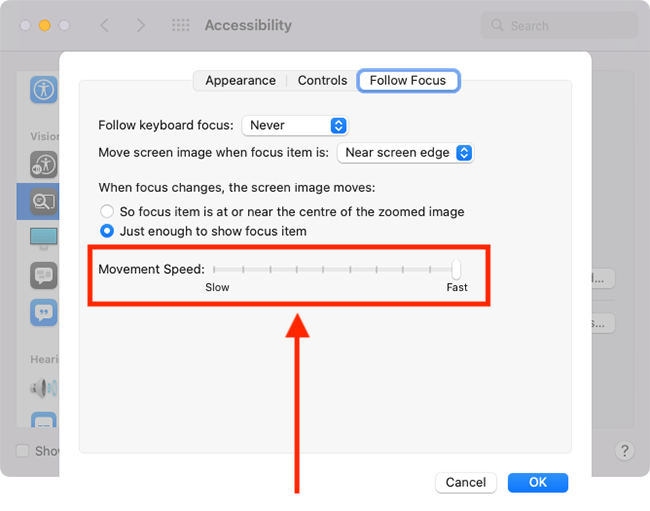
24. Use the slider for Movement speed to set how quickly the screen image moves when the focus item changes.
Close System Preferences
25. When you are happy with your settings, close System Preferences by clicking the Close button (red circle) in the top-left corner of the window or using the Cmd + W keyboard shortcut.
Note: If this does not work it could be because your computer settings are managed by someone else (an IT department or administrator for example). If so, you will need to contact them to access these settings or for help.