Call our helpline
0300 180 0028The Accessibility Reader is also built into the Magnifier app, so you can also customise text in your surroundings — like a whiteboard or screen. To learn more about using the Accessibility Reader with the Magnifier app, see our guide Using the Magnifier app on your Mac to zoom in on your suroundings in macOS 26 Tahoe.
Short guide:
- Click the Apple icon
 in the top left corner of the screen and select System Settings.
 - Click Read & Speak in the sidebar.
- Select Accessibility Reader from the list of Accessibility options on the right.
- Click the toggle switch for Accessibility Reader to turn it on.
- To use the Accessibility Reader, open an app containing text you want to read, then press the Cmd (Command ⌘) and Esc (Escape ⎋) keys.
- The text from the original app will now open in the Accessibility Reader.
- To change the appearance of text, click the AA button in the top-right corner of the app window and set your preferences.
- To hear the text read aloud, click the Play button on the playback controls located along the top of the app window.
Before and after
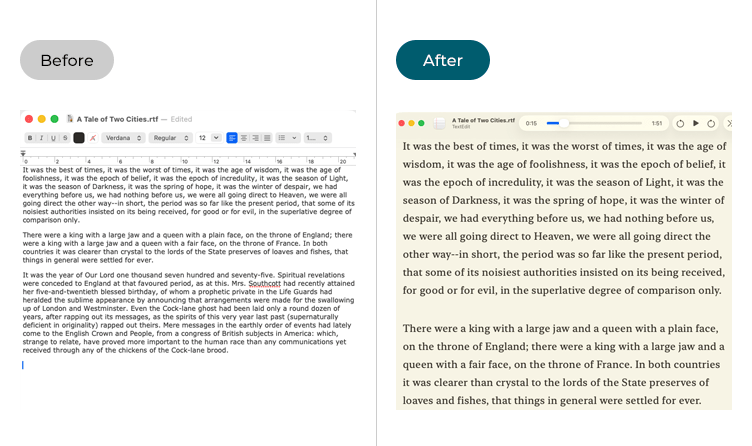
This section explains how to use the Accessibility Reader in macOS 26 Tahoe. This is a step-by-step guide with pictures of the screens to help.
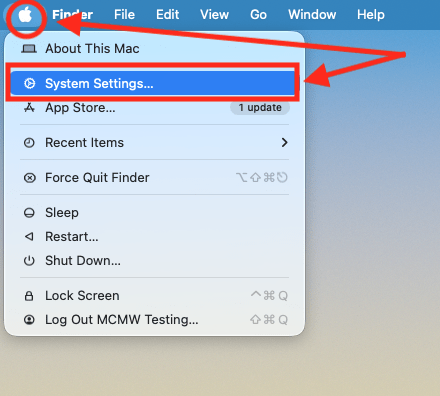
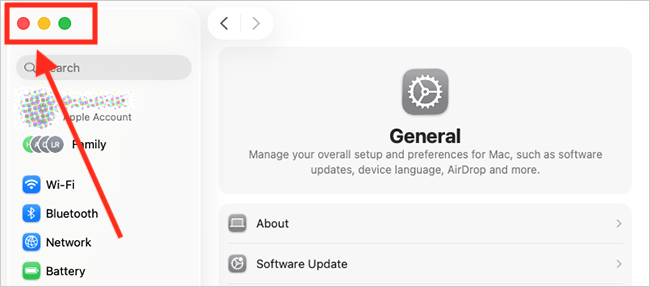
Open System Settings
1. Click the Apple icon ![]() in the top left corner of the screen and choose System Settings from the menu.
in the top left corner of the screen and choose System Settings from the menu.
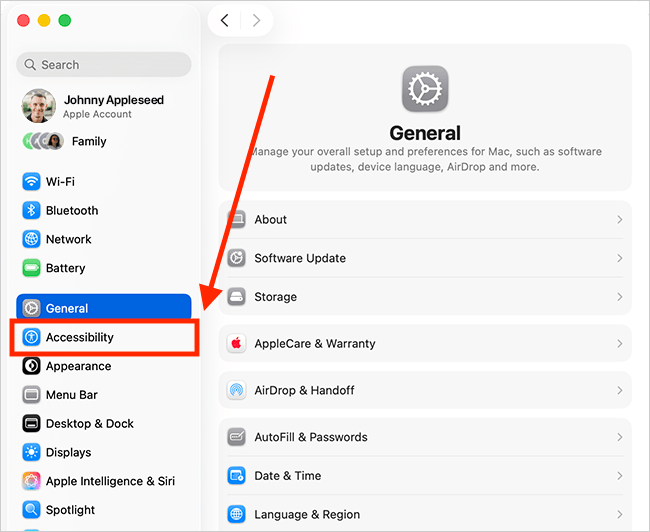
Open the Accessibility settings
2. In the System Settings window, click Accessibility in the sidebar.
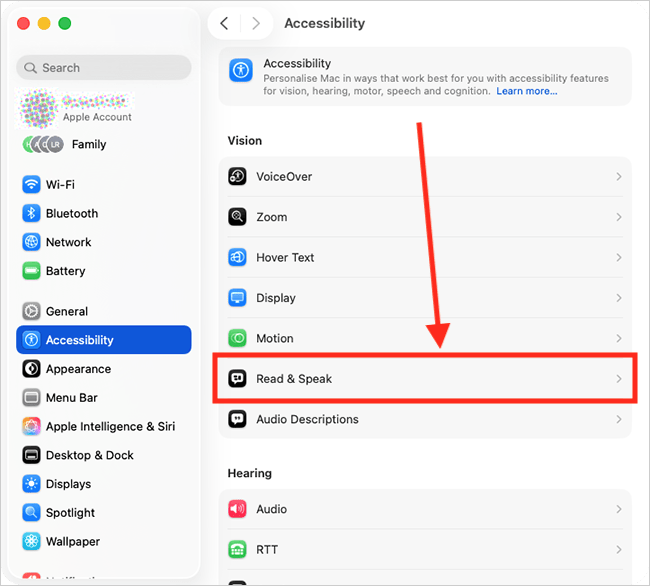
Open the Read & Speak settings
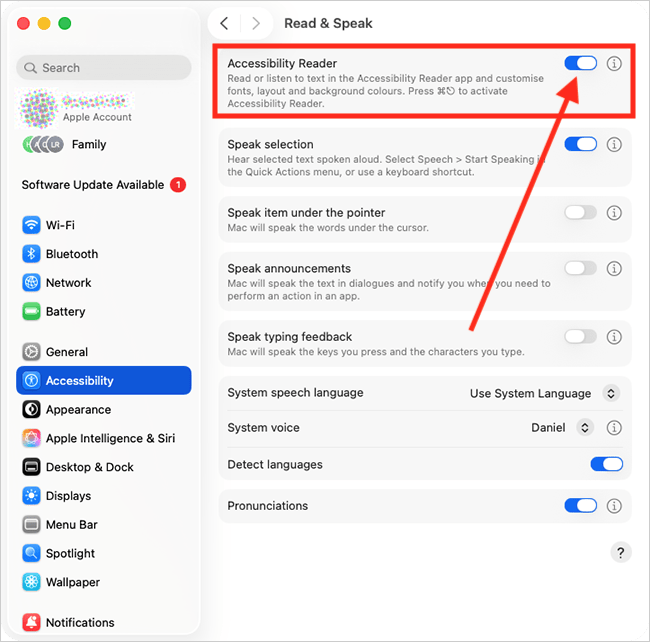
3. Select Read & Speak from the list of Accessibility options on the right.
Turn on the Accessibility Reader
4. On the Read & Speak page, click the toggle switch for Accessibility Reader to turn it on.
Close System Settings
5. When you are happy with your settings, close System Settings by clicking the Close button (red circle) in the top-left corner of the window or using the Cmd + W keyboard shortcut.
How to use the Accessibility Reader
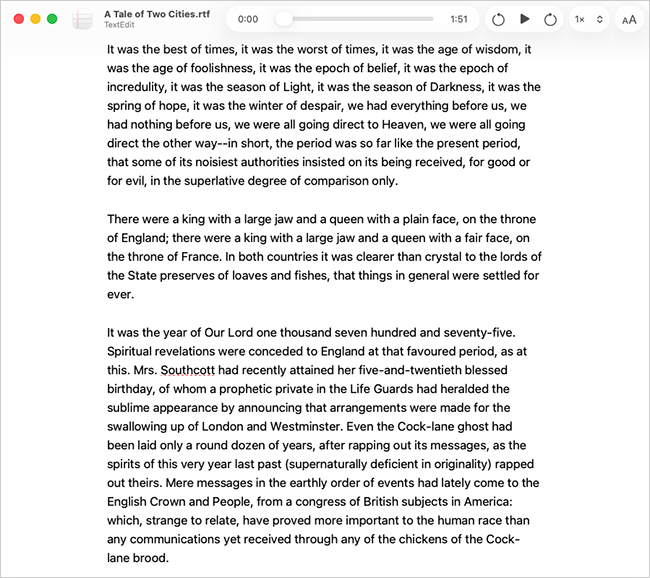
6. To use the Accessibility Reader, open an app that contains text you want to read. Then, press the Cmd (Command ⌘) and Esc (Escape ⎋) keys to open the text in the Accessibility Reader app.
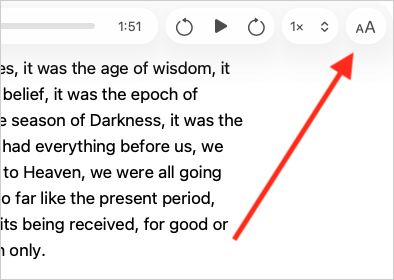
Customise how the text looks
7. To customise the appearance of the text, click the AA button in the top-right corner of the app window to show the Settings column.
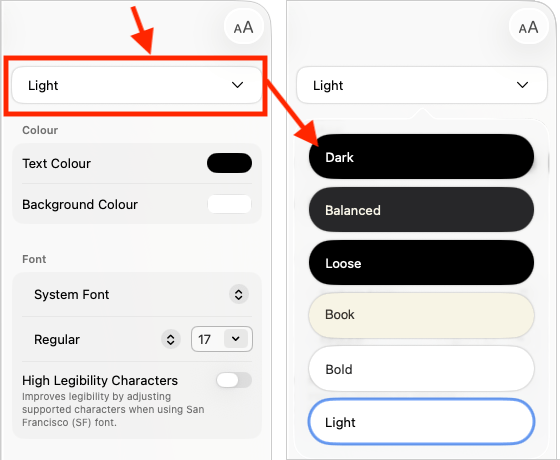
8. To help you get started, several predefined color schemes are available – all fully customisable to suit your preferences. Choose a scheme from the drop-down menu.
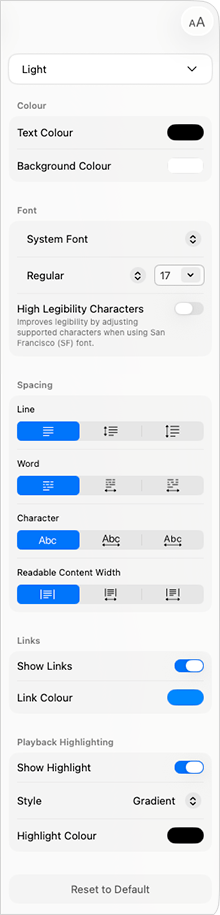
9. The table below lists the features you can customise within a scheme (also, see the screenshot below the table for reference).
| Feature |
Description | ||
Colour |
|||
| Text Colour |
Click the Text Colour swatch to choose a new text colour. | ||
| Background Colour |
Click the Background Colour swatch to choose a new background colour. | ||
Font |
|||
| Font |
Click the Font drop-down menu to choose the font that is most legible for reading. | ||
| Font Style |
Click the Font Style drop-down menu to choose the style that is most legible for reading — Regular, Bold. Italic, etc. | ||
| Font Size |
Click the Font Size drop-down menu to choose your preferred reading size. | ||
| Legibility |
(Only available when using the default system font (San Francisco). Improve the legibility of characters. Click the toggle switch for High Legibility Characters to turn this on. |
||
Spacing |
|||
| Line Spacing |
Change the space between lines of text by selecting one of the three spacing options. | ||
| Word Spacing |
Change the space between words by selecting one of the three spacing options. | ||
| Character Spacing |
Change the space between characters by selecting one of the three spacing options. | ||
| Readable Content Width |
Change the width of the text column by selecting one of the three content width options — a narrower column with fewer words per line is generally easier to read. | ||
Links |
|||
| Show Links | Links are visible by default. If you'd like to hide links, click the toggle switch for Show Links to turn it off. | ||
| Link Colour |
Click the Link Colour swatch to choose a new colour for links. | ||
Playback Highlighting |
|||
| Show Highlight |
Text is highlighted as it’s read aloud. To disable this, click the Show Highlight toggle switch. | ||
| Highlight Style |
Click the drop-down menu for Style to choose a new style for how text is highlighted as it's read aloud. You can choose from Gradient, Background, or Underline. | ||
| Highlight Colour |
Click the Highlight Colour swatch to choose a new colour for highlighting. | ||
Reset |
|||
| Reset to Default |
Reset the current scheme to its default values. | ||
10. When you are happy with your theme settings, click the AA button in the top-right corner of the app window to hide the Settings column.
Read the text aloud
11. To hear the text read aloud, click the Play button on the playback controls located along the top of the app window. The text will be highlighted as it's read, based on the settings you chose above.
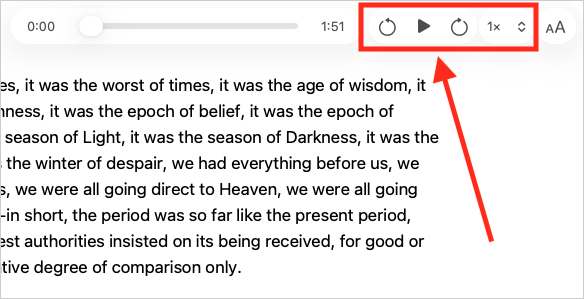
12. To skip forward or backward by 10 seconds, use the arrows on either side of the Play button. You can also use the slider next to the Play controls to navigate through the text.

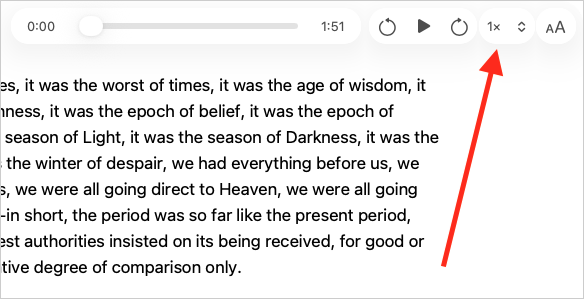
13. To change the playback speed, click the 1x button and select your preferred speed from the list.
Need some more help?
Call our helpline 0300 180 0028 or email enquiries@abilitynet.org.uk
Need free IT Support at Home?
If you are older or disabled and need IT support at home, you can book a free home visit.