Short guide:
- Press Ctrl and + (plus) to zoom in, Ctrl and – (minus) to zoom out, or Ctrl and 0 (zero) to return to the default size.
- Alternatively, click the Menu
 button in the top-right corner of the browser window, then use the + (plus) and – (minus) buttons to zoom in and zoom out of the page.
Click on the Zoom percentage indicator in the address bar to return to the default size. - Apple Mouse and Trackpad users can double-tap with one finger to zoom in and out.
- To change the default zoom level, click the Menu
 button, then click Settings.
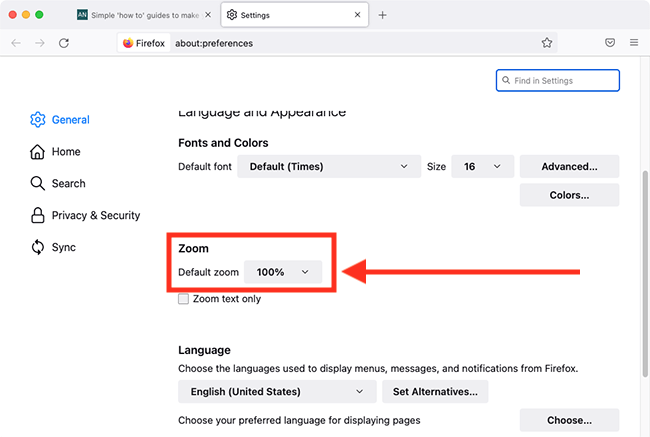
 - Scroll down to Language and Appearance and use the dropdown menu to increase the Default Zoom.
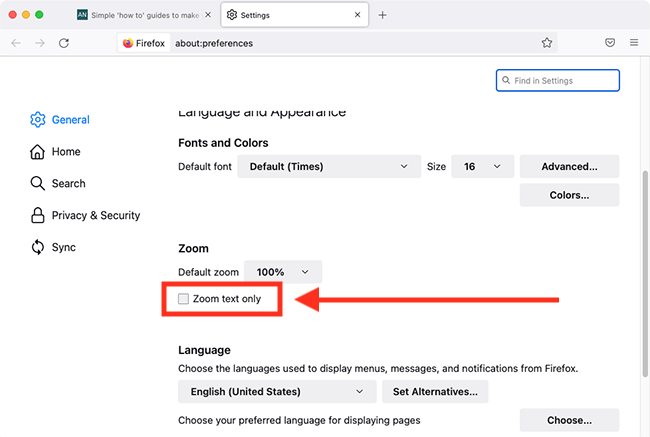
- Click the checkbox for Zoom text only to have the zoom apply solely to text.
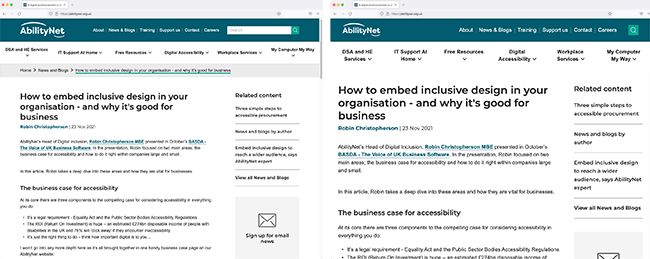
Before and after
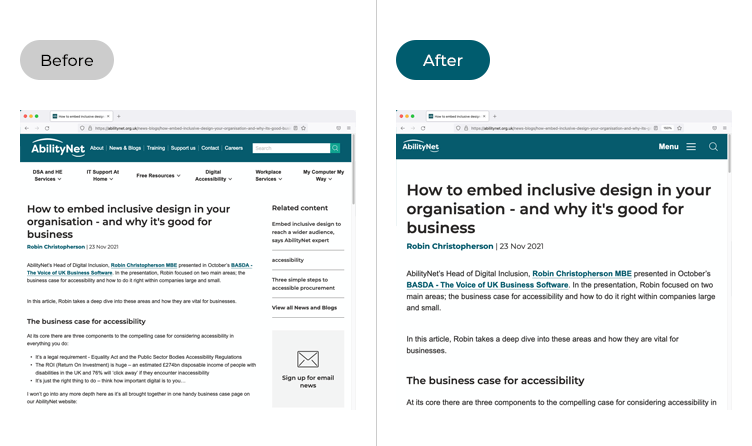
This section gives you step by step instructions on how to use the Zoom control to make text larger in the Firefox web browser in macOS 12 Monterey, with pictures of the screens to help.
Use the keyboard to zoom
1. The quickest and easiest way to use the Zoom control is through keyboard shortcuts. Press Ctrl and + (plus) while Firefox is active to zoom in. Press Ctrl and – (minus) to zoom out, or Ctrl and 0 (zero) to return to the default size.
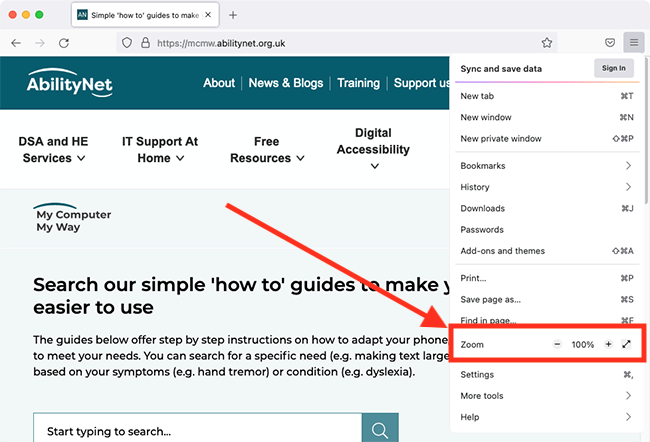
Find the Zoom control in the menu
2. You can also use the Zoom controls in the main Firefox menu. To find them, click the Menu ![]() button in the top-right corner of the Firefox window.
button in the top-right corner of the Firefox window.

Using the Zoom control
3. In the Zoom section, click the + (plus) button to increase the size of text and images. Click the – (minus) button to decrease the size of text and images. Press the Esc key to hide the menu when you’re finished.
Go back to the default zoom level
4. To quickly return to the default zoom level, click the percentage indication in the address bar.

Change the default Zoom level
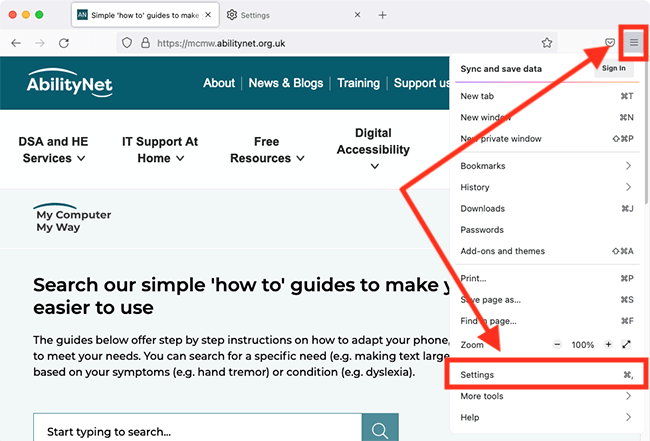
5. You can set a custom default zoom level, so that every webpage opens with text at a larger size when you launch the browser. Click on the Menu ![]() button in the top-right corner of the Firefox window, then select Settings.
button in the top-right corner of the Firefox window, then select Settings.
Set the level
6. Scroll down to the Zoom section and choose a new percentage from the drop-down menu for Default Zoom.
Only zoom text
7. Changing the default zoom level will also make images larger. If you only want text to be larger, tick the checkbox for Zoom text only.
Note: If this does not work it could be because your computer settings are managed by someone else (an IT department or administrator for example). If so, you will need to contact them to access these settings or for help.