Quick guide:
- Open the Ease of Access Center by pressing the Windows key, + U, or by opening the Charms Bar, clicking or tapping Search and entering Ease of Access. Select Ease of Access Center from the search results.
- Scroll down to Explore all settings and click Make the keyboard easier to use.
- Tick the checkbox next to Turn on Filter Keys.
- Click OK and close the Settings window.
Before and after
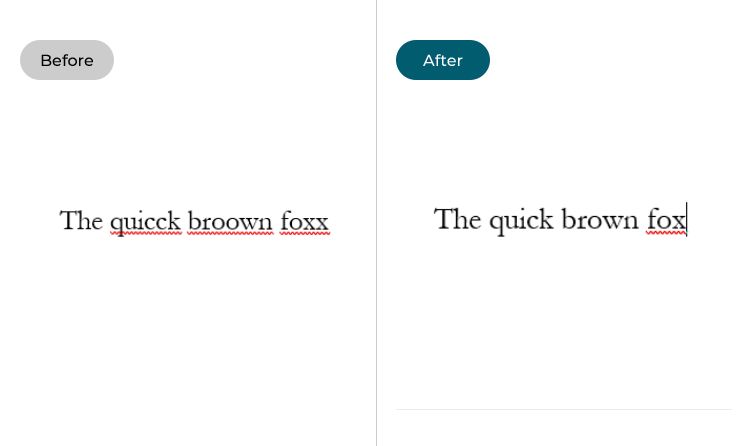
This section gives you step by step instructions on how to change your keyboard settings so that you can enable Filter Keys and prevent unwanted keystrokes. This is a step-by-step guide with pictures of the screens to help you.
Open the Ease of Access Center
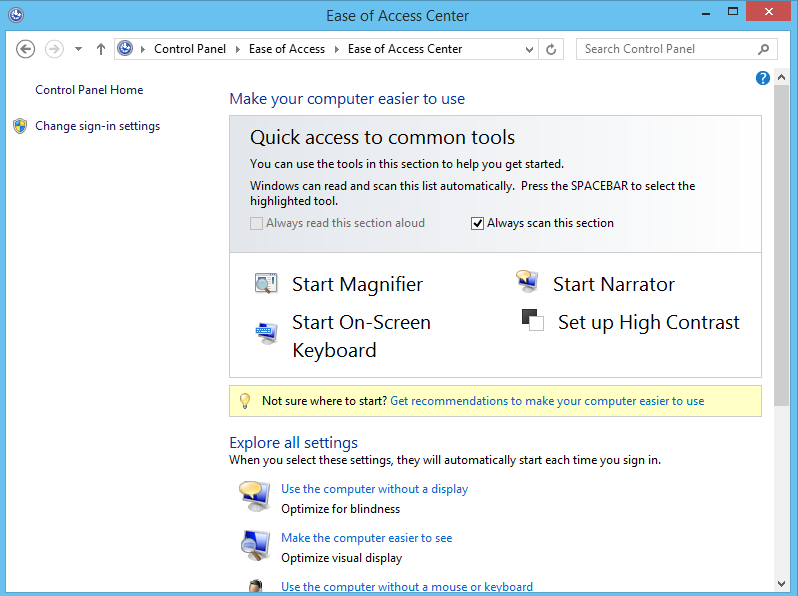
1. Open the Ease of Access Center by pressing the Windows key, ![]() + U, or by opening the Charms Bar, clicking or tapping Search and entering "Ease of Access". Select Ease of Access Center from the search results.
+ U, or by opening the Charms Bar, clicking or tapping Search and entering "Ease of Access". Select Ease of Access Center from the search results.
Click Make the keyboard easier to use
2. Scroll down to Explore all settings and click Make the keyboard easier to use.

Turn Filter Keys on
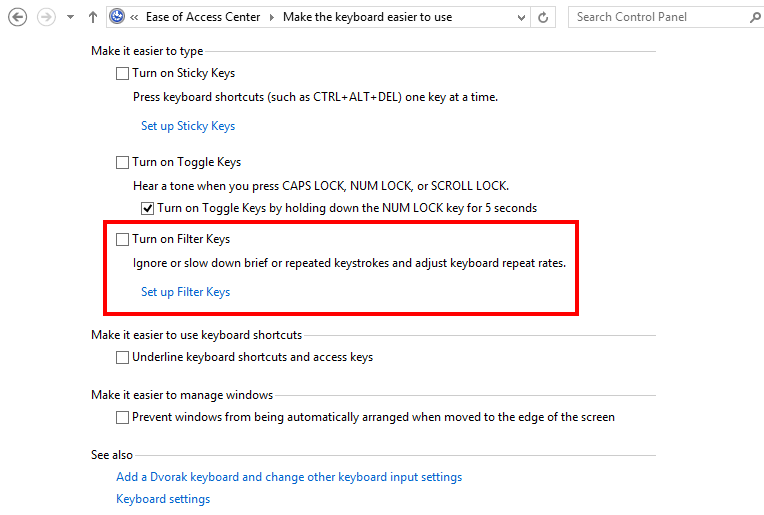
3. Tick the checkbox next to Turn on Filter Keys
Customising Filter Keys
4. To customise the Filter Keys, click on Set up Filter Keys

Turn on keyboard shortcuts, alerts and messages
5. Tick the checkbox under Keyboard shortcut to enable the right Shift keyboard shortcut. Pressing the right Shift key down for 8 seconds will now turn on Filter Keys. Tick the other checkboxes to enable a warning message or make a sound when Filter Keys is turned on or off.
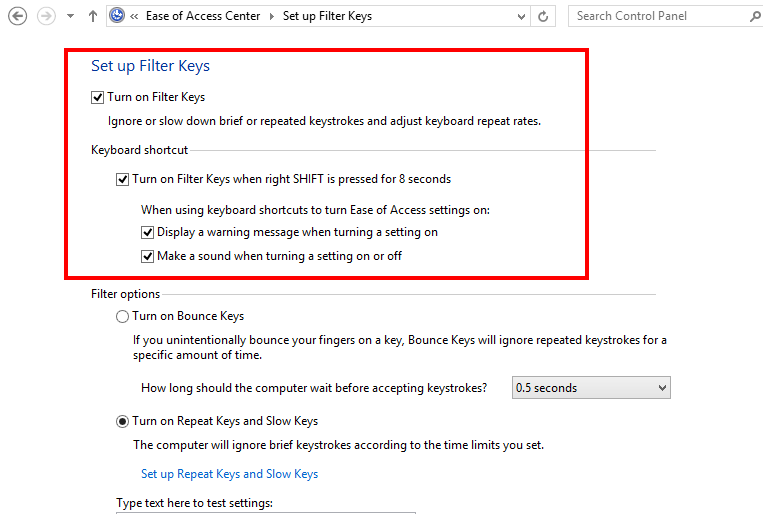
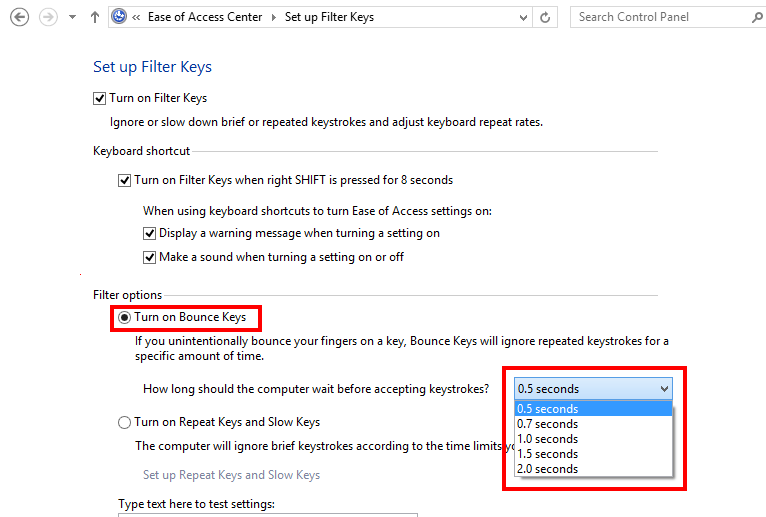
Turn on Bounce keys
6. The Bounce keys feature ignores repeated keystrokes caused when you accidentally bounce your fingers on a key. Click the button to turn it on, and use the drop-down menu next to How long should the computer wait before accepting keystrokes to set how long Windows waits before accepting a second keystroke.
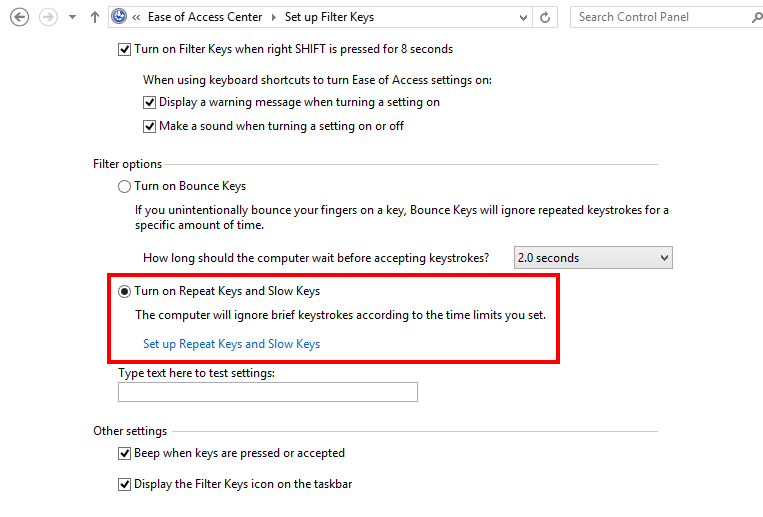
Turn on Repeat Keys and Slow Keys
7. The Repeat Keys and Slow Keys features tell Windows to ignore brief and accidental keystrokes. Click the button for Turn on Repeat Keys and Slow Keys to turn them on, or click Set up Repeat Keys and Slow Keys to change the settings.
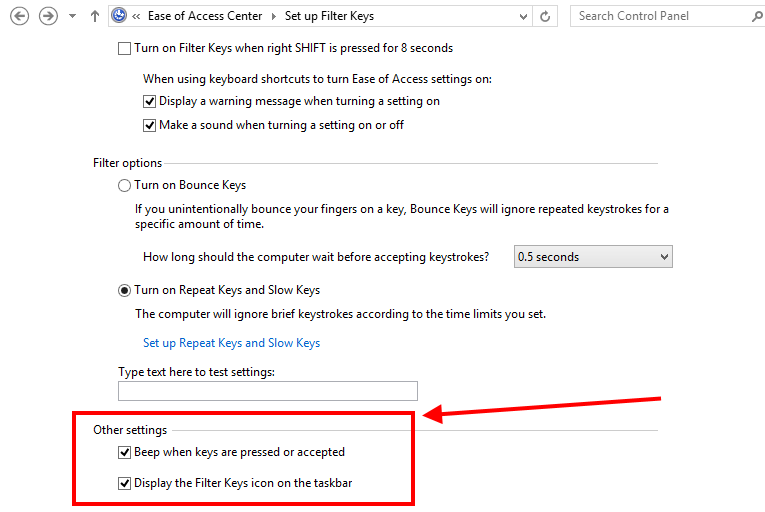
Enabling taskbar icons and sounds
8. Tick the checkbox next to Display the Filter Keys icon on the taskbar if you want a visual reminder that Filter Keys is turned on. You can also tick the checkbox next to Beep when keys are pressed or accepted to get a sound every time that Windows recognises a keystroke. When you're finished, click OK.
Note: If this does not work it could be because your computer settings are managed by someone else (an IT department or administrator for example) in which case you will need to contact them to access these settings or for further help.
Need some more help?
Call our helpline 0300 180 0028 or email enquiries@abilitynet.org.uk
Need free IT Support at Home?
If you are older or disabled and need IT support at home, you can book a free home visit.