Call our helpline
0300 180 0028Short guide:
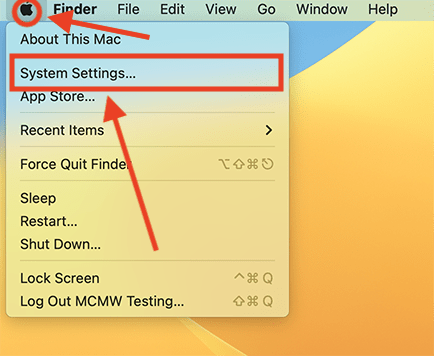
- Click the Apple icon
 in the top left corner of the screen and select System Settings.
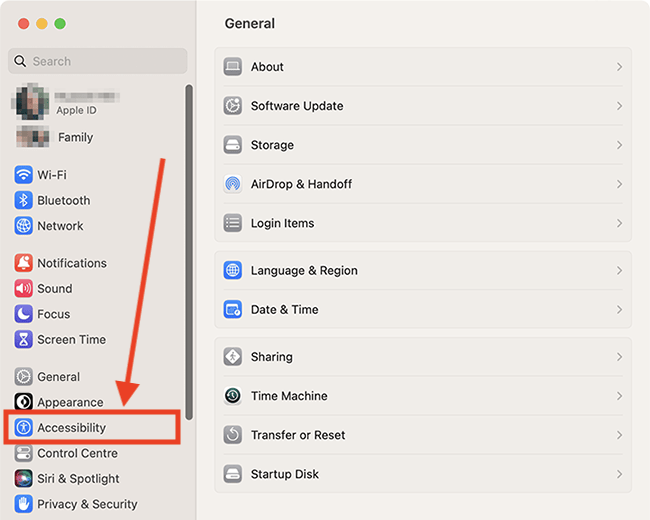
 - Click Accessibility in the sidebar.
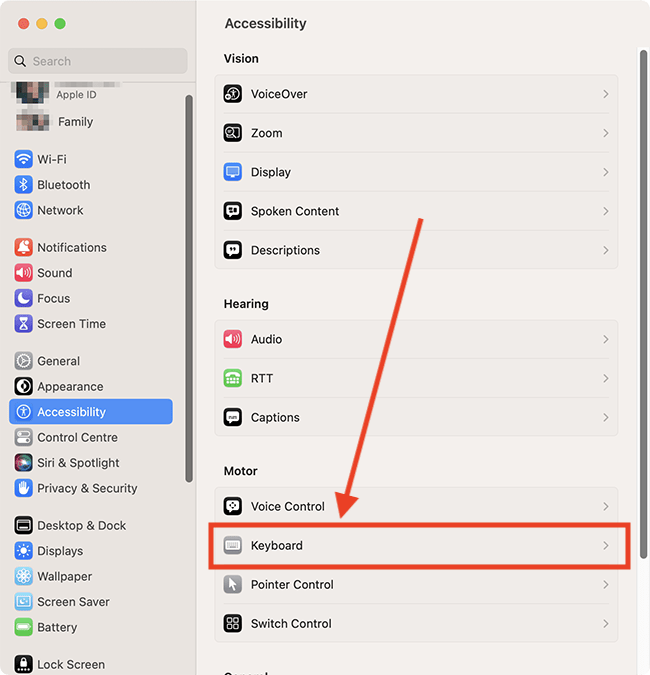
- Select Keyboard from the list of Accessibilty options.
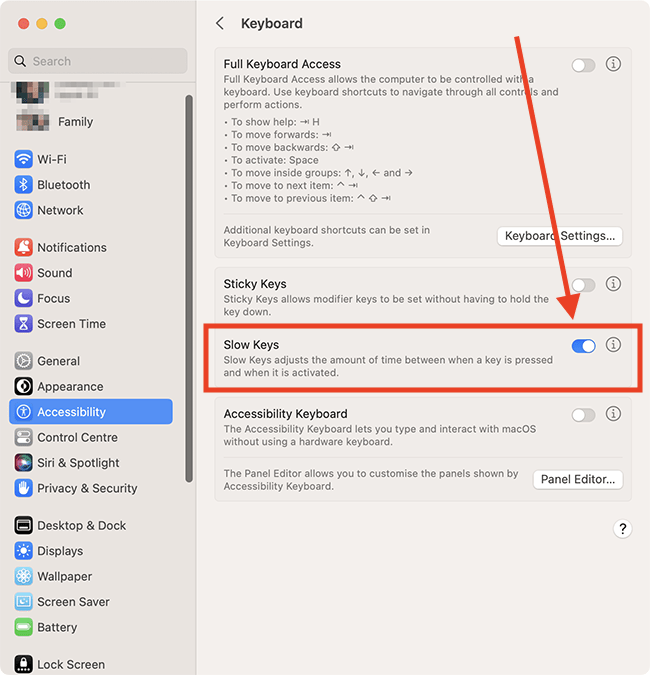
- Click the toggle switch for Slow Keys to turn it on.
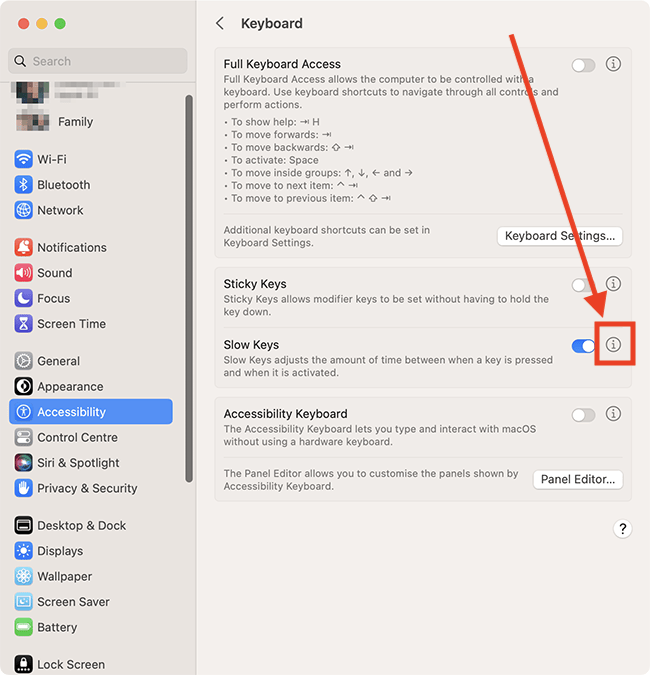
- Click the i button
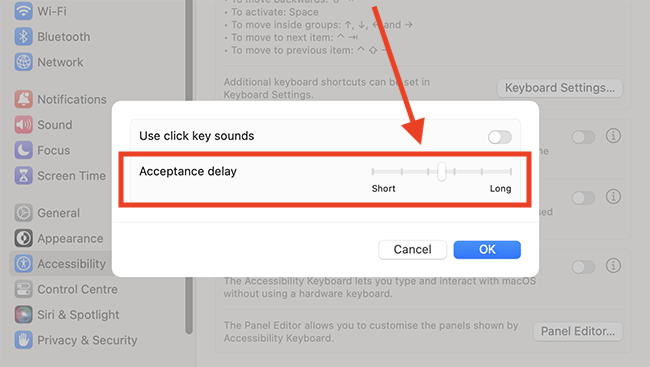
 next to the toggle switch, then use the adjust for Acceptance Delay to change the delay time.
Before and after
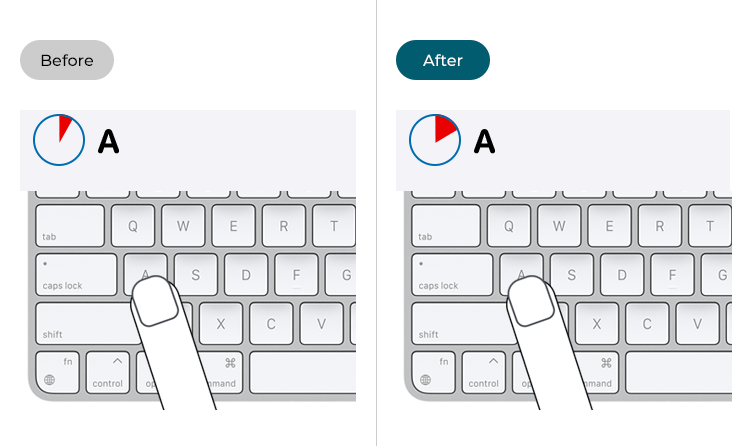
This section gives you step by step instructions on how to enable Slow Keys in macOS 13 Ventura, with pictures of the screens to help.
Open System Settings
1. Click the Apple icon ![]() in the top left corner of the screen and choose System Settings from the menu.
in the top left corner of the screen and choose System Settings from the menu.
Open the Accessibility settings
2. In the System Settings window, click Accessibility in the sidebar.
Find the Keyboard settings
3. Select Keyboard from the list of Accessibilty options on the right.
Enable Slow Keys
4. On the Keyboard page, click the toggle switch for Slow Keys to turn it on.
Customise Slow Keys
5. Click the i (show detail) button ![]() next to the toggle switch.
next to the toggle switch.
Change the key delay time
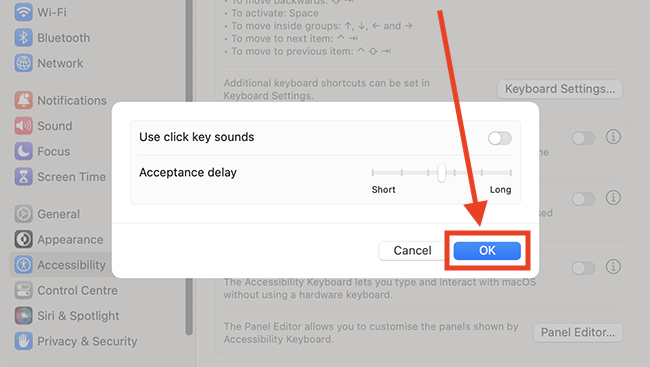
6. Adjust the slider for Acceptance Delay to change the amount of time between when a key is pressed and when a character is entered.
Hear a sound when a key is pressed
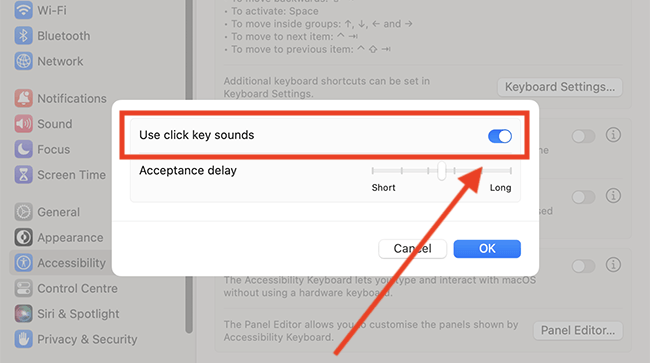
7. To hear a sound when a key is first pressed and again when the character is entered, tick the checkbox for Use click key sounds.
Save your changes
8. Click OK to save your changes
Close System Settings
9. When you are happy with your settings, close System Settings by clicking the Close button (red circle) in the top-left corner of the window or using the Cmd + W keyboard shortcut.
Note: If this does not work it could be because your computer settings are managed by someone else (an IT department or administrator for example). If so, you will need to contact them to access these settings or for help.