Short guide:
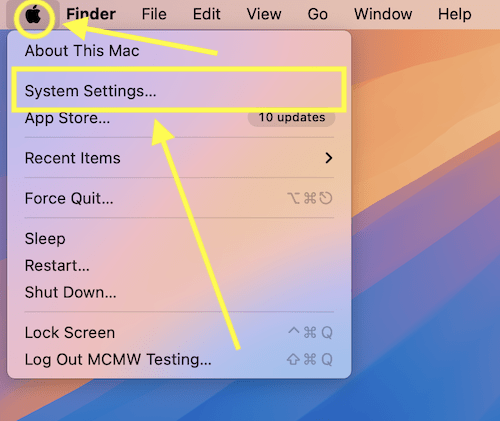
- Click the Apple icon
 in the top left corner of the screen and select System Settings.
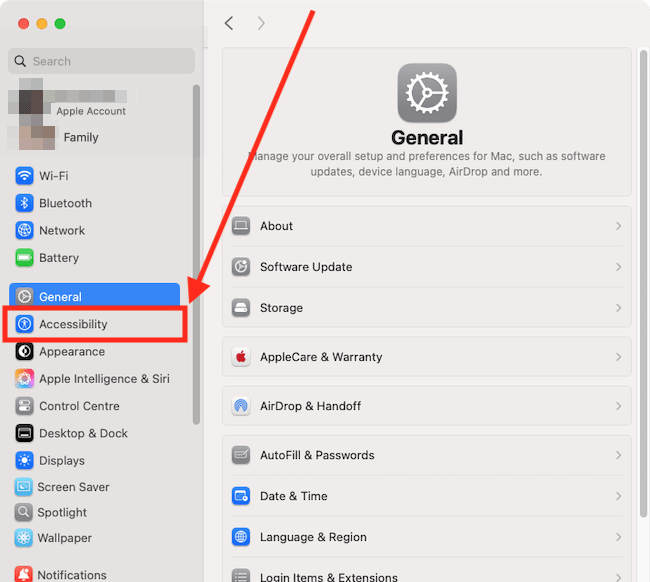
 - Click Accessibility in the sidebar.
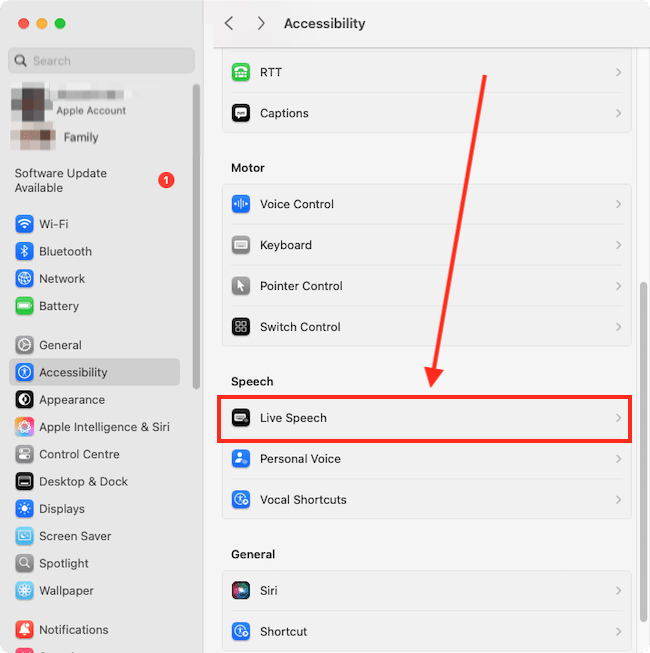
- Select Live Speech from the list of Accessibility options.
- Tap the toggle switch for Live Speech to turn it on.
- The Live Speech window will appear onscreen. Type phrases into the text box, then click the play button to have them spoken.
Before and after
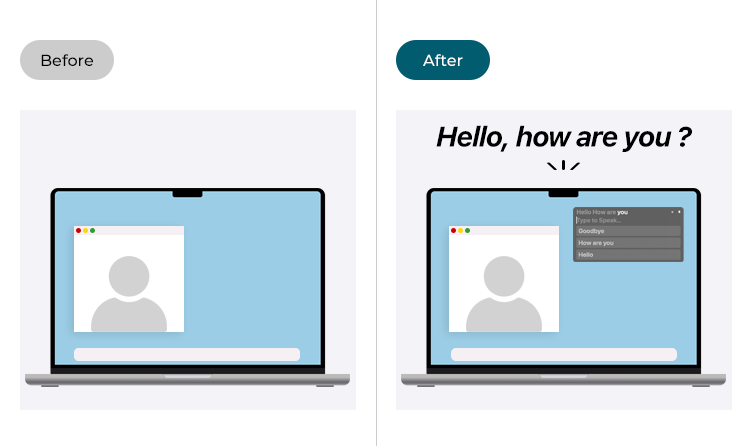
This section gives you step by step instructions on how to use Live Speech in macOS 15 Sequoia, with pictures of the screens to help.
Open System Settings
1. Click the Apple icon ![]() in the top left corner of the screen and choose System Settings from the menu.
in the top left corner of the screen and choose System Settings from the menu.
Open the Accessibility settings
2. In the System Settings window, click Accessibility in the sidebar.
Find the Live Speech settings
3. Select Live Speech from the list of Accessibility options on the right.
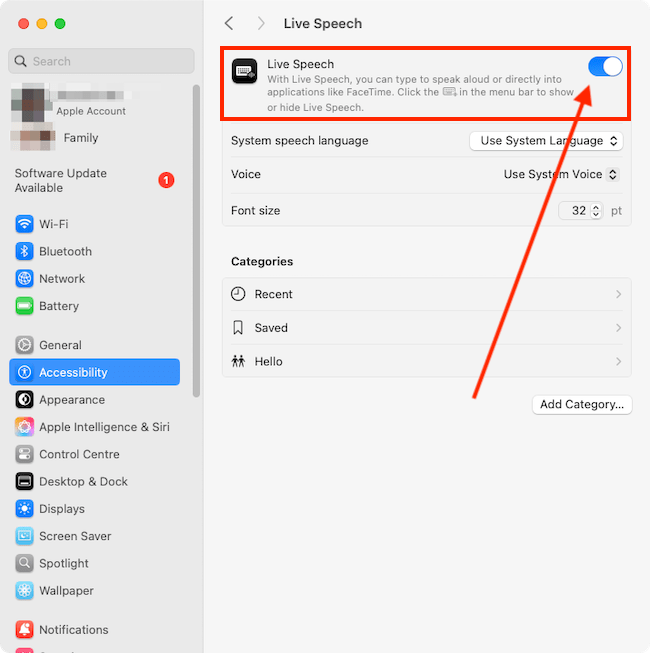
Turn on Live Speech
4. Tap the toggle switch for Live Speech to turn it on.
5. The Live Speech window will appear on the screen. You can click and drag the window to move it to a different position.

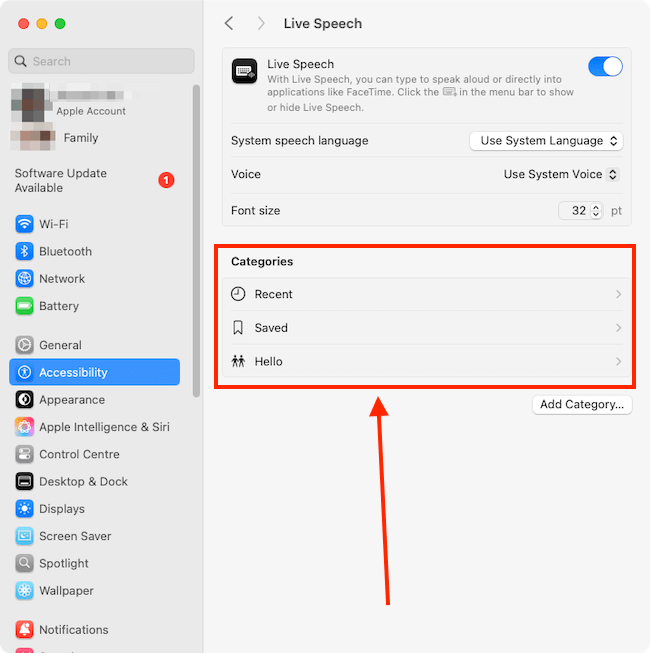
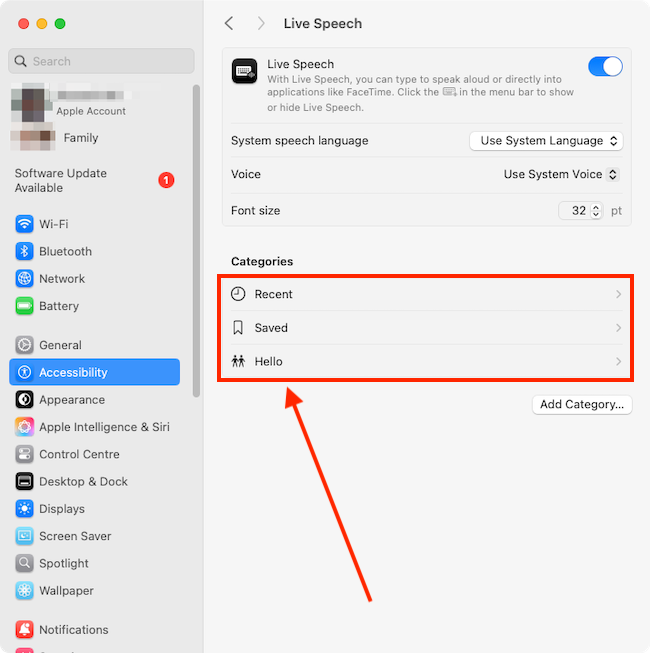
Creating lists of phrases
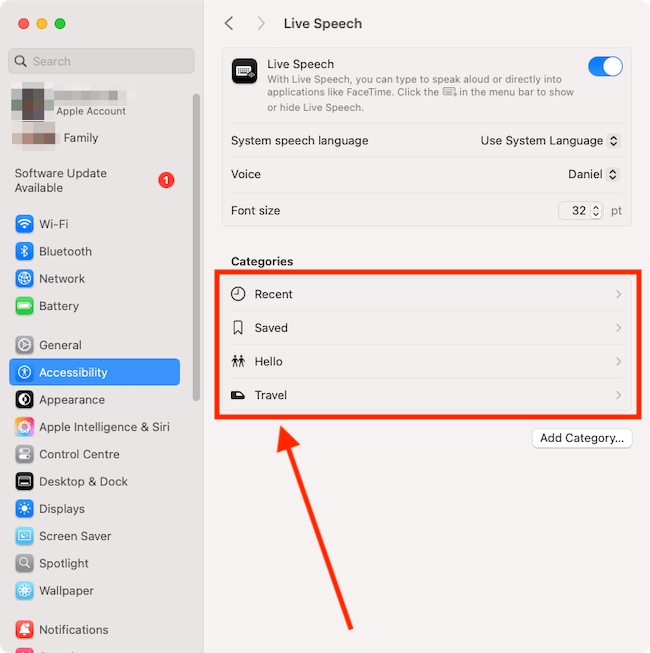
6. You can create a list of frequently used phrases to save you from having to type them each time. Phrases are grouped into categories to make them easier to access when using Live Speech.
Live Speech has two default categories - Recent and Saved. The Recent category stores phrases you have typed while using Live Speech. Saved is where you can create pre-written phrases to use later.
You can add more of your own categories. There is an example category called Hello to get you started. This can be renamed or deleted if you don't need it. We will cover that later in this guide.
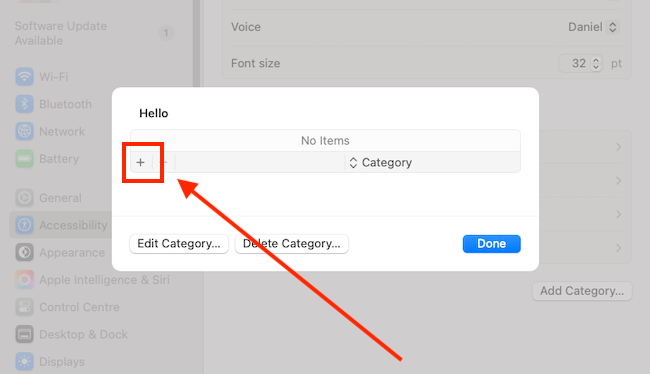
Add a new phrase to an existing category
7. To add a new phrase to an existing category, click the category name.
Note: Phrases you add are synced to all the devices you are logged in to with the same Apple ID.
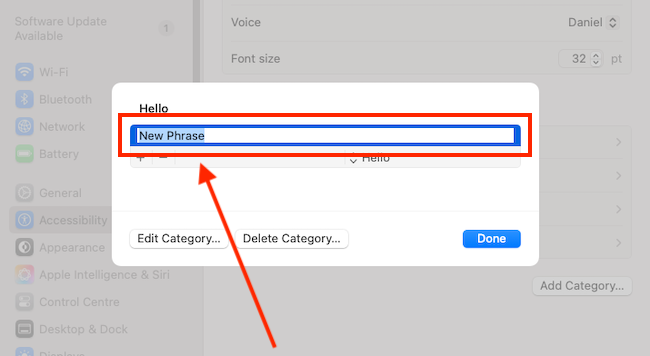
8. In the pop-up window, click the + (plus) button.
9. Type your new phrase in the box that appears. Click the + (plus) button again if you want to add another phrase.
10. To delete a phrase, click it to highlight it, then click the – (minus) button.
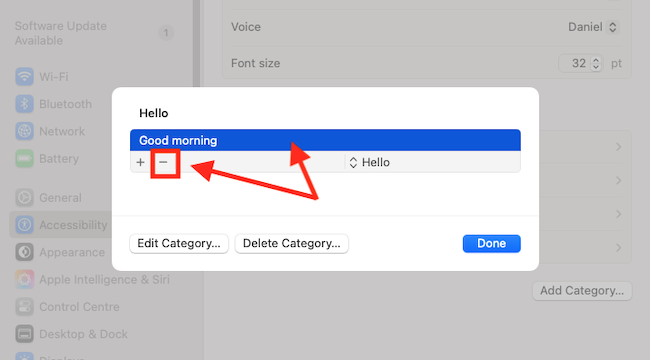
11. When you have finished adding phrases, click the Done button.

How to add a new phrase category
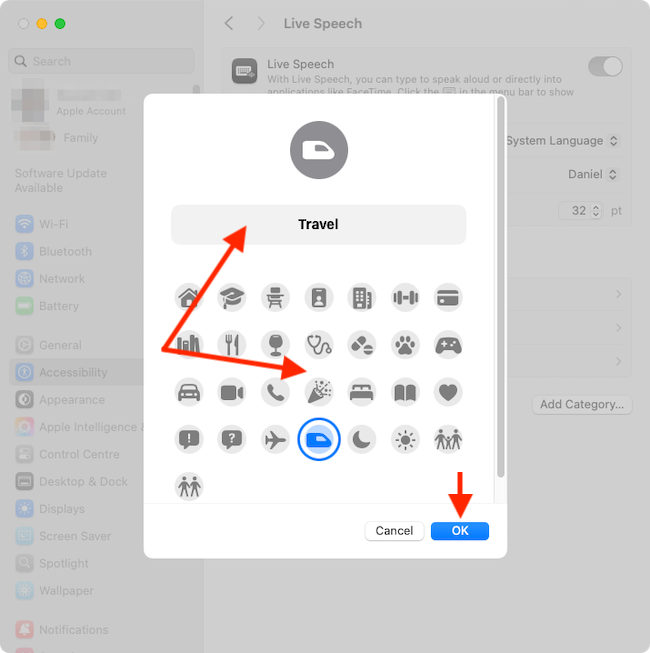
12. To add a new category, click the Add Category button.

13. Give the category a name, then select a symbol to represent it. Click the OK button to save your new category.
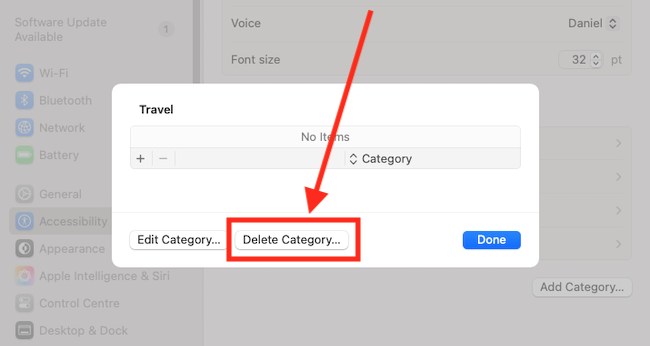
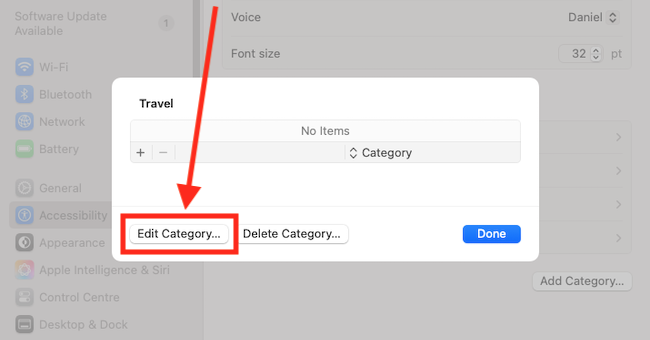
How to edit or delete a category
14. Click the category you want to edit or delete.
Delete a category
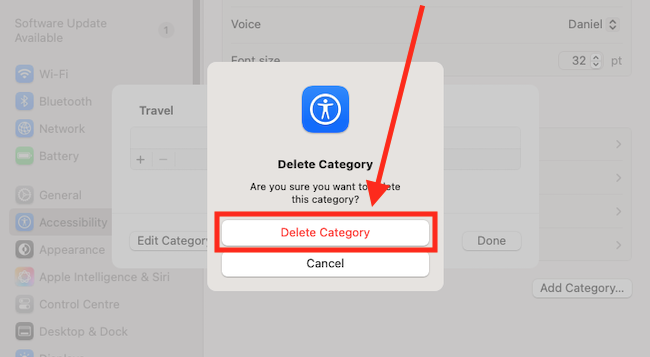
15. To delete the category, click the Delete Category button. Note: If the category contains phrases, the phrases will also be deleted. You cannot edit or delete the Recent or Saved categories but you can delete individual phrases saved in those categories.
16. On the pop-up window, click Delete Category to confirm.
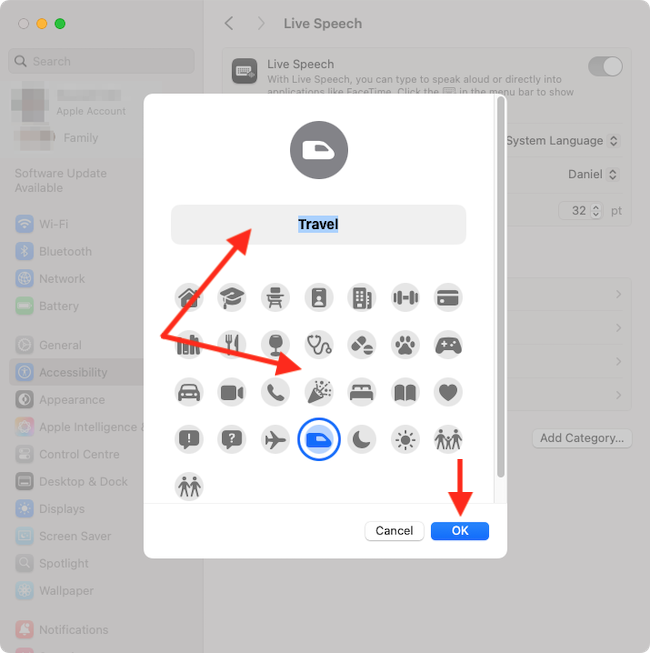
Edit a category
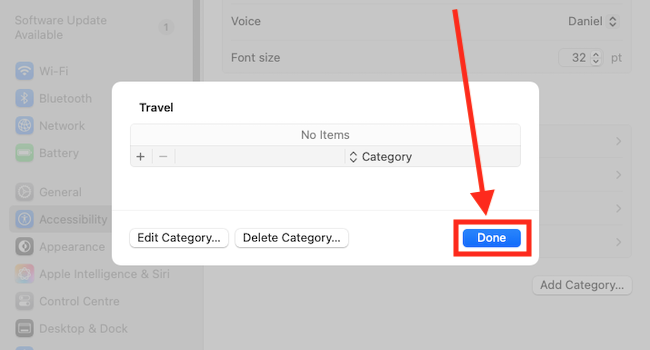
17. To edit a category, click the Edit Category button.
18. On the next page, you can rename the category and change the symbol that represents it. Click the OK button to save your changes.
19. Click the Done button when you've finished.
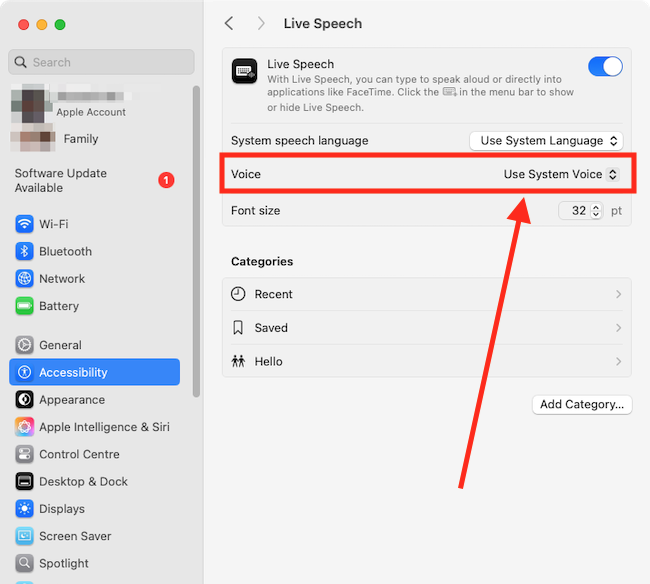
Choose a voice to use for speaking your phrases
20. To choose a different voice for Live Speech, click the drop-down me for Voice, then choose a new voice from the list.
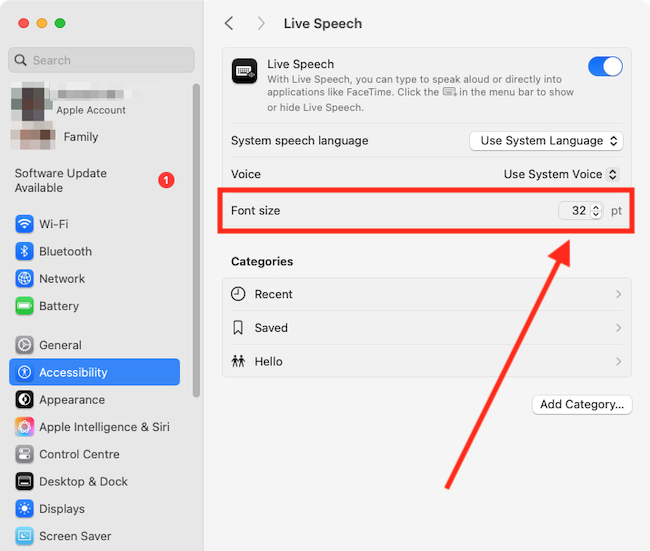
Change the font size for the Live Speech box
21. To change the size of the text in the Live Speech box, adjust the point size for Font Size.
Close System Settings
22. When you are happy with your settings, close System Settings by clicking the Close button (red circle) in the top-left corner of the window or using the Cmd + W keyboard shortcut.
Using Live Speech
23. To type a new phrase to have spoken, click on the Live Speech window where it says "Type to speak…". Type your phrase, then click the play button.

24. To use a saved phrase, click the category box.

25. Next, select the category that contains the phrase you want to speak.
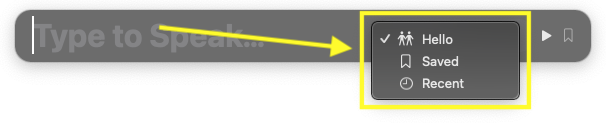
26. Next, click the ribbon icon to show the phrase for that category.

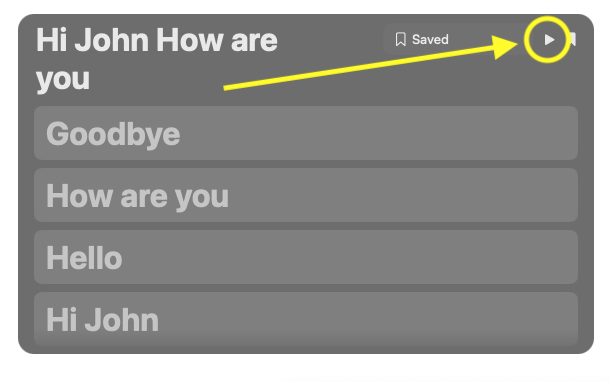
27. Select a phrase, then click the play button to have it spoken. Note: You can select multiple phrases.
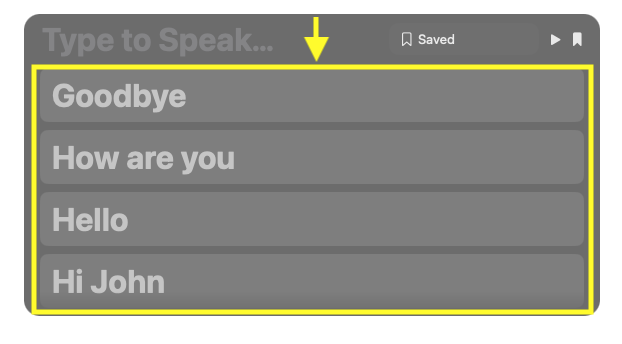
28. Finally, click the play button to have your phrase/s spoken one after the other.
Hide the Live Speech window
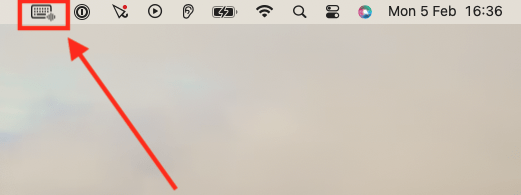
29. To hide the Live Speech window, click the Live Speech keyboard icon in the menu bar at the top of the screen, on the right. To show the Live Speech window, click the icon again.
Note: If this does not work it could be because your computer settings are managed by someone else (an IT department or administrator for example). If so, you will need to contact them to access these settings or for help.
Need some more help?
Call our helpline 0300 180 0028 or email enquiries@abilitynet.org.uk
Need free IT Support at Home?
If you are older or disabled and need IT support at home, you can book a free home visit.