Call our helpline
0300 180 0028 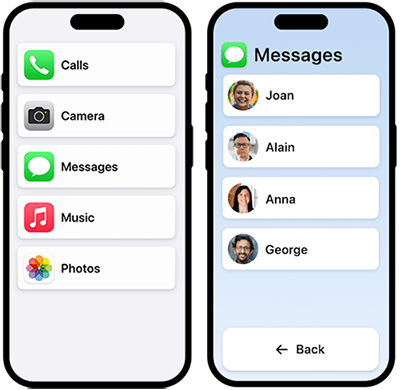
Once set up, you can add Assistive Access to the Accessibility Shortcut. You can then start Assistive Access by triple-clicking the Side button. For more information about using the Accessibility Shortcut, see our guide How to use the Accessibility Shortcut in iOS 18 for iPhone or iPad.
Short guide:
- Open the Settings app
 and tap Accessibility.
 - Scroll to the bottom of the Accessibility page and select Assistive Access.
- Tap Set Up Assistive Access
- The Assistive Access assistant will guide you through the set-up process. The set-up process covers choosing how apps and text are displayed, which apps to use, and setting a passcode to turn Assistive Access on or off..
Before and after
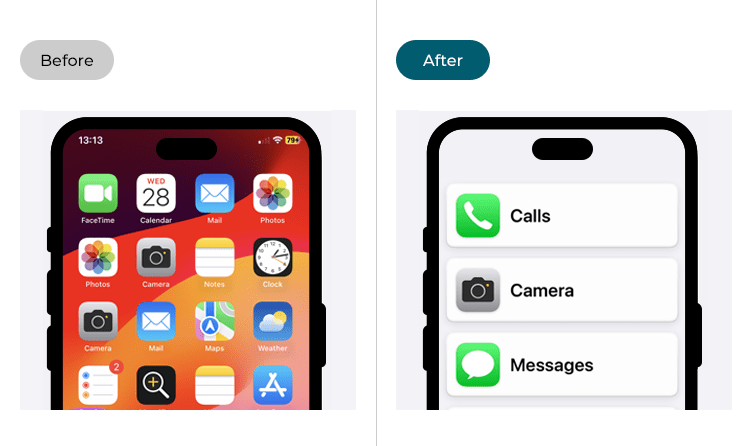
This section gives you step by step instructions on how to enable and configure Assistive Access in iOS 18, with pictures of the screens to help.
Open the Accessibility settings
1. Tap the Settings icon to launch the Settings app. Scroll down and select Accessibility from the list.
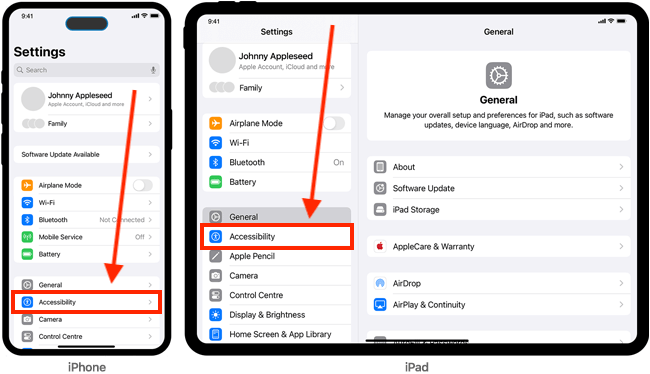
Find the Assistive Access settings
2. On the Accessibility screen, scroll down to the General section at the bottom of the page and tap Assistive Access.
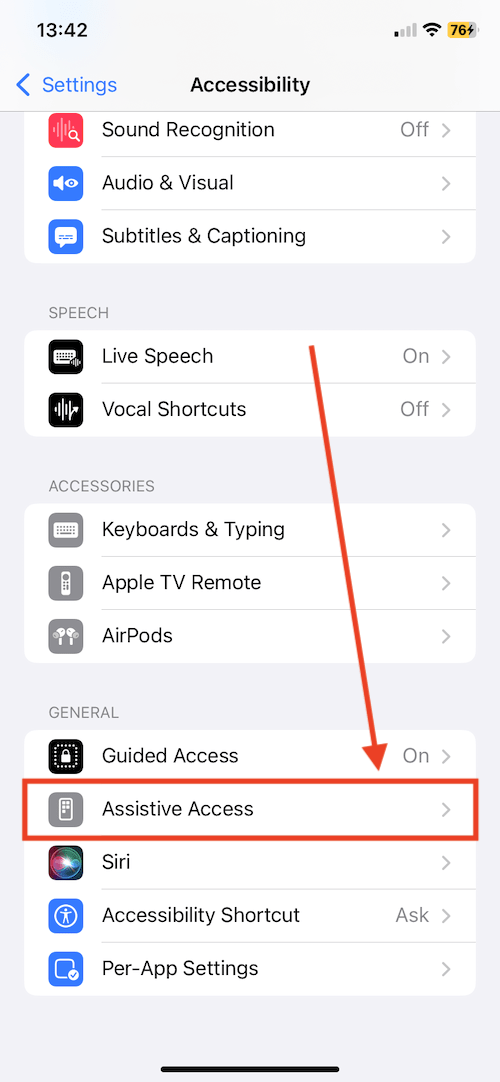
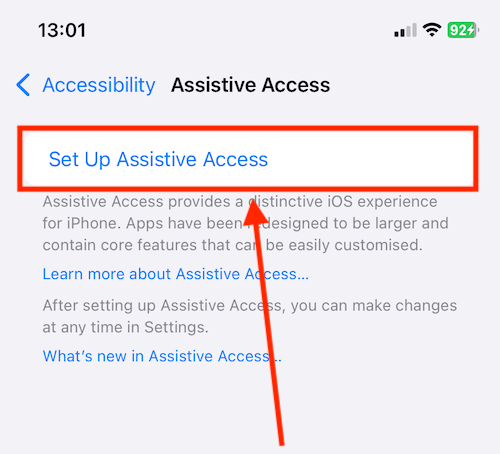
Set Up Assistive Access
3. The first time you use Assistive Access, you will be guided through the set-up process. The set-up process covers choosing how apps and text are displayed, which apps to use, and setting a passcode to turn Assistive Access on or off. Tap Set Up Assistive Access to begin.
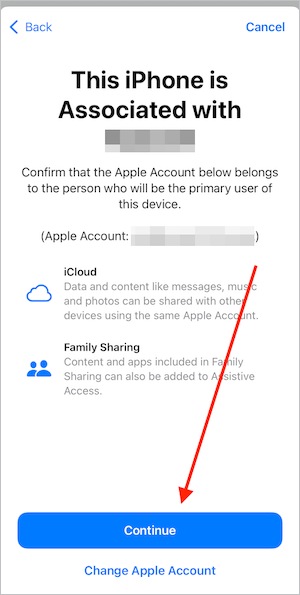
4. On the next page, tap the Continue button.

Choose which Apple account to use with Assistive Touch
5. Assistive Touch assumes the Apple account associated with this device belongs to the person who is going to use Assistive Touch. If a different user is going to use Assistive Touch, tap the Change Apple Account link at the bottom of the screen. On the next page, enter the user's Apple ID username and password. Otherwise, tap the Continue button.
Choose how to display app icons on the Home screen of apps
6. In Assistive Access, app icons are much bigger, with large text labels and a white border. This makes them easier to distinguish and tap. The icons can be displayed in rows or side-by-side in a grid formation. Tap Rows or Grids to choose, then tap the Continue button.

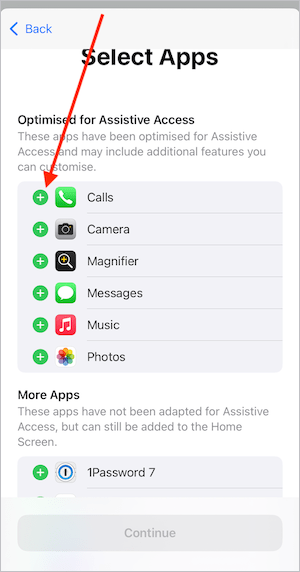
Choose which apps to use with Assistive Access
7. At the time of writing, only a few of the default iPhone/iPad apps are optimised for Assistive Access. These are Calls, Camera, Magnifier, Messages, Music, and Photos. You can use other apps with Assistive Access but they may not work quite as expected. Tap on the + (plus) button next to an app to add it to Assistive Access.
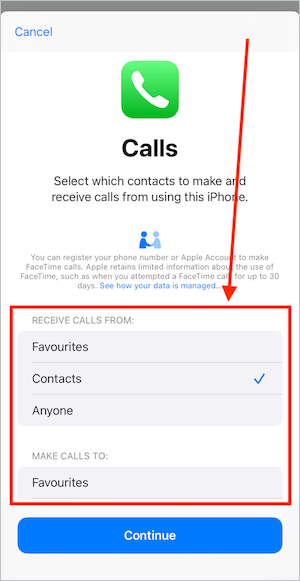
Customise the features when adding optimised apps
8. When you add an optimised app to Assistive Touch, you'll see a page showing the customisation options for that app. For instance, the Calls app (see screenshot below) allows you to set who the user can receive calls from and who they can make calls to. When done, tap Continue.
9. When you have selected all the apps you want to include, tap the Continue button at the bottom of the screen.
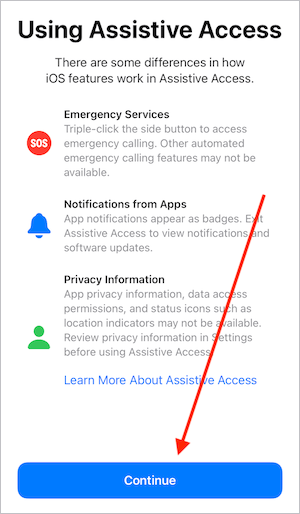
10. The next page details some of the differences you can expect when using Assistive Access compared to the regular iOS interface. Click the Continue button.
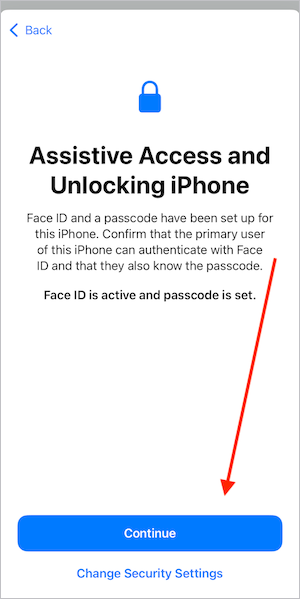
Using Face ID and a passcode with Assistive Access
11. Face ID and a passcode have been set for the primary user of this iPhone. If you need to change the security details, tap the Change Security Settings link. Follow the onscreen prompts to add new details. Otherwise, tap the Continue button.
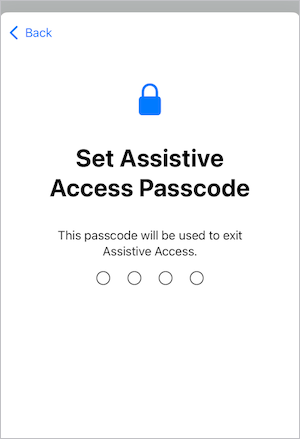
Set a passcode to use when starting and exiting Assistive Access
12. On the next screen, add a passcode to use when starting or exiting Assistive Access. Then confirm the passcode.
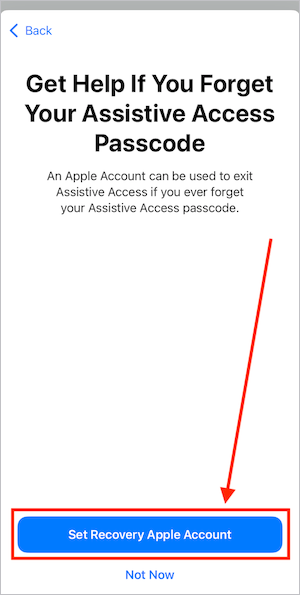
Set up a recovery Apple ID
13. If the user forgets their Assistive Access passcode, a different Apple account can be used to exit Assistive Touch. To set this up, tap Set Recovery Apple Account. Enter the email or phone number associated with another Apple account. Enter the password associated with that account when prompted. If you don't want to add a recovery Apple ID, tap Not Now.
Assistive Touch information
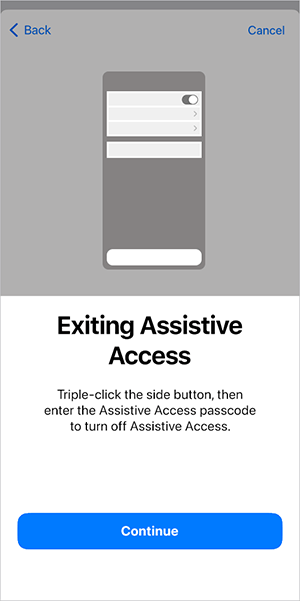
14. The next page details how to exit* Assistive Access. Tap the Continue button.
*The steps to exit Assistive Access are as follows: Triple-click the side button, then enter the Assistive Access passcode you set up in step 12.
Start using Assistive Access
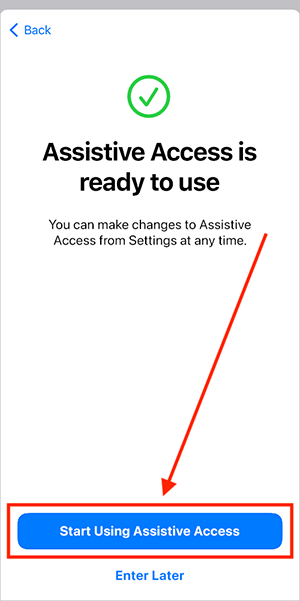
15. To begin using Assistive Access, tap the Start Using Assistive Access button. If you don't want to start Assistive Access right away, tap Enter Later. This will return you to the Assistive Access settings page.
Note: To turn on Assistive Access at other times, triple-click the Side button*, then enter the Assistive Access passcode. *If you have set up other accessibility features that use the triple-click shortcut, select Assistive Access from the list.
The Assistive Access interface
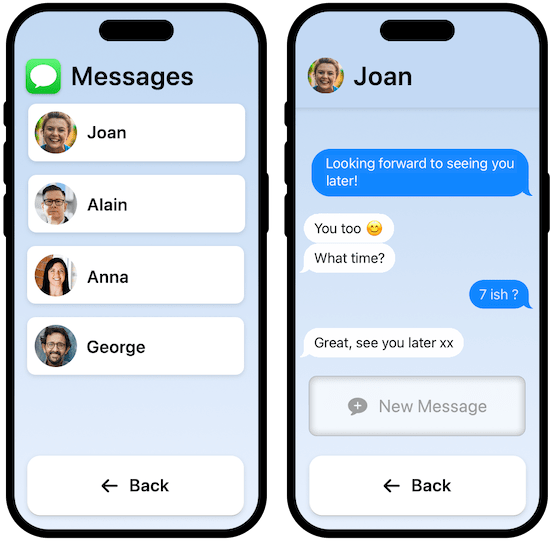
16. Depending on which method you chose for displaying apps and text (see step 6 above), apps will appear in rows or a grid formation. Tap an app to start using it.

17. Items you can tap will have large buttons. Pages will have a large Back button at the bottom of the screen.
Changing system settings from within Assistive Access
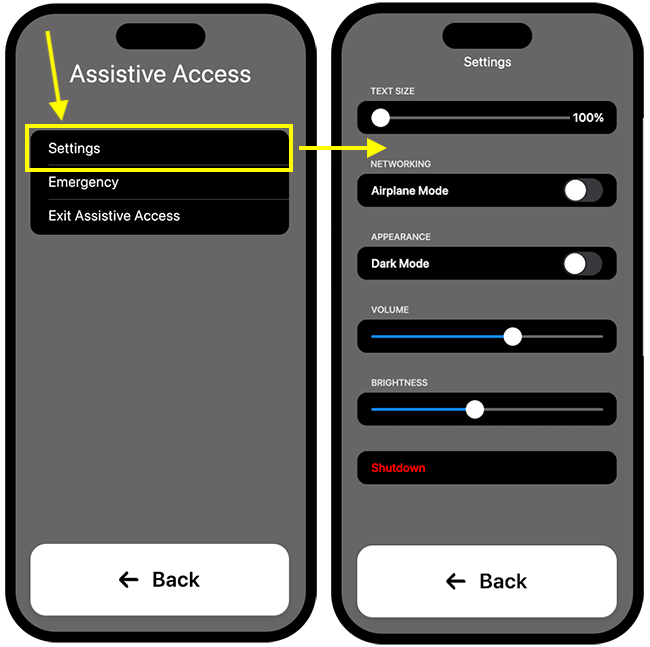
18. There are several system settings you can change in Assistive Access. The settings you can change are:
- Text Size
- Turn Airplane Mode on or off
- Turn Dark Mode on or off
- Adjust the Volume level
- Adjust the screen Brightness
- You can also Shutdown the device from this settings page
To access these settings, triple-click the Side button. Tap Settings, then enter the Assistive Access passcode.
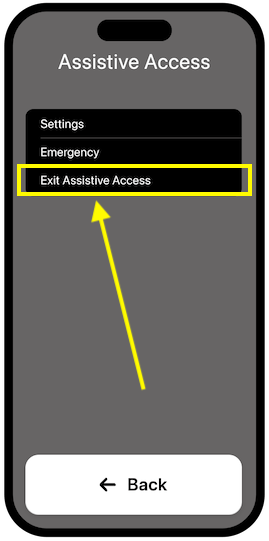
Exiting Assistive Access
19. To exit Assistive Access, triple-click the Side button. Tap Exit Assistive Access, then enter the Assistive Access passcode.
Assistive Access settings
20. After you have set up Assistive Access, you can tweak how Assistive Access looks and works. To open the Assistive Access settings page, tap the Settings icon on your Home screen of apps > then choose Accessibility > then scroll down to the bottom of the page and tap Assistive Access (see steps 1-2, above).
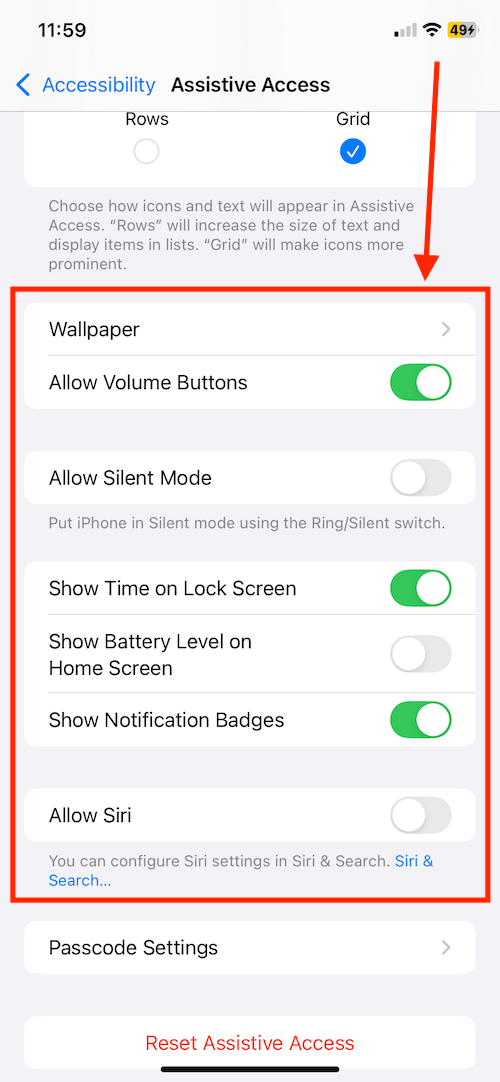
You can change which apps to use with Assistive Access and how apps and text are displayed (as covered in steps 6 + 7 above). You can also choose some other features to use while using Assistive Access.
The features you can choose to use are:
- Wallpaper
- Allow Volume Buttons
- Allow Silent Mode
- Show Time on Lock Screen
- Show Battery Level on Home Screen
- Show Notification Badges
- Allow Siri
Turn the toggle switches on or off, depending on your preferences.
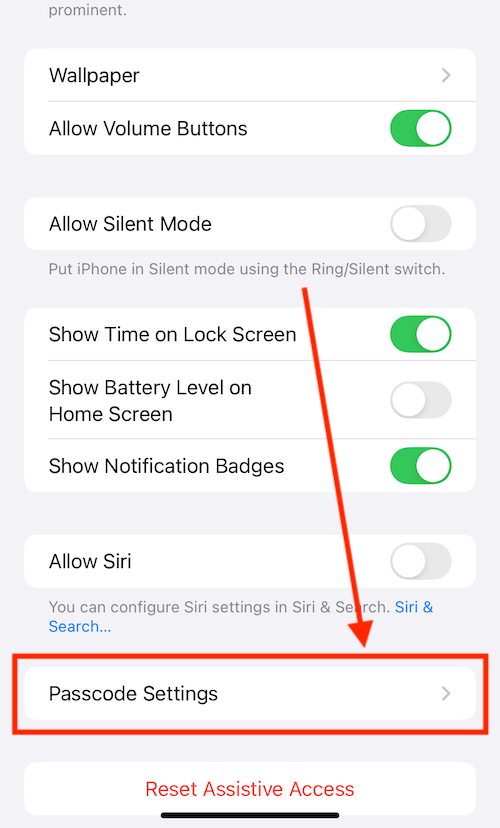
Changing the passcode
21. If you need to change the passcode, scroll to the bottom of the Settings page and tap Passcode Settings. Follow the onscreen prompts to change the passcode.
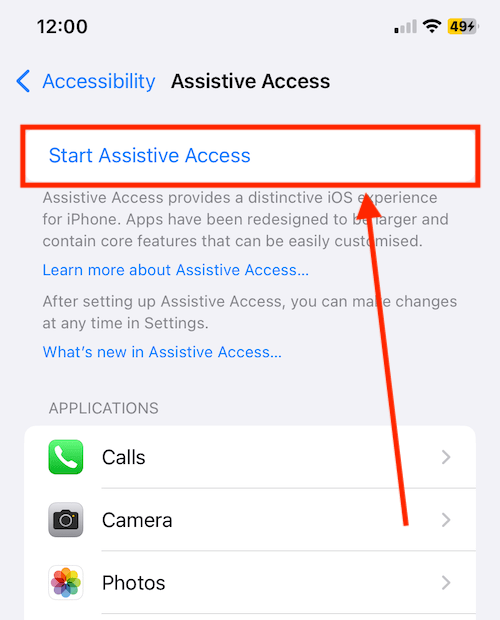
Restarting Assistive Access
22. You start Assistive Access by triple-clicking the Side button*. Enter the Assistive Access passcode when prompted. *If you have set up other accessibility features that use the triple-click shortcut, select Assistive Access from the list.
Alternatively, you can start Assistive Access by tapping Start Assistive Access at the top of the page.
Need some more help?
Call our helpline 0300 180 0028 or email enquiries@abilitynet.org.uk
Need free IT Support at Home?
If you are older or disabled and need IT support at home, you can book a free home visit.