Call our helpline
0300 180 0028- Deuteranomaly (Green-red)
- Protanomaly (Red-green)
- Tritanomaly (Blue -yellow)
- Greyscale (or Achromatopsia)
Short guide:
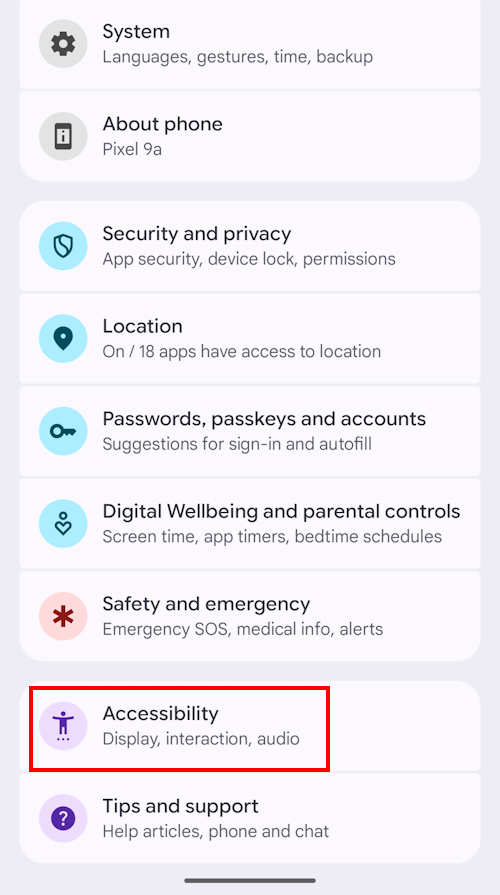
- Open the Settings and select Accessibility.
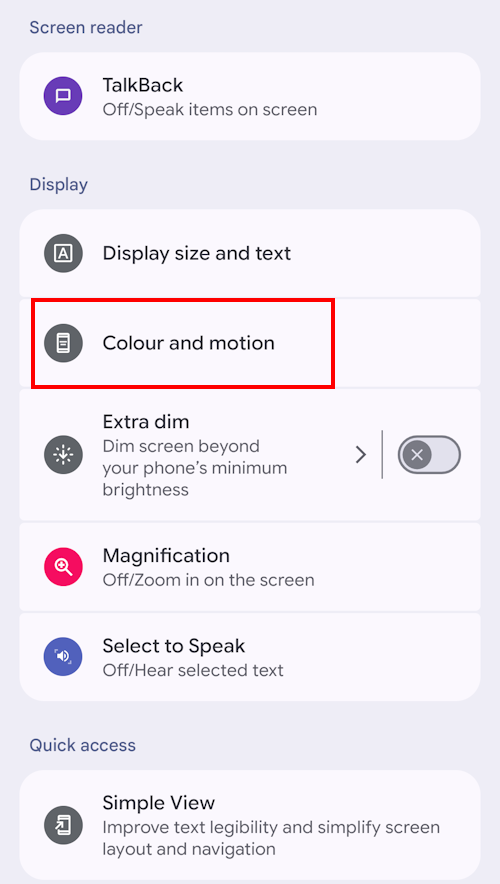
- Scroll down to the Display section and tap Colour and motion.
- Tap Colour correction. Tap the toggle switch for Use colour correction to turn it on.
- Scroll down and select the right Correction mode.
- Tap the toggle switch for Colour correction shortcut to turn the on-screen shortcut on.
Before and after
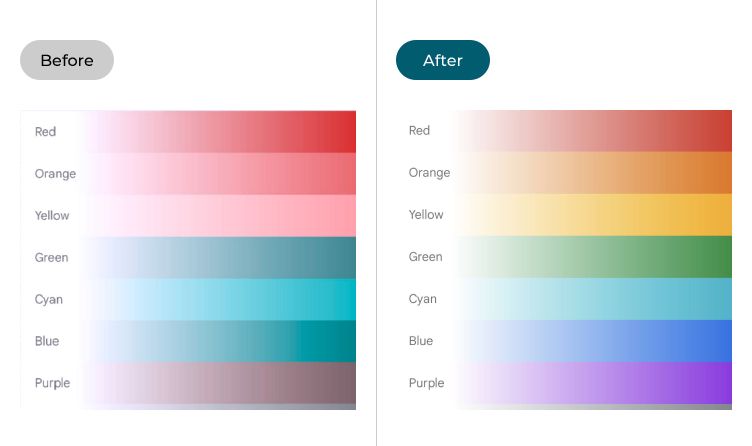
This section explains how to use the Colour correction feature in Android 16. This is a step-by-step guide with pictures of the screens to help.
Open the Accessibility settings
1. Open the Settings and select Accessibility.
Open the Colour and motion settings
2. Scroll down to the Display section and tap Colour and motion.
Enable Colour correction
3. Tap Colour correction. In the Colour correction screen, tap the toggle switch for Use colour correction to turn it on.
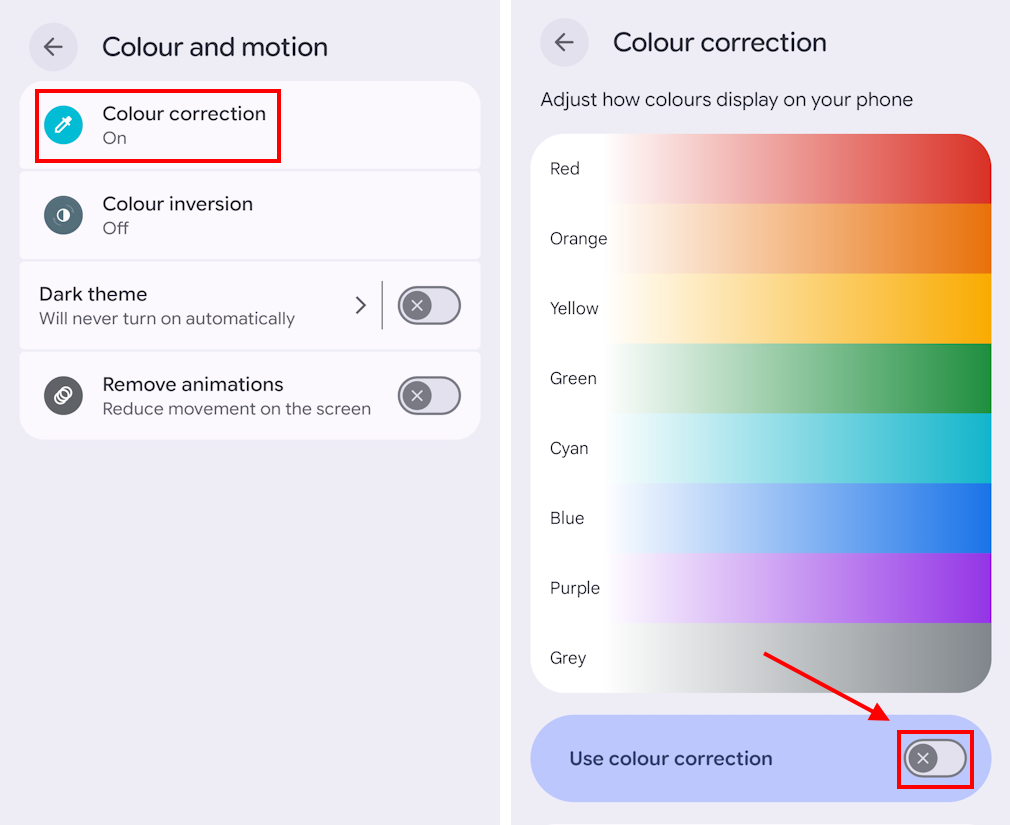
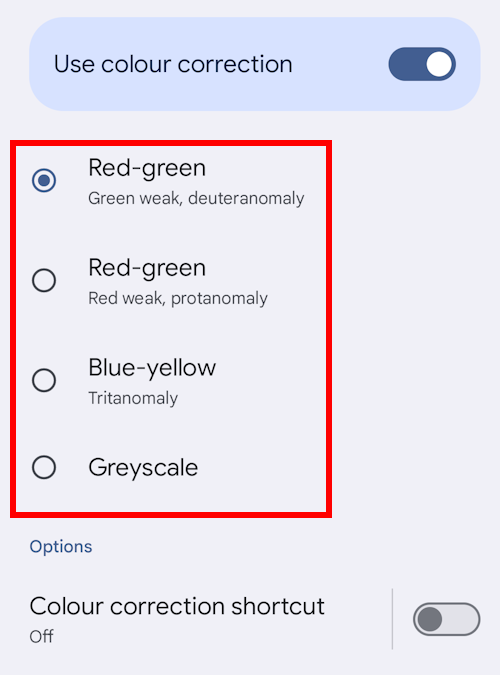
Select a correction mode
4. Scroll down to select the right Correction mode. As you tap the round radio button next to a mode, the coloured bars at the top of the screen should change appearance. Scroll up if these aren’t visible.
Adjusting the intensity
5. You can adjust the intensity of the correction to make sure you get the best possible colour balance. Move the Intensity slider to the left or right until the coloured bars look right to you.

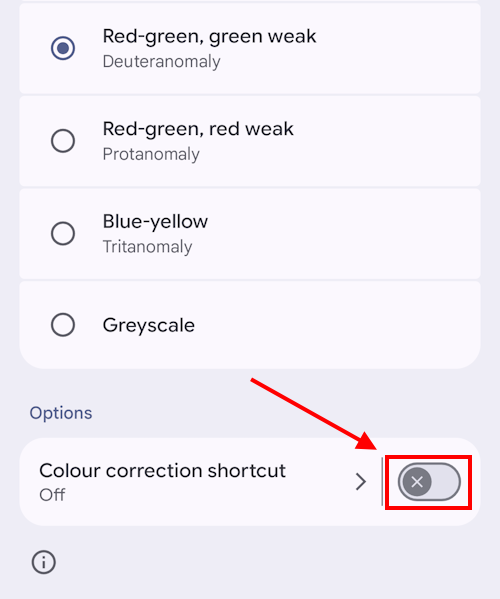
Add a shortcut
6. To add a shortcut to activate and deactivate Colour correction quickly, tap the toggle switch for Colour correction shortcut to turn it on. You will receive a pop-up notification explaining how this works. Tap OK to continue.
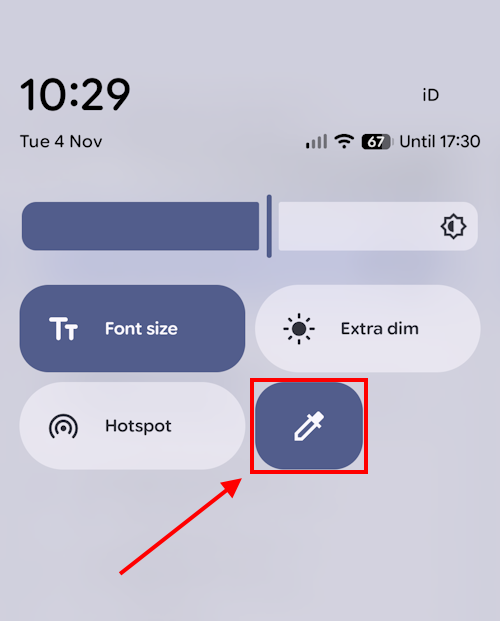
Using the shortcut
7. You can now activate or de-activate Colour correction by sliding down twice from the top of the screen to see the Quick Settings panel, then scrolling right until you see the Colour correction shortcut. Tap on it to toggle Colour correction on or off.
Note: We have written these instructions for devices running the standard version of the Android operating system. You may find some minor presentation differences if the manufacturer has customised the theme.
Need some more help?
Call our helpline 0300 180 0028 or email enquiries@abilitynet.org.uk
Need free IT Support at Home?
If you are older or disabled and need IT support at home, you can book a free home visit.