In this guide we’ll look at how to use Guided Access and start and end a session. To find out more about how to enable and configure Guided Access, see How to set-up Guided Access in iOS 26 for iPhone or iPad.
Short guide:
- Open the app you want to use with Guided Access.
- Next, triple-click the Side button on devices that use Face ID or the Home button on devices that have a physical Home button.
- The Guided Access interface will appear around the outside of the app. You can draw circles over any parts of the app that you want to restrict access to, and they'll be locked once a session starts.
- Tap Session Settings and set the toggle switches to enable or disable the Side or Home button, the Volume Buttons, Motion controls, Software Keyboards, or Touch (to lock your device’s touchscreen).
- To set a time limit, set the Time Limit toggle switch to On and set the length of the Guided Access session. Tap Done when you're finished.
- Click Start in the top-right corner to begin the Guided Access session. If you haven’t already set a passcode, or enabled Touch ID or Face ID, you will need to set a passcode here.
- To stop a Guided Access session before it finishes, or to change the session’s options either triple-click the Home button, on devices that have a Home button, or the Side button on devices that use Face ID. Tap End to stop the session, Options to change the settings or Resume to continue the session.
Before and after
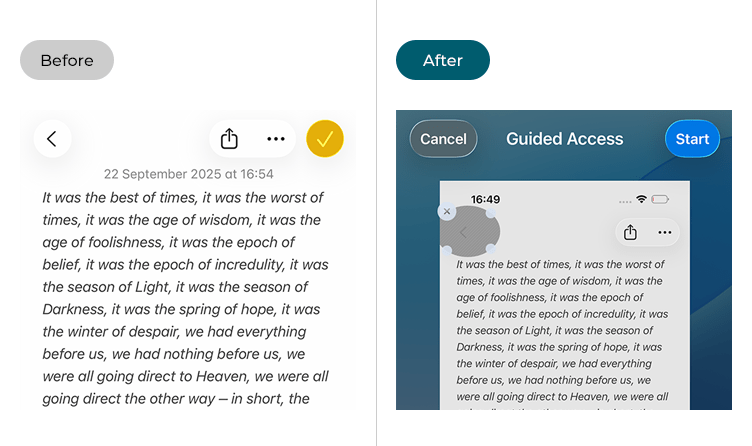
This section gives you step by step instructions on how to use Guided Access in Apple iOS 26, with pictures of the screens to help.
Open your app and switch to Guided Access
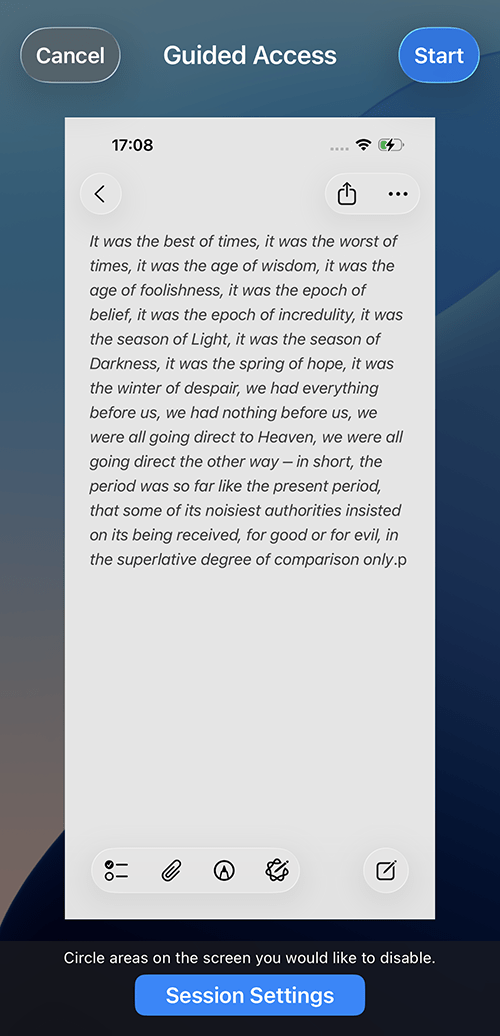
1. Open the app you want to use with Guided Access - in our examples, below, we are using the Notes app.
2. Next, triple-click the Side button on devices that use Face ID or the Home button on devices that have a physical Home button. The app shrinks to the middle of the screen, surrounded by the Guided Access interface.
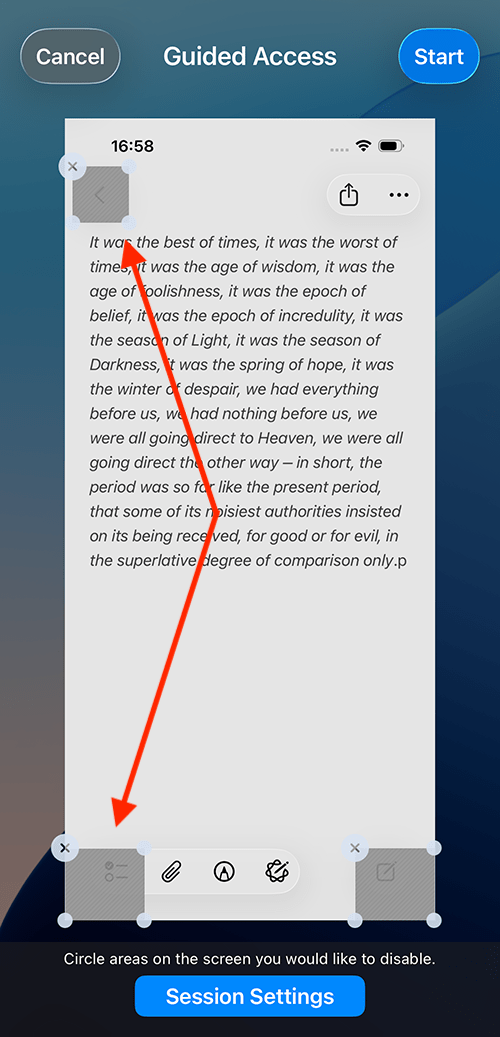
Block on-screen buttons and icons
3. Guided Access allows you to lock buttons or controls that you don't want your user to have access to. Just draw a circle with your finger on an area you wish to lock. A small patch will appear over it. Tap the X in the top-left corner of the patch to remove it.
Open the settings for a Guided Access session
4. To open the settings for a Guided Access session, tap Session Settings.

Lock the physical controls
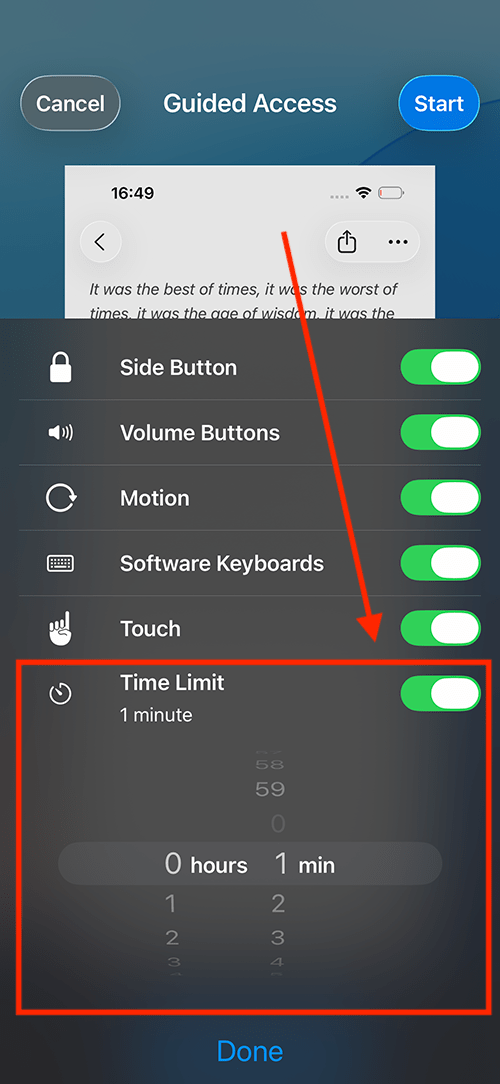
5. Set the toggle switches to enable or disable the Side or Home button, the Volume Buttons, Motion controls, or Software Keyboards. Tap the toggle switch for Touch to lock your device’s touchscreen.
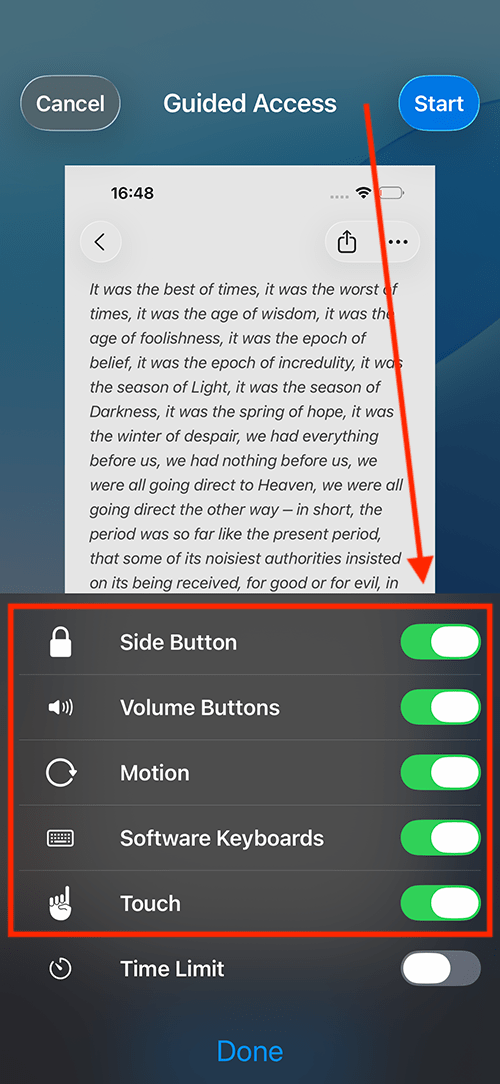
Set a time limit
6. To set a time limit for a session, tap the Time Limit toggle switch to turn it on and set the length of the Guided Access session. Tap Done when you're finished.
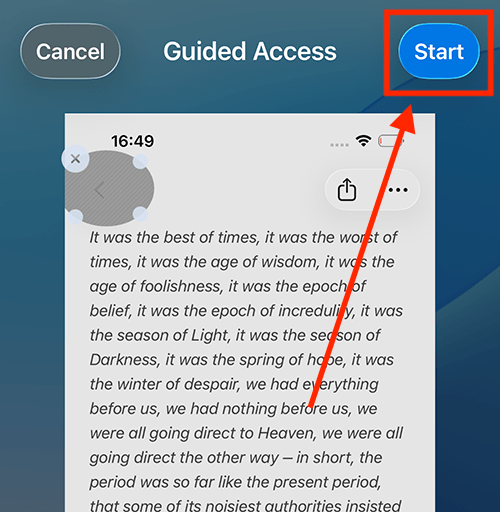
Start the session
7. Click Start in the top-right corner to begin a Guided Access session. If you haven’t already set a passcode, or enabled Touch ID, you will need to set a passcode here.
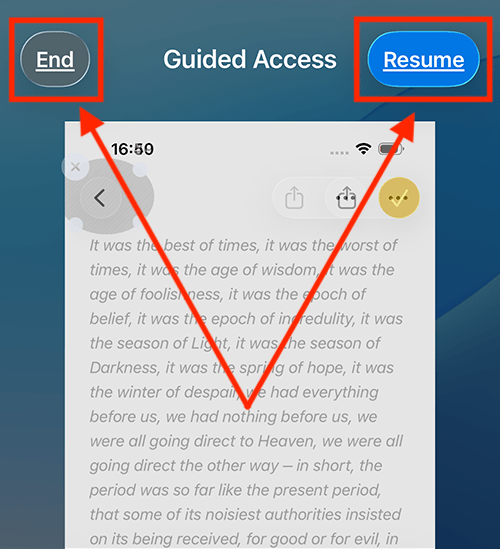
Change session settings or end a session
8. To end a Guided Access session before it finishes, or to change the session’s options triple-click the Home button on devices that have a Home button, or triple-click the Side button on devices that use Face ID. Tap End to stop the session, Options to change the settings or Resume to continue the session.
Need some more help?
Call our helpline 0300 180 0028 or email enquiries@abilitynet.org.uk
Need free IT Support at Home?
If you are older or disabled and need IT support at home, you can book a free home visit.