In this guide, we’ll look at how to set up Siri and cover some examples of how you might use it.
Short guide:
- Click the Apple icon
 in the top left corner of the screen and select System Preferences.
 - Click Siri.
- In the sidebar, tick the checkbox for Enable Ask Siri.
- If you want to use the “Hey Siri” command to launch Siri, tick the checkbox for Listen for “Hey Siri” and follow the onscreen instructions to teach Siri your voice.
- Once enabled, you can launch Siri by saying “Hey Siri”, using the Cmd + Space keyboard shortcut, or by clicking the Siri icon
 in the dock or the menu bar.
 - When the Siri window appears, ask your query.
Before and after
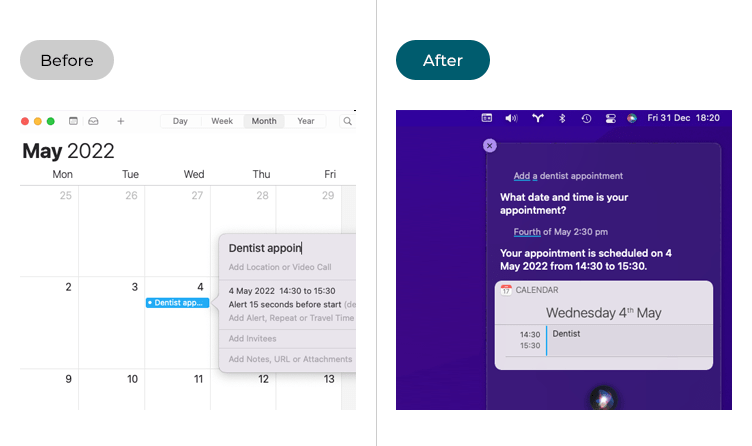
This section gives you step by step instructions on how to use Siri, the digital assistant in macOS 12 Monterey, with pictures of the screens to help.
Open System Preferences
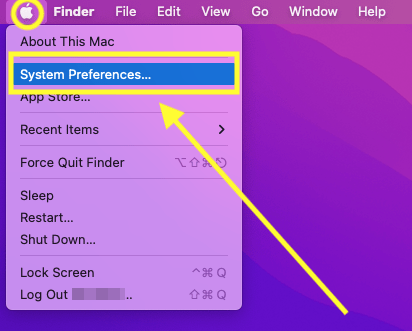
1. Click the Apple icon ![]() in the top left corner of the screen and choose System Preferences from the menu.
in the top left corner of the screen and choose System Preferences from the menu.
Open Siri settings
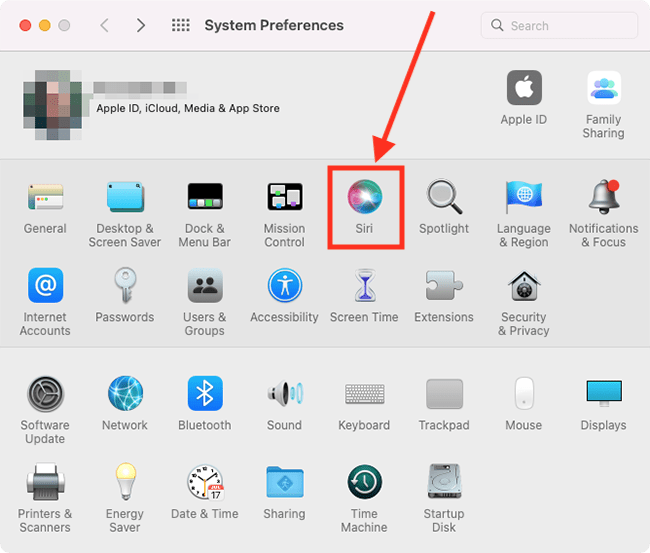
2. In the System Preferences window, click Siri.
Enable Siri
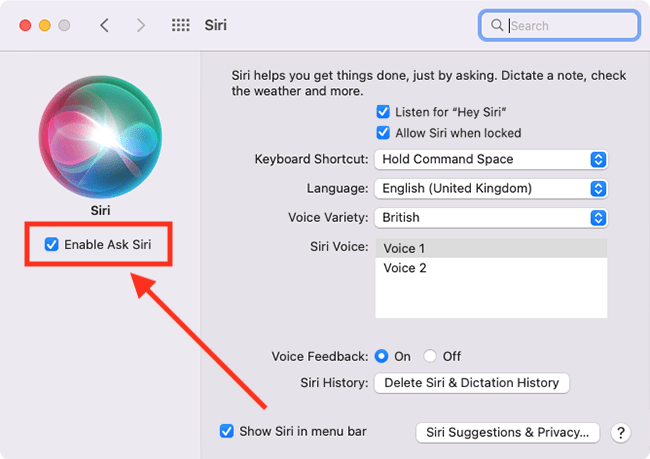
3. In the sidebar, tick the checkbox for Enable Ask Siri.
Enable the "Hey Siri" voice command
4. If you want to use the “Hey Siri” command to launch Siri, tick the checkbox for Listen for “Hey Siri” and follow the onscreen instructions to teach Siri your voice.
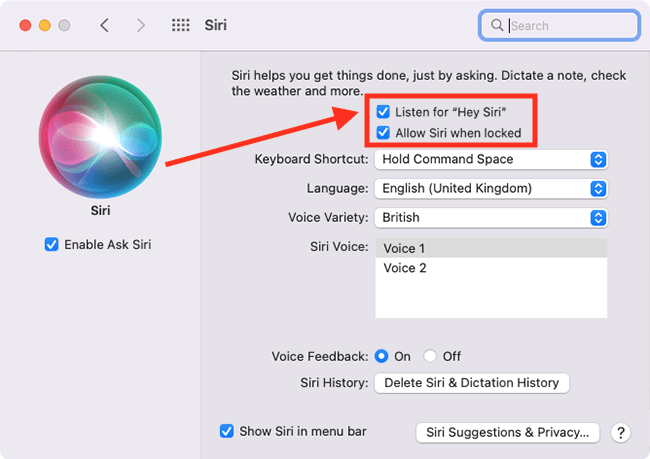
Siri settings
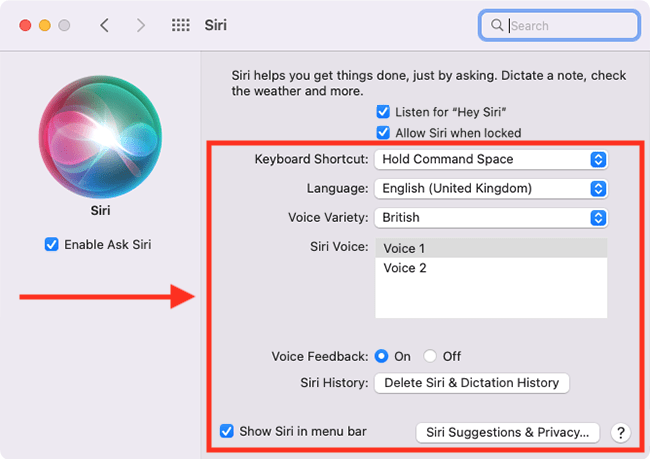
5. On the Siri preferences screen, you can:
- Change the keyboard shortcut used to launch Siri. By default, this is holding down the Cmd + Space keys.
- Set the language Siri uses
- Change Siri’s voice
- Choose whether to receive spoken feedback when you ask Siri a query. If you turn off Voice Feedback you will just receive the visual response shown in the Siri window.
- Choose to show the Siri icon in the menu bar
Close System Preferences
6. When you are happy with your Siri settings, close System Preferences by clicking the Close button (red circle) in the top-left corner of the window or using the Cmd + W keyboard shortcut.
Launching Siri
7. There are several ways to launch Siri:
- Say ”Hey Siri” on devices that support “Hey Siri”.
- Press the keyboard shortcut – by default, the keyboard shortcut to launch Siri is holding down Cmd + Space keys.
- Click the Siri icon
 in the dock or the menu bar.
The Siri window will appear in the top-right corner of your screen.

Questions and commands
8. Now speak your query. It will appear as text in the Siri window. When you have finished, Siri will respond with spoken and visual feedback.
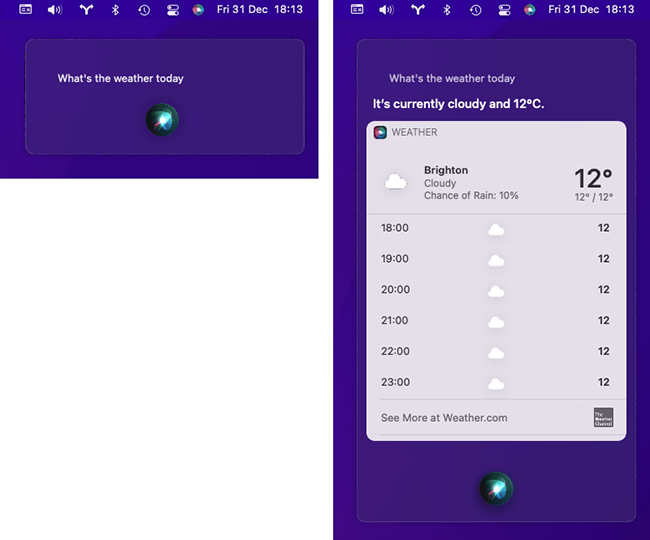
You can ask Siri to perform a wide variety of tasks on your device, including:
- Make Facetime calls (for example, “Hey Siri, Facetime Mum”)
- Send messages (for example, “Hey Siri, send a message to Mum”)
- Set calendar events and reminders (for example, “Hey Siri, set a reminder”)
- Set alarms and timers (for example, “Hey Siri, set an alarm/timer”)
- Get weather forecasts (for example, “Hey Siri, what’s the weather like?”)
- Get directions on Apple Maps (for example, “Hey Siri, navigate to … “)
- Perform calculations (for example, “Hey Siri, what is 28lbs in kilograms?”)
- Give translations (for example, “Hey Siri, how do you say ‘Hello’ in Italian?”)
- Open apps (for example, “Hey Siri, open Safari.”)
- Open Accessibility options (“Hey Siri, open accessibility options”)
- Change settings on your device, such as changing the brightness and volume or toggling Wi-Fi on or off (for example, “Hey Siri, turn up the volume.”)
- Perform web searches (“Hey Siri, who is …”)
- Play music from particular artists, songs or albums (for example, “Hey Siri. Play Taylor Swift.”)
- Play videos on YouTube (for example, “Hey Siri, play AbilityNet videos on YouTube.”)
- Control any smart home devices you may have (for example, “Hey Siri, turn on the lights in the lounge.”)
Tip: To ask another query whilst Siri is open, click on the animated Siri icon at the bottom of the Siri window.
Note: Siri needs a connection to the internet to work.
Find out what else Siri can do
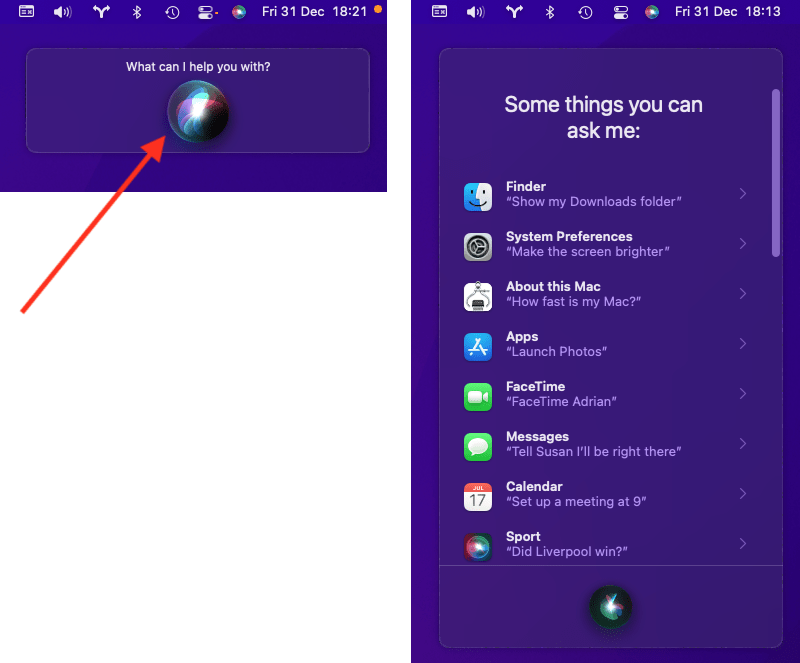
9. To find out more about what Siri can help you with, launch Siri, then click the animated Siri icon in the Siri window. Siri will show you a list of tasks it can perform. You can select any item in the list to see more details.
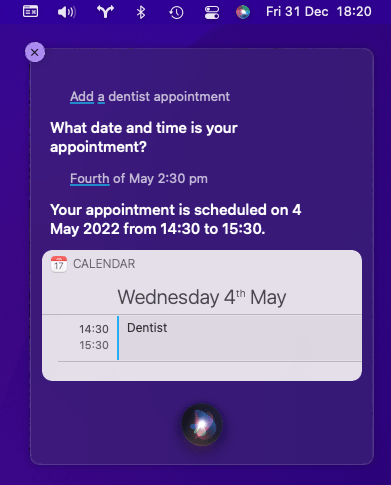
Using Siri to add a calendar appointment
10. To create a calendar event, launch Siri and say, "Add a [name of appointment] to my calendar".

Siri will ask you for the date and time of the appointment.

After you have given the date and time, Siri will confirm this event has been added to your calendar.
Typing queries and commands
You can type queries in Siri, but first, you need to enable this in System Preferences.
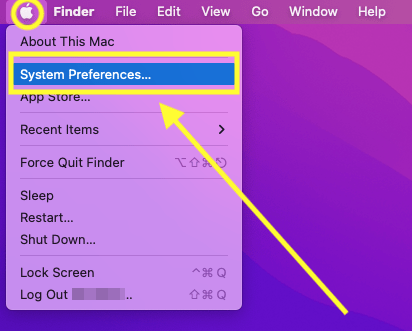
Open System Preferences
11. Click the Apple icon ![]() in the top left corner of the screen and choose System Preferences from the menu.
in the top left corner of the screen and choose System Preferences from the menu.
Open the Accessibility settings
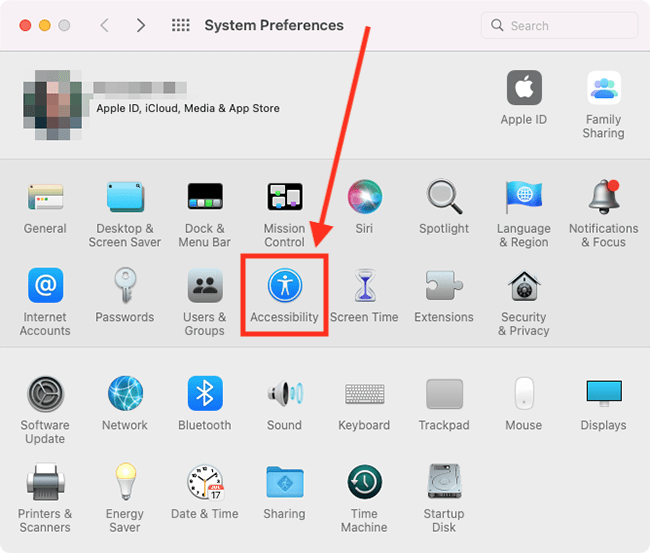
12. In the System Preferences window, click Accessibility.
Find the Siri settings
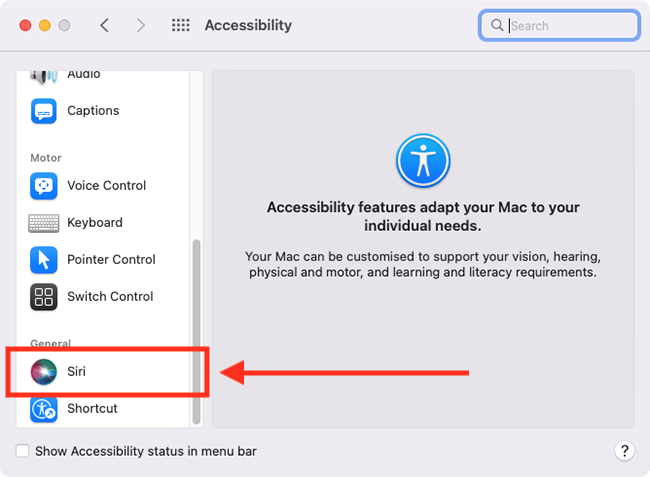
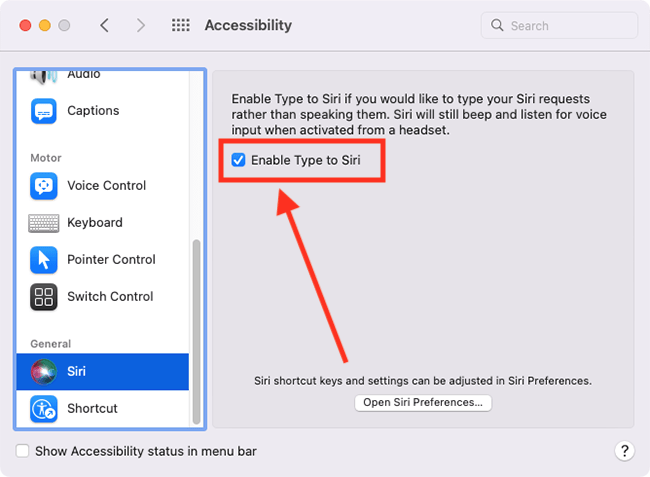
13. In the sidebar, scroll down and select Siri.
Enable Type to Siri
14. Tick the checkbox for Enable Type to Siri.
Close System Preferences
15. When you are happy with your Siri settings, close System Preferences by clicking the Close button (red circle) in the top-left corner of the window or using the Cmd + W keyboard shortcut.
Using Type to Siri
16. In this example, we will create a new reminder. You don't need to type full questions or commands, as Siri will usually work them out from a few keywords. Start by launching Siri, as explained above.
Type your query
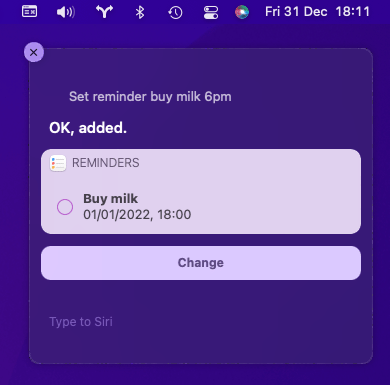
17. You can start typing as soon as the Siri window appears. In our example we type “Set reminder get milk 6 pm.”

Submit your query
18. When you have finished typing your query, press the Return key. Siri will confirm that the reminder has been created.
Note: If this does not work it could be because your computer settings are managed by someone else (an IT department or administrator for example). If so, you will need to contact them to access these settings or for help.