In this guide, we’ll look at how to set up Siri and cover some examples of how you might use it.
Short guide:
- Click the Apple icon
 in the top left corner of the screen and select System Settings.
 - Click use Siri, the digital assistant in in the sidebar.
- Turn on the toggle switch for Siri.
- If you want to use a voice command to launch Siri, choose "Siri" or "Hey Siri" or just "Hey Siri" from the Listen for menu and follow the on-screen instructions to teach Siri your voice.
- There are different methods for launching Siri depending on whether you want to speak or type your requests.
- To launch Siri to speak your requests, say "Siri" or ”Hey Siri” or hold down the microphone key on your keyboard (F5).
- To launch Siri to type your requests, press Command (Cmd ⌘) key twice or click the Siri icon
 in the dock or the menu bar.
- When the Siri interface appears, ask or type your query.
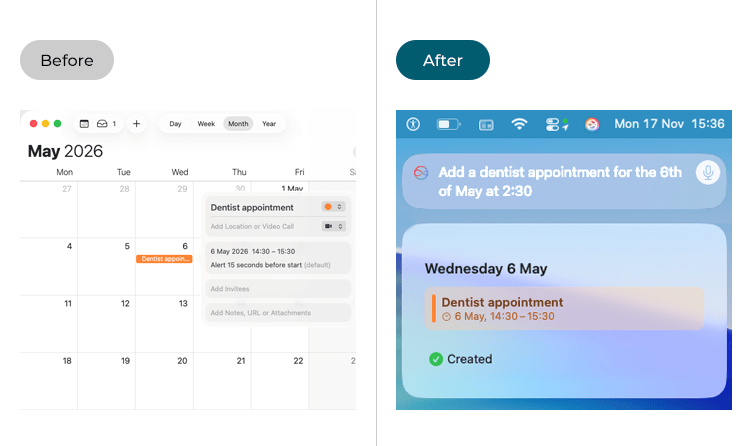
Before and after
This section explains how to set-up and use Siri, the digital assistant in macOS 26 Tahoe. This is a step-by-step guide with pictures of the screens to help.
Open System Settings
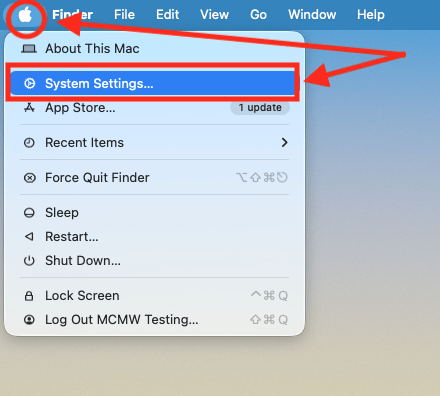
1. Click the Apple icon ![]() in the top left corner of the screen and choose System Settings from the menu.
in the top left corner of the screen and choose System Settings from the menu.
Open the Apple Intelligence & Siri settings page
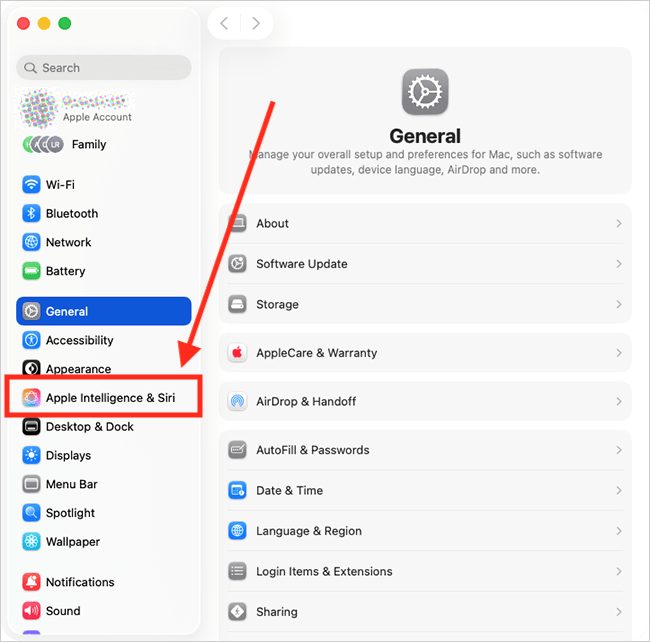
2. In the System Settings window, click Apple Intelligence & Siri in the sidebar.
Enable Siri
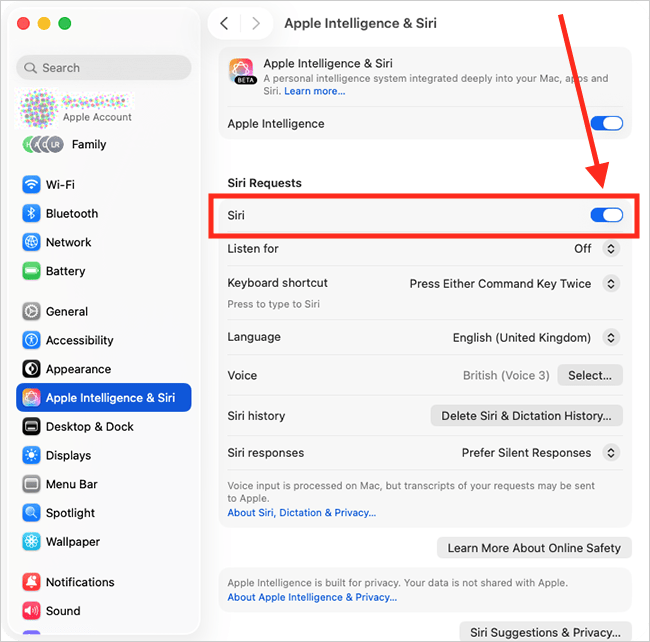
3. On the Apple Intelligence & Siri page, click the toggle switch for Siri to turn it on.
Enable the "Siri" / "Hey Siri" voice command
4. If you want to use a voice command to launch Siri, click the drop-down menu for Listen for and choose "Siri" or "Hey Siri" or "Hey Siri".
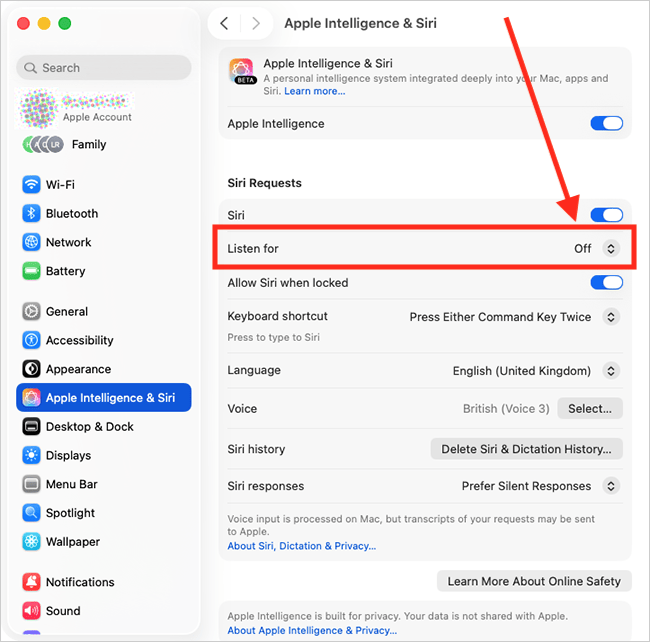
5. Follow the on-screen instructions to teach Siri your voice. When you reach the screen announcing Siri is Ready, click the Done button.

Launching Siri
6. There are different methods for launching Siri depending on whether you want to speak or type your requests:
| How to launch Siri | ||||
| Speaking your requests |
To activate Siri to speak your request, say “Siri” or “Hey Siri”, or press and hold the microphone key (F5) on your keyboard. | |||
| Tying your requests | To activate Siri to type your requests, press Command (Cmd ⌘) key twice or click the Siri icon |
|||
Ask Siri a question
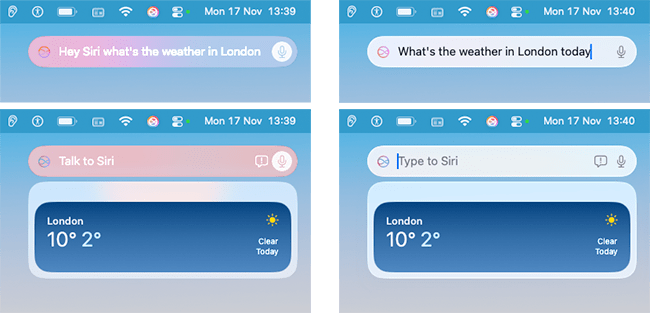
7. Use one of the methods described above to launch Siri. The Siri interface will appear in the top-right corner of the screen to indicate that it is active. For spoken requests, the Siri interface will display “Talk to Siri”. For typed requests, it will display “Type to Siri”, with a flashing cursor ready for you to begin typing. Examples of both interfaces are shown below.


8. Now speak or type your query. When you have finished, Siri will provide spoken and/or visual feedback, depending on the preferences you have set for Siri Responses (see step 15). In the examples shown below, we asked Siri for the weather in London. For more ideas on what you can ask Siri, see the next section.
Examples of what you can ask Siri
- Make Facetime calls (for example, “Hey Siri, Facetime Mum”)
- Send messages (for example, “Hey Siri, send a message to Mum”)
- Set calendar events and reminders (for example, “Hey Siri, set a reminder”)
- Set alarms and timers (for example, “Hey Siri, set an alarm/timer”)
- Get weather forecasts (for example, “Hey Siri, what’s the weather like?”)
- Get directions on Apple Maps (for example, “Hey Siri, navigate to … “)
- Perform calculations (for example, “Hey Siri, what is 28lbs in kilograms?”)
- Give translations (for example, “Hey Siri, how do you say ‘Hello’ in Italian?”)
- Open apps (for example, “Hey Siri, open Safari.”)
- Open Accessibility options (“Hey Siri, open accessibility options”)
- Change settings on your device, such as changing the brightness and volume or toggling Wi-Fi on or off (for example, “Hey Siri, turn up the volume.”)
- Perform web searches (“Hey Siri, who is …”)
- Play music from particular artists, songs or albums (for example, “Hey Siri. Play Taylor Swift.”)
- Play videos on YouTube (for example, “Hey Siri, play AbilityNet videos on YouTube.”)
- Control any smart home devices you may have (for example, “Hey Siri, turn on the lights in the lounge.”)
To find out more about Siri and what it can help you with, visit Apple's Siri page at https://support.apple.com/en-gb/siri
Customise how Siri behaves
9. To customise how Siri behaves, head back to the Apple Intelligence & Siri settings page (System Settings > Apple Intelligence & Siri — see steps 1 & 2, above).
Use Siri even when your device is locked
10. If you have enabled Listen for "Siri" / "Hey Siri", you can choose whether to allow Siri to respond when your device is locked. Set the toggle switch for Allow Siri when locked to on or off.

Change the keyboard shortcut that launches Siri
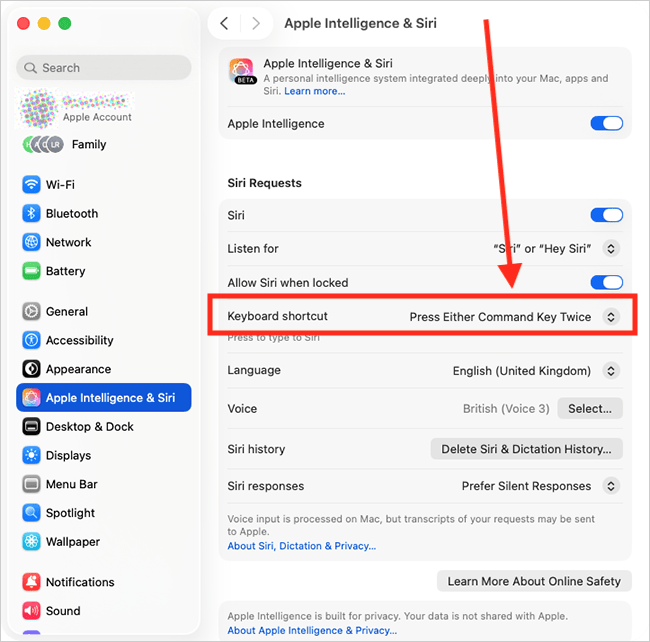
11. Siri can be launched using a keyboard shortcut. The default shortcut is pressing the Command (Cmd ⌘) key twice. To choose a different shortcut, click the drop-down menu for Keyboard shortcut and choose from the options.
If you choose Customise, you can create your own key combination to use for the shortcut; Press your preferred keys when prompted.
Change the language Siri uses
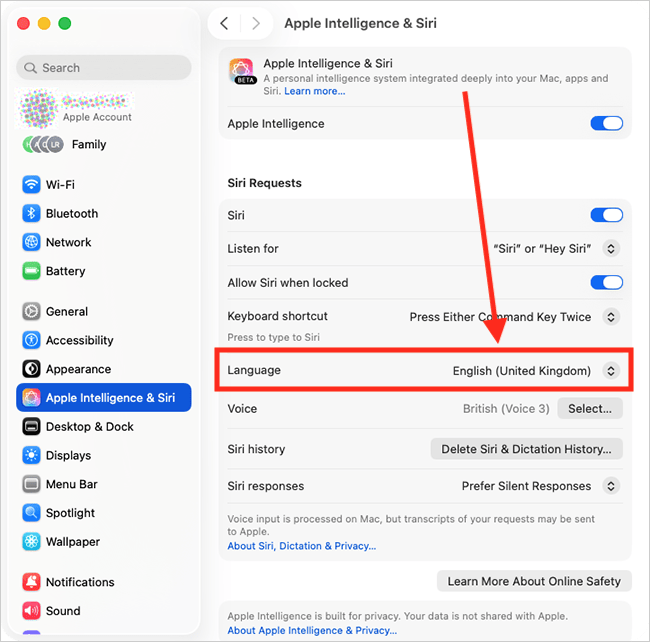
12. To change the language Siri uses, click the drop-down menu for Language and choose from the options.
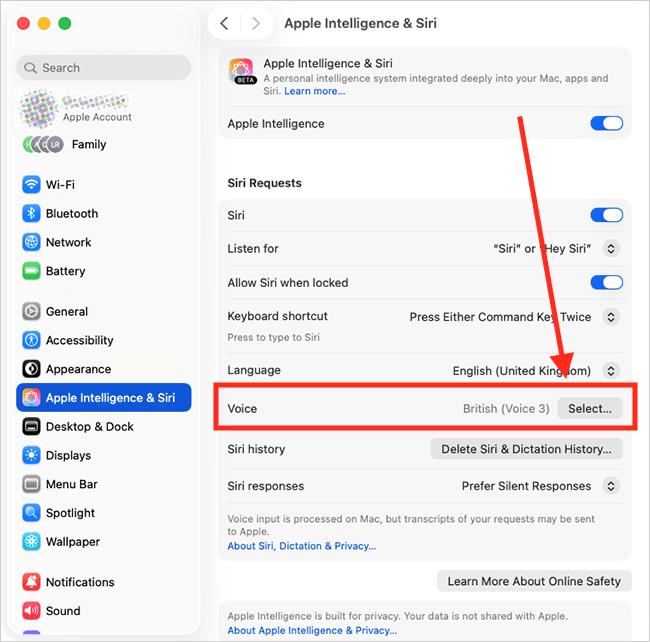
Change Siri's voice
13. To change Siri's voice, click the Select button for Voice and choose your preferred option.
Choose how Siri responds when you ask a query
14. Siri can give spoken and visual responses when you ask a query. Siri can also show a text transcription of what you have asked. To choose which of these you receive, click the Siri Responses button.
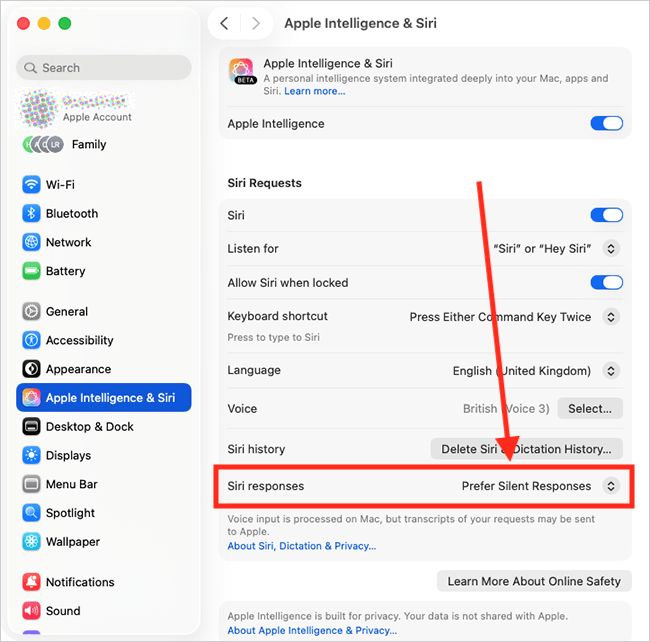
15. Choose your preference from the options shown in the table below. Click the Done button to save your changes.
| Siri Responses | |
| Prefer Spoken Responses | Siri gives spoken and visual responses when you ask a query. |
| Automatic | Siri uses on-device intelligence to decide whether to speak or respond silently. For instance, if you are wearing headphones, Siri will give you spoken responses. |
| Prefer Silent Responses | Siri only provides visual responses. |

Close System Settings
16. When you are happy with your Siri settings, close System Settings by clicking the Close button (red circle) in the top-left corner of the window or using the Cmd + W keyboard shortcut.

Note: If this does not work, it could be because your computer settings are managed by someone else (an IT department or administrator, for example). If so, you will need to contact them to access these settings or for help.
Need some more help?
Call our helpline 0300 180 0028 or email enquiries@abilitynet.org.uk
Need free IT Support at Home?
If you are older or disabled and need IT support at home, you can book a free home visit.