Call our helpline
0300 180 0028Short guide:
- Tap the Settings icon to open the Settings app. Scroll down and tap Accessibility.
- On the Accessibility screen, tap Spoken Content.
- Tap Speak Selection to set the toggle switch to On.
- To customise how content is highlighted while it’s being read, tap Highlight Content
- You can use Speak Selection in most text-based apps. Select the text you want read aloud, then tap the Speak button in the menu.
Before and after
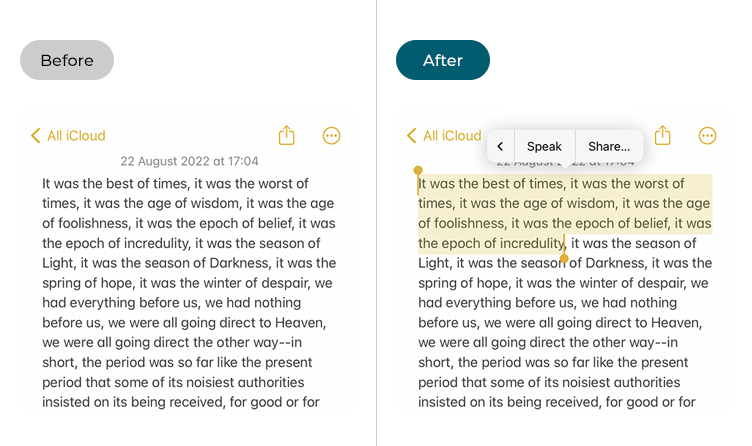
This section gives you step by step instructions on how to enable and use the Speak Selection feature in iOS 17, with pictures of the screens to help.
Open the Accessibility settings
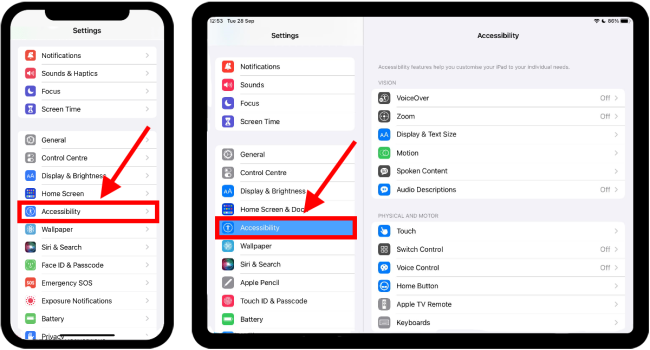
1. Tap the Settings icon to open the Settings app. Scroll down and tap Accessibility.
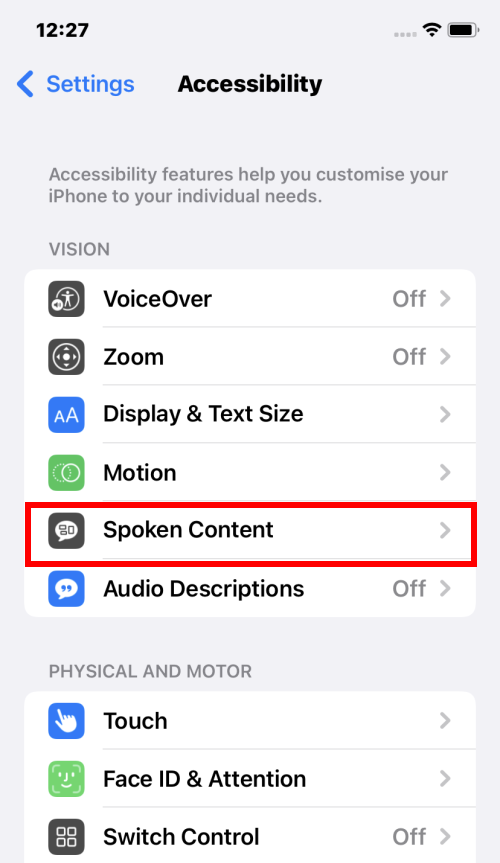
Tap Spoken Content
2. On the Accessibility screen, look under Vision and tap Spoken Content.
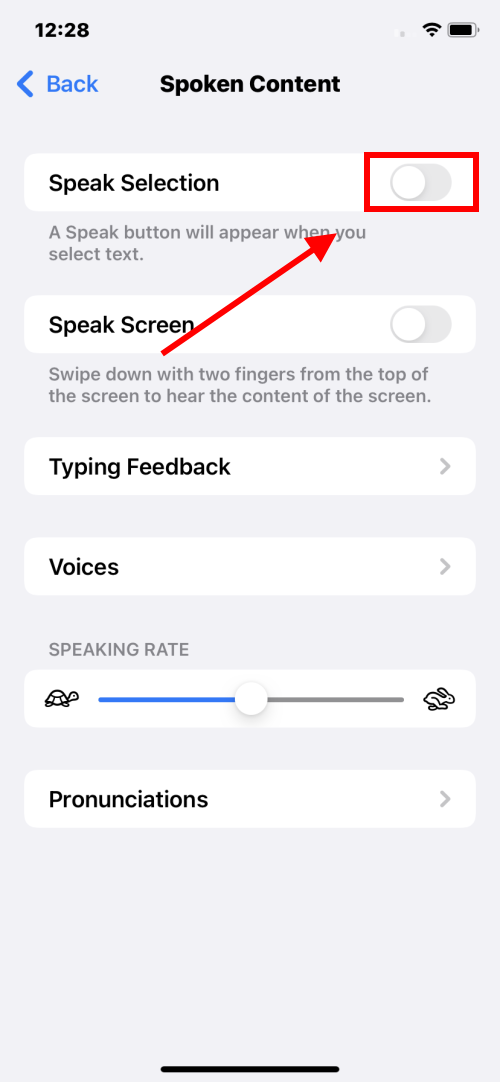
Enable Speak Selection
3. On the Spoken Content screen, tap Speak Selection to switch the toggle switch on.
Change the Highlight Content settings
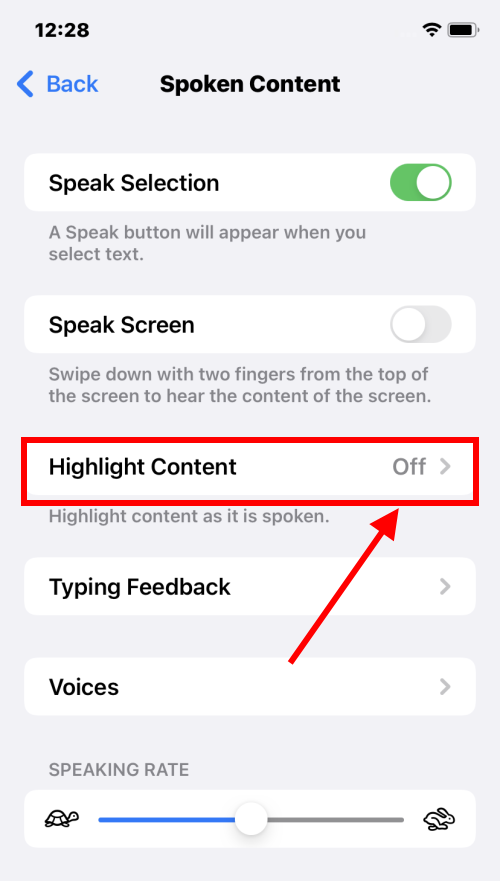
4. As text is read, you can have highlights to point out the individual words or sentences. To enable this, tap Highlight Content.
Select what to highlight
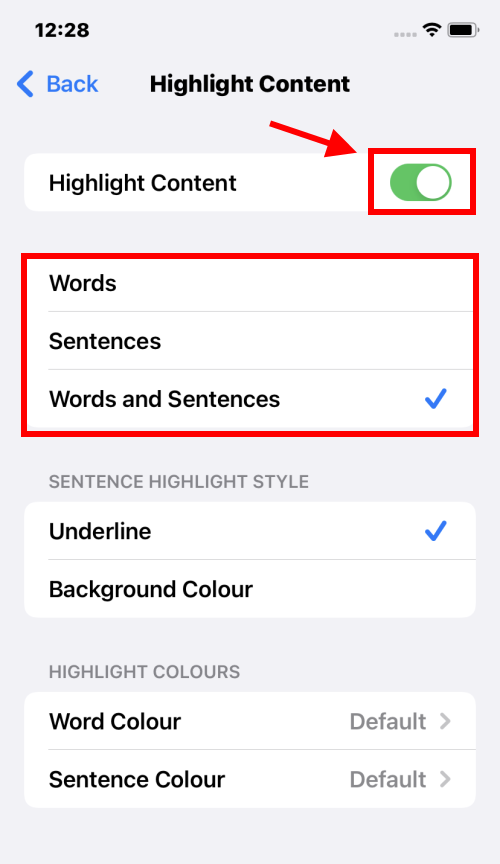
5. Tap Highlight Content to set the toggle switch to on, then choose what you would like to see highlighted when text is being read aloud. You can select Words, Sentences or Words and Sentences.
Choose a highlight style
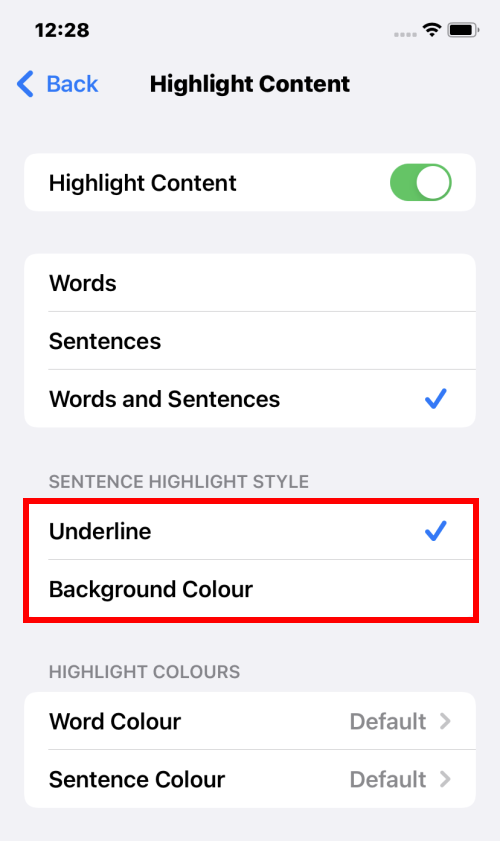
6. Now choose a highlight style. To have the words and sentences underlined, tap Underline. For a background colour, tap Background Colour.
Pick a highlight colour
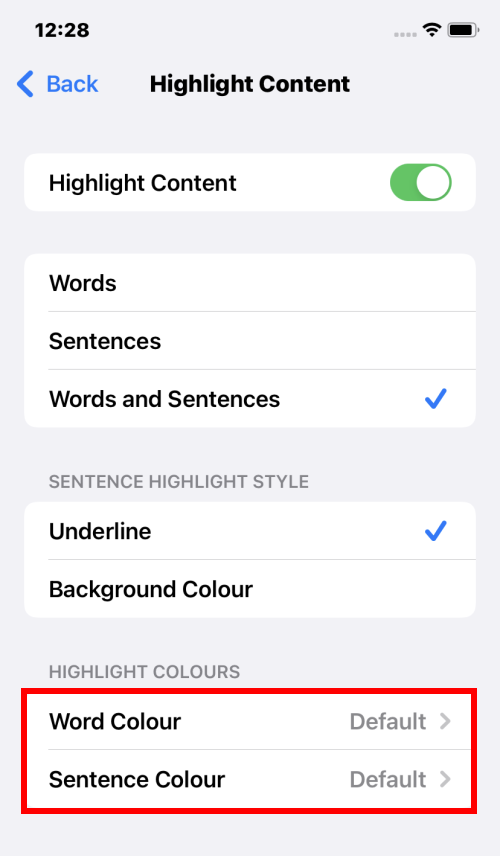
7. Finally, tap Word Colour or Sentence Colour to select a colour for the highlight. Tap the Back link when you're finished.
Using Speak Selection
8. You can use Speak Selection anywhere you can select text, such as in emails, websites, and documents. Select the text you want to have to read aloud. In our example we have highlighted text in the Notes app. To hear the highlighted text read aloud, tap the Speak button in the menu bar that appears. Note: In some apps you may need to press the right arrow button on the menu to reveal the Speak option.
