Short guide:
- Open the Ease of Access Center by pressing the Windows key + U.
- Click Make the mouse easier to use.
- Under Control the mouse with the keyboard, tick the checkbox next to Turn on Mouse Keys.
- You can customise the Mouse Keys feature by clicking Set-up Mouse Keys.
Before and after
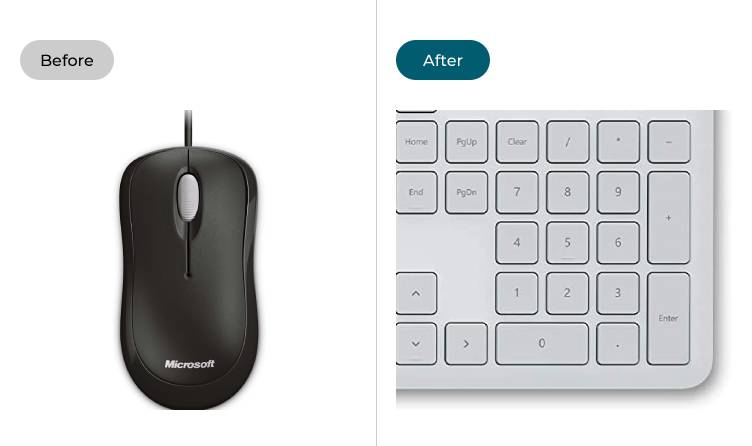
This section takes you through the steps to enable the Mouse Keys feature in Windows 7. This is a step-by-step guide with picture of the screens to help you.
Open the Ease of Access Center
1. Open the Ease of Access Center by pressing the Windows key ![]() . Alternatively, click the Start button
. Alternatively, click the Start button ![]() , then Control Panel, then Ease of Access.
, then Control Panel, then Ease of Access.
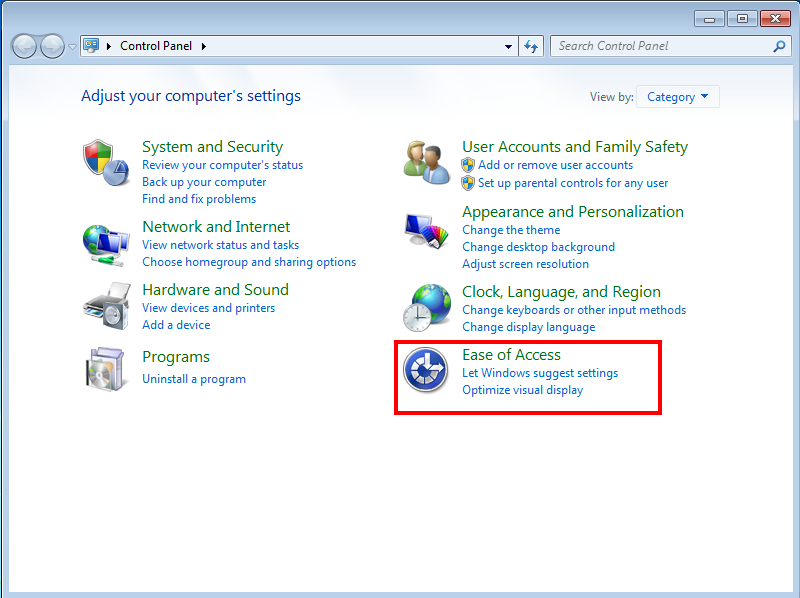
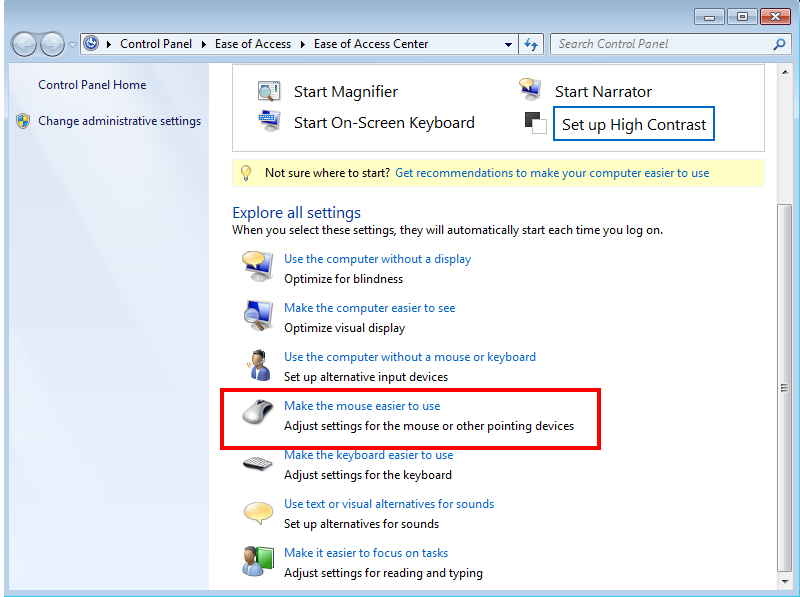
Click Make the mouse easier to use
2. Scroll down to Explore all setings and click Make the mouse easier to use.
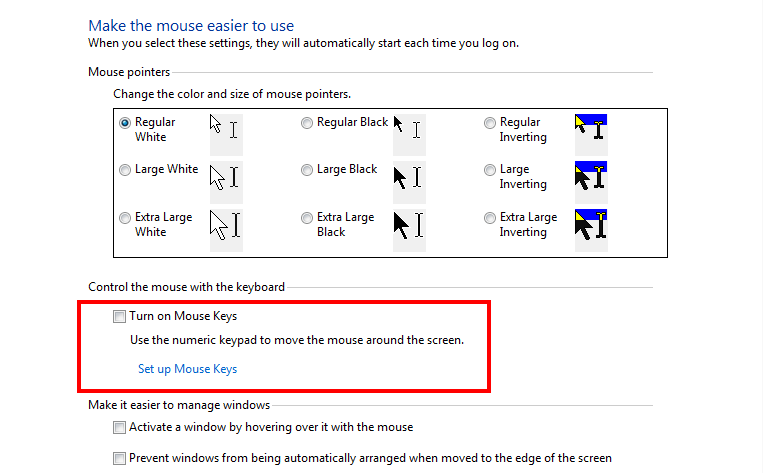
Enable Mouse Keys
3. Look under Control the mouse with the keyboard and tick the checkbox next to Turn on Mouse Keys.
Customise Mouse Keys
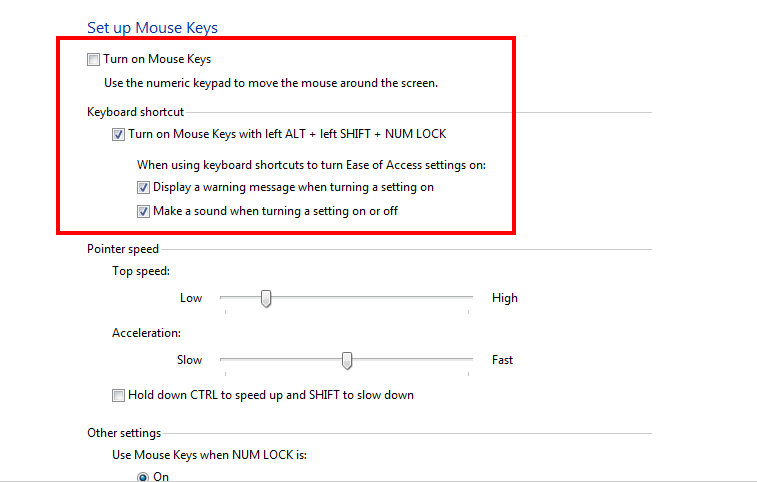
4. To customise Mouse Keys, click Set-up Mouse Keys. You can configure the feature to turn on when you press Alt + Left Shift + Num Lock, or to display a warning message when you turn the setting on by clicking in the top two checkboxes. You can also tick the checkbox next to Make a sound when turning a setting on or off to get a sound alert.
Adjust speed and acceleration
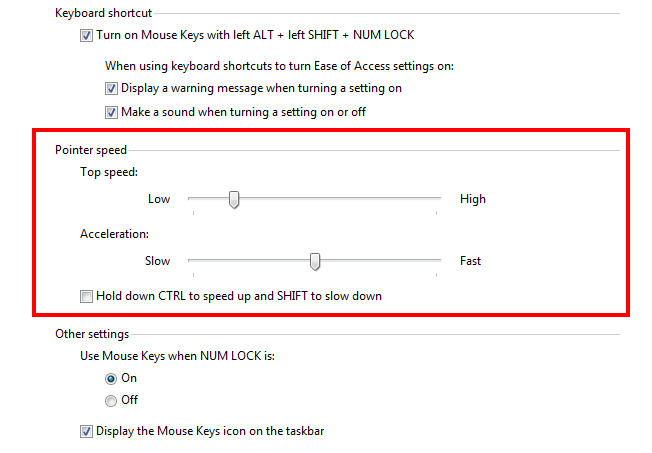
5. You can adjust the maximum speed of the mouse pointer and how fast it accelerates from a standstill using the sliders marked Top Speed and Acceleration. Tick the checkbox next to Hold down CTRL key to speed up and SHIFT to slow down to activate these keyboard shortcuts.
Activate the taskbar icon
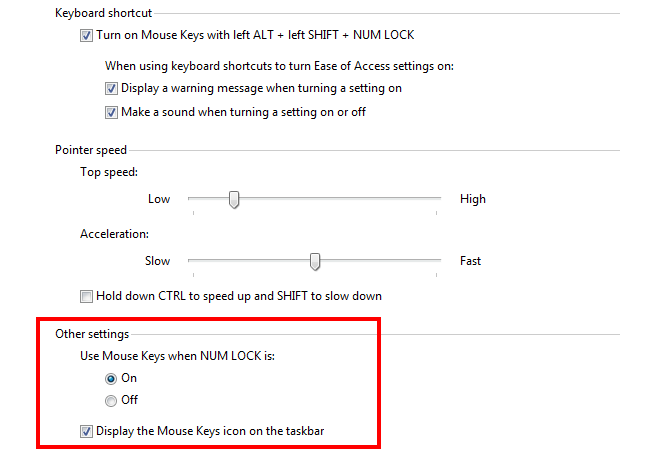
6. You can enable a taskbar icon to turn Mouse Keys on or off by ticking the checkbox next to Display the Mouse Keys icon on the taskbar. You can also click the On or Off button to set whether you can Use Mouse Keys when NUM LOCK is turned on. Click the On button if you want Mouse Keys to be active even when Num Lock and the numeric pad would normally be enabled.
Note: If this does not work it could be because your computer settings are managed by someone else (an IT department or administrator for example). If this is the case you will need to contact them to access these settings or for further help.