Short guide
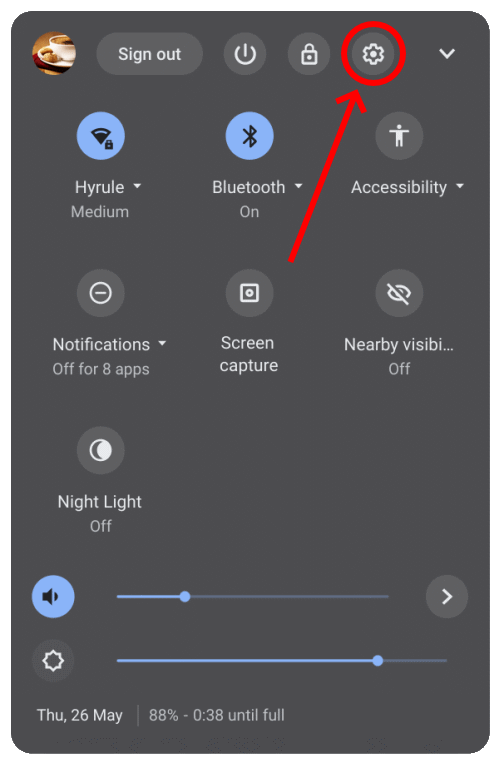
- Click the Time widget in the bottom right corner of the screen, then click Settings .
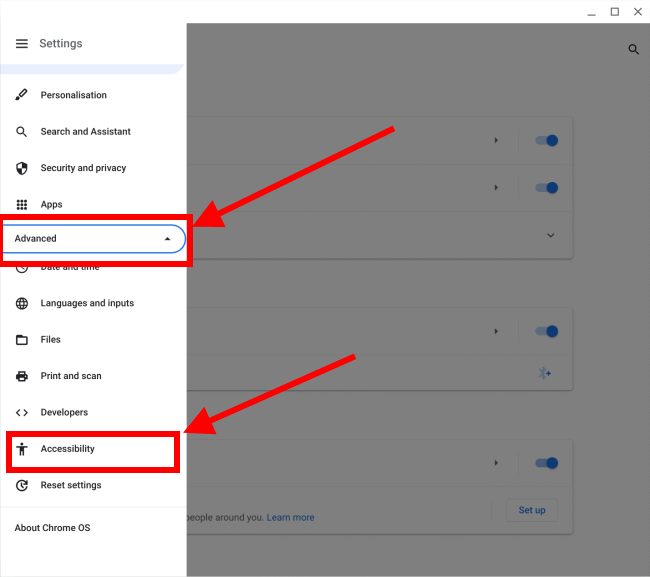
- In the Settings window, select Accessibility from the left-hand column. If Accessibility is not visible, click Advanced to reveal more menu items.
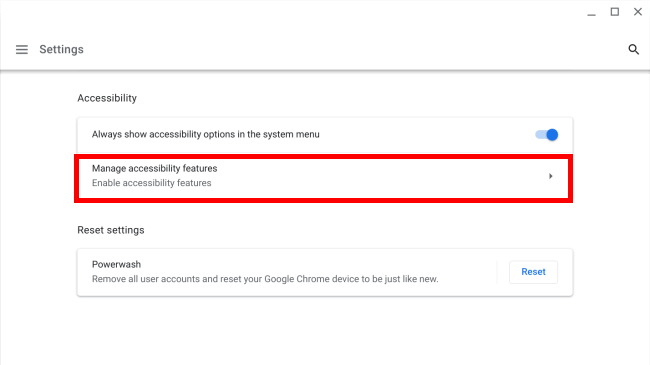
- Click Manage Accessibility Features in the right-hand panel.
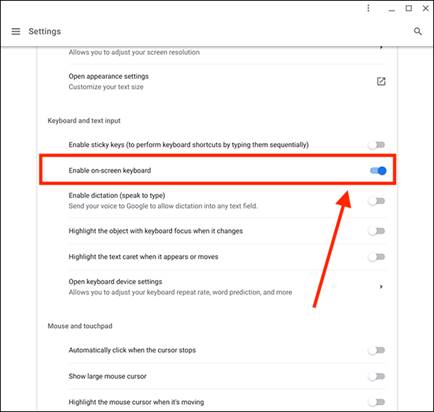
- In the Accessibility settings, scroll down to the Keyboard and text input section. Select Enable on-screen keyboard to set the toggle switch to On.
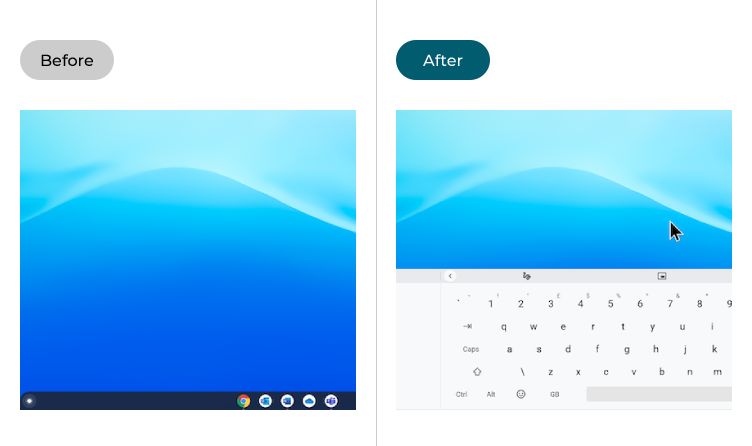
- You can now launch the on-screen keyboard by clicking on the icon in the bottom-right hand corner of the screen, on the Status Bar.
Before and after
Video guide
This section explains the steps you need to follow in order to enable the on-screen keyboard in Chrome OS. This is a step-by-step guide with pictures of the screens to help you.
Open the System menu
1. Click on the Time widget in the bottom right corner to open the System menu.

Open Settings
2. Click on the Settings button ![]() .
.
Find the Accessibility settings
3. In the Settings window, select Accessibility from the left-hand column. If Accessibility is not visible, click Advanced to reveal more menu items.
Open the accessibility features
4. Click on Manage accessibility features in the right-hand panel.
Enable the on-screen keyboard
5. Scroll down to the Keyboard and text input section, then click on the toggle switch next to Enable on-screen keyboard to turn it on.
Launching the on-screen keyboard
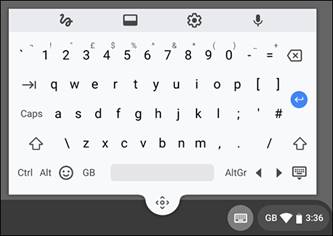
6. The on-screen keyboard will appear whenever you click on an area where you can enter text, but you can also launch it manually by clicking on the keyboard icon in the Status Bar towards the bottom-right corner of the screen.

Using the on-screen keyboard
7. You can type on the on-screen keyboard by clicking on or pressing each key in turn. To perform a keyboard shortcut, click on or tap the keys one after the other. To hide the on-screen keyboard tap or click on the minimise keyboard icon ![]() in the bottom-right corner.
in the bottom-right corner.

Switch to the compact keyboard
8. You can also switch to a compact or floating keyboard by clicking on the compact keyboard icon ![]() at the top of the on-screen keyboard. You can reposition it by dragging it around the screen by the move handle
at the top of the on-screen keyboard. You can reposition it by dragging it around the screen by the move handle ![]() at the bottom. To switch back to the full-sized keyboard, click the full-sized keyboard button
at the bottom. To switch back to the full-sized keyboard, click the full-sized keyboard button ![]() .
.
Note: If this does not work it could be because someone else manages your computer settings (an IT department or administrator). If this is the case, you will need to contact them to access these settings or for further help.