Short guide
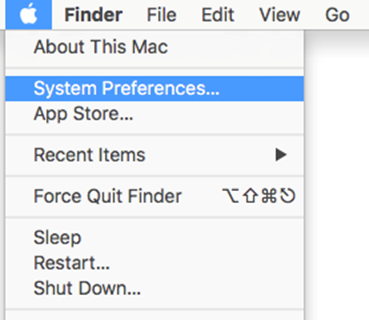
- Click the Apple icon in the top left corner of the screen and select System Preferences from the drop-down menu.
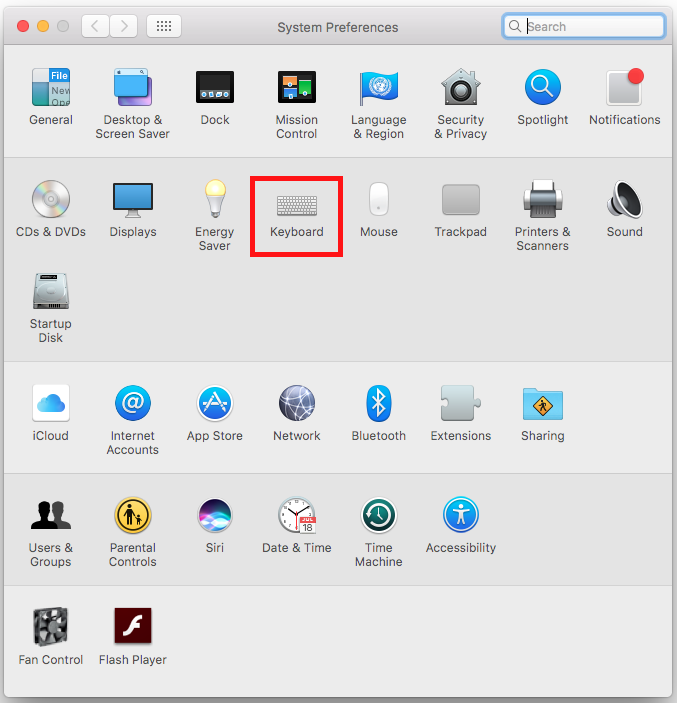
- In the System Preferences window, click on Keyboard.
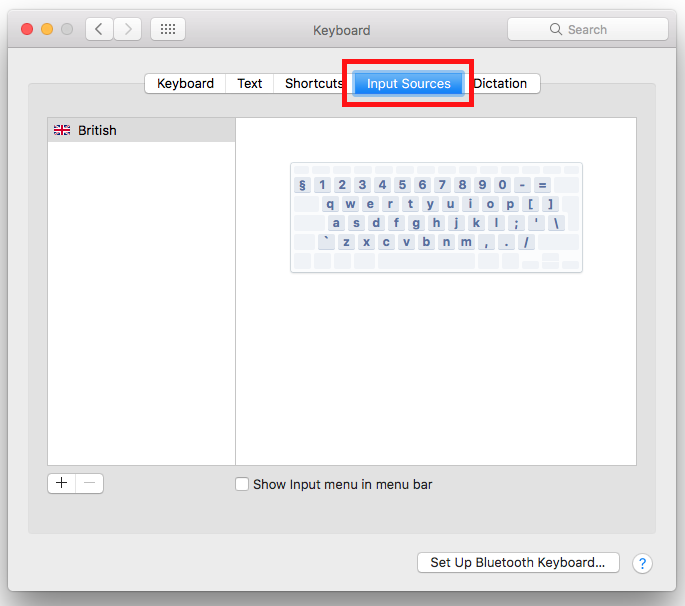
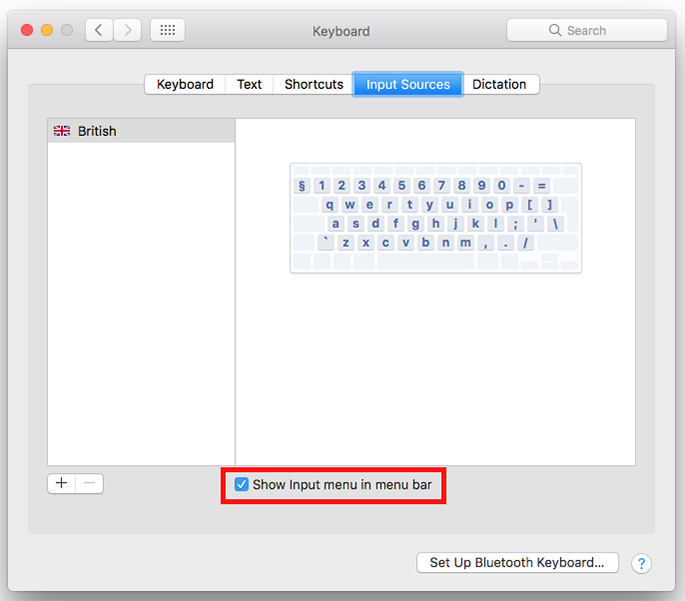
- Click on the Input Sources tab.
- Tick the checkbox next to Show input menu in menu bar. You can now use the Input menu in the top-right corner of the screen to switch to the on-screen keyboard.
- Click the red Close button to close the window.
Before and after
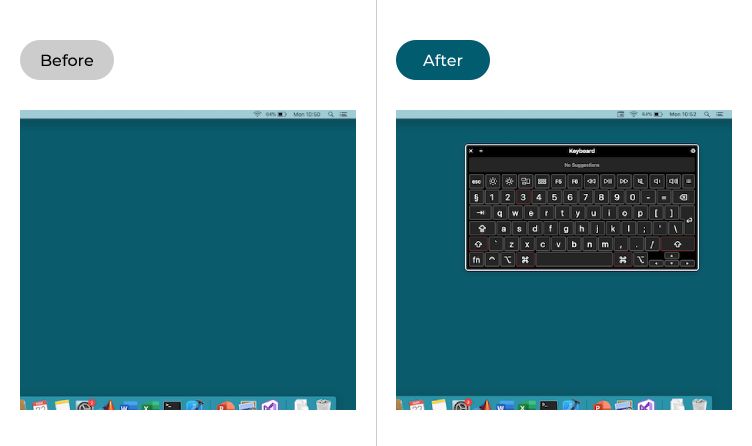
This section takes you through the steps for enabling and using the on-screen keyboard in macOS 10.12 Sierra, complete with pictures of each step.
Open the System Preferences
1. Click the Apple icon, ![]() , in the top left corner of the screen, then select System Preferences… from the menu.
, in the top left corner of the screen, then select System Preferences… from the menu.
Open the Keyboard preferences
2. When the System Preferences window opens, click on the Keyboard icon to see the Keyboard preferences.
Select Input Sources
3. Click on the Input Sources tab to select it.
Enable the Input menu
4. Tick the checkbox near the bottom of the window for Show Input menu in menu bar. The icon to launch the Input menu will now appear in the top-right corner of the screen.
Launching the on-screen keyboard
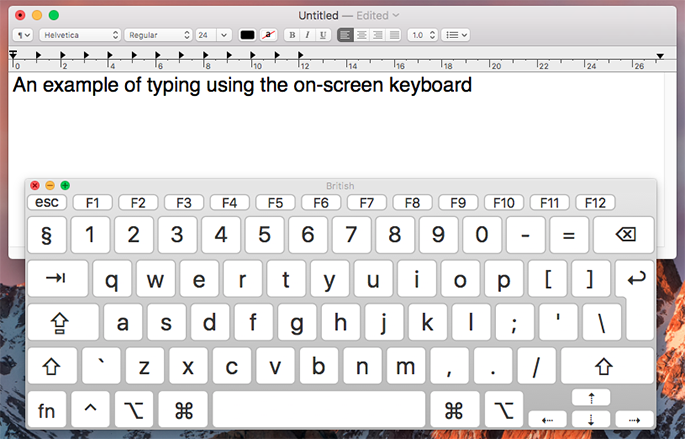
5. To launch the on-screen keyboard, click on the Input menu icon and select Show Keyboard Viewer.

Using the on-screen keyboard
6. You can type using the on-screen keyboard by clicking on any of the keys, and resize it by clicking on the green Resize button in the top-left corner, then clicking and dragging any of the on-screen keyboard's corners. To perform keyboard shortcuts, such as Cmd + C to copy text, you must first enable Sticky Keys in the Keyboard settings under Accessibility. See the article macOS 10.12 Sierra - Using the keyboard one-handed for more information.
Hiding the on-screen keyboard
7. If you want to close the on-screen keyboard click the Close (red) button in the top-left corner of the on-screen keyboard or click on the Input menu icon in the menu bar and select Hide Keyboard Viewer.

Note: If this does not work it could be because your computer settings are managed by someone else (an IT department or administrator for example). If this is the case you will need to contact them to access these settings or for further help.