Call our helpline
0300 180 0028The Magnify in iOS 16 adds new features to detect people and doors, and give descriptions of objects in your surroundings. See our articles about Image Descriptions, People Detection, and Door Detection.
Short guide
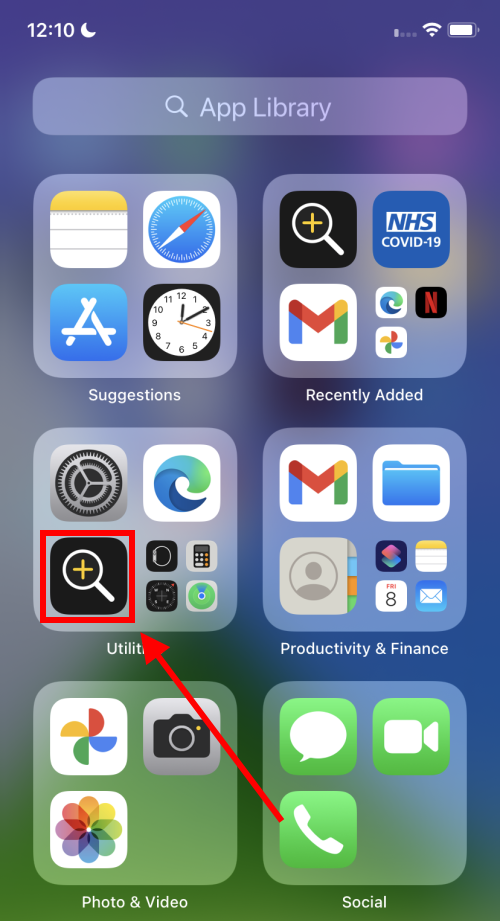
- To find the Magnifier, swipe right through the Home page screens to find your App Library. Tap the Magnifier icon in the Utilities folder.
- Launch the Magnifier and point your camera at an object or a page. Drag the central slider to zoom in and out or use the handle at the top of the window downwards to hide the controls.
- Tap the Brightness or Contrast icons to adjust brightness or contrast, tap the Torch icon to turn on the torch, or the Switch camera icon to switch camera.
- Tap the Screen Capture button to take a screenshot, or tap the Multi-capture button to take multiple screenshots. Adjust the brightness and contrast or add filters, and tap the Share button to save or share your screenshots.
- When you've finished using the Magnifier, swipe up from the bottom of the screen or press the Home button to return to the Home screen.
Before and after

This section explains how to use the Magnifier in Apple iOS 15, with step-by-step instructions and pictures of the screen to help.
Find the magnifier
1. You can find the Magnifier in your App Library. Swipe right through your Home pages until you find it, then tap the Magnifier icon in the Utilities folder.
Add the Magnifier the Home screen
2. You can also tap and hold the Magnifier icon then drag it out onto a page of your Home screen. It’s also possible to add it as an Accessibility Shortcut. See the article How to use the Accessibility Shortcut in iOS 15.

Adjust the Zoom level
3. Launch the Magnifier and point your camera at an object or a page of small text. You can drag the central slider to change the level of magnification and zoom in and out, or drag the handle at the top of the control window downwards to hide the controls.

Understanding the controls
4. The other controls have the following functions:
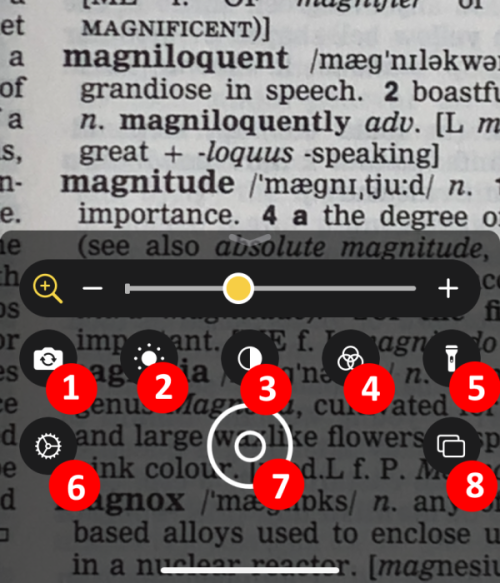
- Switch camera: Switch the magnified view from the rear-facing camera to the front-facing camera.
- Brightness: Tap the icon then drag the slider to adjust the brightness levels.
- Contrast: Tap the icon then drag the slider to adjust the contrast.
- Filter: Tap the icon then choose a colour filter to apply it to the screen.
- Torch. Tap the icon to turn on your device’s torch.
- Magnifier settings: Change and reorder the controls that appear on the Magnifier screen.
- Screen capture: Freeze and capture an image of magnified view (see below).
- Multi-capture button: Take multiple screen captures, one after the other.
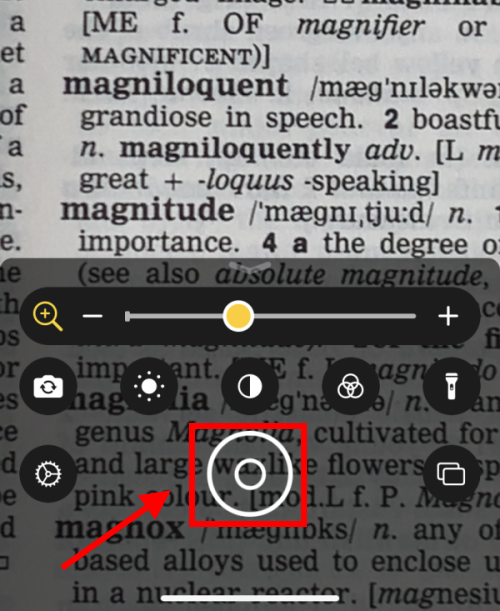
Capture screenshots
5. Tap the Screen Capture button to take a screenshot of the current view. You can zoom in and out on the captured image and apply brightness, contrast, and filters. Press the button again to unfreeze the screen.
Take multiple screenshots
6. Tap the Multi-capture button to take multiple screenshots and view them later. Tap it once, then tap the Screen capture button each time you want to capture the magnified view.
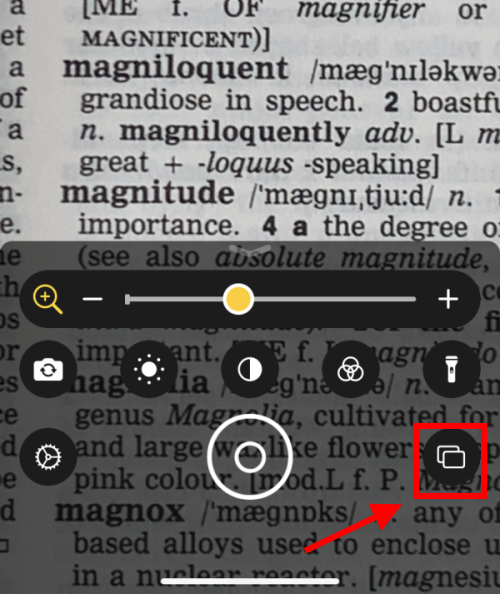
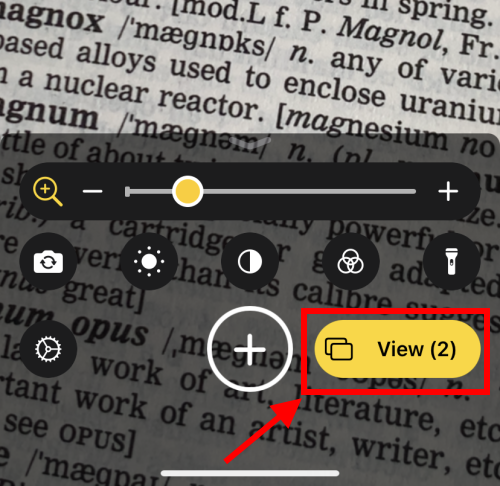
View your screenshots
7. To view your new screenshots tap the Multi-capture button again. The button will now be yellow and indicate how many screenshots you have taken.
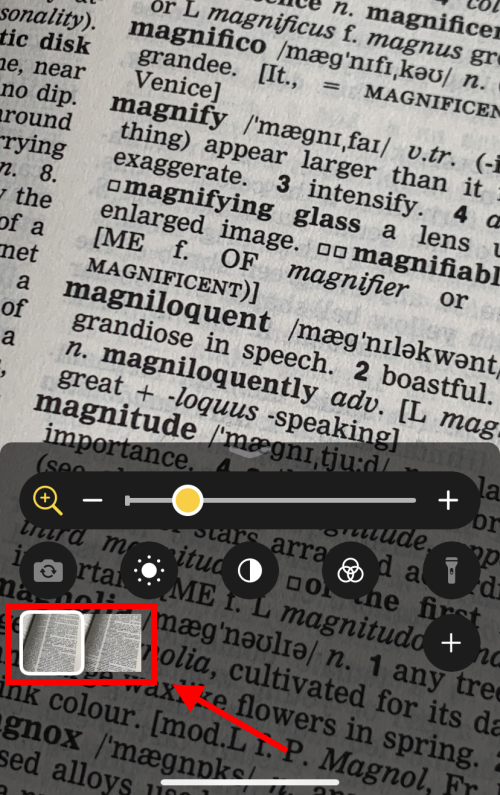
Editing screenshots
8. Select a screenshot by tapping on a thumbnail in the bottom-left corner. You can change the brightness and contrast and add filters to your captured images.
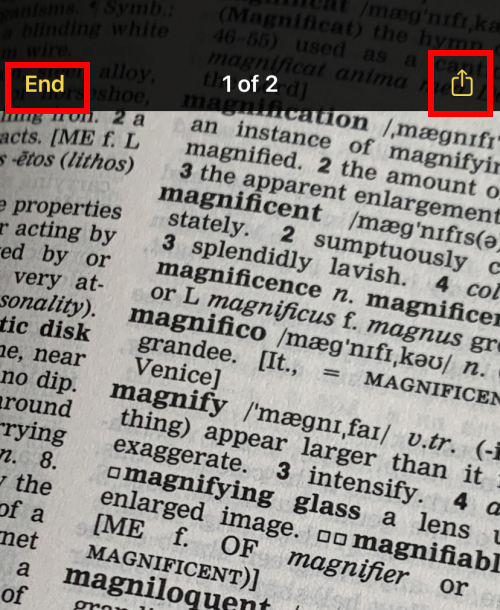
Share your screenshots
9. If you want to save or share a screenshot, tap the Share button in the top-right and choose a destination. You should see your email, photo-sharing and social media apps listed.
Return to the Home screen
10. When you’ve finished using the Magnifier, swipe up from the bottom of the screen or tap the Home button, if your device has one, to return to the Home screen.
Need some more help?
Call our helpline 0300 180 0028 or email enquiries@abilitynet.org.uk
Need free IT Support at Home?
If you are older or disabled and need IT support at home, you can book a free home visit.