Terminology:
‘Alt’ refers to the ‘Option’ key (⌥)
If you have enabled ‘Use F1, F2, etc. keys as standard function keys’ under ‘Keyboard’ settings in ‘System Preferences’ then omit the ‘Fn’ key from the keyboard shortcuts shown in this article.
For Apple computers with Retina displays:
- Open the ‘Apple Menu’ by clicking on the Apple icon in the top-left corner of the screen, or press ‘Fn’ + ‘Ctrl’ + ‘F2’ to highlight the Apple icon and press ‘Enter’.
- Select ‘System Preference’ from the Apple menu as shown in Fig 1 or press the down arrow key to highlight it and then press ‘Enter
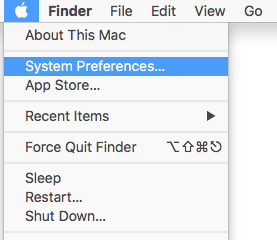
Fig 1 - In the System Preferences window, select ‘Displays’ or press ‘Tab’ repeatedly (you might need to press ‘Fn’ + ‘Ctrl’ + ‘F7’ first) to cycle through the icons until the ‘Displays’ icon is highlighted and then press the ‘Spacebar’, see Fig 2.
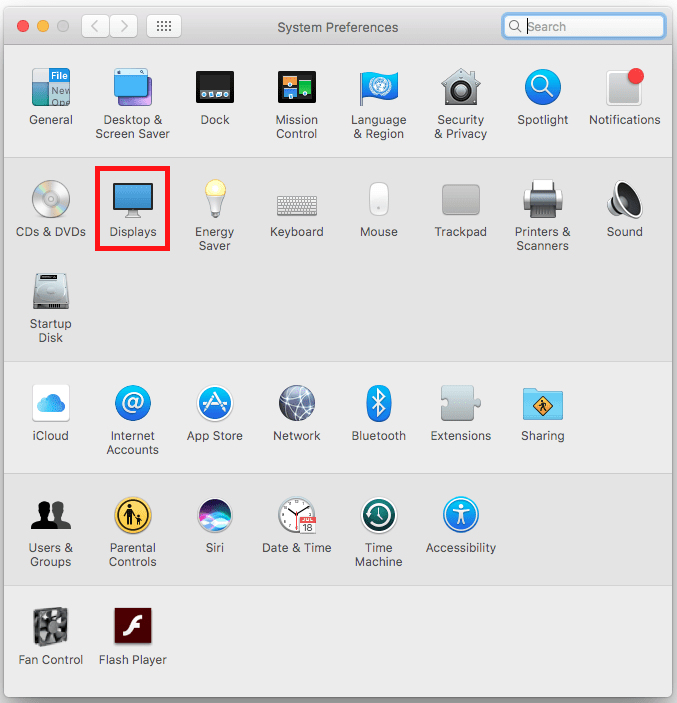
Fig 2 - On the Displays screen, click on ‘Scaled’ or press ‘Tab’ repeatedly until ‘Default for display’ is highlighted then press the down arrow to select ‘Scaled’, see Fig 3.
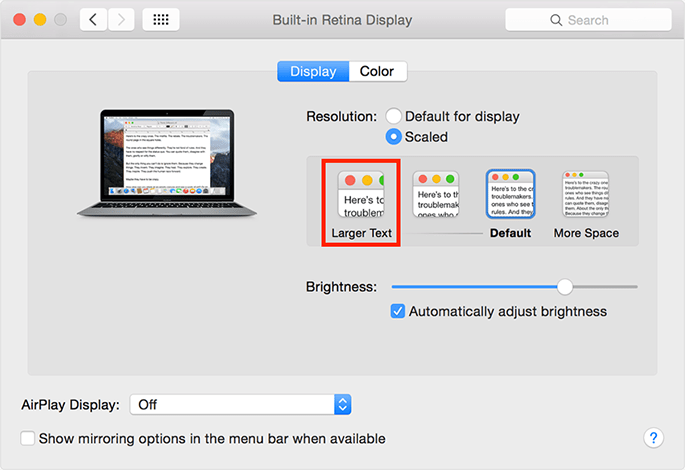
Fig 3 - Click on ‘Larger Text’ or press ‘Tab’ until ‘Larger Text’ is highlighted and then press ‘Spacebar’ see Fig 3.
- When you select ‘Larger Text’ you will see a message saying “Are you sure you want to switch to this scaled resolution? When using this scaled resolution, some applications may not fit entirely on screen.”Click ‘OK’ to confirm or press ‘Tab’ until ‘OK’ is highlighted and then press ‘Enter’.
- When you are happy with the screen size click the ‘Close’ (red) button at the top of the window or press ‘Cmd’ + ‘W’ to close the window.
For Apple computers with non-Retina displays
- Open the ‘Apple Menu’ by clicking on the Apple icon in the top-left corner of the screen, or press ‘Fn’ + ‘Ctrl’ + ‘F2’ to highlight the Apple icon and press ‘Enter’.
- Select ‘System Preference’ from the Apple menu as shown in Fig 1 or press the down arrow key to highlight it and then press ‘Enter’.

Fig 4 - In the System Preferences window, select ‘Displays’ or press ‘Tab’ repeatedly (you might need to press ‘Fn’ + ‘Ctrl’ + ‘F7’ first) to cycle through the icons until the ‘Displays’ icon is highlighted and then press the ‘Spacebar’, see Fig 2.

Fig 5 - On the Displays screen, click on ‘Scaled’ or press ‘Tab’ repeatedly until ‘Default for display’ is highlighted then press the down arrow to select ‘Scaled’, see Fig 6. The typical display resolution is 1366 × 768 although this depends on the type of display you are using with your computer - yours may have a different setting. To make text on-screen bigger change your resolution to a value lower than the current setting. To do this either click on the resolution you want to use or press ‘Tab’ to highlight the resolutions settings and use the up and down arrows keys to select a resolution that is best for you, see Fig 6.
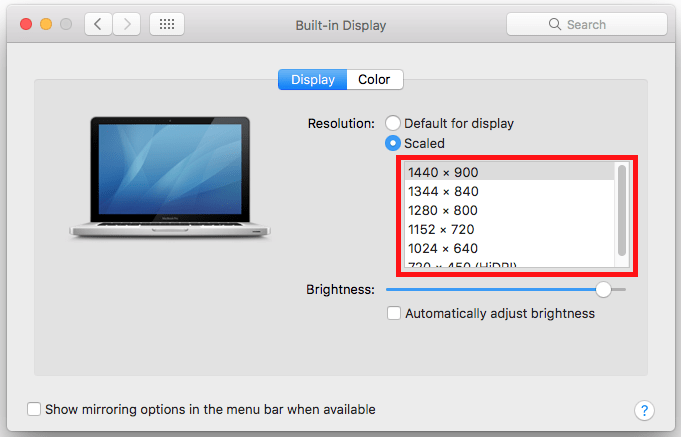
Fig 6 - When you are happy with the screen resolution settings, click the ‘Close’ (red) button at the top of the window or press ‘Cmd’ + ‘W’ to close the window.
Changing the font size for file and folder names
This section explains the ways you can change both the text and icon size for all files and folders including those on the desktop on your Mac. To change the text size for file and folder names in Finder:
- Make sure you are in ’Finder’ - press ’Cmd’ + ’Tab’ if necessary to cycle through your open applications until you return to ’Finder’.
- Make sure you have a ‘Finder’ window visible (press ‘Cmd’ + ‘N’ to open a new window if necessary).
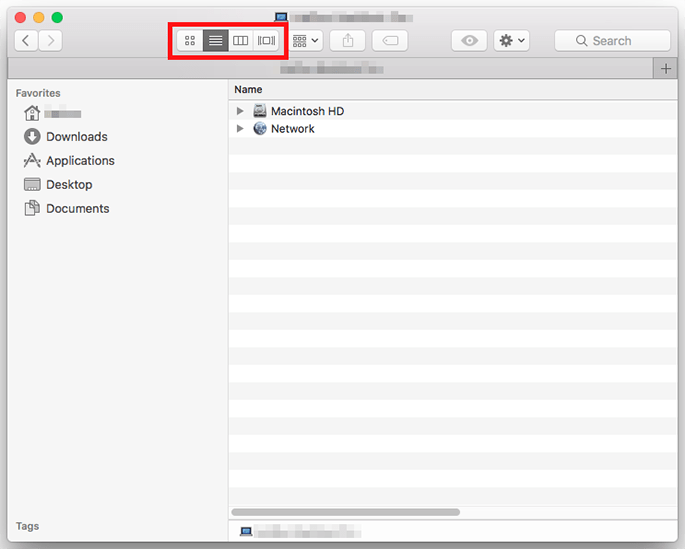
Fig 7
Note: ‘Finder’ offer multiple ways for viewing files and folders (see Fig 7). These view options are:
![]() = ‘Icon’ view (shortcut = ‘Cmd’ + ‘1)
= ‘Icon’ view (shortcut = ‘Cmd’ + ‘1)
 = ‘List’ view (shortcut = ‘Cmd’ + ‘2’)
 = ‘Column’ view (shortcut = ‘Cmd’ + ‘3’)
 = ‘Cover Flow’ view (shortcut = ‘Cmd’ + ‘4’)
The following instructions will show you the steps for changing the text size in ‘List’ view. Note: You will need to repeat these steps to change the text size for each of the other view options shown above.
- In a Finder window, click on the ‘List’ view button or press ‘Cmd’ + ‘2’, see Fig 7 above.
- Next, select ‘View’ in the menu bar, then choose ‘Show View Options’ from the menu or press ‘Cmd’ + ‘J’, see Fig 8.

Fig 8 - Using the mouse, click on the drop-down menu next to ‘Text size’ and choose a font size up to 16pt, see Fig 9 below.You can also make the Icon size smaller or larger by selecting a small or large icon (no keyboard shortcut).
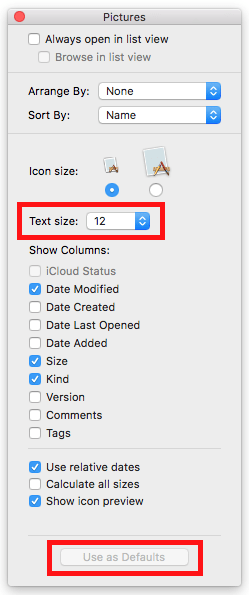
Fig 9 - Click ‘Use as Defaults’ to apply these settings to all folders when Finder is in ‘List’ view. If you don’ t click ‘Use as Defaults’ only the files in the current folder will have larger text. See Fig 9, above. Note: The ‘Use as Defaults’ button will only become active when you change one of the settings.
- When you are happy with your settings, click on the red close button at the top of the window or press ‘Cmd’ + ‘W’.
To change the text size for icon and folder names on the desktop
- Make sure you are in ’Finder’ press ’Cmd’ + ’Tab’ if necessary to cycle through open applications until you return to ’Finder’.
- Close all ‘Finder’ windows by pressing ‘Cmd’ + ‘W’ repeatedly to close each open window - this enables access to the desktop’s settings rather than the Finder window settings.
- When all ‘Finder’ windows are closed, select ‘View’ in the menu bar then choose ‘Show View Options’ or press ‘Cmd’ + ‘J’, see Fig 10.
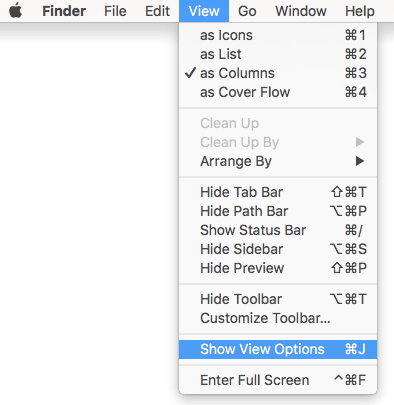
Fig 10 - Using the mouse, click on the box next to ‘Text size’ and choose a font size up to 16pt, see Fig 11 below.You can also make the Icon size smaller or larger by clicking on the ‘Icon size’ slider (no keyboard shortcut).To change the space between icons by click on the ‘Grid spacing’ slider (no keyboard shortcut).
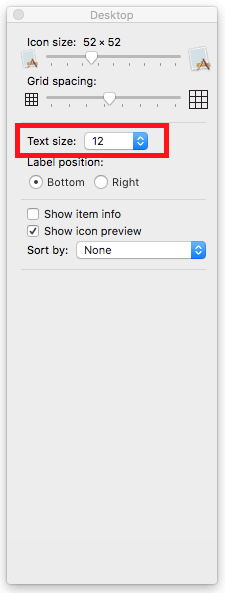
Fig 11 - When you are happy with your settings, click on the red close button at the top of the window or press ‘Cmd’ + ‘W’.
Note: If this does not work it could be because your computer settings are managed by someone else (an IT department or administrator for example). If this is the case you will need to contact them to access these settings or for further help.
Related information:
Please also see: http://osxdaily.com/2016/02/25/change-text-font-size-finder-mac-os-x/ Note: It is possible to increase the text size for some individual applications. Apple have more information here: https://support.apple.com/kb/PH18831?locale=en_US (scroll down to ‘Make text bigger’).
Need some more help?
Call our helpline 0300 180 0028 or email enquiries@abilitynet.org.uk
Need free IT Support at Home?
If you are older or disabled and need IT support at home, you can book a free home visit.