NOTE: Siri needs a connection to the internet in order to work.
If you have enabled ‘Use F1, F2, etc. keys as standard function keys’ under ‘Keyboard’ settings in ‘System Preferences’ then omit the ‘Fn’ key from the keyboard shortcuts shown in this article.
Examples of what Siri can do
- Make Facetime calls
- Send emails and messages
- Set calendar events and reminders
- Obtain weather forecasts
- Give directions on Apple Maps
- Perform calculations
- Open applications
- Open accessibility options
- Turn on certain accessibility features such as ‘VoiceOver’.
- Change setting on your device such as changing the brightness and volume or toggling Wi-Fi on or off.
- Perform web searches
- Play music, including particular artists, songs or albums
How to enable Siri
‘Siri’ can be enabled when you first set up your computer or at later date using the following instructions:
- Open the ‘Apple Menu’ by clicking on the Apple icon (
 ) in the Menu Bar, or press ‘Fn’ + ‘Ctrl’ + ‘F2’ to highlight the Apple icon and press ‘Enter’
 - Click to select ‘System Preferences…’ as shown in Fig 1 or press the down arrow key to highlight it and then press ‘Enter’.

Fig 1 - In the ‘System Preferences’ pane, click on the ‘Siri’ icon or press ‘Tab’ repeatedly (you might need to press ‘Fn’ + ‘Ctrl’ + ‘F7’ first) to cycle through the icons until the ‘Siri’ icon is highlighted with a blue border as shown in Fig 2 and then press the ‘Spacebar’.
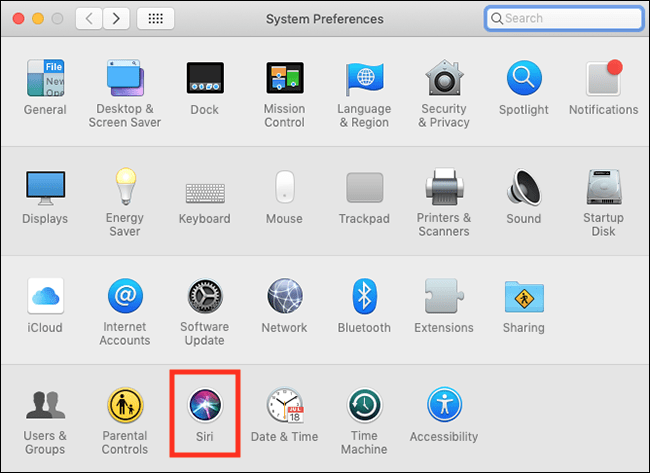
Fig 2 - If ‘Siri’ is not already enabled, click the checkbox next to ‘Enable Ask Siri’ or press ‘Tab’ until the checkbox is highlighted and press ‘Spacebar’. Fig 3.

Fig 3
With ‘Siri’ enabled you can adjust the following settings:
Keyboard Shortcut
You can change the keyboard shortcut used to trigger ‘Siri’. By default, ‘Siri’ is trigger by pressing ‘Cmd’ + ‘Spacebar’ and holding them until the ‘Siri’ pop-up window appears.
To change this shortcut, click on the dropdown menu next to ‘Keyboard Shortcut’ or press ‘Tab’ until the dropdown menu is highlighted and press ‘Spacebar’ to trigger the menu. Fig 4.

Fig 4
Choose from the following options:
- Off
- Hold Command Space
- Hold Options Space
- Press Fn (Function) Space
- ^Space
- Customise…
Mic Input
By default, the computer automatically chooses which microphone to use for voice input. Your computer’s internal microphone is used unless you have an alternative microphone plugged in.
To change this setting, click on the dropdown menu next to ‘Mic Input’ or press ‘Tab’ until the dropdown menu is highlighted and press ‘Spacebar’ to trigger the menu. Fig 5.

Fig 5
Choose from the following options:
- Automatic
- Internal Microphone
- Line In
Language
By default, ‘Siri’ uses the language you selected when you first set up your computer. If you would like to change the language ‘Siri’ uses, click on the dropdown menu next to ‘Language’ or press ‘Tab’ until the dropdown menu is highlighted and press ‘Spacebar’ to trigger the menu. Fig 6.
In the menu that appears, click on the language you would like to use.

Fig 6
Siri Voice
To change the voice that ‘Siri’ uses when giving spoken feedback, click on the dropdown menu next to ‘Siri Voice’ or press ‘Tab’ until the dropdown menu is highlighted and press ‘Spacebar’ to trigger the menu. Fig 7.

Fig 7
Choose from the following options:
- American (Female)
- American (Male)
- Australian (Female)
- Australian (Male)
- British (Female)
- British (Male)
Voice Feedback
By default, ‘Siri’ gives spoken, as well as visual, feedback to your queries. If you would like to turn off spoken feedback click on the radio button next to ‘Off’ or press ‘Tab’ until the radio button is highlighted and press ‘Spacebar’ to activate it. Fig 8.

Fig 8
Show Siri in menu bar
By default, a ‘Siri’ icon appears in the menu bar in the top-right corner of the screen. If you would prefer not to show the icon in the menu bar click on the checkbox next to ‘Show Siri in menu bar’ or press ‘Tab’ until the checkbox is highlighted and press ‘Spacebar’ to deactivate it. Fig 9.

Fig 9
Using Siri
- To launch Siri either:
- Press the keyboard shortcut (see the Keyboard Shortcut section above).
- Click the ‘Siri’ icon in the dock. Fig 10.
- Click the ‘Siri’ icon in the menu bar. Fig 10.

Fig 10
- The ‘Siri’ window will appear in the top-right of your screen asking what you would like help with. You will also see an animated pattern to show ‘Siri’ is listening. Fig 11.

Fig 11 - You can now ask your query or state your request. In our example, below, we asked ‘Siri’ for the weather forecast. Fig 12.

Fig 12 - We received a spoken and visual response, see in Fig 13.

Fig 13 - If you didn’t ask you query in time, or you would like to ask another query whilst the ‘Siri’ window is still open, click on the animated ‘Siri’ icon at the bottom of the pop-up window. Fig 14.

Fig 14
Ask Siri what she/he can do
- To find out more about what ‘Siri’ is capable of doing on your computer just launch ‘Siri’ and ask “What can you do?” (Fig 15.

Fig 15 - You will be presented with a list of apps that ‘Siri’ is able to interact with. Fig 16.

Fig 16 - Click any app name in the list to see how ‘Siri’ can be of assistance and to see examples of how to phrase your queries. See Fig 17 for an example of how ‘Siri’ can help using the Messages app.

Fig 17
Examples of using Siri
The following examples use spoken queries, if you would prefer to type your queries and requests to ‘Siri’ please see the ‘Type to Siri’ section below.
Add a new Calendar event
In our example below, we will ask ‘Siri’ to add a new ‘Calendar’ entry for a dentist appointment.
- Launch ‘Siri’ by pressing the keyboard shortcut or by click on the icon in the dock or the menu bar. Say “New calendar event for dentist appointment”. Fig 18.

Fig 18 - ‘Siri’ will responding by asking for the date and time of the appointment. When the glowing wave appears at the bottom of the screen (indicating that ‘Siri’ is listening) give ‘Siri’ the details. Fig 19.

Fig 19 - In our example, we have given the date as 21st November and the time as 2.30pm. Fig 20.

Fig 20 - ‘Siri’ gives spoken and visual confirmation of the event details and ask you to confirm them before adding the event to your calendar. Fig 21.
- When the sound wave appears again to indicate ‘Siri’ is listening say “Yes” or “Confirm”, or click the ‘Confirm’ button on the screen. Fig 21.

Fig 21
Add a new Reminder
In our example below we will ask ‘Siri’ to set a reminder to buy milk the following day.
- Launch ‘Siri’ by pressing the keyboard shortcut or by click on the icon in the dock or the menu bar.
- Say, “Set a reminder to buy milk tomorrow at 5pm”. Fig 22.

Fig 22 - ‘Siri’ immediately sets the reminder and gives spoken and visual confirmation of the reminder that has been created. Fig 23. Note: ‘Siri’ also presents a ‘Remove’ button so that you can delete the reminder if you’ve made an error or changed your mind.

Fig 23
Type to Siri
If you would prefer to type your queries and requests to ‘Siri’ you can enable the ‘Type to Siri’ option in ‘Accessibility’ settings.
- Open ‘Accessibility Preferences’: Apple Menu > System Preferences > Accessibility. (See the article Open Accessibility Preferences on this website for more information.)
- In the left column, under ‘Interacting’, click on ‘Siri’ or press ‘Tab’ to highlight ‘General’ and then press the up or down arrow keys to select ‘Siri’, see Fig 24.

Fig 24 - Click the checkbox next to ‘Enable Talk to Siri’ or press ‘Tab’ to highlight the checkbox and press the ‘Spacebar’. Fig 25.

Fig 25 - When happy with your settings click the close icon in the top left of the window or press ‘Apple’ + ‘W’ on the keyboard to close the window.
Using ‘Type to Siri’
- Launch ‘Siri’ by pressing the keyboard shortcut or by click on the icon in the dock or the menu bar.
- The ‘Siri’ window will appear in the top-right of your screen asking what you would like help with. An input box with a flashing cursor appears below this prompting you to type your query. Fig 26.

Fig 26 - You can start typing your query immediately. In our example below we asked about the weather. Fig 27.

Fig 27 - We received a spoken and visual response, see in Fig 28.

Fig 28 - if you would like to ask another question whilst ‘Siri’ is open there is another ‘Type to Siri’ input box at the bottom of the window where you can start typing. Fig 29.

Fig 29
More information:
Apple’s guide to using Siri on a Mac: https://support.apple.com/en-gb/HT206993
iMore’s Siri help guide: https://www.imore.com/siri-mac
Need some more help?
Call our helpline 0300 180 0028 or email enquiries@abilitynet.org.uk
Need free IT Support at Home?
If you are older or disabled and need IT support at home, you can book a free home visit.