The pointer changes shape depending on where it is on the screen. Most often it appears as a small white arrow with a black outline; over a white background this is simply a black outline. In some cases it is even less easy to see. For example, over any area where you can type it turns into a 'I' cursor (called an ' I-beam ').
This section shows you how to increase the size of your mouse pointer so that it will be easier to see under all conditions.
Method 1: Using the Ease of Access Center in the Control Panel
This method has more configuration options than Method 2, but it is recommended for users with a keyboard and/or a mouse – the interactive elements are small and therefore difficult to tap. If you are using a tablet or a phone, you will probably prefer Method 2.
To open the 'Ease of Access Center' in the Control Panel
- Press the 'Windows' key + U.
Or
- Move the mouse pointer to the upper right hand corner of the screen to reveal the charms.
- Click on the 'Search' charm – the one with the magnification glass icon.
- Type the query 'Ease of Access Center' in the search box (Fig 1).
- Click on the button 'Ease of Access Center'.
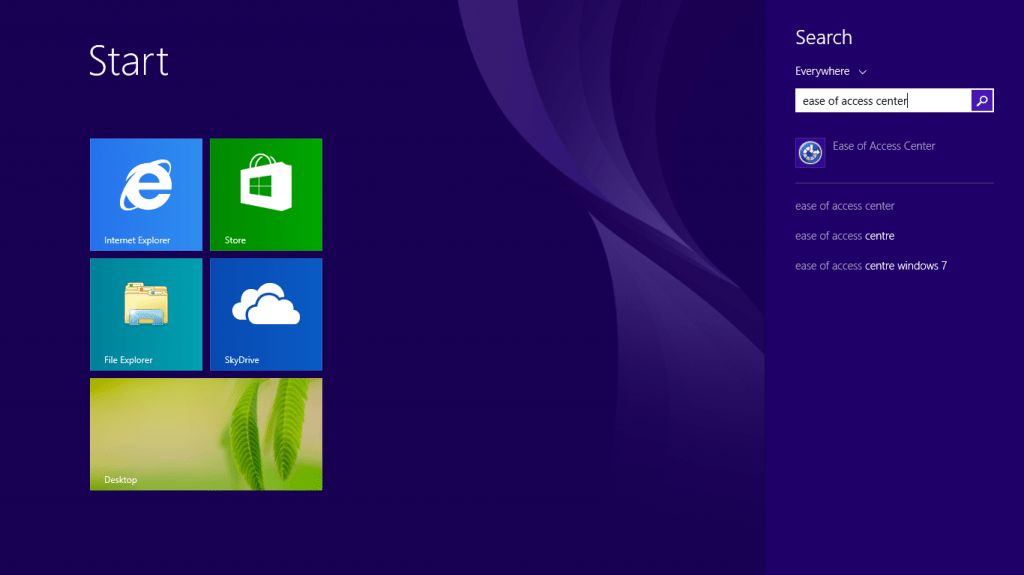
Figure 1: Using the search to go to the Ease of Access Center
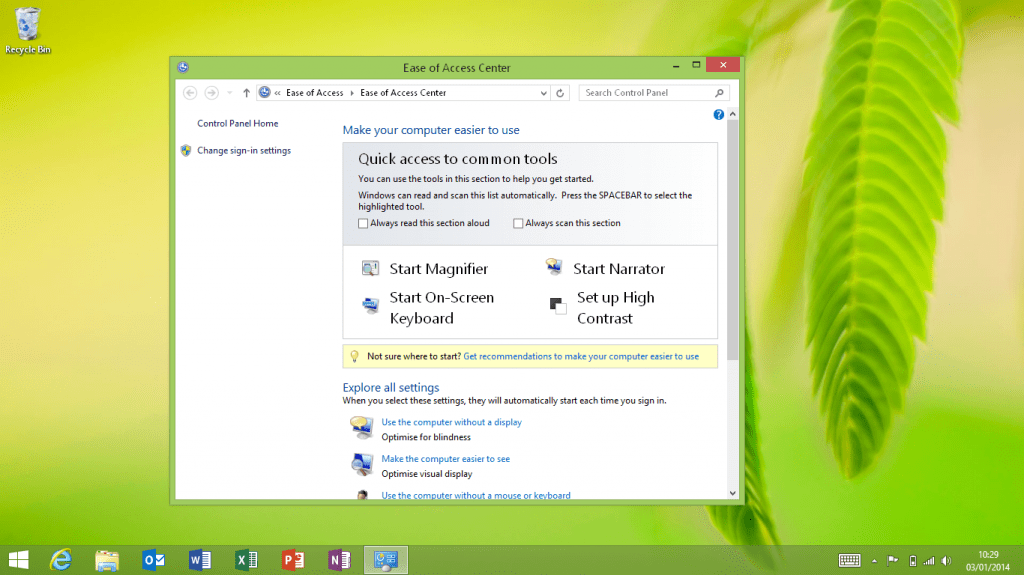
Figure 2: Ease of Access Center
To make the mouse pointer larger
- In the Ease of Access centre, click ‘Make the mouse easier to use’, under 'Explore all settings' (Fig 3).

Figure 3
- Select the mouse pointer that you prefer, under 'Make the mouse easier to use' (Fig 4).
Click to select or press to change your mouse pointer:
- ‘ALT’ + ‘R’ for Regular White
- ‘ALT’ + ‘I’ for Large Inverting
- ‘ALT’ + ‘X’ for Extra Large White
- ‘ALT’ + ‘U’ for Regular Black
- ‘ALT’ + ‘K’ for Extra Large Black
- ‘ALT’ + ‘G’ for Regular Inverting
- ‘ALT’ + ‘N’ for Extra Large Inverting
- ‘ALT’ + ‘L’ for Large White
- ‘ALT’ + ‘B’ for Large Black
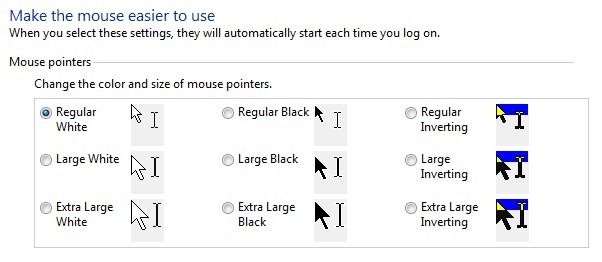
Figure 4
Method 2: Using the Ease of Access Center in the PC settings
This method is recommended for users with touch enabled devices such as tablets or phones.
To open the 'Ease of Access' section in PC settings
From a computer with a keyboard and a mouse
- Move the mouse pointer to the upper right hand corner of the screen to reveal the charms.
- Click on the 'Settings' charm – the one with the cog icon.
- Click on the link 'Change PC settings'.
- Click on the button 'Ease of access' (Fig 5).
From a touch enabled device
- Swipe in from the right hand edge of the screen to reveal the charms.
- Tap on the 'Settings' charm – the one with the cog icon.
- Tap on the link 'Change PC settings'.
- Tap on the button 'Ease of access' (Fig 5).
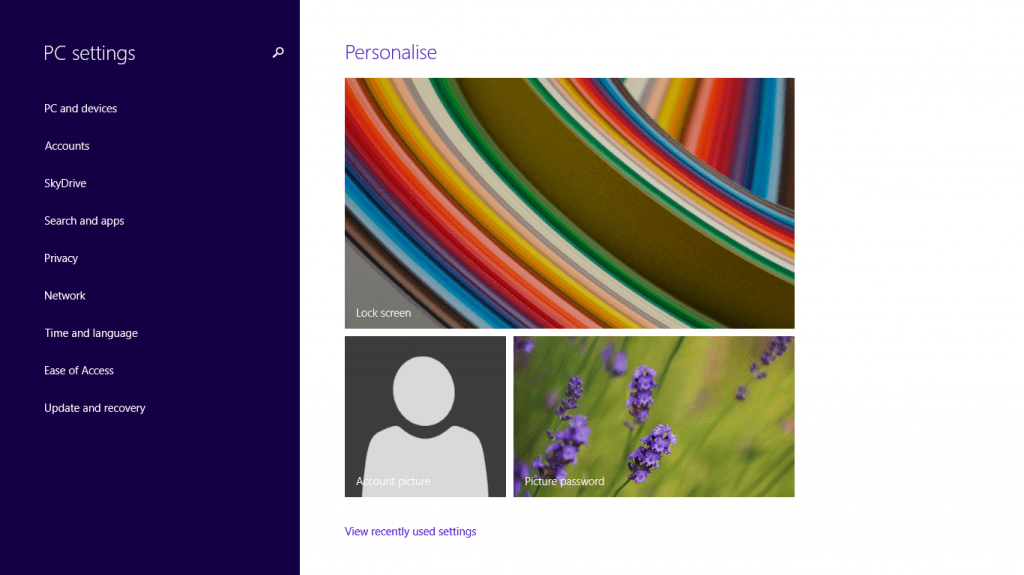
Figure 5: PC settings, which includes 'Ease of Access' (second option from the bottom)
To make the mouse pointer larger
From the Ease of Access section (Fig 5):
- Tap or click 'Mouse' in the left-hand side menu.
- Tap or click the type of pointer you prefer in 'Pointer size' and 'Pointer colour' (Fig 6).
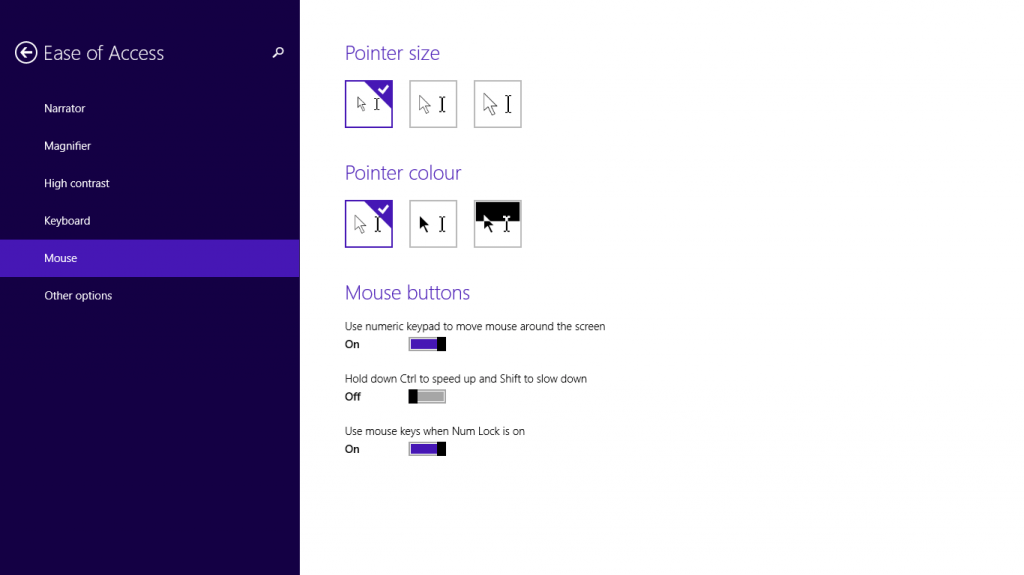
Figure 6
Note: If this does not work it could be because your computer settings cannot be changed due to local IT policies - contact your local IT support for further help.
Need some more help?
Call our helpline 0300 180 0028 or email enquiries@abilitynet.org.uk
Need free IT Support at Home?
If you are older or disabled and need IT support at home, you can book a free home visit.