To set up your microphone
Before you use Speech Recognition you will need to setup your microphone.
From a computer with a keyboard and a mouse
- Move the mouse pointer to the upper right hand corner of the screen to reveal the charms.
- Click on the 'Search' charm – the one with the magnification glass icon.
- Type the query 'Set up a microphone' in the search box.
- Click on the button 'Set up a microphone'.
From a touch enabled device
- Swipe in from the right hand edge of the screen to reveal the charms.
- Tap on the 'Search' charm – the one with the magnification glass icon.
- Type the query 'Set up a microphone' in the search box.
- Tap on the button 'Set up a microphone'.
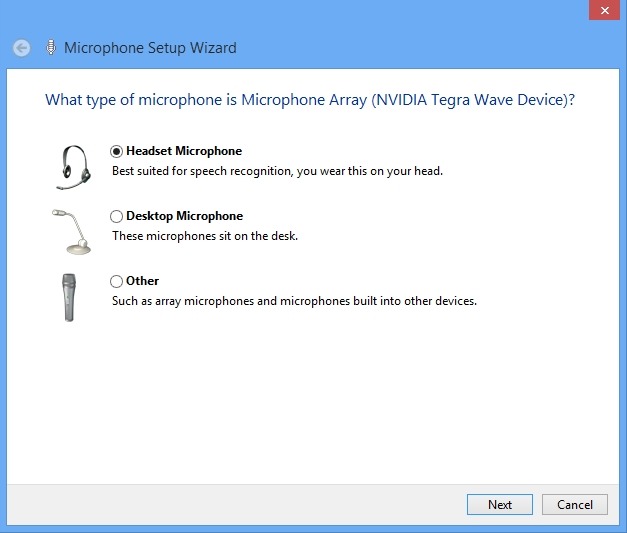
Figure 1: Microphone Setup Wizard
- You will now have access to the 'Microphone Setup Wizard' (Fig 1). Select your type of microphone and click 'Next' (or ‘Alt’ + ‘right arrow key’).
- You will see a screen on placing your microphone. Click ‘Next’ (or ‘Alt’ + ‘right arrow key’).
- Next you are asked to read a sentence on screen and you see a slider in the volume bar move as you speak (Fig 2). Read it and click ‘Next’ (or ‘Alt’ + ‘right arrow key’).
- The microphone is setup. Click the ‘Finish’ button.
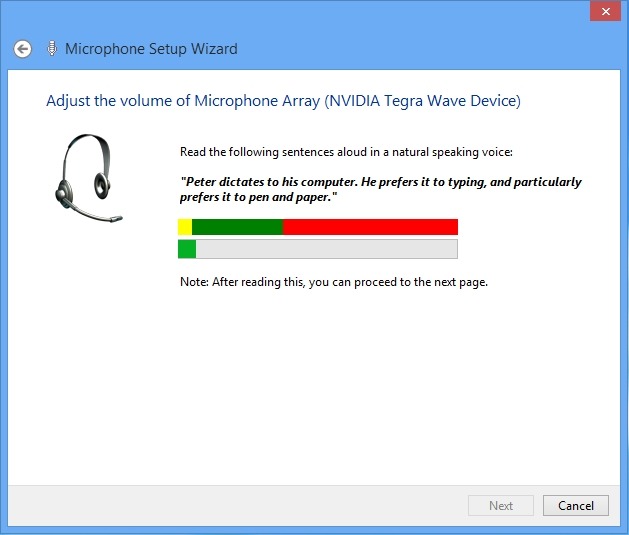
Figure 2
To train the Speech Recognition system
You can now start dictating. However, the recognition will not be accurate as the computer has not “learnt” your voice.
From a computer with a keyboard and a mouse
- Move the mouse pointer to the upper right hand corner of the screen to reveal the charms.
- Click on the 'Search' charm – the one with the magnification glass icon.
- Type the query 'Speech recognition' in the search box.
- Tap on the button 'Speech recognition'.
From a touch enabled device
- Swipe in from the right hand edge of the screen to reveal the charms.
- Tap on the 'Search' charm – the one with the magnification glass icon.
- Type the query 'Speech recognition' in the search box.
- Tap on the button 'Speech recognition'.
The window 'Speech Recognition' will open (Fig 3).
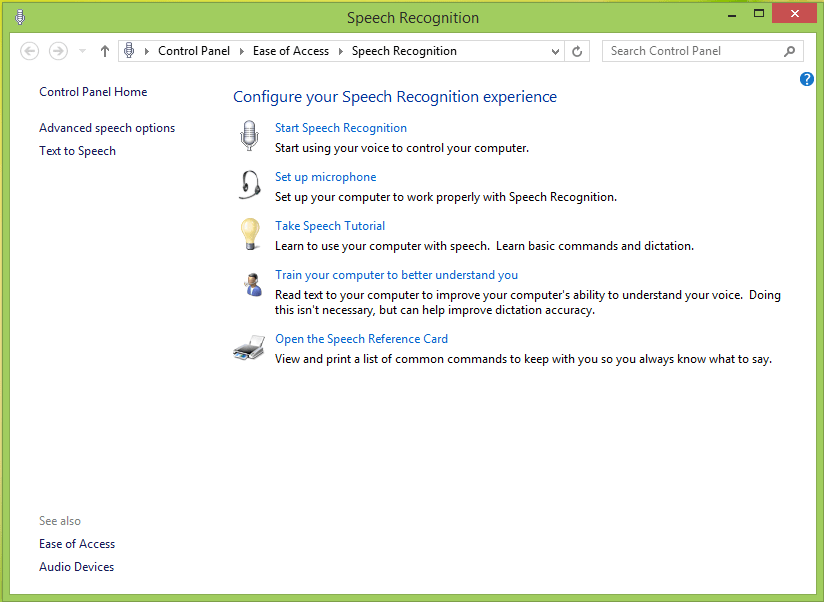
Figure 3: Speech recognition window
- Click ‘Train your computer to better understand you’. This takes 5 minutes and you can take further units if you want.
- Read the Welcome screen text, and click ‘Next’.
- Read aloud the training text and click ‘More Training’.
- Click 'Next'. After you have done this the computer should recognise your voice.
- For a list of speech commands click ‘Open reference card’.
To open Speech Recognition automatically when Windows starts
From the ‘Ease of Access Center’:
- Click ‘Use the computer without a display’ under 'Explore all settings' (Fig 4).
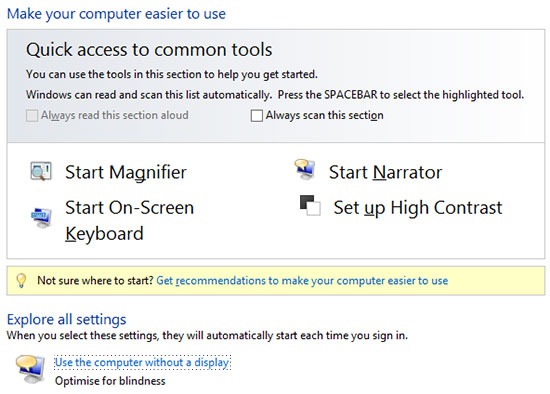
Figure 4
- Click ‘Set up Text to Speech’ under 'Hear text read aloud' (Fig 5).
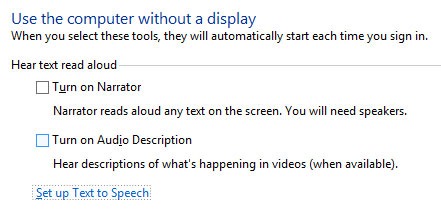
Figure 5
- Click the tab ‘Speech Recognition’.
- Click the checkbox ‘Run Speech Recognition at startup’ under ‘User Settings’ (Fig 6).
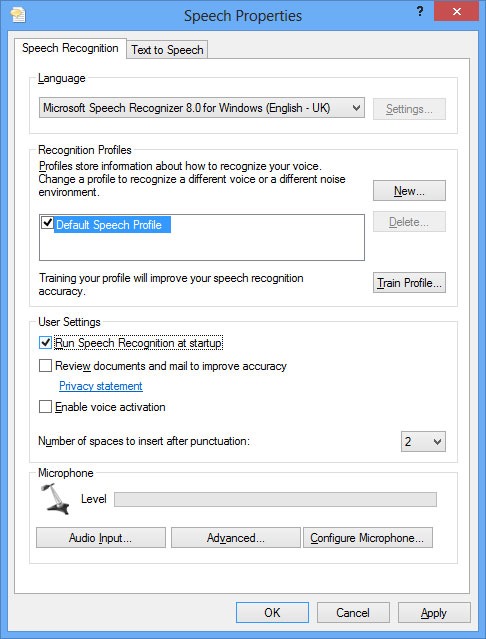
Figure 6
- Click ‘Apply’.
Note: If this does not work it could be because your computer settings cannot be changed due to local IT policies - contact your local IT support for further help.
Need some more help?
Call our helpline 0300 180 0028 or email enquiries@abilitynet.org.uk
Need free IT Support at Home?
If you are older or disabled and need IT support at home, you can book a free home visit.