Call our helpline
0300 180 0028Types of Switches:
- An external switch –These connect via USB or Bluetooth, with one or more buttons that you can assign actions to.
- An external keyboard – You can attach a USB or Bluetooth keyboard to your device and assign actions to any of the keys.
Note: For USB keyboards, your phone will need to support On The Go (OTG) connections and you may also need an OTG converter cable. - The buttons on your device – you can assign actions to the up and down volume buttons on your device. This is an easy introduction to the possibilities Switch Access
How to enable Switch Access
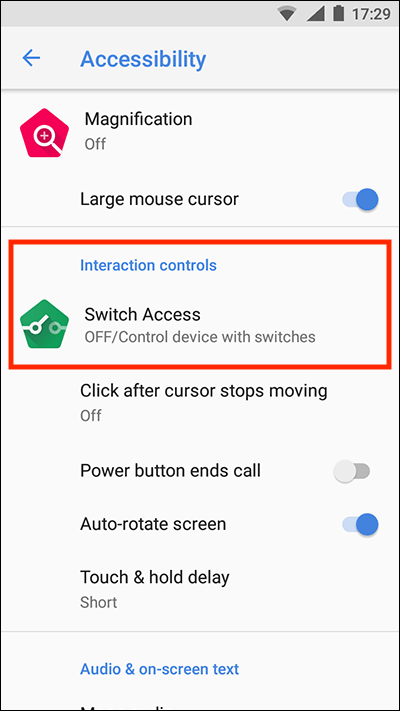
- Open ‘Settings’ and choose ‘Accessibility’ (see the article Android – How to open the Accessibility Settings on this website for more information).
- Scroll down to the Interaction controls section and tap on ‘Switch Access’.
- Tap the on/off toggle switch to begin the setup process. (Note: If you want to use your device’s volume buttons as switches, skip to the ‘Switch Access settings’ section below. Once you have added the volume buttons as switches, come back here and turn Switch Access on.)
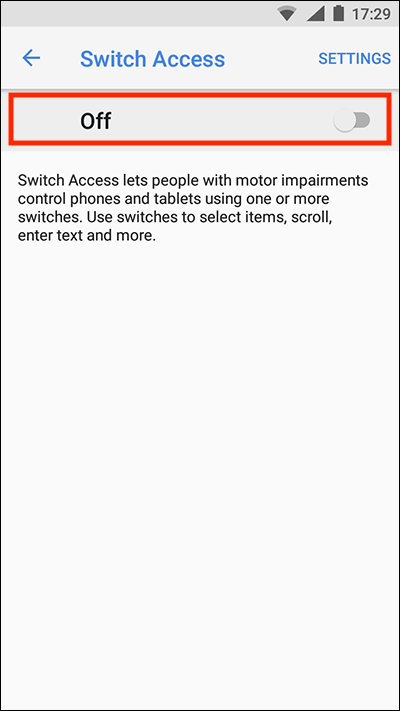
- An alert will appear on the screen asking permission for Switch Access to perform certain actions on your Tap OK if you are happy to proceed.
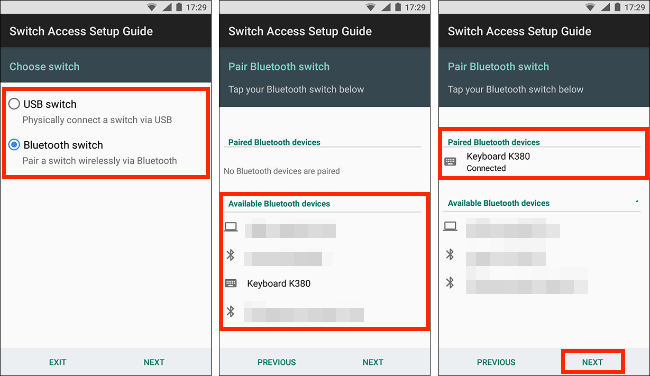
- Choose which type of device you are connecting - a USB Switch or Bluetooth switch. In our example, we use a Bluetooth keyboard as our switch device. We first need to pair the keyboard with our Android device.
- Under, ‘Available Bluetooth devices’ tap the name of the device to begin pairing it.
- Once it appears in the list of ‘Paired Bluetooth devices’ tap ‘Next’ to proceed.
- Choose the number of switches you wish to use then tap ‘Next’.
- One switch: You press the switch to start cycling through the items on the screen, press it again to select the highlighted item.
- Two switches: You press one switch to start cycling through the items on the screen and press the other switch to select the highlighted item.

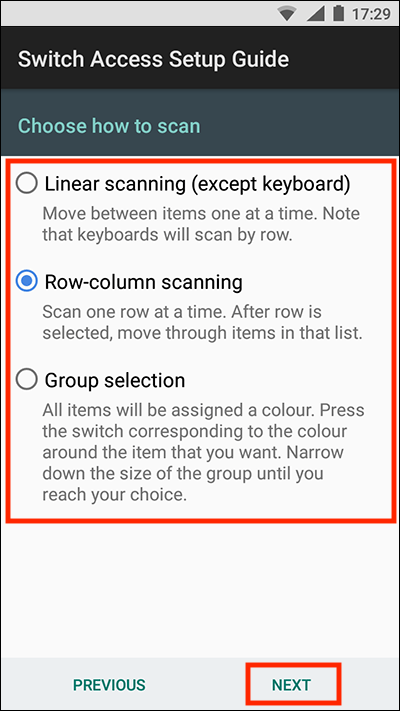
- Next, choose how you would like your device to scan through the items on the screen, then tap next to proceed.
- Linear scanning (except keyboards): Move between items one at a time. Note: Keyboards will scan by row.
- Row-column scanning: Cycle through rows of items and then cycle through the items within a selected row.
- Group selection (Note: this option is only available if you chose ‘Two switches’ on the previous screen): Items are automatically grouped by colour: some red, some blue and you select the colour of the group that contains the item you want to select. Each time you select a group, the items within that group will be split into red and blue again. You repeat this until there are only two items left to choose between, one red, one blue.
- Once you have selected a scanning method you can assign switches to an action. In our example, we are going to assign switches based on the Row-column scanning method above so we will need to select one switch to start scanning and another to select highlighted items.
When prompted, press a key or button on your switch device to assign it to the action shown. In our example, we assigned the ‘right arrow’ key as the switch to move to the next item and the ‘space bar’ as the switch to select highlighted items.

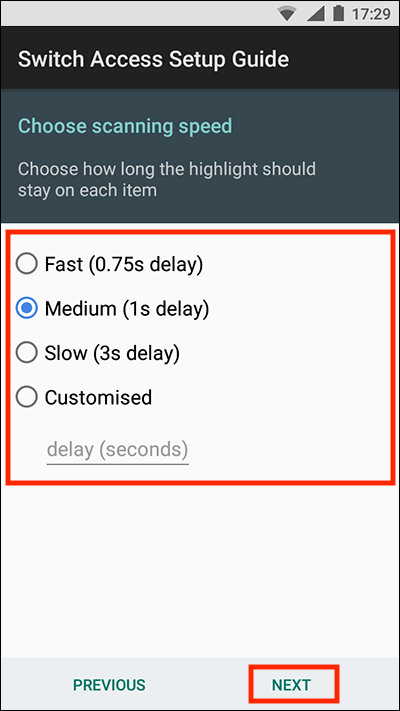
Note: You can assign more than one switch to an action. Tap ‘Next’ when you are ready to proceed. - Now choose a scanning speed – this is how long each item is highlighted before Switch Access automatically proceeds to the next item. Note: this step only applies if you chose to use only one switch earlier. Choose from:
- Fast (0.75s delay)
- Medium (1s delay)
- Slow (3s delay)
- Customise (enter your own delay speed here)
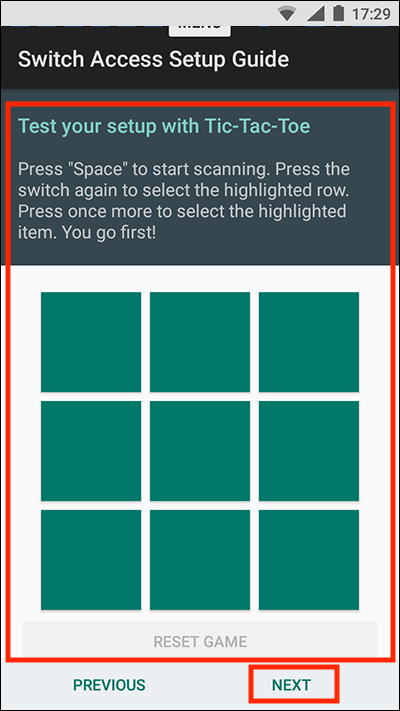
- Finally, you can practice using your switches with a game of tic-tac-toe. Tap ‘Next’ to complete the setup process and then press ‘Finish’.
Re-enable the on-screen keyboard:
When you connect an external switch or keyboard to your device, the onscreen keyboard is hidden. To be able to use it with your switch you will need to un-hide it.
- Open the ‘Settings’ app.
- Scroll down to the bottom and tap ‘System’.
- Tap ‘Language & input methods’.
- Tap ‘Physical keyboard’.
- Tap ‘Show virtual keyboard’.
Switch Access settings
Any of the options you chose during the Switch Access setup process, as well as some additional advanced options, can be edited in the ‘Settings’ menu.
- Open the settings app and choose ‘Accessibility’ (see the article Android – Android – How to open the Accessibility Settings on this website for more information).
- Scroll down to the Interaction controls section and tap on ‘Switch Access’.
- Tap on ‘Settings’.
- If you would like to repeat the setup process or you skipped it initially, tap on ‘Open setup guide’ otherwise you can edit the following settings directly:
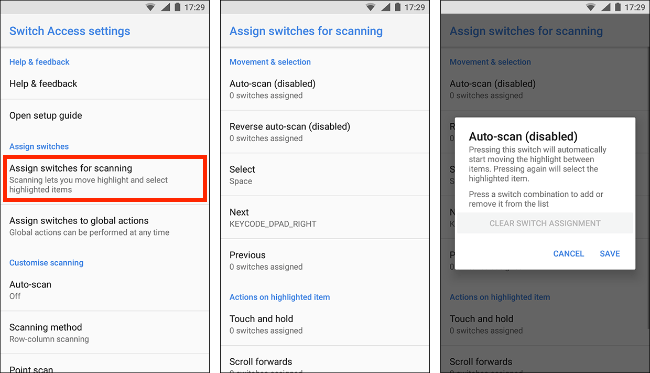
Assign switches for scanning
To edit which switches are assigned to actions or to assign switches to additional actions not covered in the setup process (such as ‘Reverse auto-scan’ and ‘Previous’), tap ‘Assign switches for scanning’. Select an action and choose switch you would like use to activate it.
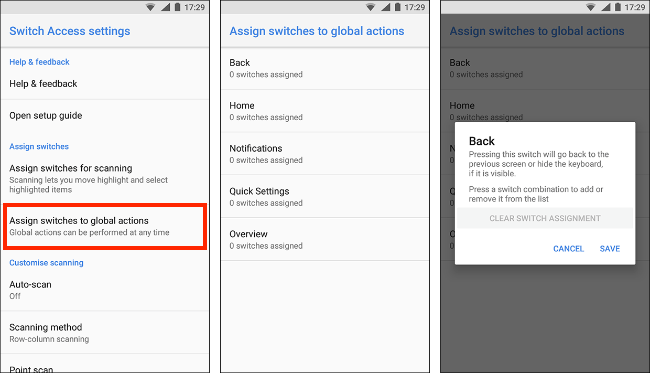
Assign switches to global actions
Here you can assign switches to features you use across your device (Global actions) such as the ‘Home’ and ‘Back’ buttons and/or opening ‘Notifications’. Tap ‘Assign switches to global actions’, select an action and then choose the switch you would like use to activate it.
Auto-scan
Use this option if you would like to start cycling through all the items on the screen when you press the assigned switch. Tap ‘Auto-scan’ then tap the toggle switch to enable this option. Once enabled, you can adjust the:
- Auto-scan time
- Delay on first item
- Number of scans

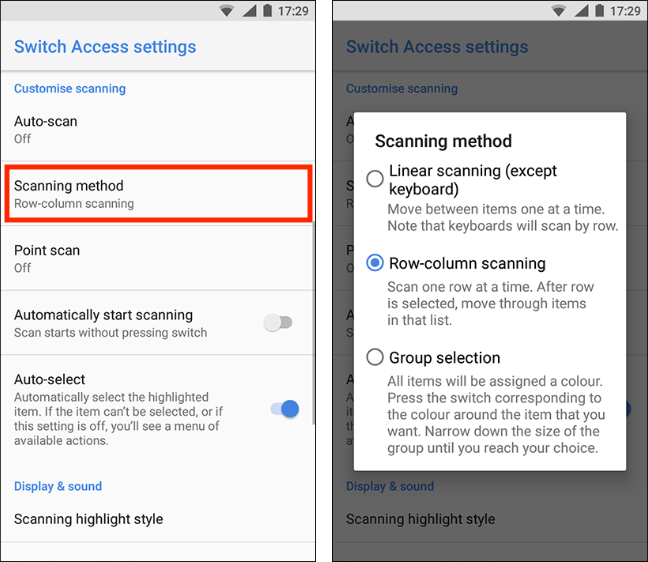
Scanning method
Tap ‘Scanning method’ and select from:
- Linear scanning (except keyboards): Move between items one at a time. Note: Keyboards will scan by row.
- Row-column scanning: Cycles through each row and then cycles through each item from a selected row.
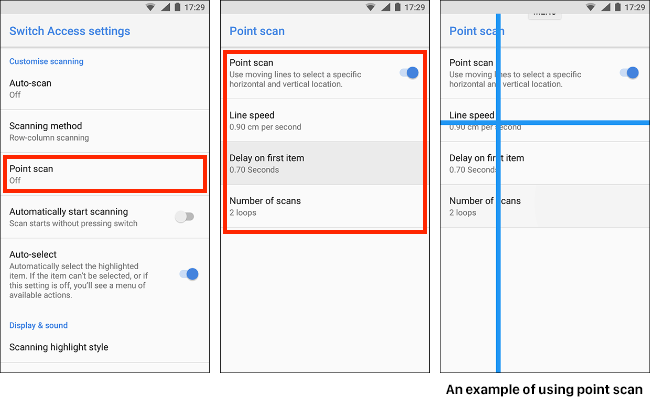
Point scan
Point scan uses horizontal and vertical lines to pinpoint a specific location on the screen to select an item. If you would like to use this scanning method, tap ‘Point scan’, then tap the on/off toggle switch. Once enabled, you can adjust:
- Auto-scan time
- Delay on first item
- Number of scans
Automatically start scanning
Enable this option if you would like scanning to start automatically when you open a new screen.
Auto-select
When this setting is enabled, clicking on a highlighted item will automatically select it. If the item can’t be selected, or this setting is off, you will be given a menu of all the available actions that can be performed.
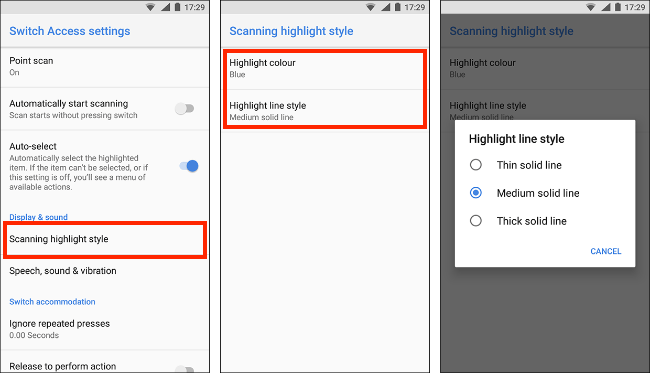
Scanning highlight style
Change the colour and line style of the highlight.
Speech, sound & vibration
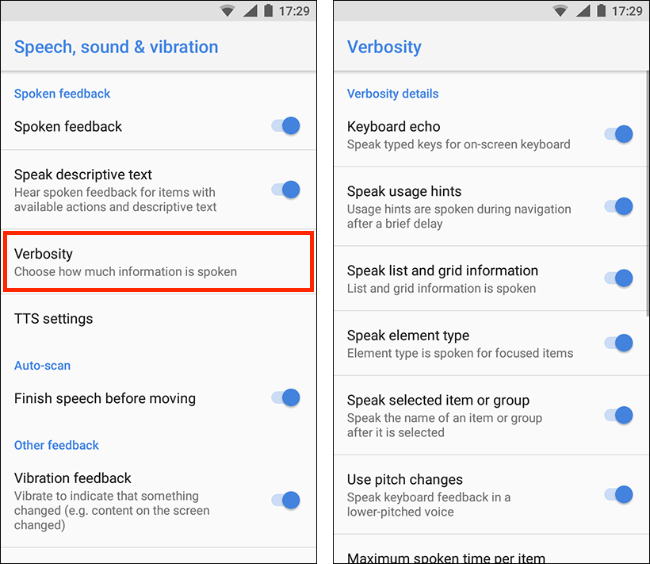
You can adjust the level of feedback you receive as you cycle through the items on the screen. Tap ‘Speech, sound & vibration’ and then edit the following options:
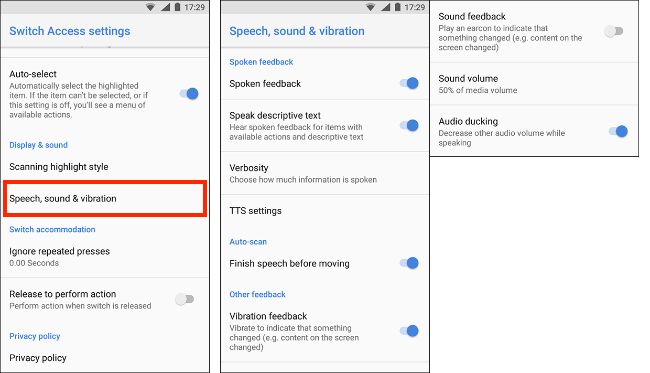
- Spoken feedback – tap to toggle on or off. When Spoken feedback is set to ‘on’ you can customise the following settings:
- Speak descriptive text - hear a description of the highlighted item and any actions available for it. Tap to toggle on or off.
- Verbosity - the Verbosity settings enable you to control how much spoken feedback you receive. Tap ‘Verbosity’ and turn the options on or off to suit your needs.
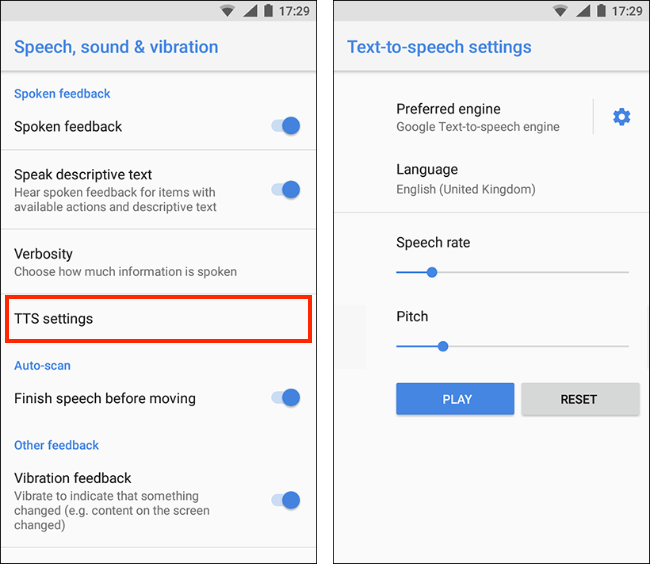
- TTS settings – change the speed and pitch of spoken feedback and the language that is used.
- Finish speaking before move – hear the whole spoken description before moving to the next item. Tap to toggle on or off.
- Vibration feedback – Your device will briefly vibrate to indicate something on the screen has changed. Tap to toggle on or off.
- Sound feedback – Hear a brief sound to indicate something on the screen has changed. Tap to toggle on or off.
- Sound volume – adjust the volume of spoken feedback in comparison to other media on your device. Tap and choose from:
- Same as media volume
- 75% of media volume
- 50% of media volume
- 25% of media volume
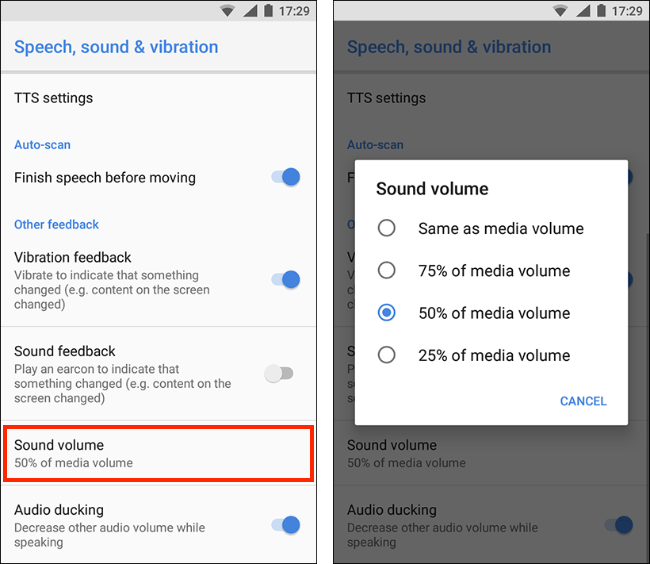
- Audio ducking – decrease the volume of other media playing on your device when feedback is spoken. Tap to toggle on or off.
Ignore repeated presses
If you find the switch is being triggered too many times, you can set your device to treat multiple presses as a single press if done within a set time. You can set this amount of time by tapping on ‘Ignore repeated presses’ and setting a time limit that suits you.

Release to perform action
You can choose to trigger a switch (button or key) when it is released rather than when it is pressed. Tap to toggle on or off.
Volume controls for Switch Access
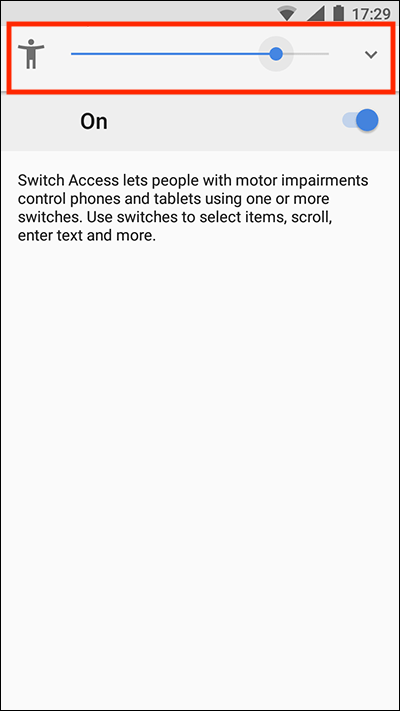
When Switch Access is enabled you’ll see a separate volume slider for changing the volume levels of spoken accessibility services.
To access the Accessibility volume slider, press one of the volume buttons on your device.
The Accessibility volume slider will appear at the top of the screen. You can adjust the level using the volume buttons or by using your switch device.
Note: These instructions apply to the standard version of Android 8 Oreo. Please be aware that many manufacturers add their own customisations to the Android operating systems so you may find minor differences from the steps shown.
Related information
Google’s Switch Access guide which includes an excellent introductory video: https://support.google.com/accessibility/android/answer/6122836?hl=en-GB
Google’s tips for using Switch Access: https://support.google.com/accessibility/android/answer/6395627?hl=en
Need some more help?
Call our helpline 0300 180 0028 or email enquiries@abilitynet.org.uk
Need free IT Support at Home?
If you are older or disabled and need IT support at home, you can book a free home visit.