The pointer changes shape depending on where it is on the screen. Most often it appears as a small white arrow with a black outline; over a white background this is simply a black outline.
In some cases it is even less easy to see. For example, over any area where you can type it turns into a ‘I’ cursor (called an ‘ I-beam ‘).
Note: Mac key convention: ‘Ctrl’ is used for ‘Control’, ‘Apple’ is used for ‘Command’ (⌘) and ‘Alt’ is used for the ‘Option’ (⌥) key.
Note: For keyboard access make sure ‘Full keyboard access’ is turned on – you can turn it on or off; by pressing ‘Ctrl’ + ‘F1’ at any time.
Step 1
- Open the ‘Apple Menu’ by clicking on the Apple icon () in the Menu Bar, or by pressing ‘Ctrl’ + ‘F2’
- Click to select ‘System Preferences…’ as shown in Fig 1 or press the down arrow key to highlight it and then press ‘Enter’.
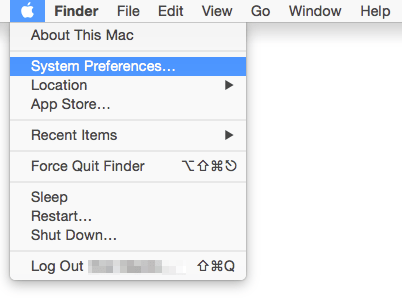
Fig 1.
Step 2
- In the ‘System Preferences’ window, choose ‘Accessibility’ or press ‘Tab’ repeatedly (you might need to press ‘Fn’ + ‘Ctrl’ + ‘F7’ first) to cycle through the icons until the ‘Accessibility’ icon is highlighted with a blue border as shown in Fig 2 and then press the ‘Spacebar’.
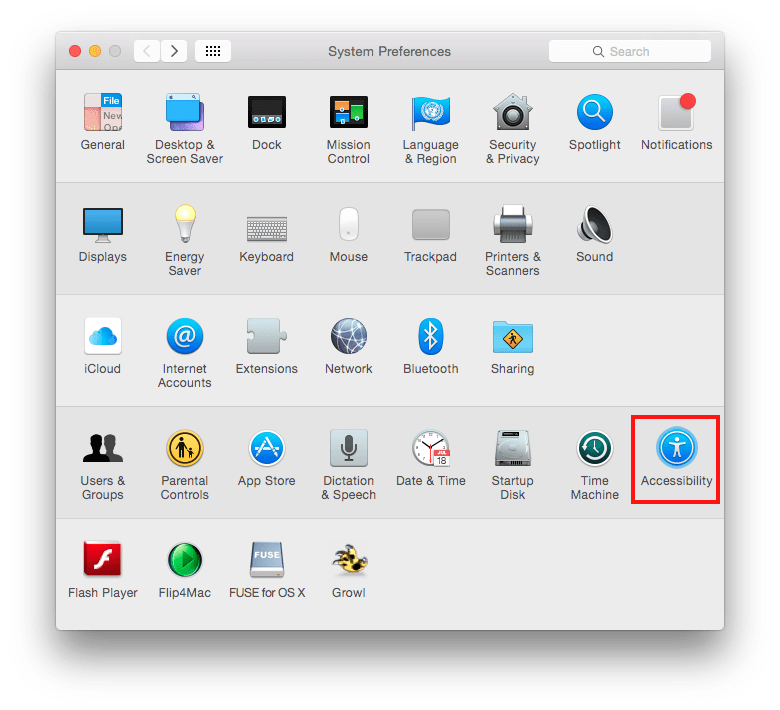
Fig 2.
- On the Accessibility screen, choose ‘Display’ from the left-hand column or press ‘ Ctrl ‘ + ‘ F7 ‘ (once or twice) to highlight one of the items for example ‘ Keyboard ‘ and then press the up and down arrow key to select the ‘ Display’ tab (highlighted in blue).
- In the Display settings on the right, adjust the ‘ Cursor Size: ‘ slider as shown in Fig 3 to change the pointer size, or press ‘ Tab ‘ to reach the gauge bar and use the left and right arrow keys to select your pointer size.
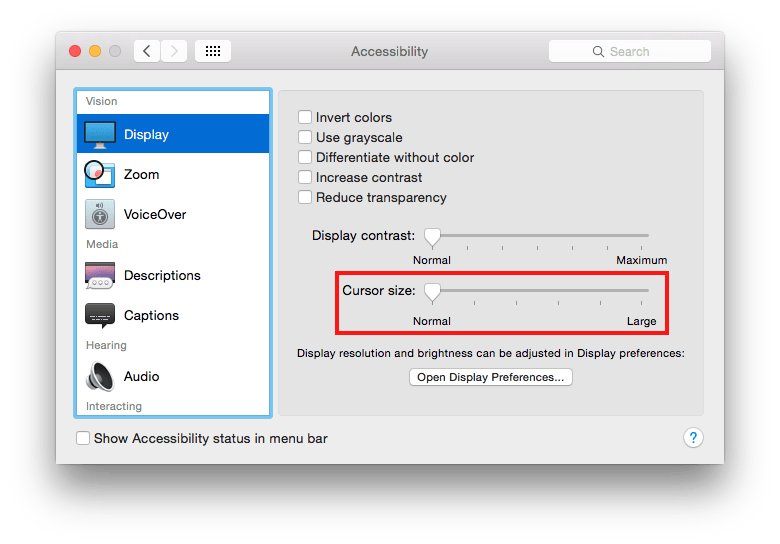
Fig 3.
- When you are happy with your pointer click the ‘ Close ‘ (red) button at the top of the ‘ Accessibility ‘ window or press ‘ Apple ‘ + ‘ W ‘ to close the window and return to the Finder desktop.
Note: If this does not work it could be because your computer settings cannot be changed due to local IT policies – contact your local IT support for further help.
Need some more help?
Call our helpline 0300 180 0028 or email enquiries@abilitynet.org.uk
Need free IT Support at Home?
If you are older or disabled and need IT support at home, you can book a free home visit.