Note: Mac key convention: ‘Ctrl’ is used for 'Control', ‘Apple’ is used for 'Command' and ‘Alt’ is used for the ‘Option’ key.
Note: For keyboard access make sure ‘Full keyboard access’ is turned on - you can turn it on or off; by pressing ‘Ctrl’ + ‘F1’ at any time.
Step 1
- Make sure you are in ‘Finder’, press ‘Apple’ + ‘Tab’ if necessary to cycle through open applications until you return to ‘Finder’.
- Click on the ‘Apple’ menu or press ‘Ctrl’ + ‘F2’.
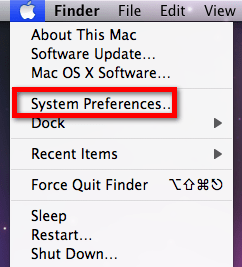
- Click to select ‘System Preferences...’ as shown in Fig 1 or press the down arrow key to highlight it and then press ‘Enter’.
Step 2
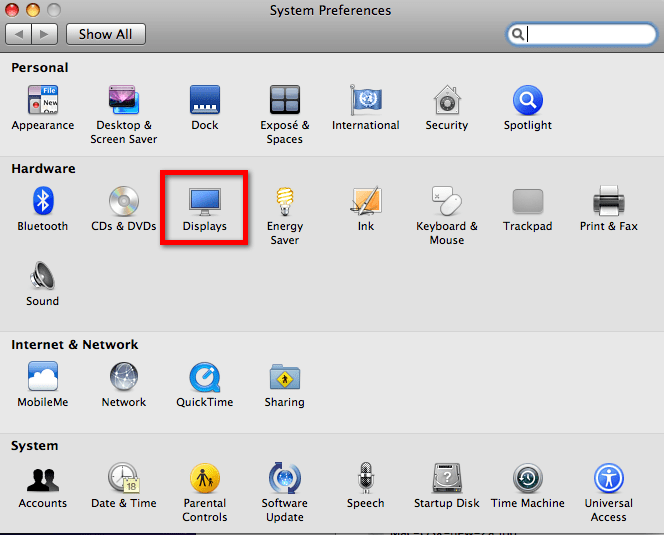
- Click on the ‘Displays’ icon or press ‘Tab’ repeatedly (you might need to press ‘Ctrl’ + ‘F7’ first) to cycle through the icons until the ‘Displays’ icon is highlighted, see Fig 2 and then press the ‘Spacebar’.
- Click on the‘Display’ tab or press ‘Ctrl’ + ‘F7’ to highlight to select the ‘Display’ tab if it is not already selected.
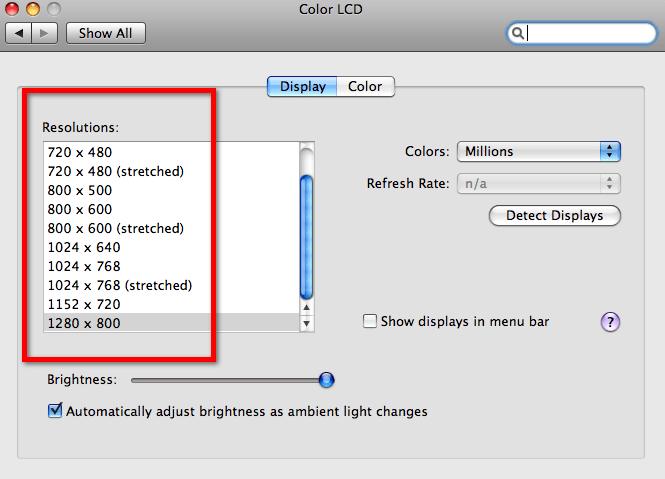
- The typical display resolution is 1024 x 768, to make text on the screen bigger you can change it to 800 x 600 or 640x 480. To do this either click on the resolution you want or ‘Tab’ to highlight ‘Resolutions:’ settings is selected as shown in Fig 3 then using the up and down arrow keys select a resolution best for you.
Step 3
When you are happy with screen size click the ‘Close’ (red) button at the top of the window or press ‘Apple’ + ‘W’ to close the window and return to the Finder desktop.
Changing font size for displaying files and folders
- You can change both the text and icon size for all files and folders including those on the desktop on your Mac.
- To change the size of files and folders on your desktop:
- Make sure you are in ‘Finder’,press ‘Apple’ + ‘Tab’ if necessary to cycle through open applications until you return to ‘Finder’.
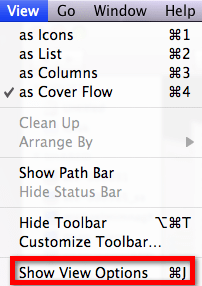
- Click to select ‘View’ and select ‘Show View Options’ or press ‘Apple’ + ‘J’, Fig 4.
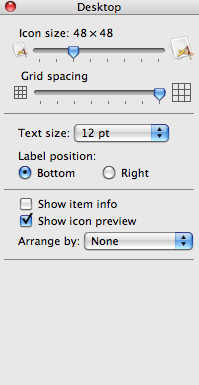
- Using the mouse, click on the box next to ‘Text size:’ and choose a font size up to 16pt. You can also make the Icon size smaller or larger by clicking on the ‘Icon size’ gauge, Fig 5.
- When you are happy with your choice, click on the close button at the top of the window.
To change the text size for files in folders:
- Select a folder by double clicking on it or press ‘Tab’ to highlight it and press ‘Apple’ + ‘O’ to open it. In this example a folder called ‘Pictures’ has been used.
- Click to select ‘View’ and select ‘Show View Options’ or press ‘Apple’ + ‘J’ , Fig 4.
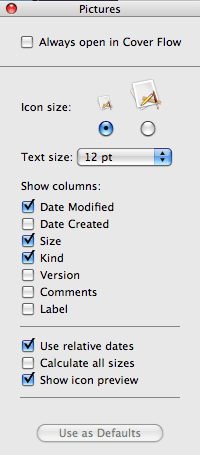
- Click on the box next to ‘Text size:’ and choose a font size up to 16 pt. You can also make the Icon size smaller or larger by selecting a small or large icon (no keyboard shortcut), Fig 6.
- When you are happy with your choice, click on the close button at the top of the window (no keyboard shortcut).
Note: If this does not work it could be because your computer settings cannot be changed due to local IT policies - contact your local IT support for further help.
Need some more help?
Call our helpline 0300 180 0028 or email enquiries@abilitynet.org.uk
Need free IT Support at Home?
If you are older or disabled and need IT support at home, you can book a free home visit.
