Note: Mac key convention: ‘Ctrl’ is used for ‘Control’, ‘Apple’ is used for ‘Command’ and ‘Alt’ is used for the ‘Option’ key.
Note: For keyboard access make sure ‘Full keyboard access’ is turned on you can turn it on or off; by pressing ‘Ctrl’ + ‘F1’ at any time.
Mac OS X version 10.4 also known as ‘Tiger’ is the first version of the Mac OS to include a fully integrated screen reader. The screen reader is called VoiceOver. Mac OS X v10.5 Leopard includes a thoroughly updated release of VoiceOver that builds on the advanced features in Mac OS X v10.4 Tiger.
Instructions on how to activate VoiceOver are explained below.
Step 1
- Make sure you are in ‘Finder’ press ‘Apple’ + ‘Tab’ if necessary to cycle through open applications until you return to ‘Finder’.
- Click on the‘Apple’ menu or press ‘Ctrl’ + ‘F2’.
- Click on ‘System Preferences...’ as shown in Fig 1 or press the down arrow key to highlight it and then press ‘Enter’.
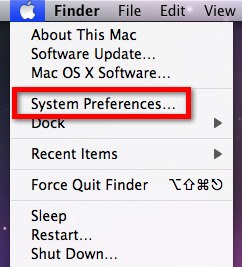
Fig 1
Step 2
- Click on the ‘Universal Access’ icon or press ‘Tab’ repeatedly (you might need to press ‘Ctrl’ + ‘F7’ first) to cycle through the icons until the ‘Universal Access’ icon is selected as shown in Fig 2 and then press the ‘Spacebar’.
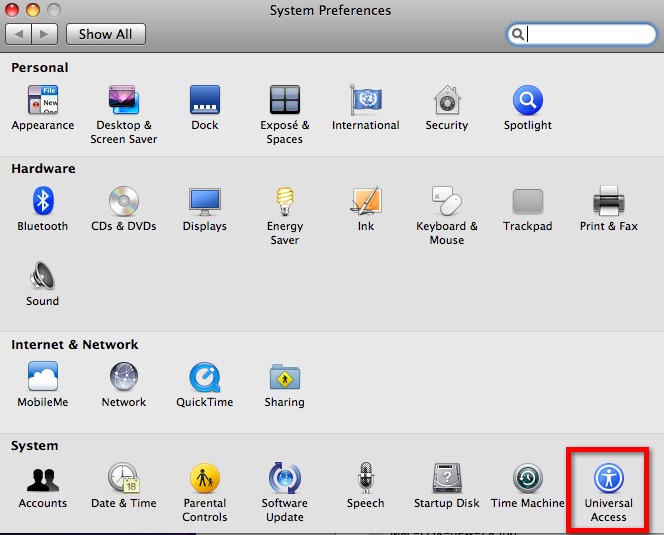
Fig 2
- Click on the ‘Seeing’ tab or press ‘Ctrl’ + ‘F7’ to highlight one of the four tabs for example ‘Keyboard’ and then press the left or right arrow key to select the ‘Seeing’ tab.
- Click on the ‘On’ radio button in the VoiceOver section shown in Fig 3 or press ‘Tab’ to highlight the radio buttons (on or off) and use the arrow keys to highlight the ‘On’ button. You can turn VoiceOver on or off at any time by pressing ‘Apple’ + ‘F5’.
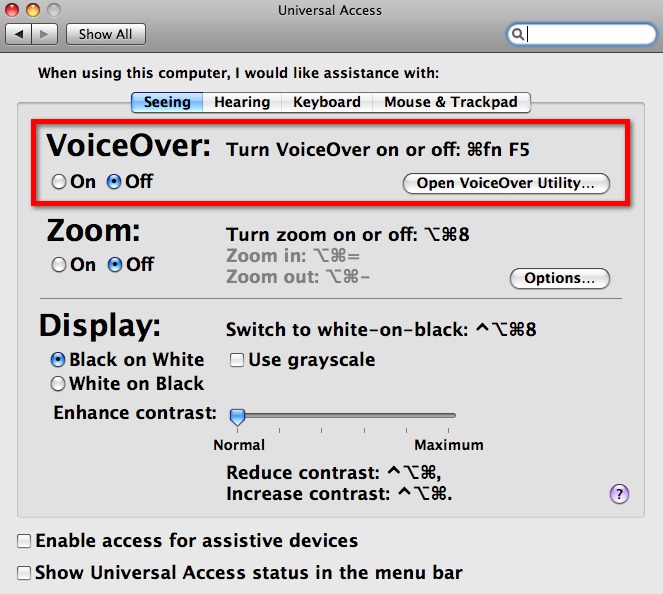
Fig 3
- To change theVoiceOver settings click on ‘Open VoiceOver Utility...’ or press ‘Tab’ until ‘Open VoiceOver Utility...’ button is highlighted and then press the ‘Spacebar’. See Fig 3.
- You can use VoiceOver in its default configuration, or you can customize VoiceOver to suit your needs. The VoiceOver Utility presents a list of nine categories, from General to Braille, Fig 4 .
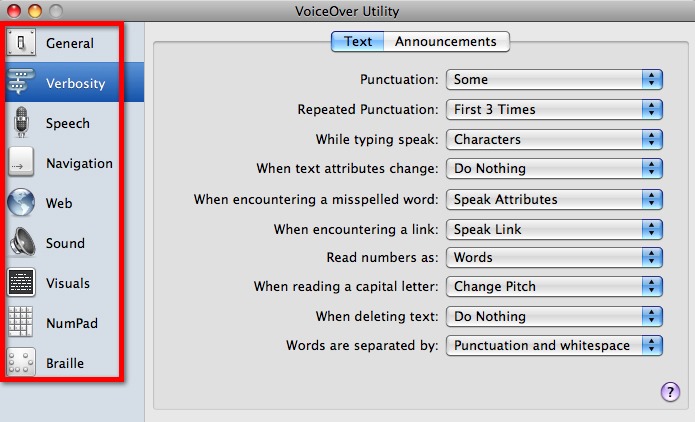
Fig 4
Note: VoiceOver includes Braille support. VoiceOver automatically recognises the model in use and programs the keys — including "wiz wheels," scrollers, router keys, and buttons — to best suit each model’s characteristics
If you don’t have a USB Braille display, you can use the onscreen visual Braille panel that VoiceOver provides.
The Braille Panel behaves like a standard 40-cell display. It displays both the Braille dots being sent to the dedicated Braille display and an English translation, sighted instructors, parents, or co-workers can read its contents with minimal disturbance to the non-sighted user.
Click to select or arrow down to a category, Fig 4. You can navigate among the categories using keyboard shortcuts.
- ‘General’ = ‘Apple’ + ‘1’
- ‘Verbosity’ = ‘Apple’ + ‘2’
- ‘Speech’ = ‘Apple’ + ‘3’
- ‘Navigation’ = ‘Apple’ + ‘4’
- ‘Web’ = ‘Apple’ + ‘5’
- ‘Sound’ = ‘Apple’ + ‘6’
- ‘Visuals’ = ‘Apple’ + ‘7’
- ‘Numpad’ = ‘Apple’ + ‘8’
- ‘Braille’ = ‘Apple’ + ‘9’
To find additional VoiceOver learning materials, including a ‘VoiceOver Getting Started’ manual, podcasts, and other items, go to the VoiceOver downloads page.
Speech output options OS X 10.6
- Make sure you are in ‘Finder’ press ‘Apple’ + ‘Tab’ if necessary to cycle through open applications until you return to ‘Finder’.
- Click on the ‘Apple’ menu or press ‘Ctrl’ + ‘F2’.
- Click on ‘Preferences’ or press the down arrow to highlight‘Preferences’ and then press ‘Enter’.
- Click on the ‘Speech’ icon or press ‘Tab’ repeatedly (you might need to press ‘Ctrl’ + ‘F7’ first) to cycle through the icons until the ‘Speech’ icon is selected as shown in Fig 5 and then press the ‘Spacebar’.
Fig 5
Text to Speech
- Click to select or ‘Tab’ to highlight ‘Text to Speech’ and then ‘Tab’ to select ‘System Voice’.
- Under the ‘Voice’ heading click on a voice to select or press ‘Tab’ until the voice list is highlighted and use the up and down arrows to select a voice.
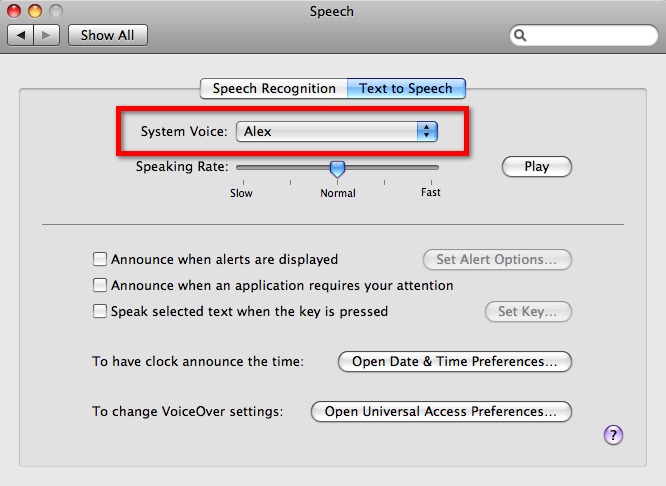
Fig 6
- You can also have the alert speech start with a phrase, to do this:
- Tab to ‘Announce when alerts are displayed’ press Space Bar or click to select.
- Tab to ‘Set Alert Options’ and press Space Bar or click to select.
- Click to select or ‘Tab’ to ‘Phrase:’ use the up and down arrow keys and press the ‘Space Bar’ or click to select a phrase.
- Note: You can edit the list of phrases and add your own, to do so choose 'Edit phrase list' from the list in the pop-up menu next to 'Speak the phrase:' .
- Click on or use the ‘Tab’ key to select ‘Delay’ and use the left and right arrow keys to select your speed. To have the computer speak the dialogue immediately select a value of ‘0’ for a 5 second delay select ‘5’.
- To hear the selected voice click on the ‘Play’ button or press the ‘Tab’ key to select and press the ‘Spacebar’.
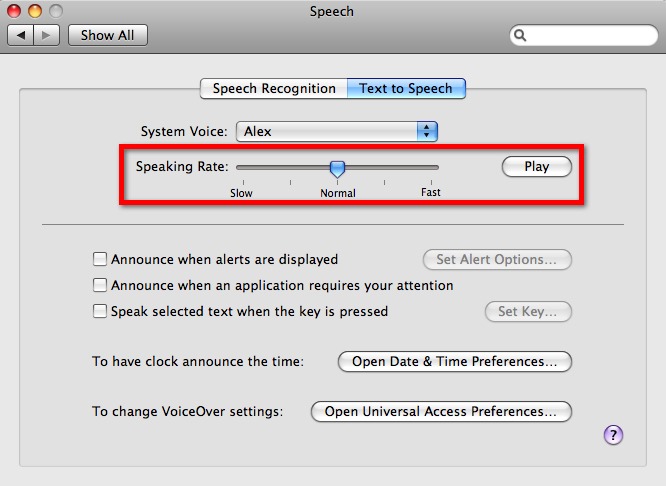
Fig 7
- Click to select or ‘Tab’ and press the ‘Spacebar’ to check ‘Announce when an application requires your attention’ to have your Mac speak the text in dialogue boxes.
Step 3
- When you have finished with your selections click the close icon in the top left of the speech options box or press ‘Apple’ + ‘W’ on the keyboard to close the window.
Note: If this does not work it could be because your computer settings cannot be changed due to local IT policies - contact your local IT support for further help.
Need some more help?
Call our helpline 0300 180 0028 or email enquiries@abilitynet.org.uk
Need free IT Support at Home?
If you are older or disabled and need IT support at home, you can book a free home visit.