Note: For keyboard access make sure ‘Full keyboard access’ is turned on - you can turn it on or off; by pressing ‘Ctrl’ + ‘F1’ at any time.
Introduction
The on-screen keyboard can be used instead of a physical keyboard to interact with your computer. You can use your mouse or pointing device to select the keys.
This page shows you how to start the Mac OS X on-screen keyboard and explains how it works:
Step 1
- Make sure you are in ‘Finder’, press ‘Apple’ + ‘Tab’ if necessary to cycle through open applications until you return to ‘Finder’.
- Click on the ‘Apple’ menu in the top-left of the screen or press ‘Ctrl’ + ‘F2’.
- Click on ‘System Preferences...’ as shown in Fig 1 or press the down arrow key to highlight it and then press ‘Enter’.
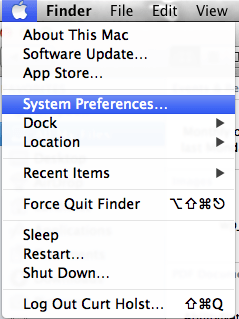
Fig 1
Step 2
- Choose 'Keyboard' or press 'Tab' repeatedly (you might need to press 'Ctrl' + 'F7' first) to cycle through the icons until the 'Keybaord' icon is highlighted and then press the 'Spacebar'. Fig 2
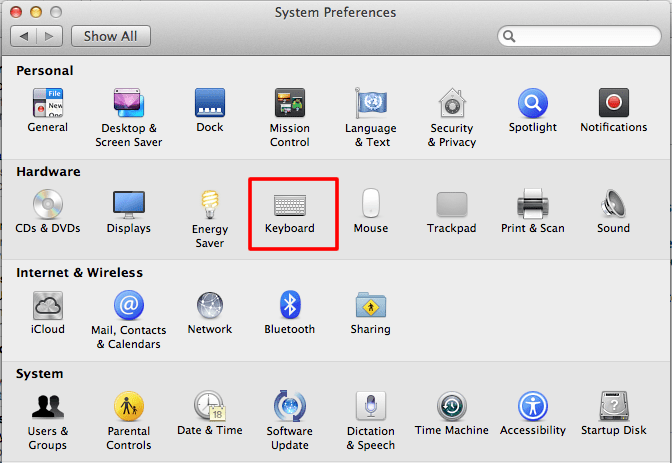
Fig 2
- Click to select or ‘Tab’ to the ‘Show Keyboard & Character Viewer in menu bar’ checkbox and press the ‘Spacebar’ to select, Fig 3.
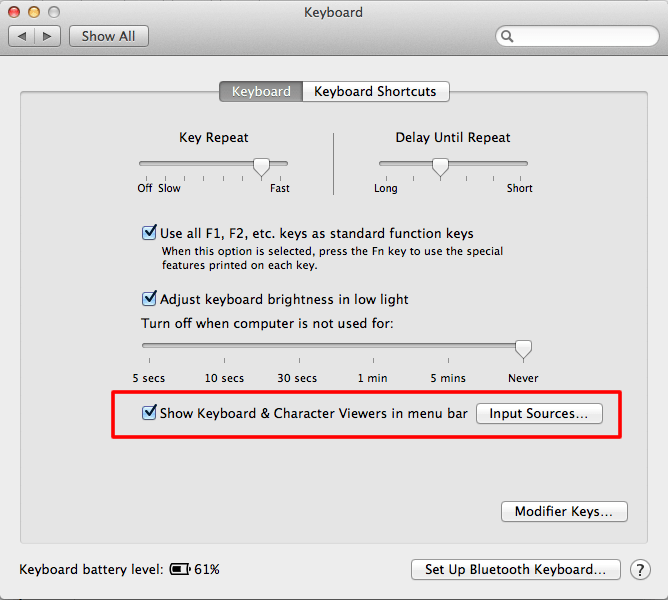
Fig 3
- Click on the 'Keyboard' window's close button or press ‘Apple’ + ‘W’.
- To view the keyboard, click on the ‘Show Character’ in the upper right of the Apple menu and select ‘Show Keyboard Viewer’ (No Keyboard shortcut), Fig 4.
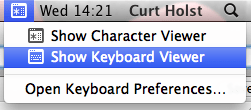
Fig 4
- The on-screen keyboard will appear and float over all applications. To make the keyboard larger or smaller click on the green ‘+’ symbol in the top-left of the keyboard , Fig 5.
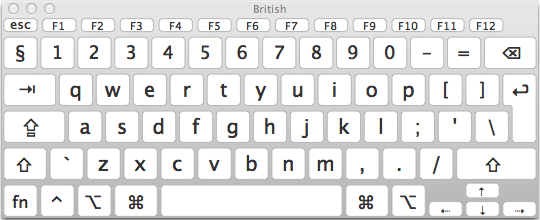
Fig 5
Note: If this does not work it could be because your computer settings cannot be changed due to local IT policies - contact your local IT support for further help.
Need some more help?
Call our helpline 0300 180 0028 or email enquiries@abilitynet.org.uk
Need free IT Support at Home?
If you are older or disabled and need IT support at home, you can book a free home visit.