In the article
How to enable Guided Access
Using Guided Access
How to enable Guided Access
- Open the Settings app
 .
. - In the Settings app, select Accessibility from the list.
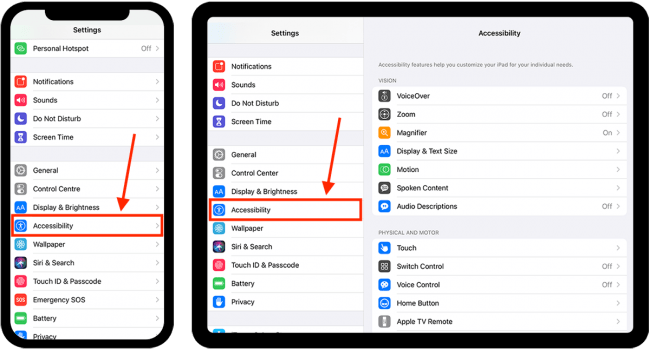
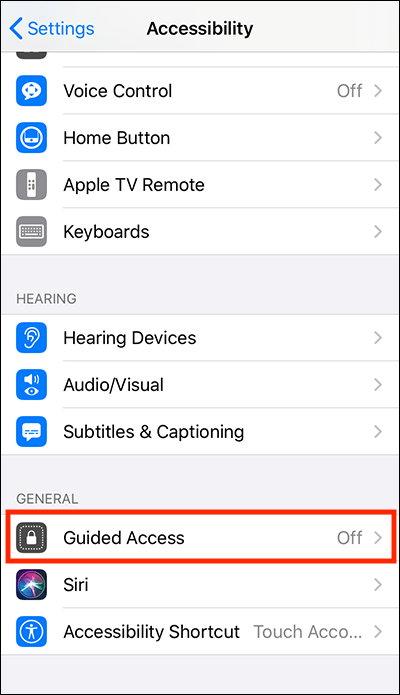
- On the Accessibility screen, scroll to the bottom and select Guided Access.
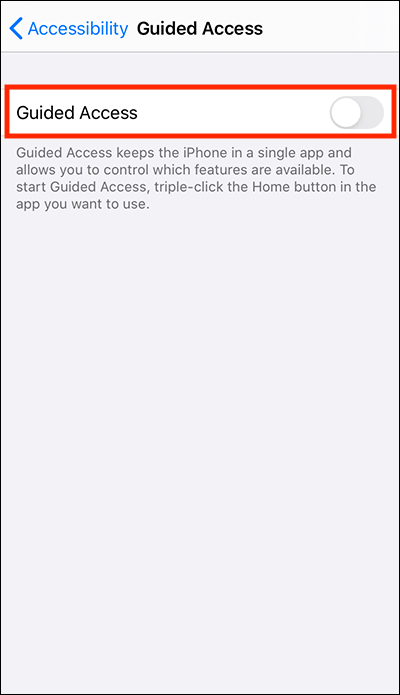
- On the next screen, select Guided Access to set the toggle switch to On.
You can now customise the following settings:
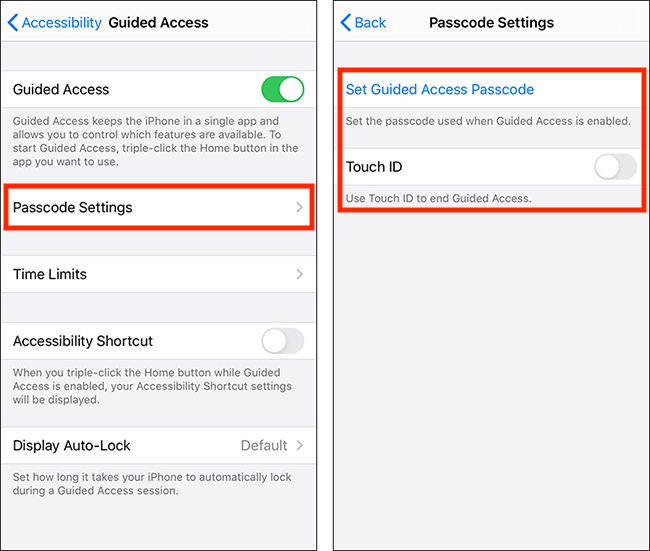
Passcode Settings
The passcode stops a user from switching off Guided Access before the set time-limit is up.
- Select Passcode Settings.
- On the Passcode Settings screen, select Set Guided Access Passcode. Enter a six-digit code.
- If your device has Touch ID you can use it to end Guided Access. Select Touch ID to set the toggle switch to On.
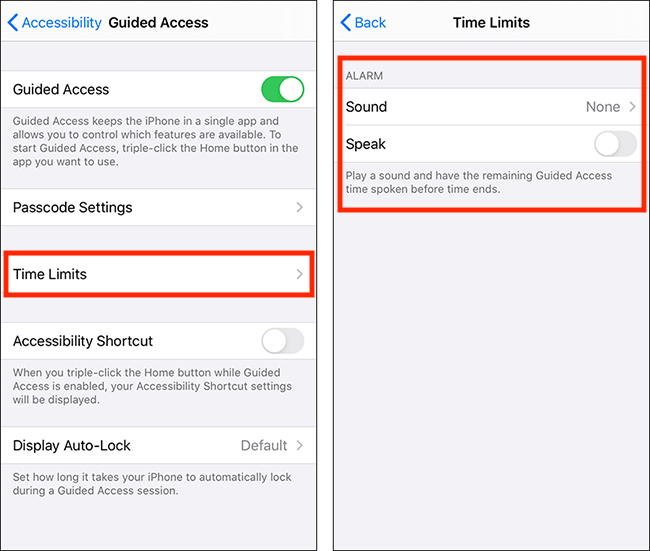
Time Limit
The Time Limit setting allows you to choose a sound to play when a Guided Access session is coming to an end. You can also choose whether the remaining time is announced or not.
- Select Time Limits.
- To enable a sound, select Sound and choose from the options.
- If you’d like to have the remaining time announced to the user, select Speak to set the toggle switch to On.
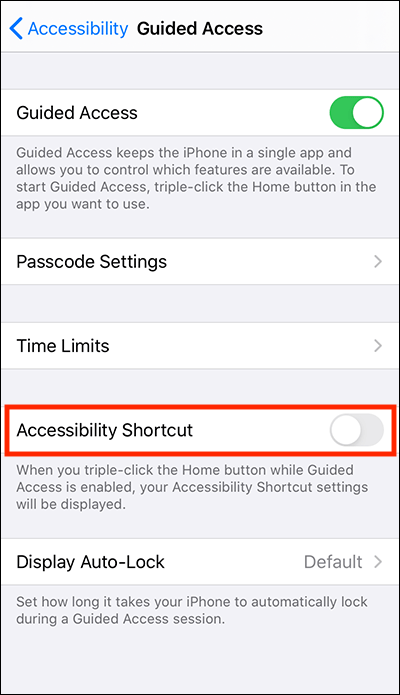
Accessibility Shortcut
To allow the Accessibility Shortcut to be useable during a Guided Access session, select Accessibility Shortcut to set the toggle switch to On.
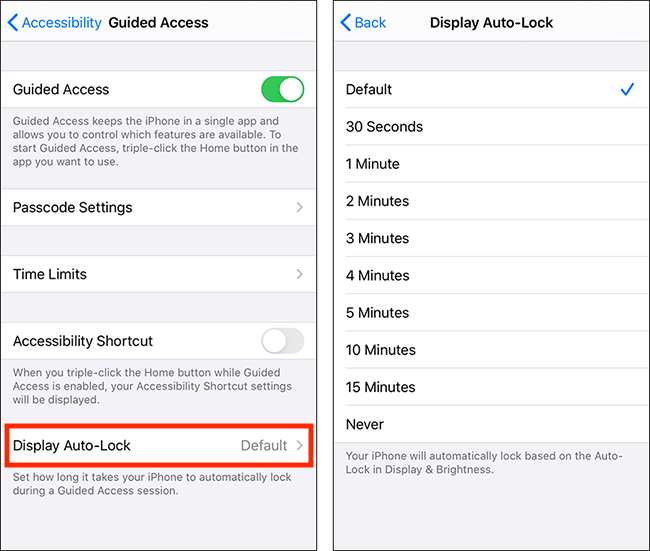
Display Auto-Lock
By default, the device will lock when the display turns off after a period of inactivity.
To override this for Guided Access sessions, select Display Auto-Lock and choose a new time-out.
Using Guided Access
- Open the app you wish to use during the Guided Access session. In our example we will use the Notes app.
- To start Guided Access:
- Triple-click the Home button, on devices that have a Home button.
- Triple-click the Side button, on devices that use Face ID.
- The Guide Access interface will appear around the outside of the app.
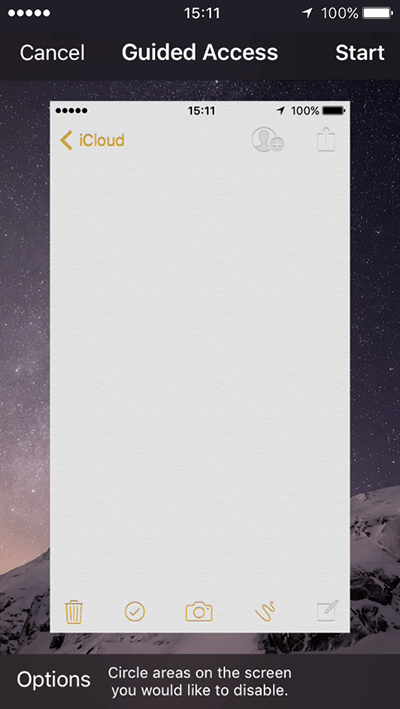
- You can draw circles over any parts of the app that you want to restrict access to.
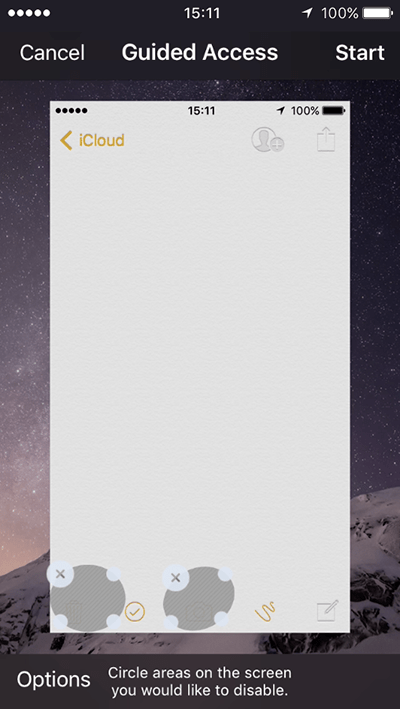
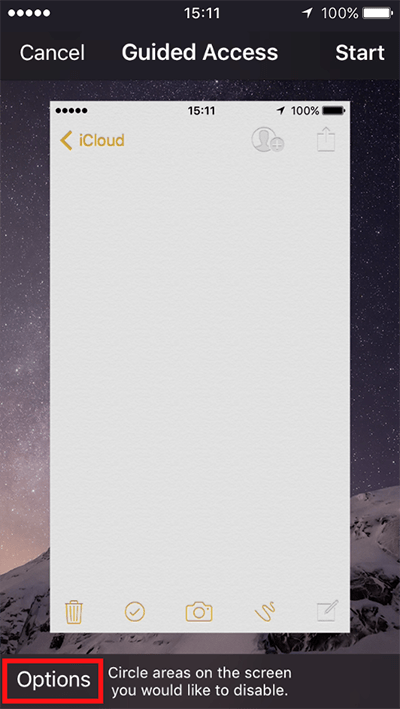
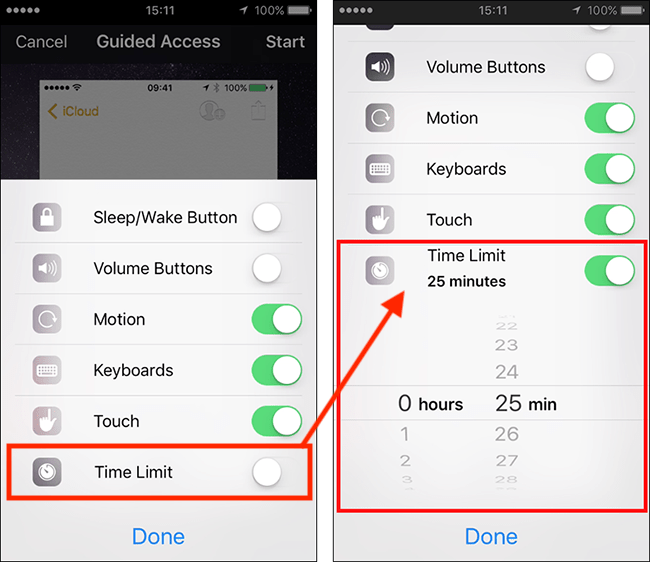
- Click Options and set the toggle switches to enable /disable:
- Sleep/Wake Button
- Volume Buttons
- Motion
- Keyboards
- Touch
- Time Limit - To set a time limit, set the Time Limit toggle switch to On and set the length of the Guided Access session.
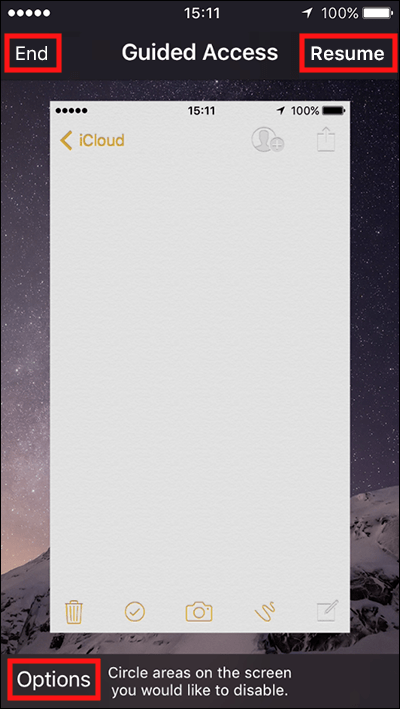
- Click Start in the top-right to begin the Guided Access session. If you haven’t already set a passcode, or enabled Touch ID, you will need to set a passcode here.

- To stop a Guided Access session before it finishes, or to change the session’s options:
- • Triple-click the Home button, on devices that have a Home button.
- • Triple-click the Side button, on devices that use Face ID.
- • Or use Touch ID, if you have enabled it.
- Then,
- • Select End to stop the session.
- • Select Options to change the settings for the session.
- • Select Resume to continue the session.
Need some more help?
Call our helpline 0300 180 0028 or email enquiries@abilitynet.org.uk
Need free IT Support at Home?
If you are older or disabled and need IT support at home, you can book a free home visit.