Call our helpline
0300 180 0028In this article
How to enable the Accessibility Keyboard
Accessibility Keyboard Features
Accessibility Keyboard settings
Typing on the Accessibility Keyboard
Panels
Dwell Control
Hot Corners
How to enable the Accessibility Keyboard
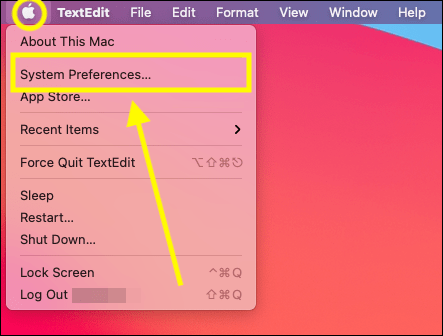
- Select the Apple icon
 in the top left corner of the screen.
 - Select System Preferences from the menu.
- In the System Preferences window, select Accessibility.
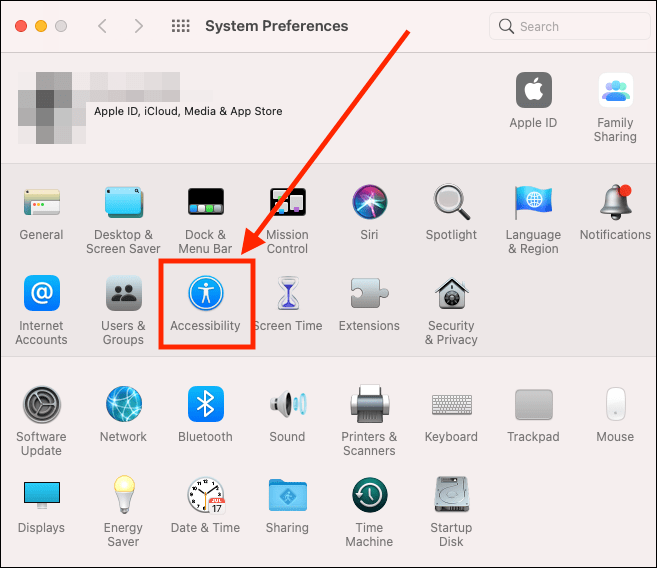
- On the Accessibility settings screen, scroll down in the left column and select Keyboard.

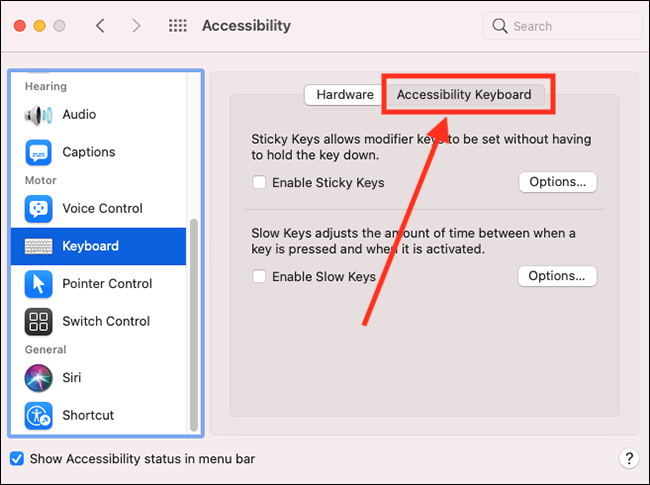
- In the right column, select the Accessibility Keyboard tab.
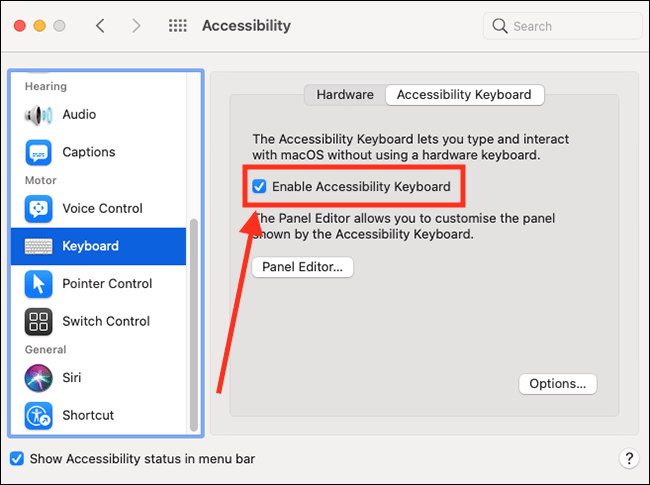
- Select the checkbox for Enable Accessibility Keyboard. The Accessibility Keyboard will appear on-screen. It sits in front of all other applications so that it is always available.
Accessibility Keyboard Features
By default, the Accessibility Keyboard is made up of the following components:
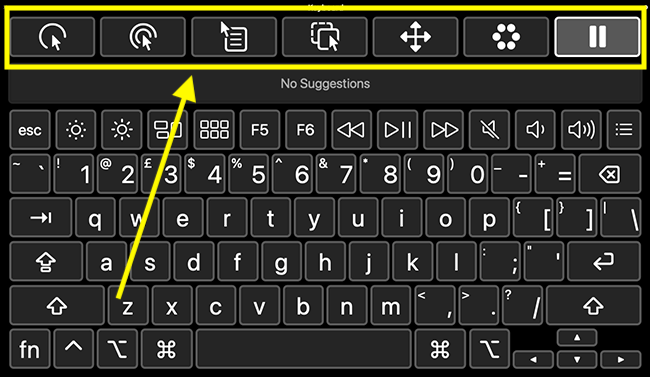
- Dwell actions: Dwell enables you to perform mouse actions when you rest over any part of the screen using eye or head-tracking devices. See the Dwell Control section of this document for more information.
- Auto suggestion row: Once you start typing on the keyboard a large selection of suggested words will appear here.
- Media / Function keys: This row mirrors the top row of a standard Apple keyboard. Many of the media keys are present such as brightness, volume and play controls.
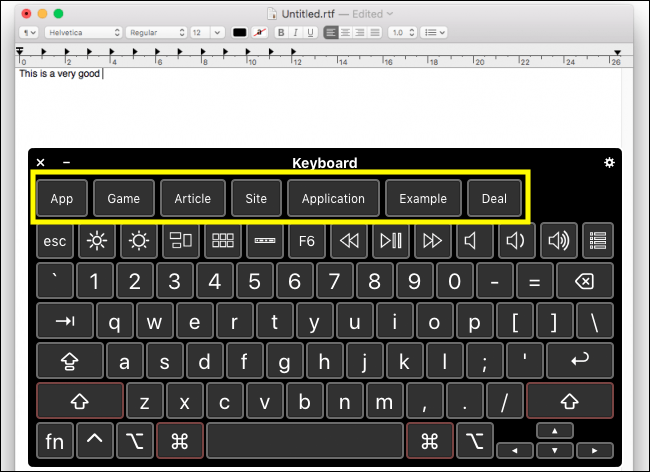
- Panels: You can create your own ‘panels’ to include the controls you need, such as opening applications, carrying out AppleScript actions, or performing keyboard shortcuts in specific apps. See the Panels section for more information.
- Standard Apple Keyboard keys: The Accessibility keyboard has the same keys as the standard Apple keyboard.
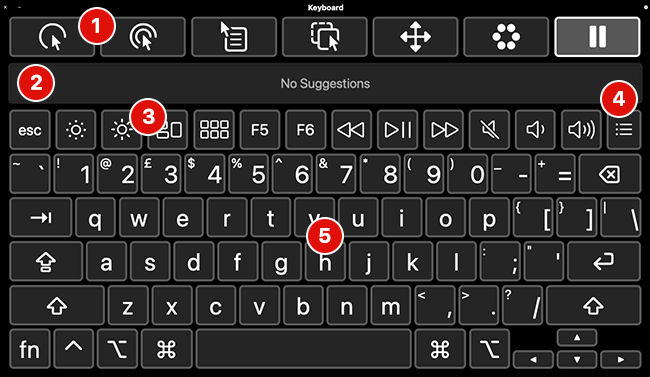
Note: You can enlarge the keyboard window by clicking and dragging on one of the corners.
Accessibility Keyboard settings
- To customise the settings for the Accessibility Keyboard, select the Apple icon in the top left corner of the screen.
- Select System Preferences from the menu.
- In the System Preferences window, select Accessibility.
- On the Accessibility settings screen, scroll down in the left column and select Keyboard.
- In the right column, select the Accessibility Keyboard tab.
- Select the Options button in the bottom right-hand corner.
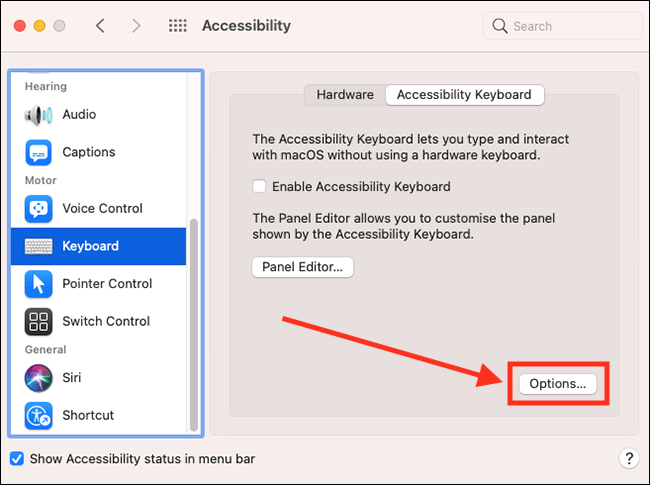
- In the Options dialogue box, make sure the General tab is selected.
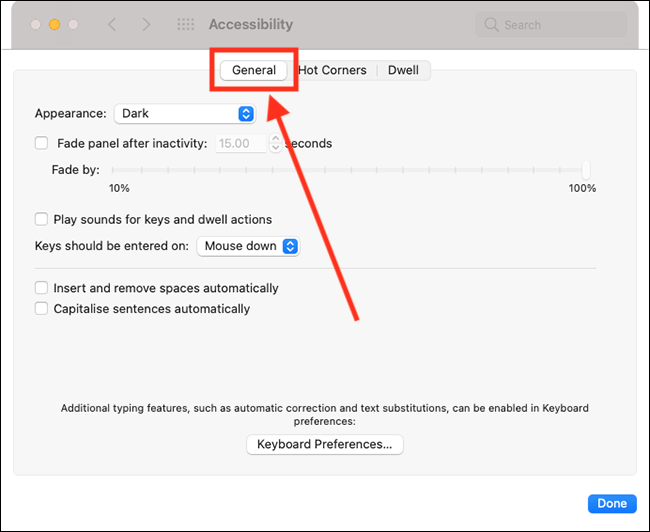
- You can customise the colour of the keyboard. Select the Appearance drop-down menu and choose from Dark or Light.
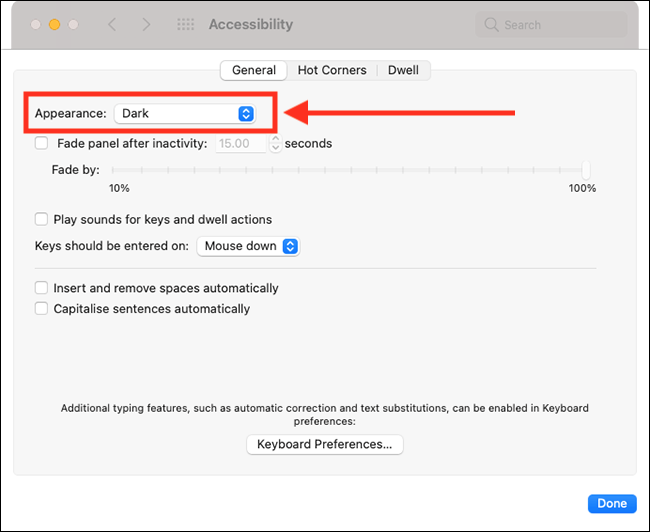
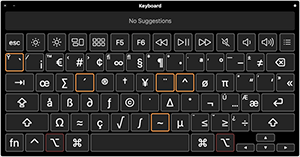
Dark keyboard
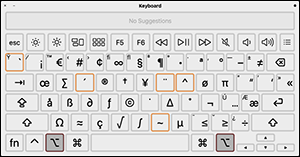
Light keyboard
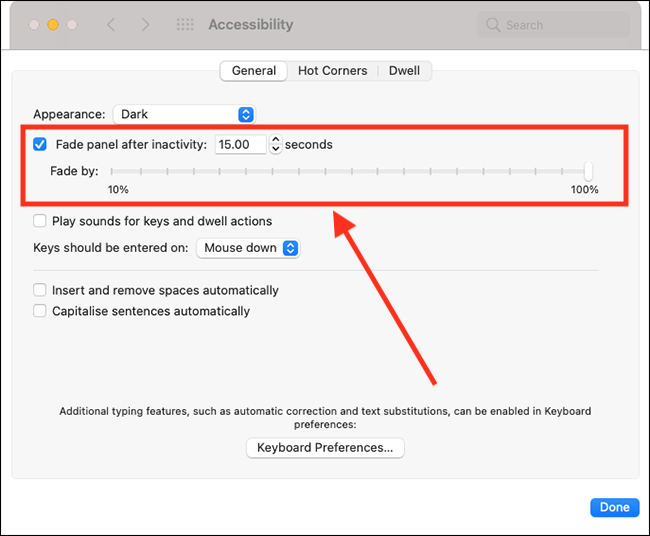
- If you’d like the keyboard to fade out after a period of inactivity, tick the checkbox for Fade panel after inactivity. Then:
- Adjust the time (in seconds) before the keyboard fades out.
- Adjust the Fade by slider to change how transparent the Accessibility Keyboard will be when it fades out.
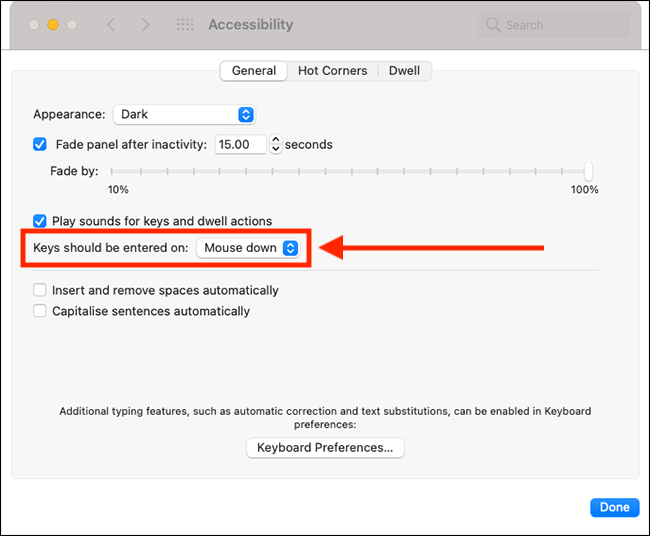
- To hear a sound when a key is ‘pressed’, tick the checkbox for Play key sounds.

- From the drop-down menu for Keys should be entered on, choose whether keys should be recognised when they are pressed (Mouse down) or when they are released (Mouse up).
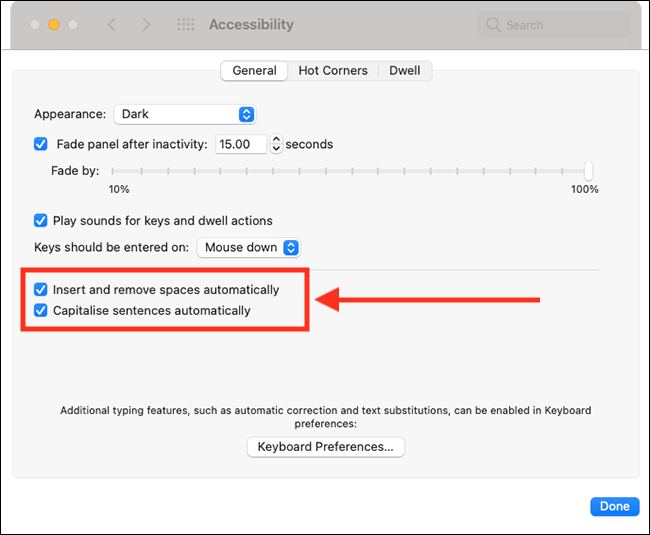
- If you would like to Insert and remove spaces automatically and / or Capitalise sentences automatically tick the corresponding checkboxes.
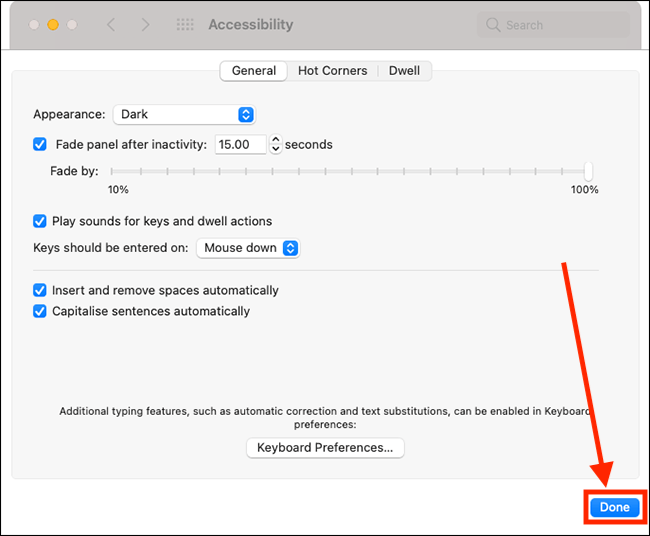
- When you are happy with your settings, select the Done button in the bottom right.
Typing on the Accessibility Keyboard
You can type on the accessibility keyboard with a mouse or trackpad or using an adaptive switch. If you are using eye or head-tracking hardware you can also dwell (rest) on keys to make selections.
When the Accessibility Keyboard is enabled you will see a selection of words appears in the auto-suggestion row. Select on any of these words to insert them into the application you are using. Alternatively, you can select characters on the keyboard and receive suggestions based on what you have typed.
If you wish to perform keyboard shortcuts using the Accessibility Keyboard you will first need to enable Sticky Keys. Sticky Keys let you perform shortcuts by typing the keys one after the other rather than at the same time. Please see the article Using the keyboard one-handed in macOS 10.15 Catalina for more information about Sticky Keys. You can also create your own on-screen buttons that will perform keyboard shortcuts, see the Panels section for more information.
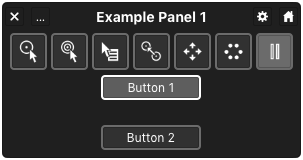
Panels
Panels are collections of configurable buttons that allow you to carry out various tasks on your computer with a single click such as opening an application or performing mouse actions.
Creating panels
For more information about creating your panels please see the article: How to create panels for using with Switch Control and the Accessibility Keyboard in macOS 11 Big Sur on this website.
Using Panels
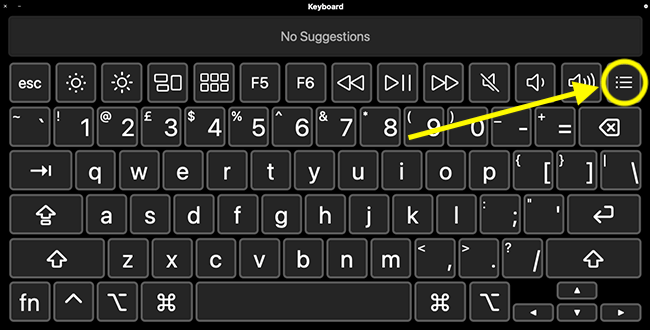
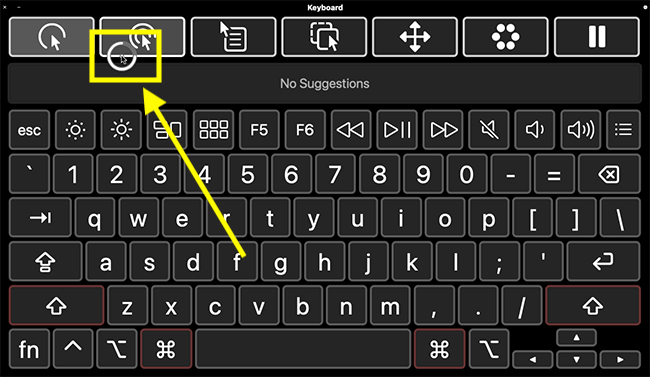
- When the Accessibility Keyboard is enabled you can access your panels by selecting or dwelling on the panel icon.
- The keyboard will then shrink to only show the panels you have created.
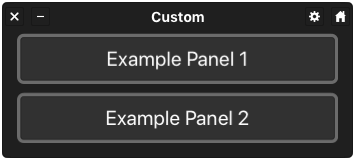
Note: You can enlarge the panel window by selecting and dragging on one of the corners. - Select a panel name to open it.

- Select a button to perform the desired action.
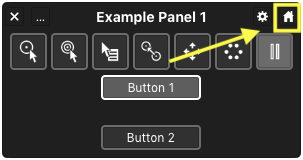
- To return to the full keyboard layout, select the Home icon in the top right of the panel.
Note: By default, each panel also shows a row of dwell actions. If not required, this can be turned off in the Dwell settings.
Dwell Control
Dwell Control enables you to perform mouse actions, such as left-clicks, scrolling and drag and drop, using eye- or head-tracking technology. It works by resting (dwelling) the mouse pointer over on-screen buttons to perform corresponding mouse actions.
How to enable Dwell control
- Select the Apple icon in the top left corner of the screen.
- Select System Preferences from the menu.
- In the System Preferences window, select Accessibility.
- On the Accessibility settings screen, scroll down in the left column and select Keyboard.
- In the right column, select the Accessibility Keyboard tab.
- Select the Options button in the bottom right-hand corner.
- In the Options dialogue box, select the Dwell tab.

- You can change the following settings:
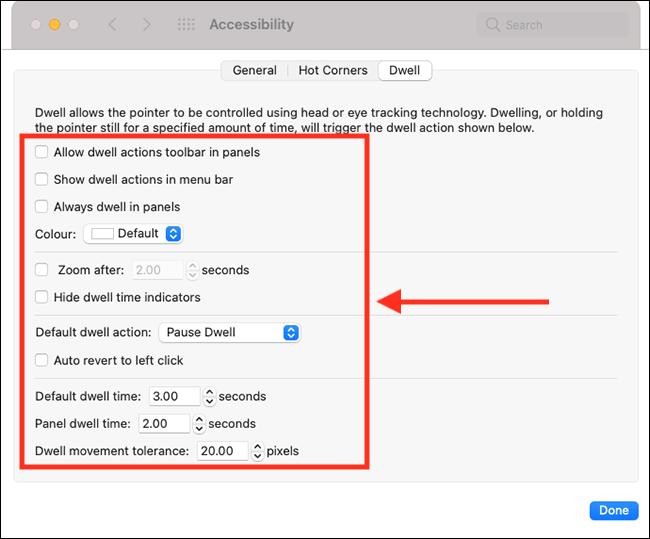
- Allow Dwell actions toolbar in panels –Show the Dwell Control icons in the top row of the Accessibility Keyboard and within Panels.
- Show dwell actions in the menu bar –add a Dwell icon to the Apple menu bar. This is visible when the Accessibility Keyboard is enabled.
- Always dwell in panels –Whenever the cursor is over a keyboard panel Dwell is active.
- Zoom after…If you enable this setting, the area around what you are dwelling on becomes magnified. Note: The size of this magnified area is based on the settings for Picture-in-picture in the Zoom accessibility feature.
- Hide dwell indicators –Turn off the visual indicator (circular outline) that appears when you dwell on an item.
- Dwell action –The default dwell action is set to left click. Click the dropdown menu to select a different action.
- Auto revert to left click –The current dwell action will revert to ‘left click’ after action is performed. Select the checkbox to turn this option off.
- Default dwell time –The length of time the pointer needs to dwell (rest) on an item before an action is performed. The default is 3 seconds – click on the arrows to increase or decrease the time.
- Panel dwell time –The length of time the pointer needs to dwell (rest) on an action in the Dwell menu before the action is selected. The default is 2 seconds – click on the arrows to increase or decrease the time.
- Dwell movement tolerance – How far the pointer can move whilst dwelling before a dwell action is cancelled. The default is 20
- When you are happy with your Dwell settings, select the Done button in the bottom right.

Using Dwell Control
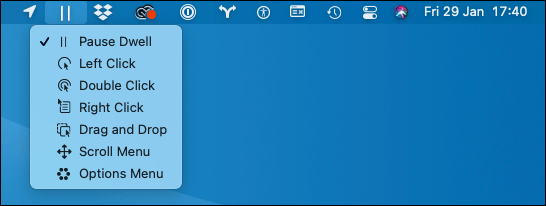
When enabled the Dwell menu appears along the top of the Accessibility Keyboard.
Dwell Control menu options
|
Menu Icon |
Description |
|---|---|
 |
Left Click – Perform a left click when you dwell on an item |
 |
Double Click – Perform a double click when you dwell on an item |
 |
Right Click – Perform a right click when you dwell on an item |
 |
Drag & Drop – Drag and drop an item. Dwell on an item to activate drag, reposition the item then dwell again to release drag. |
 |
Scroll Menu– Dwell on an item that can be scrolled, for instance a webpage. When the dwell time-out expires a large scroll indicator appear at the top and bottom of the page. Dwell on these indicators to scroll. |
 |
Options Menu – Shows the other Dwell options in a circular menu. |
 |
Pause – Deactivate Dwell Controls. Useful when watching a video or reading a webpage where you don’t want to accidentally trigger a Dwell action. Dwell can be reactivated by dwelling on one of the other Dwell menu options again. |
- To select a mouse action, dwell the pointer over an icon in the Dwell Control menu. When the pointer is stationary you will see a white circular outline appear around the pointer. The circular border will then turn grey to indicate the countdown to the action you have selected.
In the example below, we select Double Click.
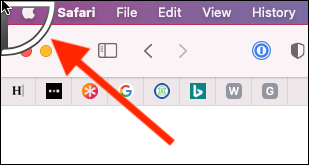
If you enabled the option Show dwell actions in the menu bar, you can also select a mouse action from the Dwell Control menu in the Apple menu bar or by using Hot Corners, see the Hot Corners section below.
Note: The icon in the menu bar will reflect the currently selected Dwell action.
- To perform the chosen mouse action, dwell (rest) the pointer over an item in the active window. The circular outline will appear again showing the countdown to the action being carried out.
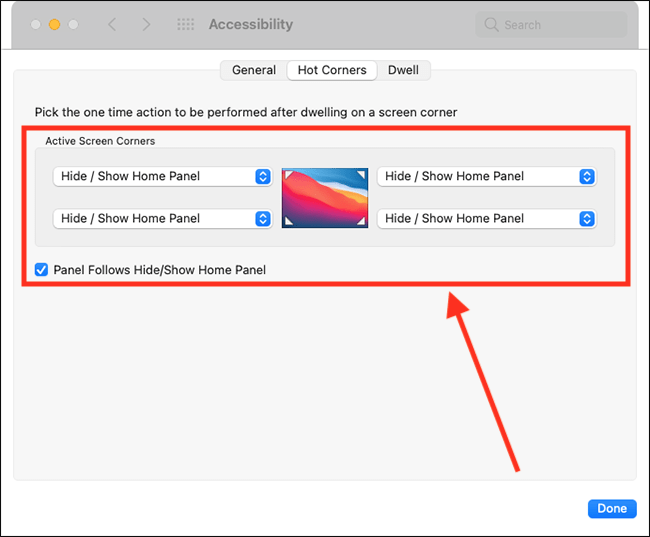
Hot Corners
Hot Corners allow you to perform a Dwell action by hovering over the corners of the screen. See below for an example of a Hot corner being activated.
Each ’Hot Corner’ can be set to select one of the following actions:
- – (to deactivate this corner)
- Hide/Show Home Panel
- Toggle Dwell Pause
- Left Click
- Right Click
- Drag and Drop
- Scroll menu
- Options Menu
Note: By default, all four corners are set to Hide/Show Home Panel when a user hovers over them.
To change the settings for Hot Corners:
- Select the Apple icon in the top left corner of the screen.
- Select System Preferences from the menu.
- In the System Preferences window, select Accessibility.
- On the Accessibility settings screen, scroll down in the left column and select Keyboard.
- In the right column, select the Accessibility Keyboard tab.
- Select the Options button in the bottom right-hand corner.
- In the Options dialogue box, choose the Hot Corners tab.
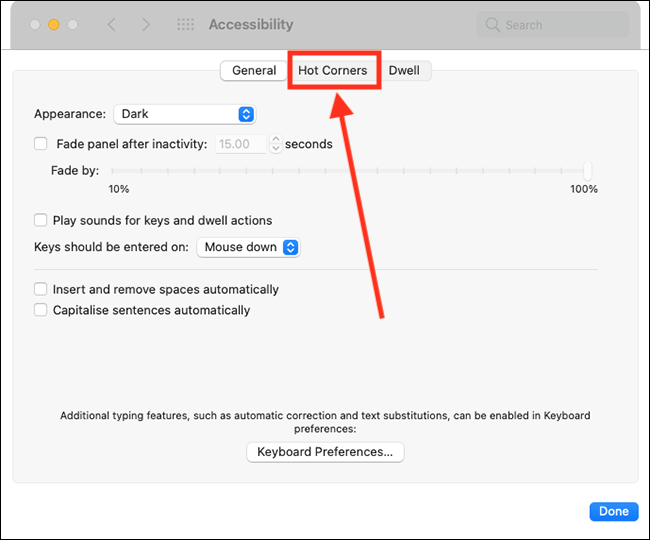
- Select the dropdown menus under Active Screen Corners and select the action you would like each Hot Corner to be associated with.
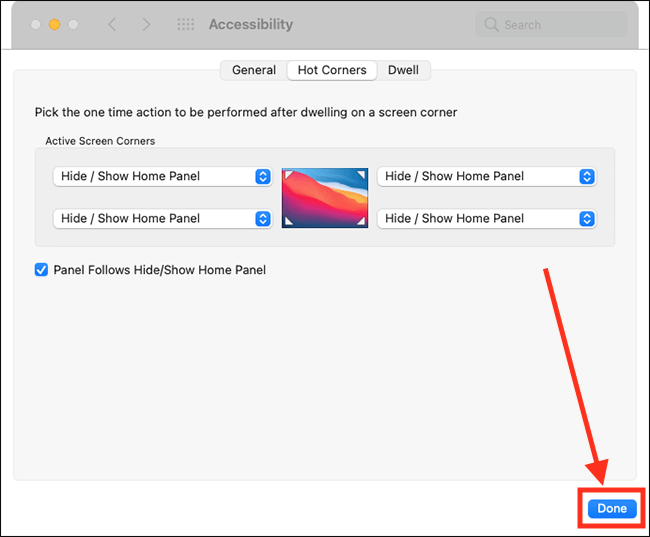
- When you are happy with your settings for Hot Corners, select the Done button in the bottom right corner.
Using Hot Corners
To use Hot Corners, dwell in the corner of the screen that corresponds to the action you wish to perform. A white, triangular outline will appear. The border will turn grey to indicate the countdown to the action has started.
Note: If this does not work it could be because someone else manages your computer settings (an IT department or administrator). If this is the case, you will need to contact them to access these settings or for further help.
More Information
Apple’s Dwell Control support document: https://support.apple.com/en-gb/guide/mac-help/control-the-pointer-using-dwell-mchl437b47b0/mac
Need some more help?
Call our helpline 0300 180 0028 or email enquiries@abilitynet.org.uk
Need free IT Support at Home?
If you are older or disabled and need IT support at home, you can book a free home visit.