Call our helpline
0300 180 0028To access the Control Centre, swipe down from the top-right corner of your device.
Short guide:
- To open the Control Centre, swipe down from the top-right corner of your device. On devices with a physical Home button, swipe up from the bottom of the screen.
- Tap the + (plus) button in the top right corner.
- Tap the Add a Control button at the bottom of the screen.
- Scroll through the list of options and tap the item you wish to add.
- Repeat steps 3 + 4 to add more items.
- Tap and hold, then drag an item to reposition it.
- Tap on a blank area to exit the edit screen.
Before and after
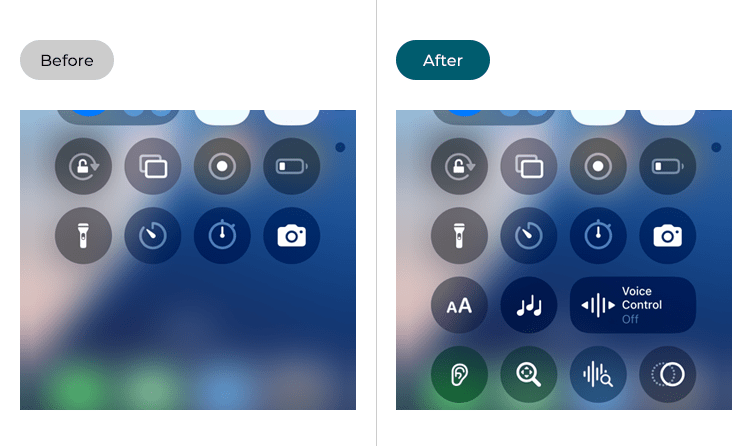
This section gives you step by step instructions on how to add accessibility items to the Control Centre in iOS 18, with pictures of the screens to help.
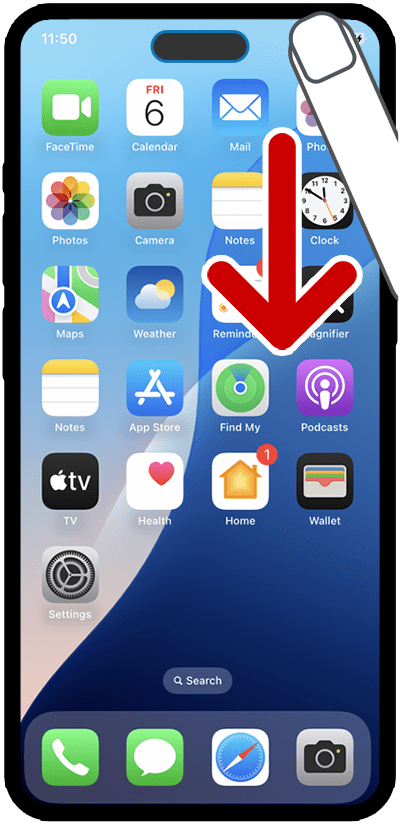
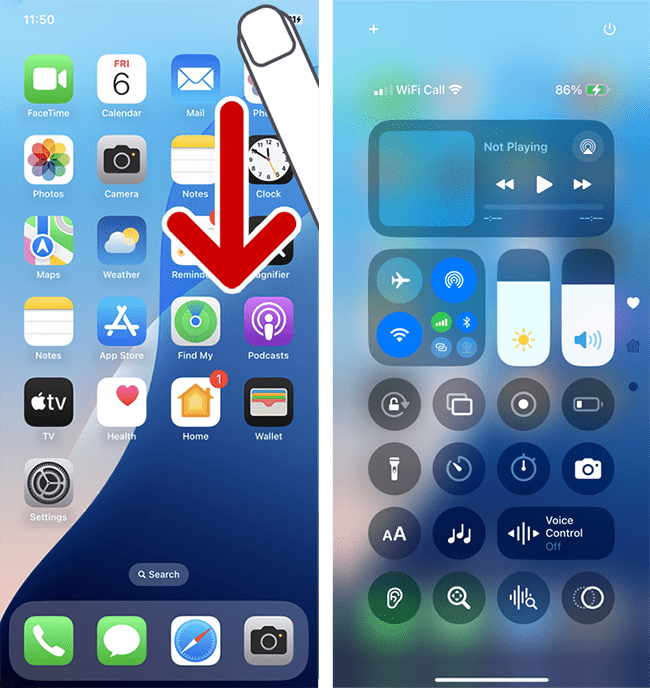
Open the Control Centre
1. To access the Control Centre, swipe down from the top-right corner of your device.
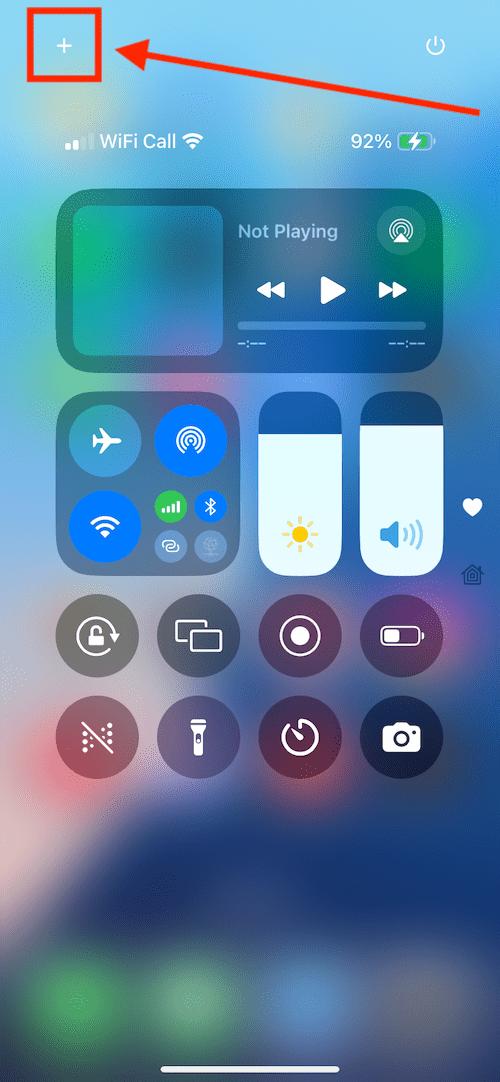
Open the Control Centre options
2. Tap the + (plus) button in the top right corner. You can now begin editing the Control Centre.
Add an item to the Control Centre
3. To add new items to the Control Centre, tap the Add a Control button at the bottom of the screen.

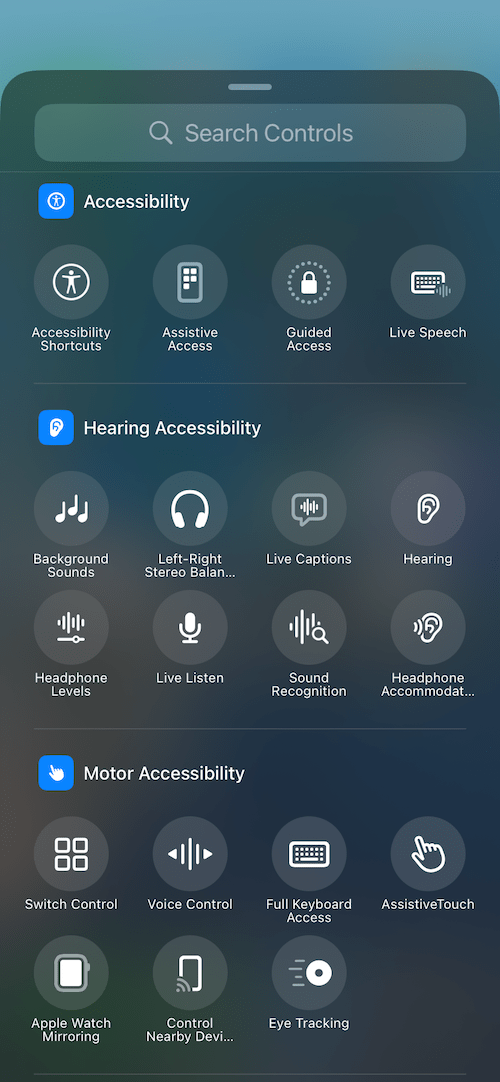
Select an item to add
4. Scroll through the list of controls and tap the item you wish to add to the Control Centre. Accessibility items are grouped by type at the end of the list.
Repeat steps 3 + 4 to add more items to the Control Centre.
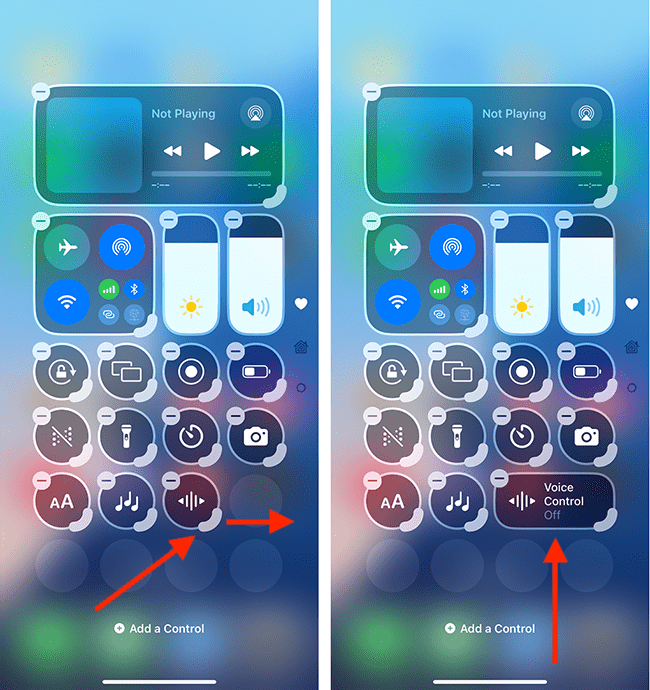
Reposition items within the Control Centre
5. You can reposition items in the Control Centre. To do so, tap and hold an item, then drag it to a new position. If you drag all the way downwards, you can add the item to an additional screen.
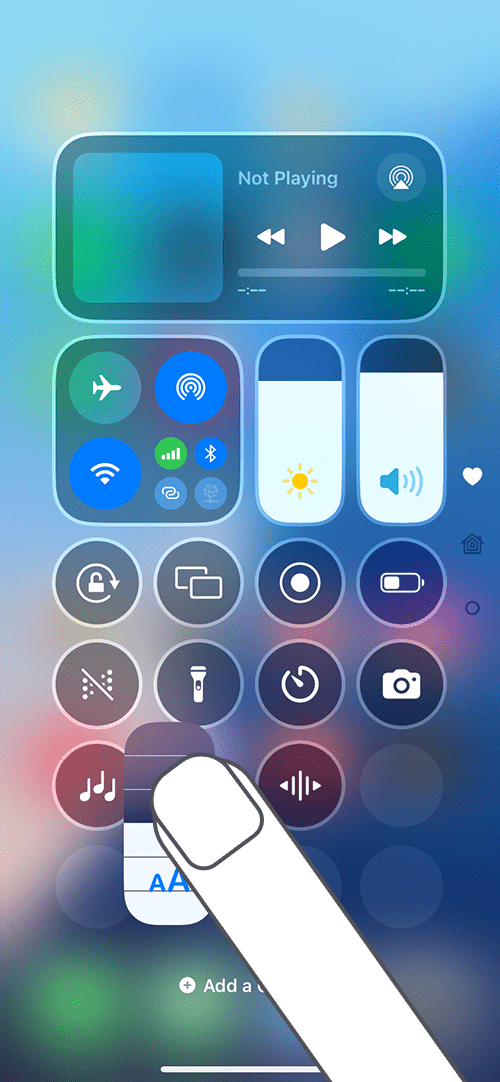
Make an item bigger or smaller
6. Items in the Control Centre can be made bigger, to make them easier to select, or smaller to fit more items onto a screen. To resize an item, drag the handle in the bottom-right corner of the icon. You can drag an item to become a small circle, or a larger square or rectangle.
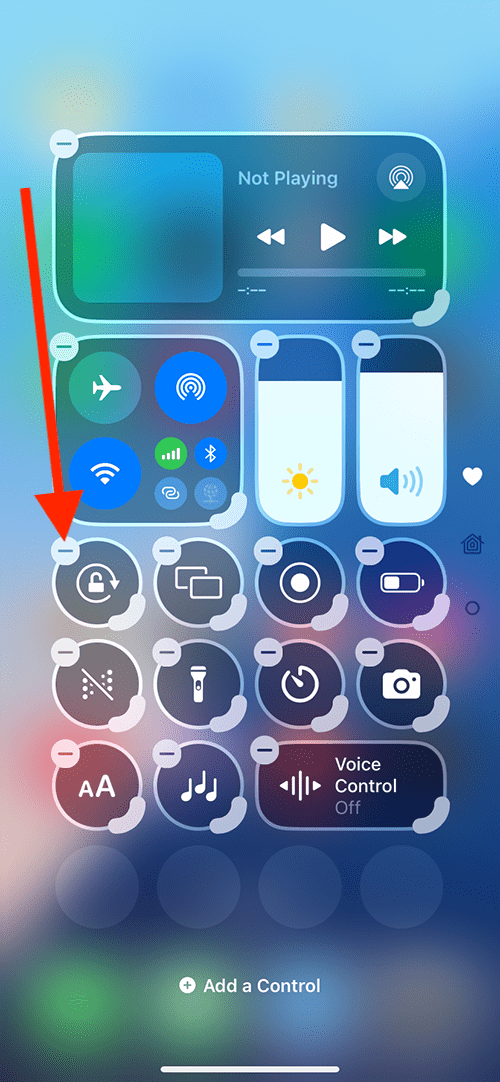
Remove an item from the Control Centre
7. To remove an item, tap the – (minus) button in the top-left corner of each icon. You can re-add the item by following the steps above.
Exit the editing screen
8. When you have finished, tap any blank area to exit the Control Centre edit screen.
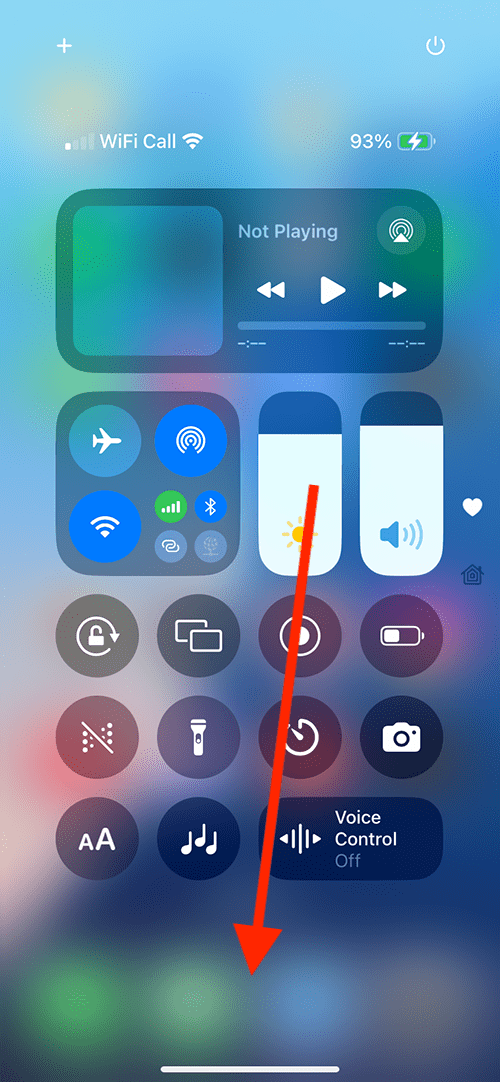
Return to the Home screen
9. When you are happy with your settings, you can return to the Home screen by swiping up from the bottom of the screen or by pressing the Home button on devices with a physical Home button.
How to use the Control Centre
10. To access the Control Centre, swipe down from the top-right corner of your device. Tapping an item in the Control Centre will either activate it or open a settings card depending on the item. You can long-press on some items to see more options. Swipe up on the open Control Centre to access other screens.
Need some more help?
Call our helpline 0300 180 0028 or email enquiries@abilitynet.org.uk
Need free IT Support at Home?
If you are older or disabled and need IT support at home, you can book a free home visit.