Call our helpline
0300 180 0028Short guide:
- Unlock your device with Face ID or Touch ID but stay on the lock screen.
- Long-press anywhere on the screen.
- Tap the Customise button at the bottom of the screen.
- Choose Lock Screen.
- Tap the – (minus) buttons shown next to the Torch and Camera buttons.
- Tap the empty icon placeholder.
- Choose a new item from the list of controls.
- Click Done in the top-right corner to save your changes.
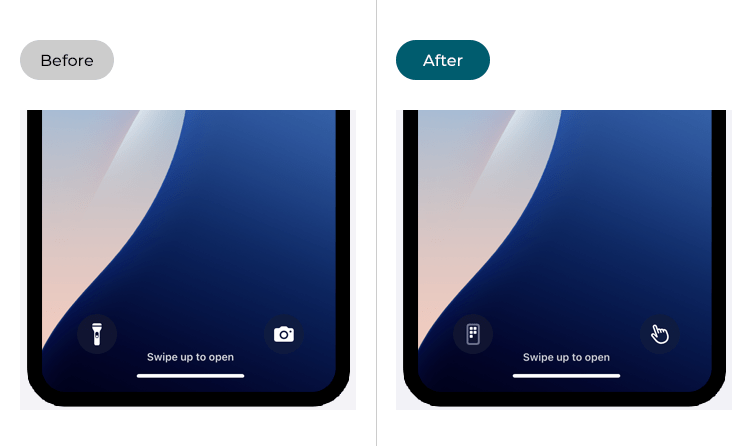
Before and after
This section gives you step by step instructions on how to add accessibility items to the Lock Screen in iOS 18, with pictures of the screens to help.
Edit the Lock Screen
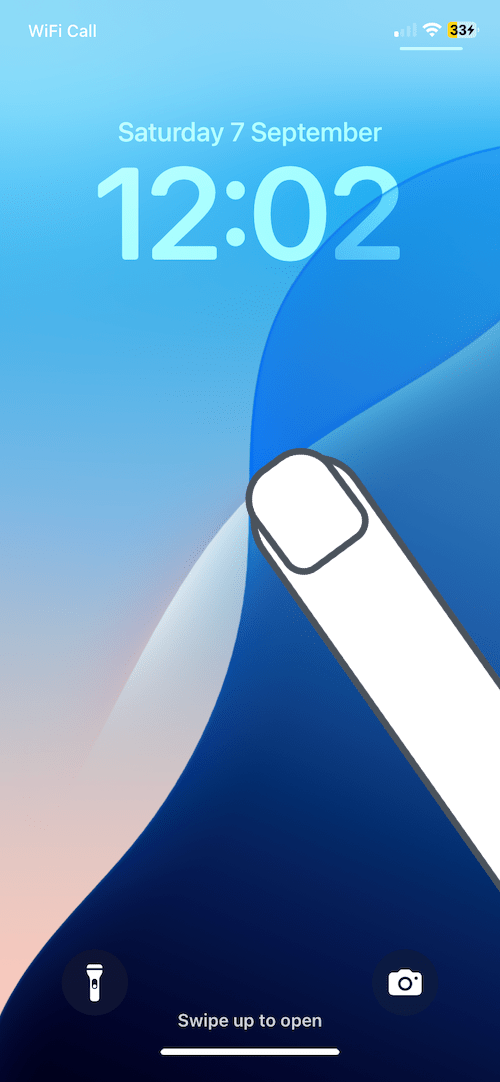
1. Unlock your device with Face ID or Touch ID but stay on the Lock Screen. Alternatively, open the Notification Centre by swiping down from the top-left of the screen.
2. Next, long-press on a blank area of the screen.
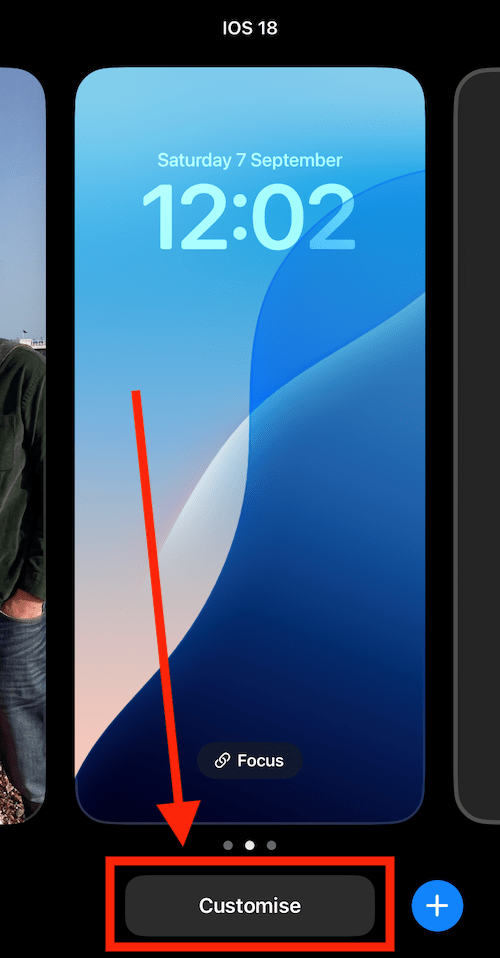
Open the customisation options
2. Tap the Customise button at the bottom of the screen.
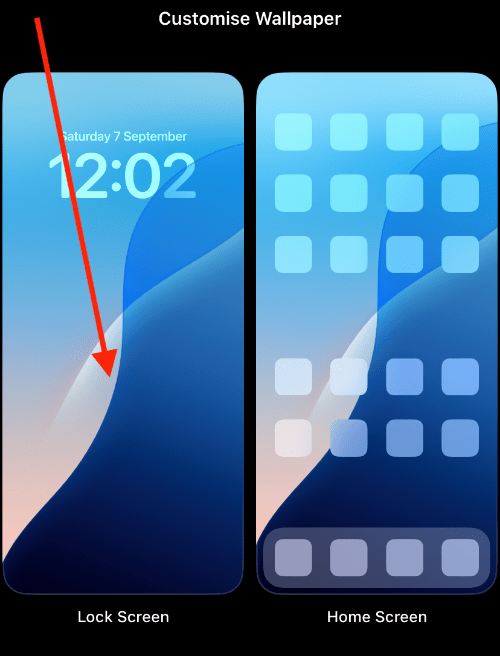
Choose the Lock Screen
3. Tap on the Lock Screen image shown on the left of the screen.
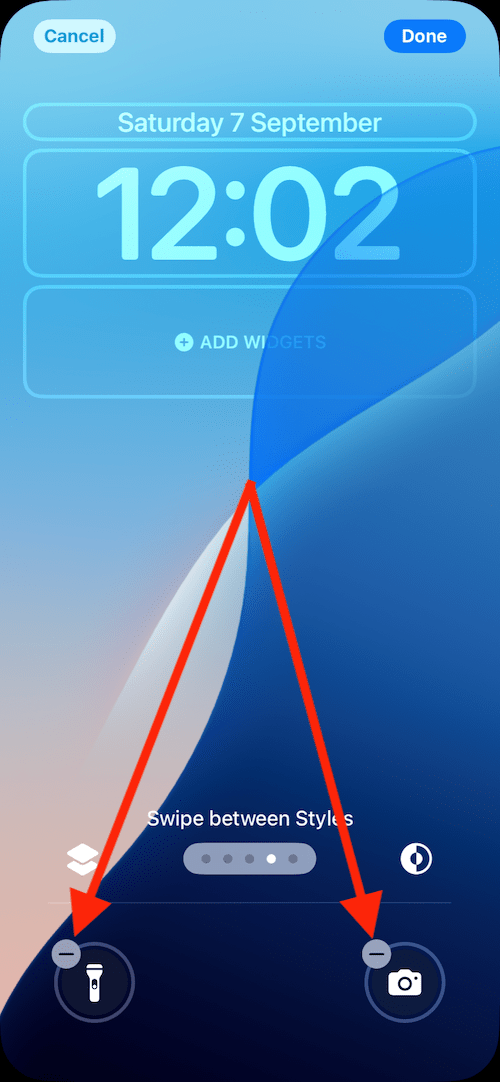
Remove the current item/s
4. Tap the – (minus) button/s shown next to the Torch and Camera buttons.
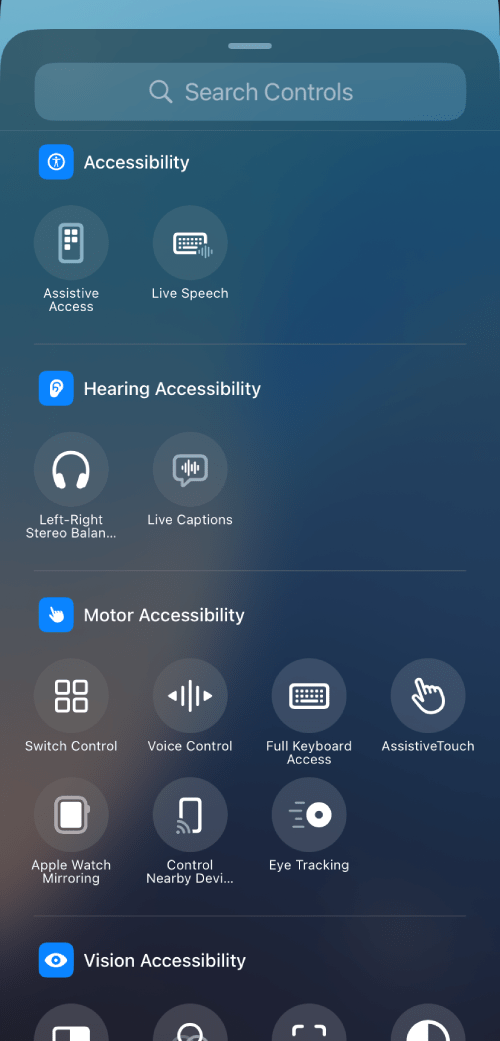
Choose a new item
5. Scroll through the list of controls and tap the item you wish to add to the Lock Screen. Accessibility items are grouped by type at the end of the list.
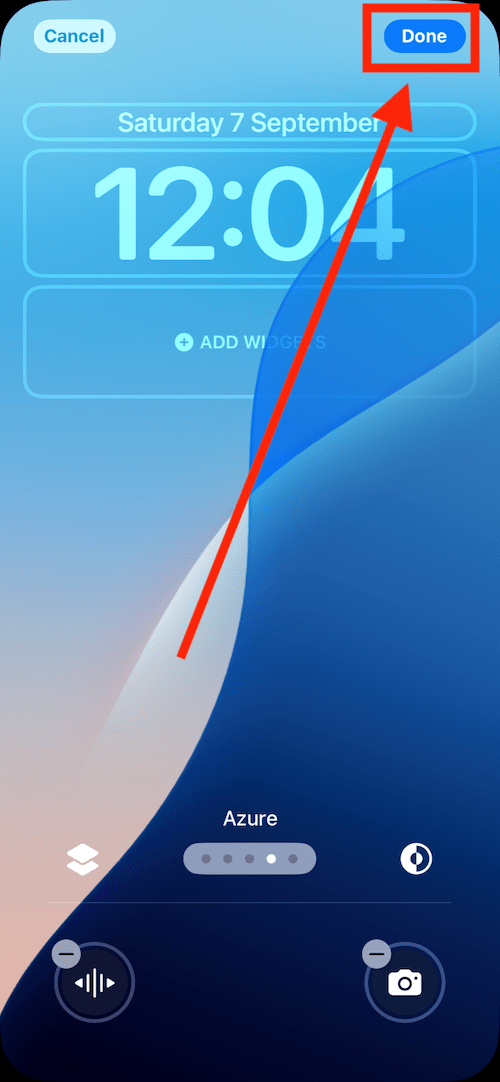
Exit the editing screen
6. When you have finished, tap the Done button in the top-right of the screen.
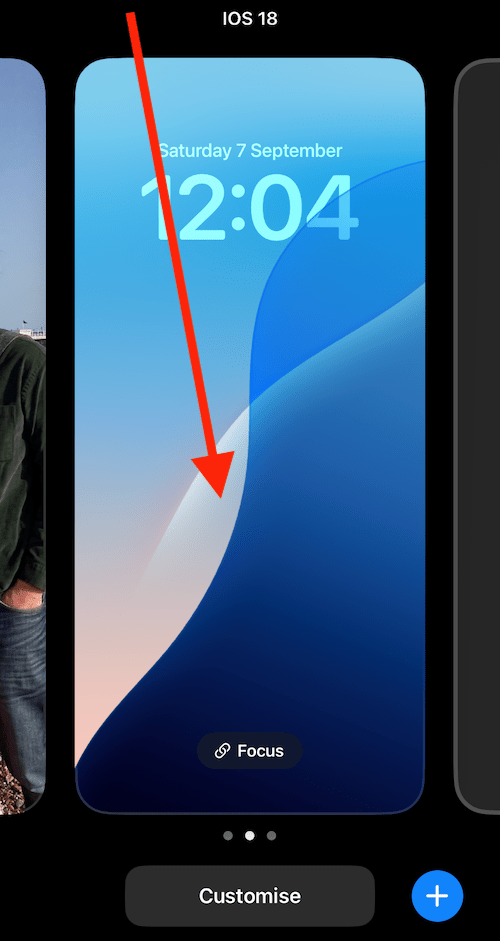
7. Finally, tap the image of the Lock Screen to finish.
Need some more help?
Call our helpline 0300 180 0028 or email enquiries@abilitynet.org.uk
Need free IT Support at Home?
If you are older or disabled and need IT support at home, you can book a free home visit.